CM602all_EJM8AESM_Service Manual.pdf - 第92页
the "Pickup position" window. 92 The "Nozzle exchange" window i s [Operation] Display the "Superimpose " window. displayed . 91 Check the position of the nozzle recognition hole. Select &quo…
88
Press (11) return key.
87
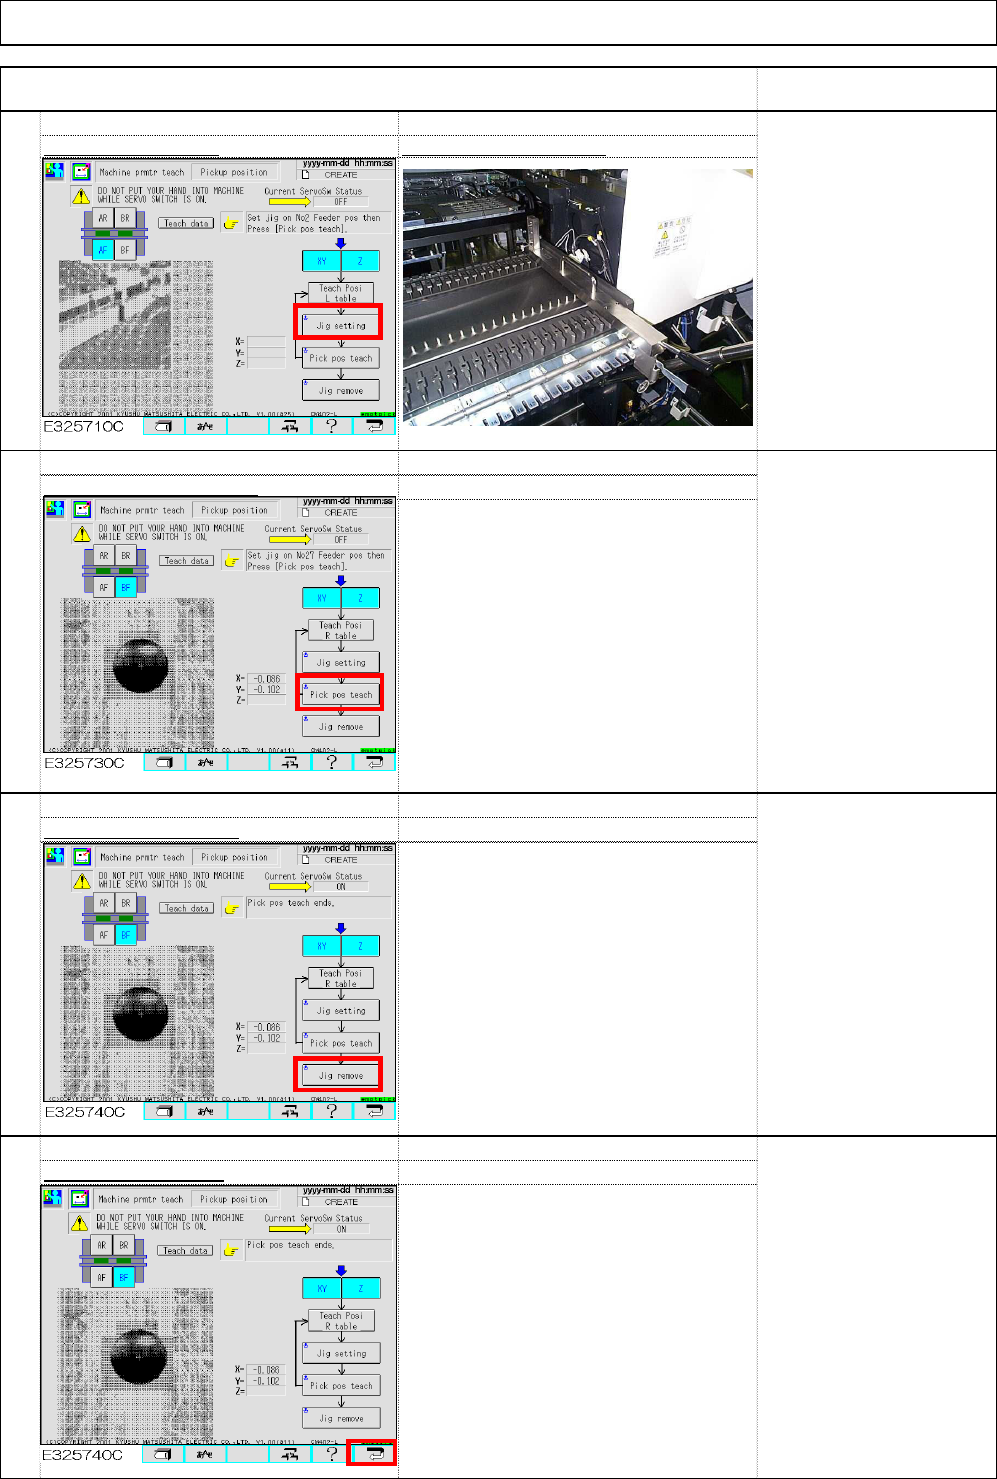
Select (10) Jig remove.
86
Select (9) Pick pos teach.
Machine Installation
Item Remark
85
Select (8) Jig setting Set the jig on PU No.27
.
* The camera is installed
right to the head; it can be
positioned on the rightmost
position PU No. 27 when
the right table is taught.
Installation
(8)
(9)
(10)
(11)
EJM8A-E-SMA020103-A01-00 Page 2-1-3-23

the "Pickup position" window.
92
The "Nozzle exchange" window i
s
[Operation] Display the "Superimpose
"
window.displayed
.
91
Check the position of the nozzle recognition
hole. Select "Machine adjust
"
Select "Nozzle exchange.
"
90
The teaching results are reflected on
89
Select "Run."
Installation Machine Installation
Item Remark
[Judgment guidance]
The recognition mark
should cover the 1/3 of the
cross line.
[Preparation]
Remove the nozzles from
the nozzle changer.
[Preparation]
When changing nozzles,
set the nozzles on the
head.
(1)
(2)
EJM8A-E-SMA020103-A01-00 Page 2-1-3-24
* A message that says "Set the nozzles
according to the data." is displayed.
Installation
96
recognition holes during teachin
g
93
Check position of the nozzle change
r
95
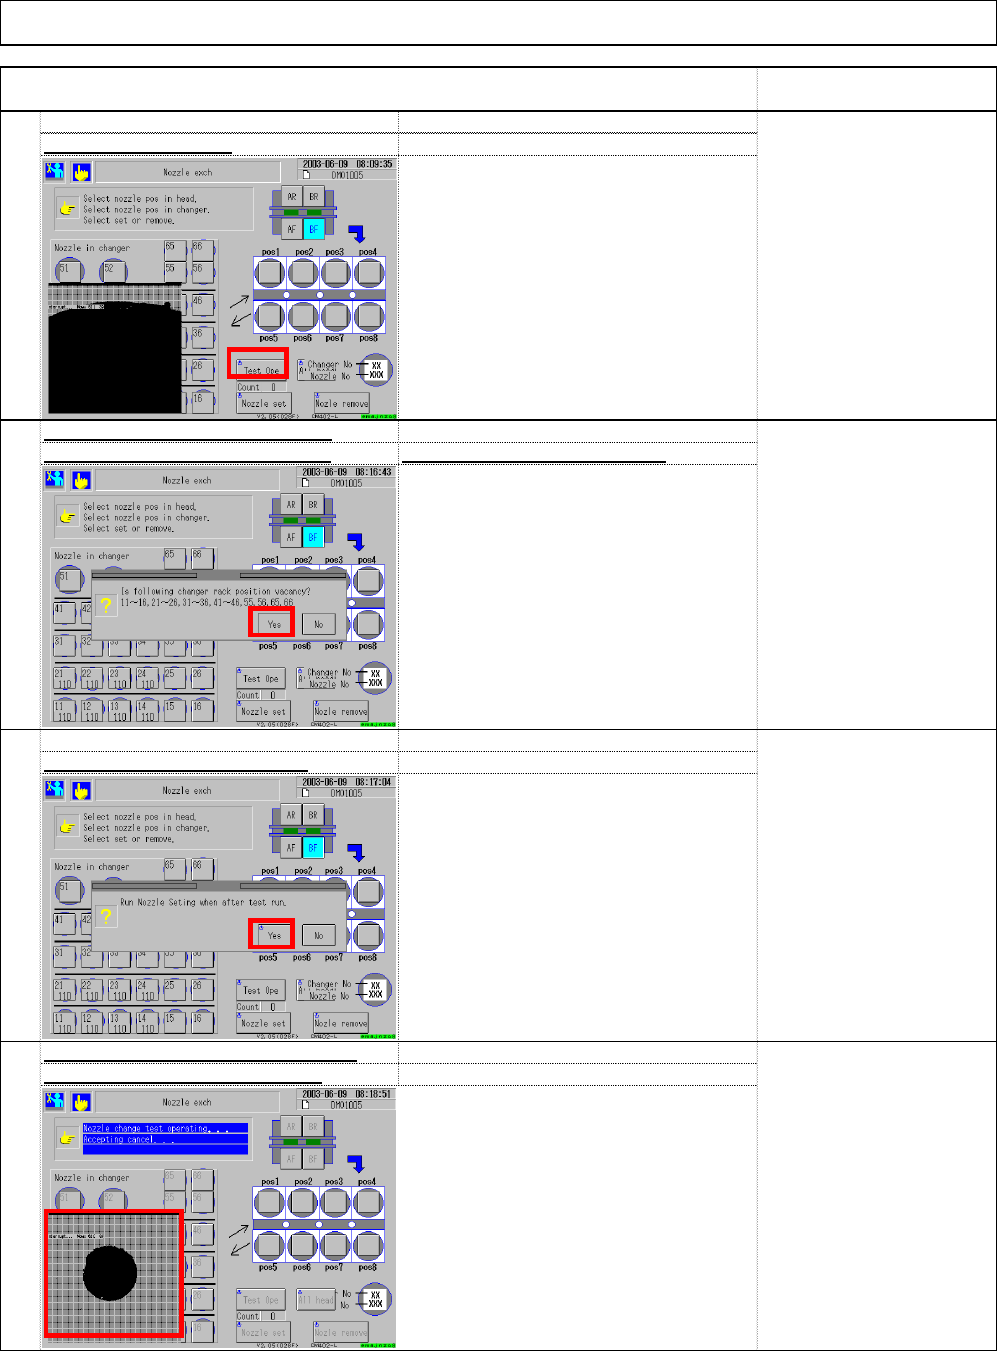
* The head repeats changing nozzles.
* Teaching finishes when a whole process
is complete once. If the holes cannot be
checked once, return to Step 93 and
repeat Step 93 to 96.
Select (3) "Test Ope.
"
94
Check that the nozzles have been
removed from the nozzle changer
A
fter checking, select (4) "Yes.
"
* If nozzles are placed in the nozzle
changer, remove them.
Machine Installation
Item Remark
A
fter checking, select (5) "Yes.
"
The recognition mark
should cover 1/3 of the
cross line.
(3)
(6)
(4)
(5)
EJM8A-E-SMA020103-A01-00 Page 2-1-3-25