CM602all_EJM8AESM_Service Manual.pdf - 第94页
Press "Return" to return to the main men u * Record the current offset. . Warm up the machine for 10 min. . Mounting position teaching . Warm up the machine for 10 min. * A type: High-speed head for both A &…
* A message that says "Set the nozzles
according to the data." is displayed.
Installation
96
recognition holes during teachin
g
93
Check position of the nozzle change
r
95
* The head repeats changing nozzles.
* Teaching finishes when a whole process
is complete once. If the holes cannot be
checked once, return to Step 93 and
repeat Step 93 to 96.
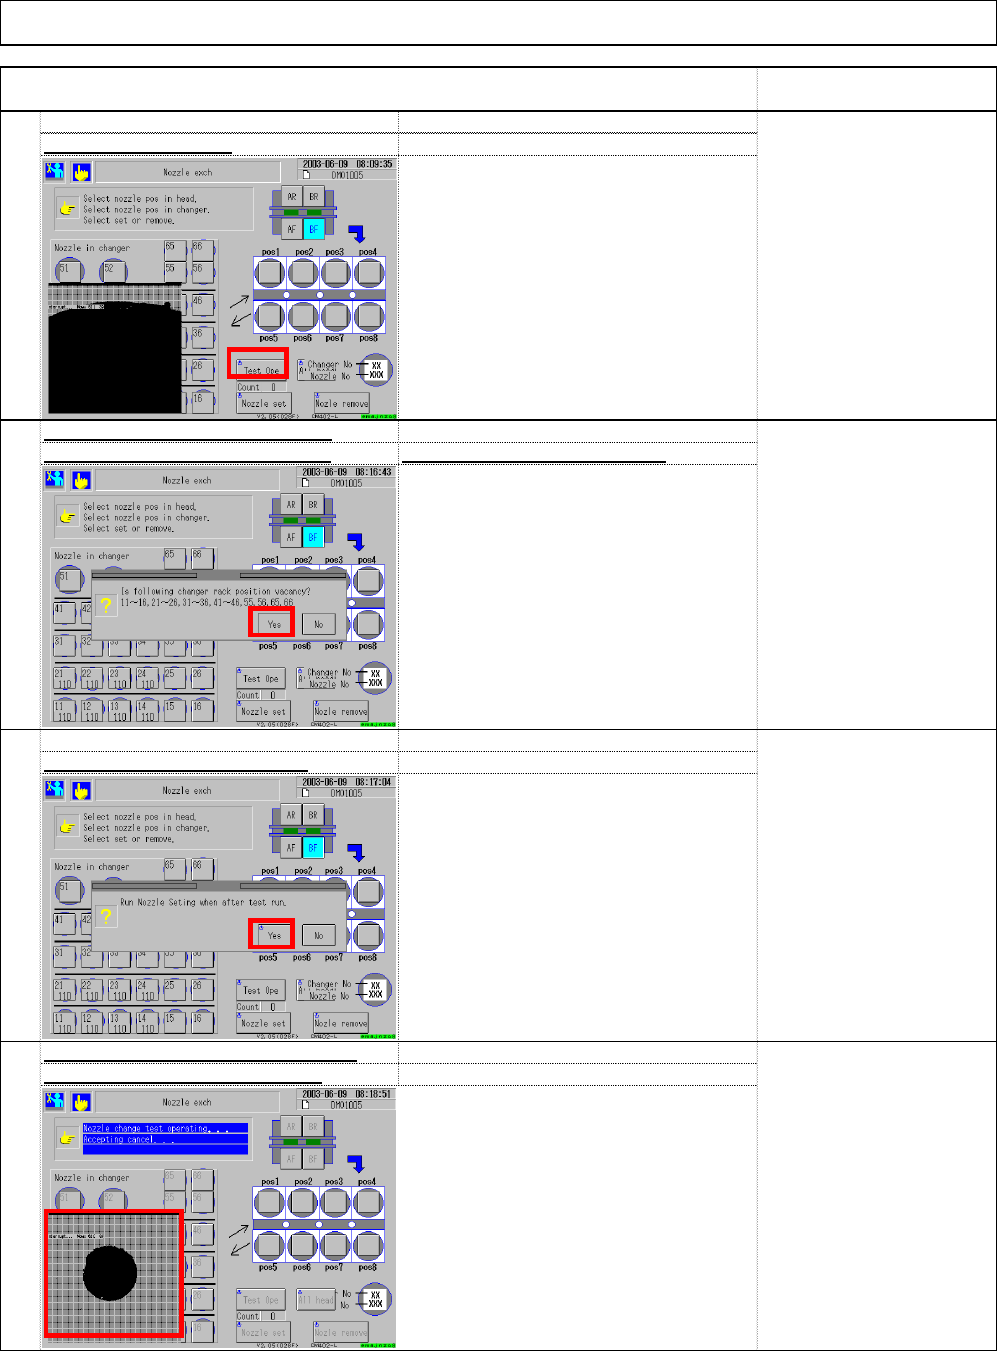
Select (3) "Test Ope.
"
94
Check that the nozzles have been
removed from the nozzle changer
A
fter checking, select (4) "Yes.
"
* If nozzles are placed in the nozzle
changer, remove them.
Machine Installation
Item Remark
A
fter checking, select (5) "Yes.
"
The recognition mark
should cover 1/3 of the
cross line.
(3)
(6)
(4)
(5)
EJM8A-E-SMA020103-A01-00 Page 2-1-3-25
Press "Return" to return to the main men
u
* Record the current offset.
. Warm up the machine for 10 min.
. Mounting position teaching
. Warm up the machine for 10 min.
* A type: High-speed head for both A & B stages
* B type: Multi-purpose for both A and B stages.
. Check accuracy.
* C type: High-speed for A, Multi-purpose for B
* Specification: cpk 1 or more
Tb4Zc-b-45D
B type high-speed head shadow
100
Check mounting position correctio
n
[High-speed head]
See Section 4-2-7.
[Multi-purpose head]
See Section 4-3-7.
[Evaluation range; High-
speed machine]
1005: ±"0.05"
0603: ±"0.05"
[Evaluation range, Multi-
purpose machine]
QFP: "0.035"
Tb4Zc-a-SH
A
A type high-speed head shadow
C type high-speed head shadow teach
Multi-purpose head 45°teaching
Multi-purpose head 90°teaching
Tb4Zc-c-D90
. Enter 0 into mounting position offset (X Y) .
Tb4Zc-b-45D
B type high-speed head shadow teach
C type high-speed head shadow teach
Tb4Zc-c-s45
Tb4Zc-a-DIR
A type high-speed head shadow
Machine Installation
Item Remark
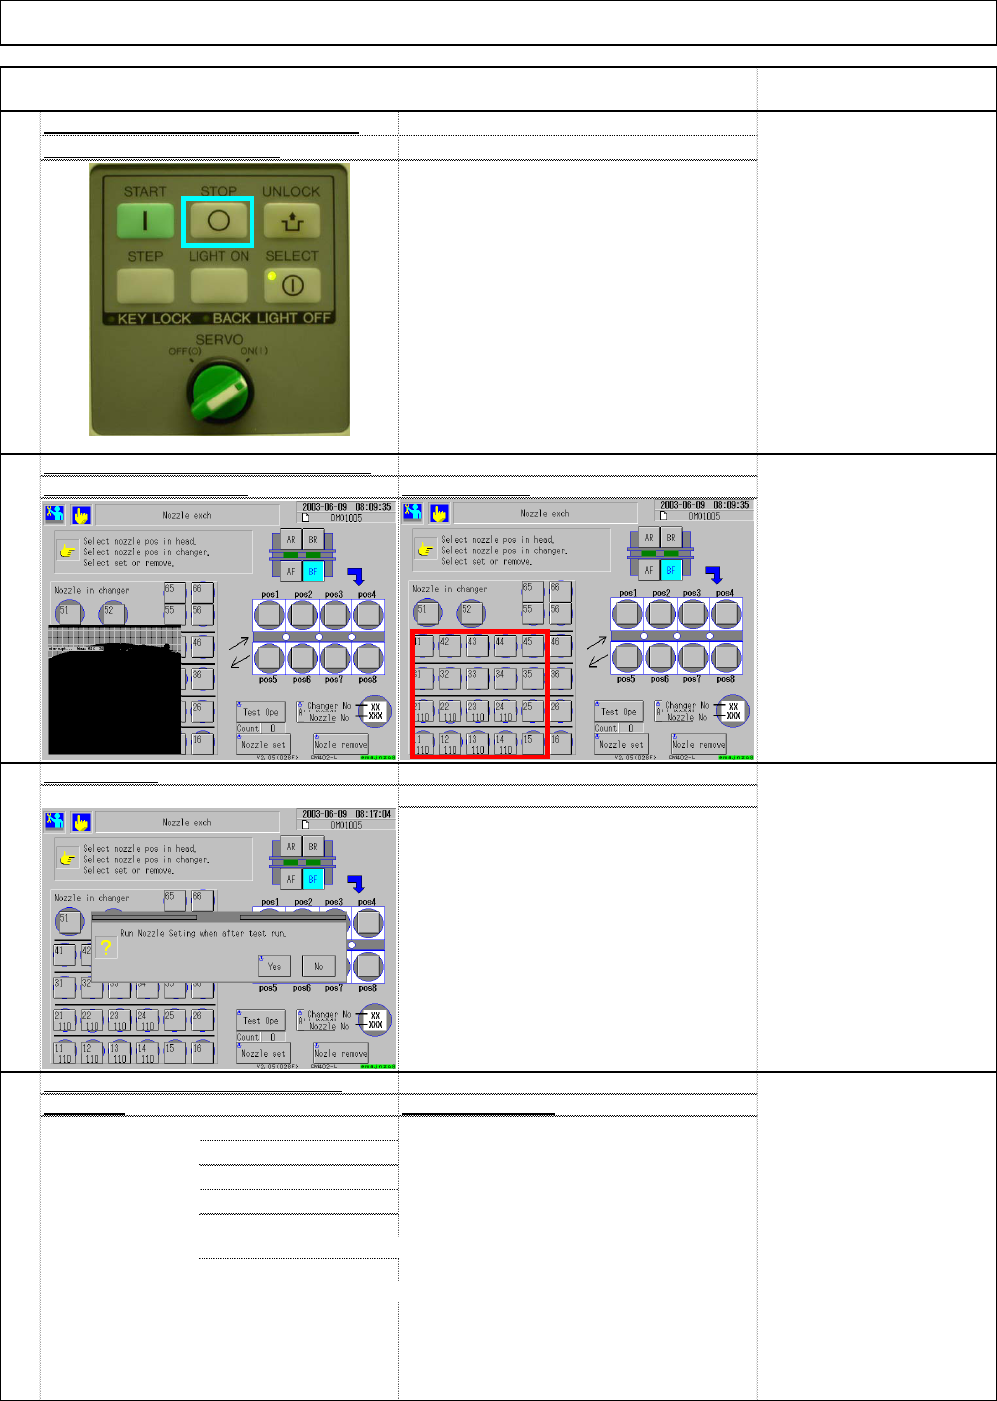
97
A
fter checking, return to the mai
n
menu by pressing "Stop."
* Even when the stop is selected, the
head moves one cycle.
Installation
* After the test run is finished, a message
that says "Set the nozzles according to
the data." is displayed.
the button several times Press "Return.
"
Select "Yes."
Data typ
e
Check procedure
s
98
Close the superimpose box by pressin
g
99
EJM8A-E-SMA020103-A01-00 Page 2-1-3-26
101
102
Installation
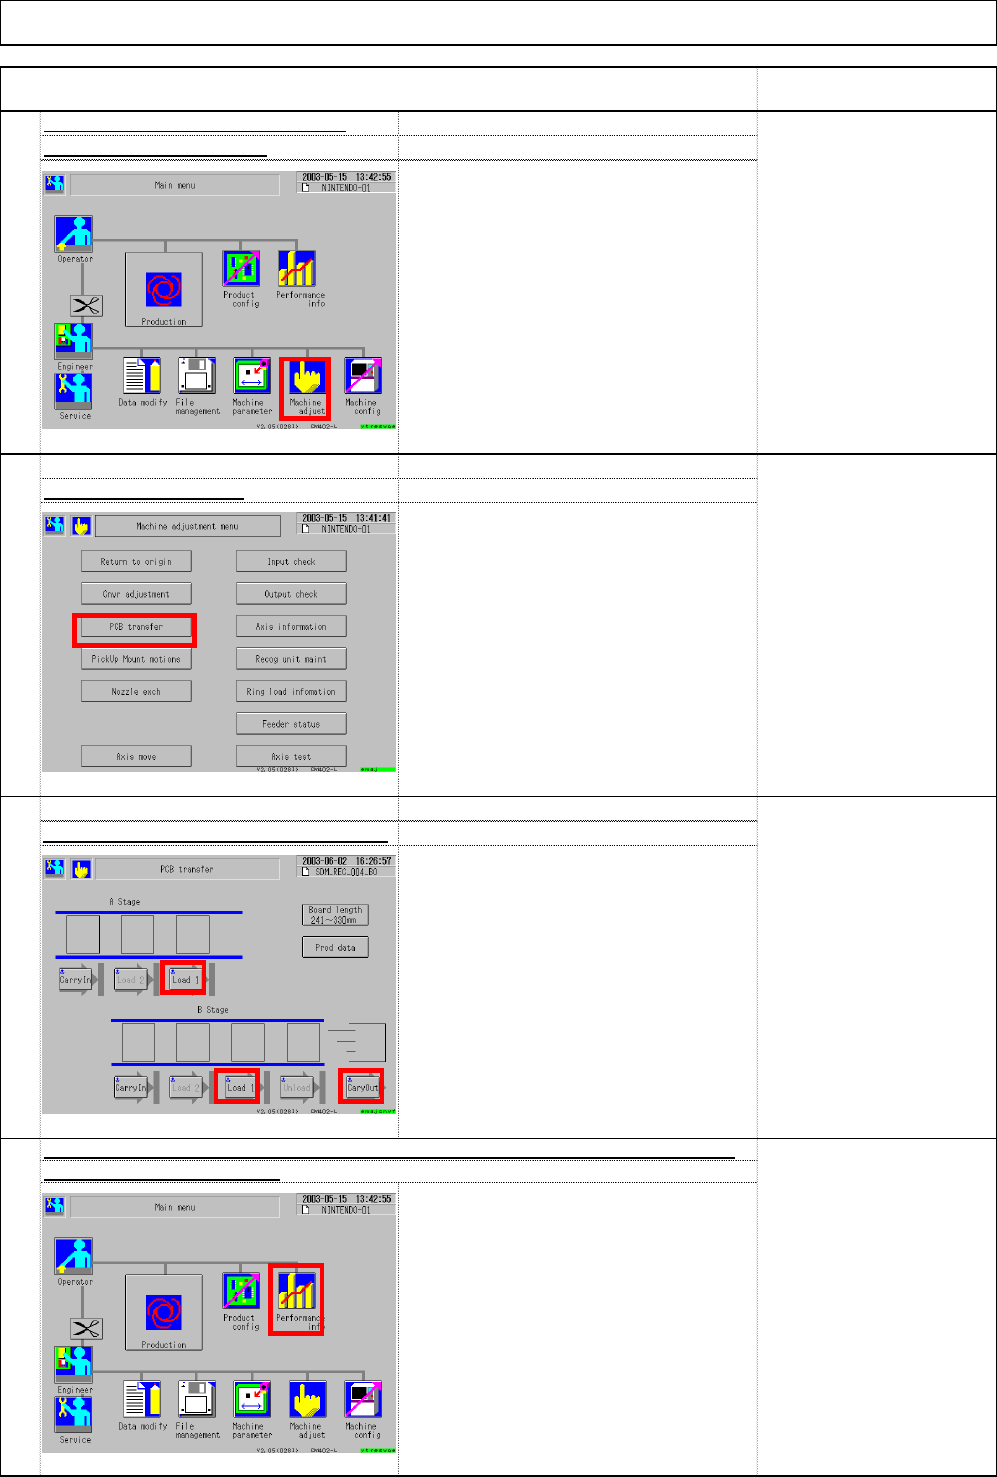
Select (1) Performance info
.
Item
Select (1) Machine adjust.
104
Reset the stop records of "Performance info." Deliver the machine to the custome
103
Select ③ Load 1, ④ Load 1 and ⑤ Cary Out.
. From upstream to downstream of the
line:
[Load 1]
↓
[Load 1]
↓
[Cary out]
Unload the board with the button.
Select (2) PCB transfer.
Machine Installation
Check board transfer. (User boards)
Remark
(1)
(2)
(3)
(4)
(5)
(1)
EJM8A-E-SMA020103-A01-00 Page 2-1-3-27