CM602all_EJM8AESM_Service Manual.pdf - 第96页
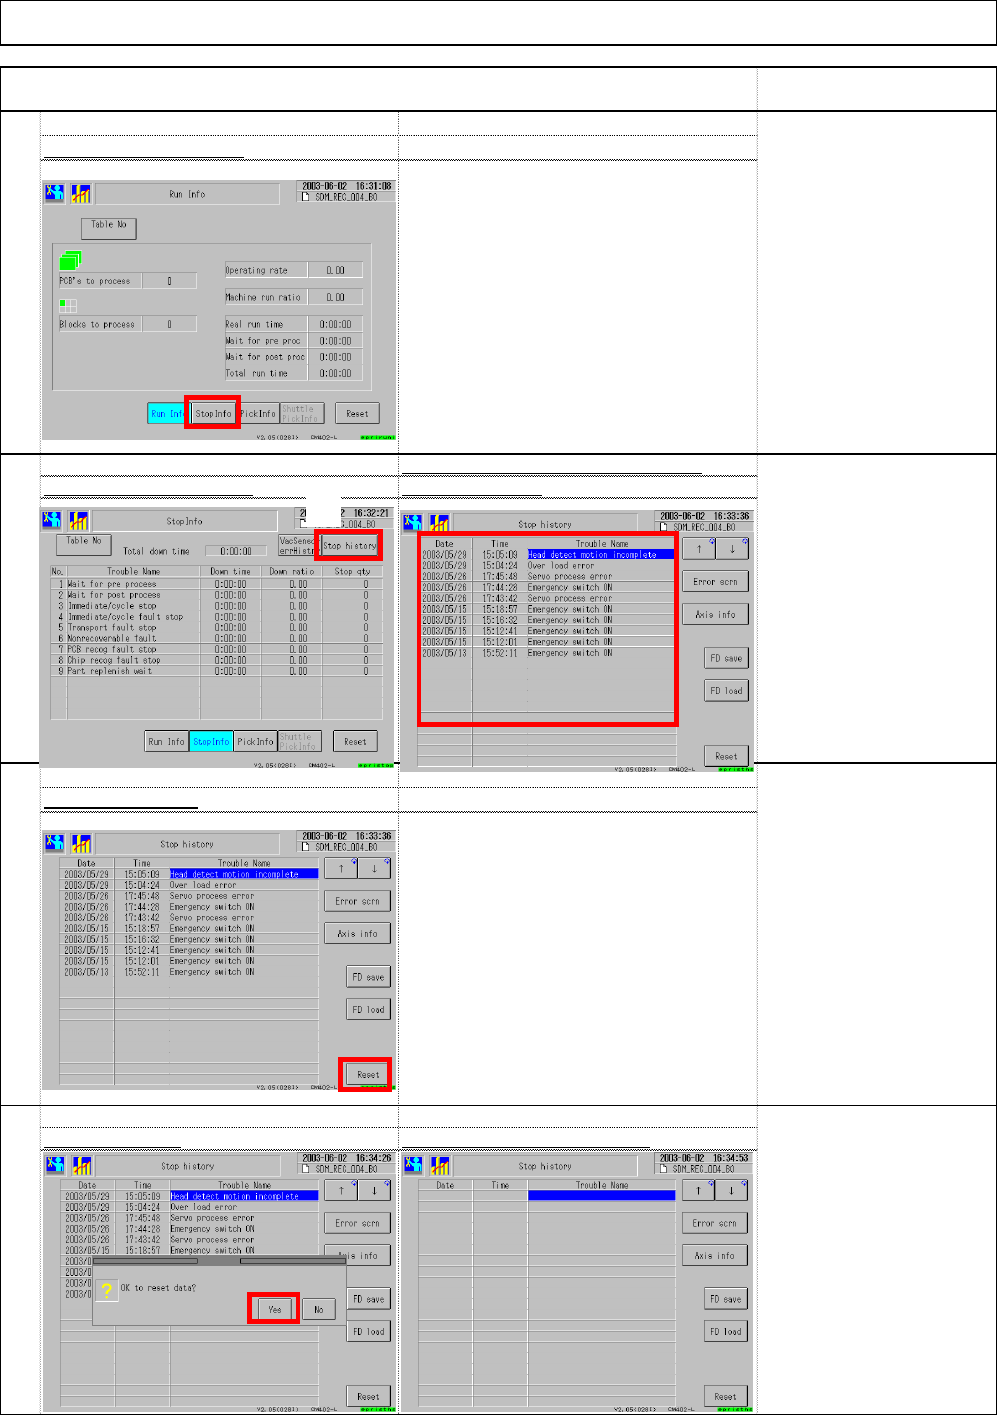
106 108 Select (6) "Yes. " The errors that have occurred so fa Select (3) "Stop history. " are displayed.(4 ) The errors records disappea r 107 Select (5) "Reset." Select (2) "Stop Info…
101
102
Installation
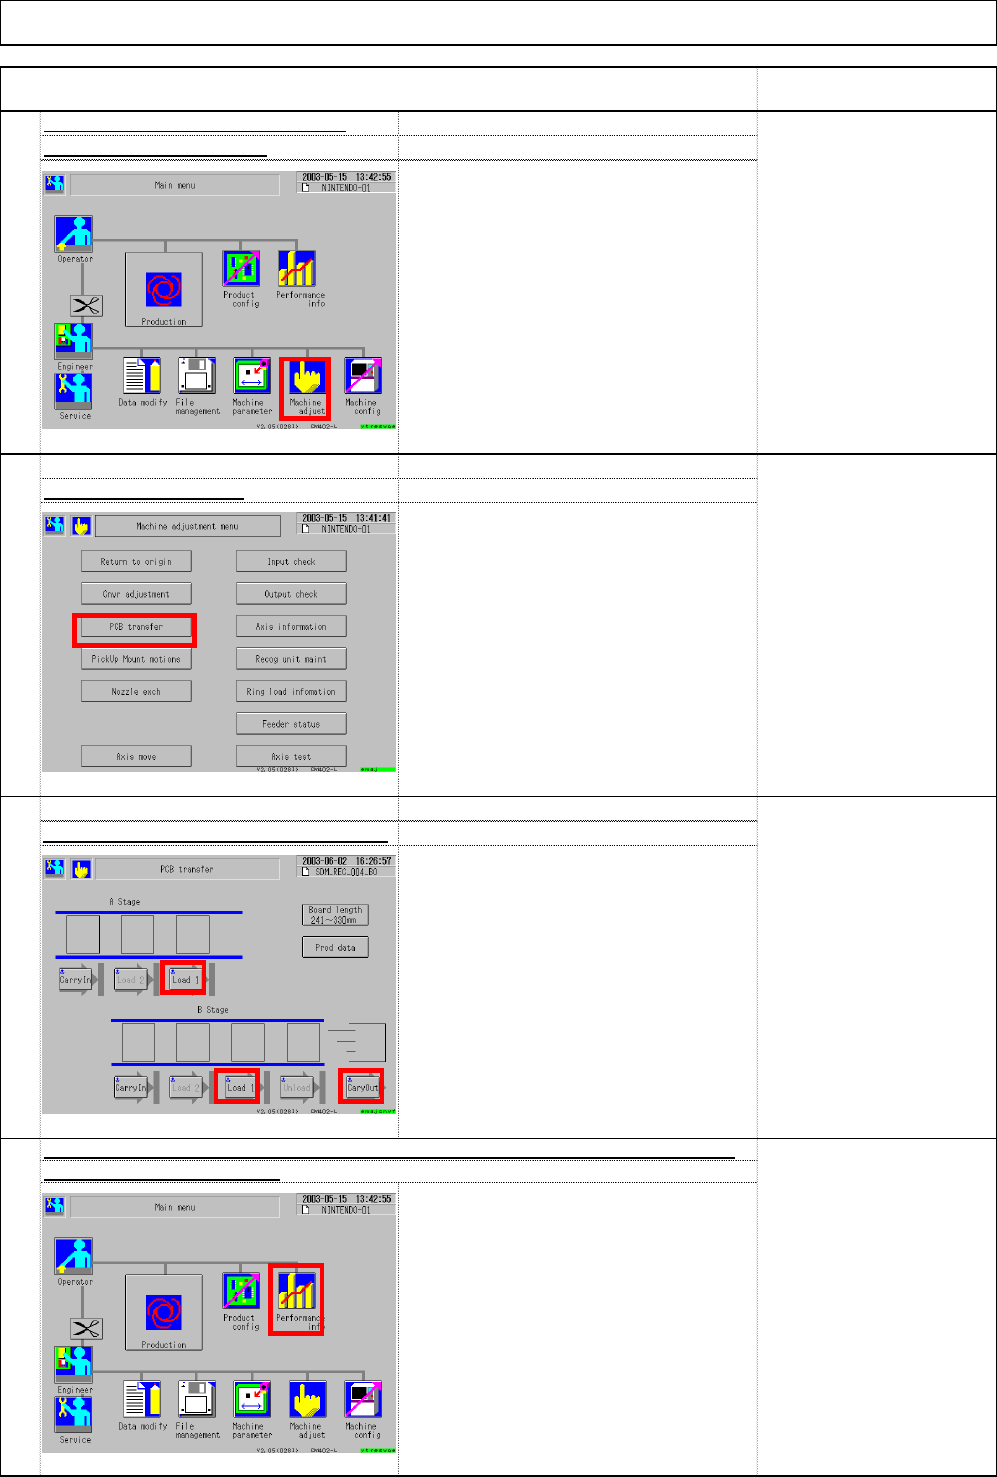
Select (1) Performance info
.
Item
Select (1) Machine adjust.
104
Reset the stop records of "Performance info." Deliver the machine to the custome
103
Select ③ Load 1, ④ Load 1 and ⑤ Cary Out.
. From upstream to downstream of the
line:
[Load 1]
↓
[Load 1]
↓
[Cary out]
Unload the board with the button.
Select (2) PCB transfer.
Machine Installation
Check board transfer. (User boards)
Remark
(1)
(2)
(3)
(4)
(5)
(1)
EJM8A-E-SMA020103-A01-00 Page 2-1-3-27
106
108
Select (6) "Yes.
"
The errors that have occurred so fa
Select (3) "Stop history.
"
are displayed.(4
)
The errors records disappea
r
107
Select (5) "Reset."
Select (2) "Stop Info.
"
Item Remark
105
Installation Machine Installation
(2)
(3)
(4)
(5)
(6)
EJM8A-E-SMA020103-A01-00 Page 2-1-3-28
Installation
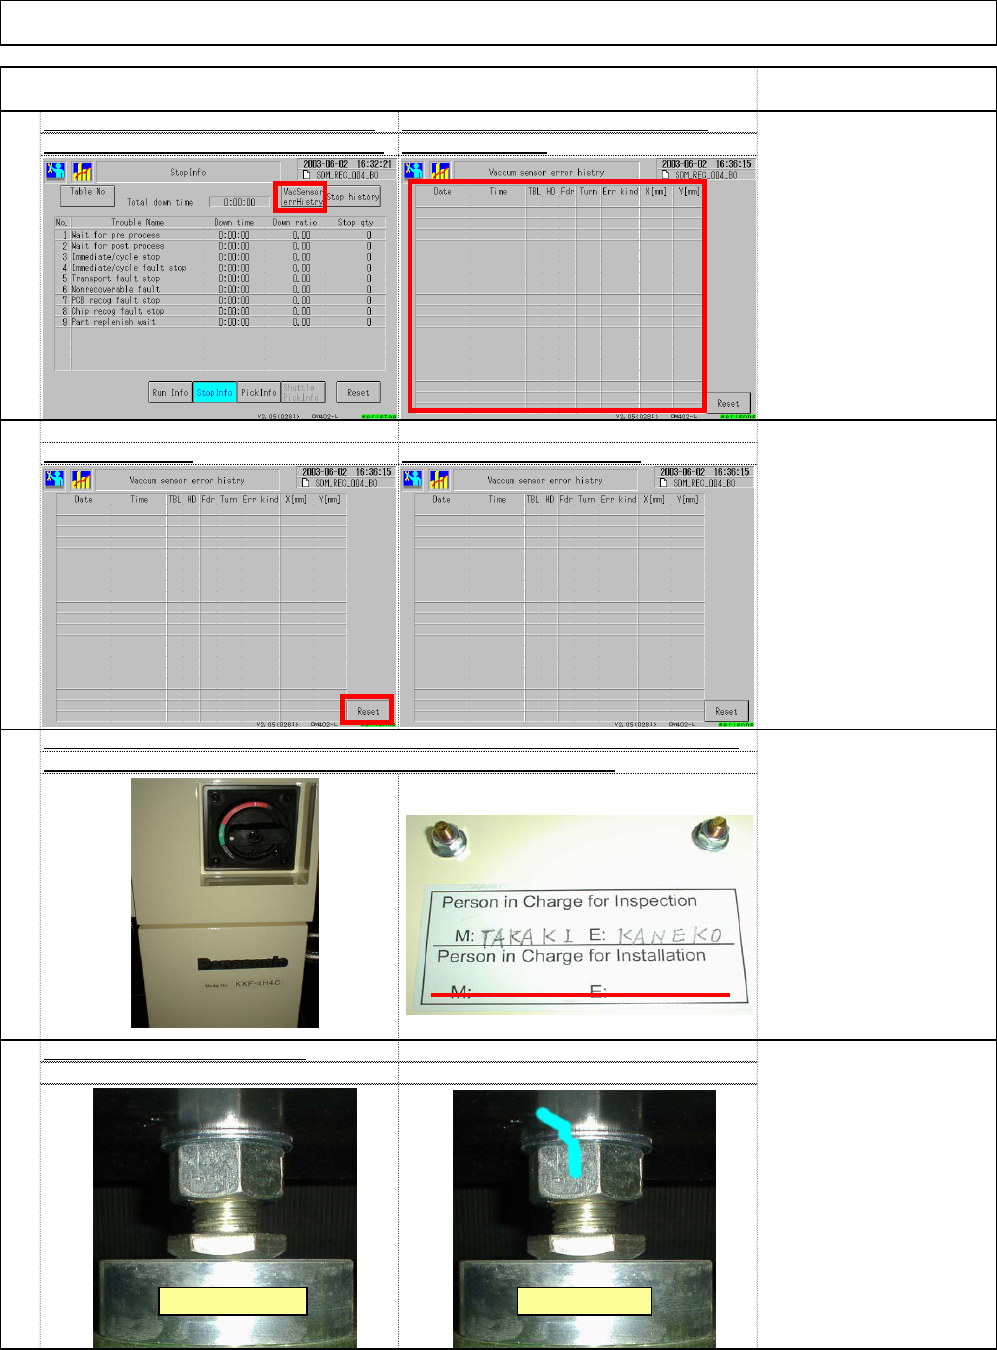
Select (1) "Vacuum sensor error history. are displayed. (2
)
109
Reset the vacuum sensor error record
s
Machine Installation
Remark
Press (3) "Reset.
"
Item
The errors that have occurred so fa
r
The error records disappear
111
112
110
* Grease is applied to the
nut. Remove excess
grease. Put a mark on the
nut.
Even though a magic
marker is used, it may not
work on a grease section.
Confirm a mark on the lock nut
[Person in charge]
Two lines for persons in
charge:
Upper line:
Persons in charge of
shipping
Lower line:
Persons in charge of
installation
Sign the inspection/installation label as shown below: (M for machine, E for electricity)
The label is placed inside the cover under the electric source sectio
(1)
(2)
Before marking After marking
(3)
EJM8A-E-SMA020103-A01-00 Page 2-1-3-29