User Manual - SIPLACE Glue Feedeer - 第74页
5 Cleaning and Maintenance 5.4 Cleaning and Inspecting the Gluing Unit 74 User Manual SIPLACE Glue Feeder 05/2020 5.4.1.5 Removing the Jet Block ► Loosen the 4 screws which fasten the jet block. ► Carefully lever the jet…
5 Cleaning and Maintenance
5.4 Cleaning and Inspecting the Gluing Unit
User Manual SIPLACE Glue Feeder 05/2020 73
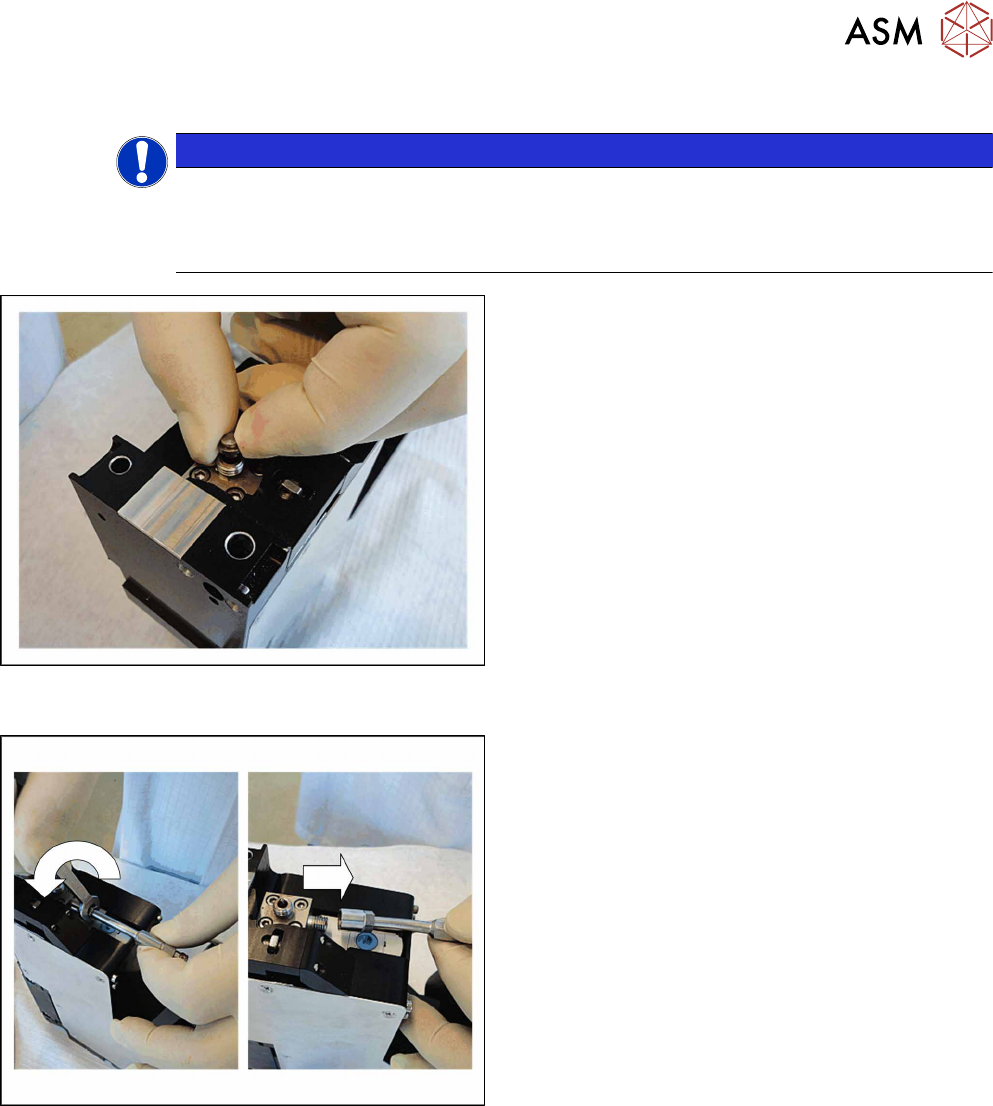
5.4.1.3 Removing the Dispenser Nozzle
NOTICE
Flat nozzle and needle nozzle
Depending upon its purpose, the glue feeder can be used with either a flat or needle
nozzle. The procedure for removing the dispenser nozzle is the same in both types and is
illustrated using the example of the flat nozzle in the following section:
► Lift the dispenser nozzle off the jet block.
5.4.1.4 Removing the Cartridge Pipe
► Hold the cartridge pipe tight with one hand.
► Loosen the screwed connection with the help of
an 8 mm open-ended wrench.
► Remove the cartridge pipe.
5 Cleaning and Maintenance
5.4 Cleaning and Inspecting the Gluing Unit
74 User Manual SIPLACE Glue Feeder 05/2020
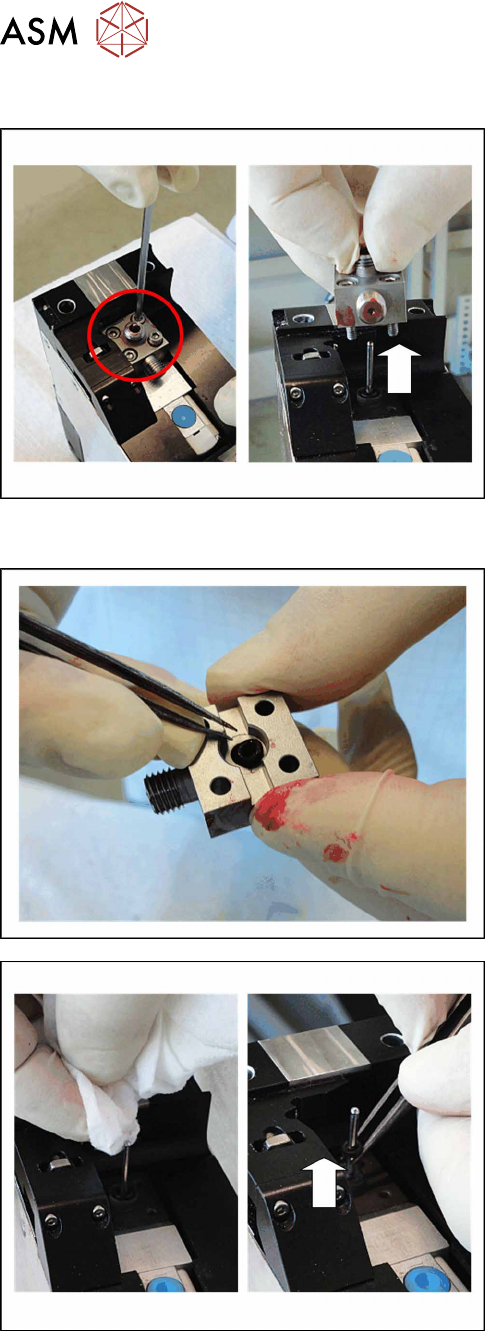
5.4.1.5 Removing the Jet Block
► Loosen the 4 screws which fasten the jet block.
► Carefully lever the jet block vertically up and off
the jet plunger.
5.4.1.6 Removing the O Rings
► Turn the jet block so that the underside is at the
top.
► Use a pair of tweezers to remove the O ring.
► Use a lint-free cloth with a little glue remover and
clean the jet plunger.
► Use a pair of tweezers to pull the O-ring up and
over the jet plunger.
5 Cleaning and Maintenance
5.4 Cleaning and Inspecting the Gluing Unit
User Manual SIPLACE Glue Feeder 05/2020 75
5.4.2 Cleaning the Gluing Unit
The individual parts of the gluing unit are cleaned using the following steps:
●
Rough cleaning of the glue with a pipe cleaner and cleansing tissue.
●
You can remove the glue more thoroughly using a disposable syringe and the cleansing
spray.
●
Rinsing of individual parts with water.
●
Optional: ultrasound bath with glue remover (approx. 5minutes at max. 50°C)
●
Drying of individual parts.
NOTICE
Residue glue can harden if too much heat is present in the ultrasound bath.
Make sure that any residue glue has been completely removed from the glue unit before
using the ultrasound bath. Residue glue can harden if too much heat is generated during
longer use of the ultrasound bath.
If there is still residue glue on the glue unit parts, remove this with a bristle brush and glue
remover before using the ultrasound bath.
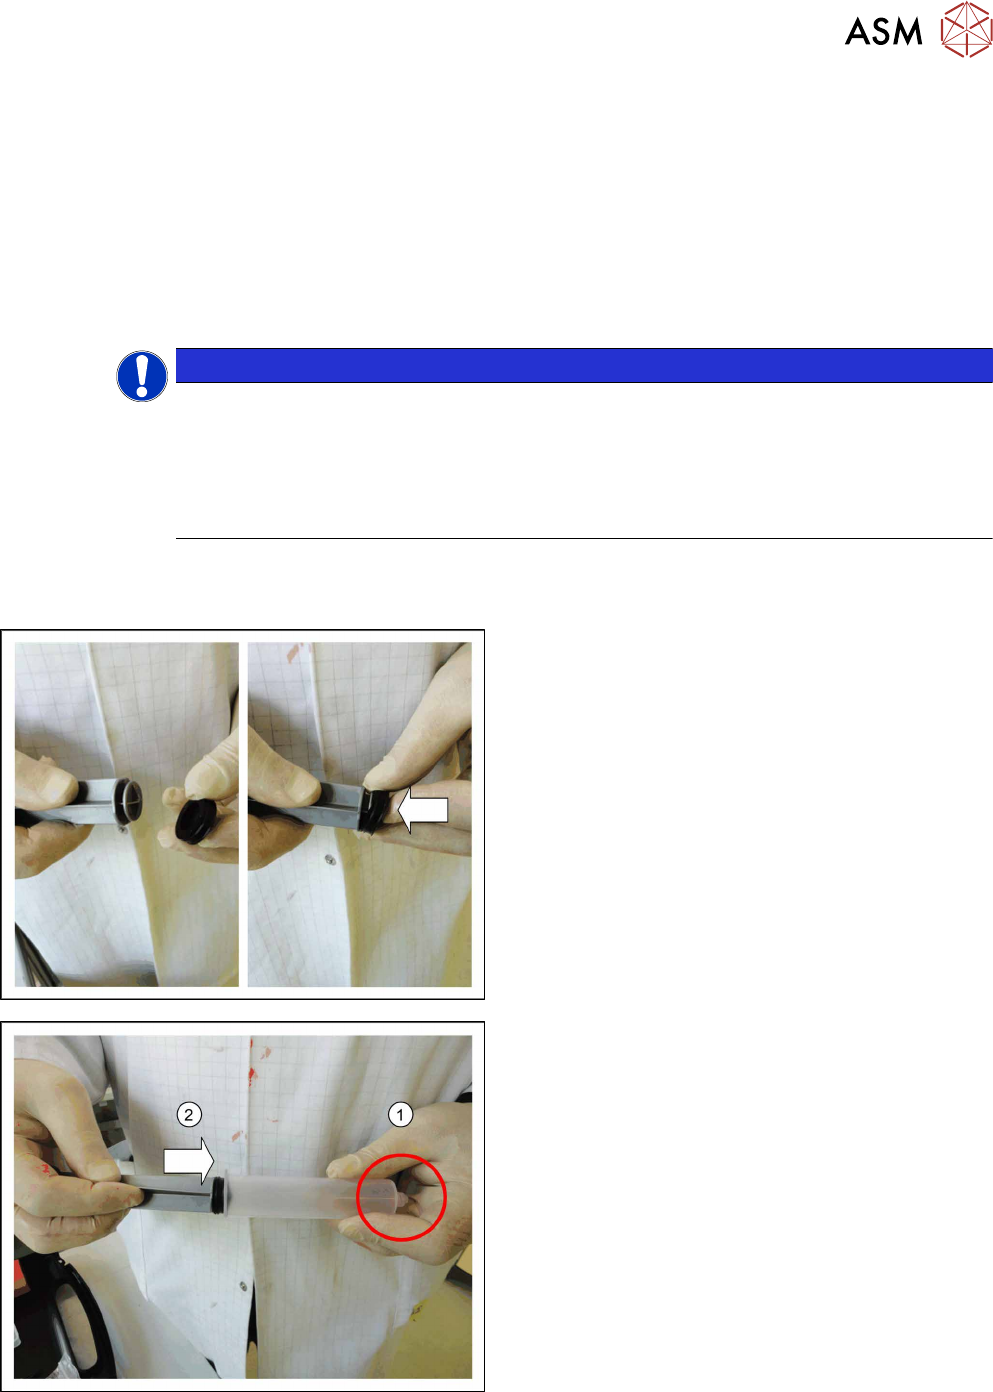
5.4.2.1 Preparing the Syringe
When you use the syringe for the first time, it needs to be prepared for use.
► Push the rubber seal onto the syringe plunger at
the front.
Make sure that the rubber seal lies against it all
the way round.
► Before using the plunger, coat the rubber seal
with a little glue remover (Zestron ES200) or O
ring grease (Turmotemp II/400 CL 2), so that the
syringe plunger can be moved.
► Check that the nozzle on the tip of the syringe is
free. Remove the cap if present.
► Push the plunger back into the syringe cylinder.