User Manual - SIPLACE Glue Feedeer - 第80页
5 Cleaning and Maintenance 5.4 Cleaning and Inspecting the Gluing Unit 80 User Manual SIPLACE Glue Feeder 05/2020 ► Carefully push the O-ring plunger (item no. 03094179-xx) onto the size 2.5 Allen key. ► Open the tip of …
5 Cleaning and Maintenance
5.4 Cleaning and Inspecting the Gluing Unit
User Manual SIPLACE Glue Feeder 05/2020 79
5.4.2.7 Cleaning the Syringe
If you have not used the syringe for a long time and before you place it back in the maintenance
case, you should close it and clean it on the outside.
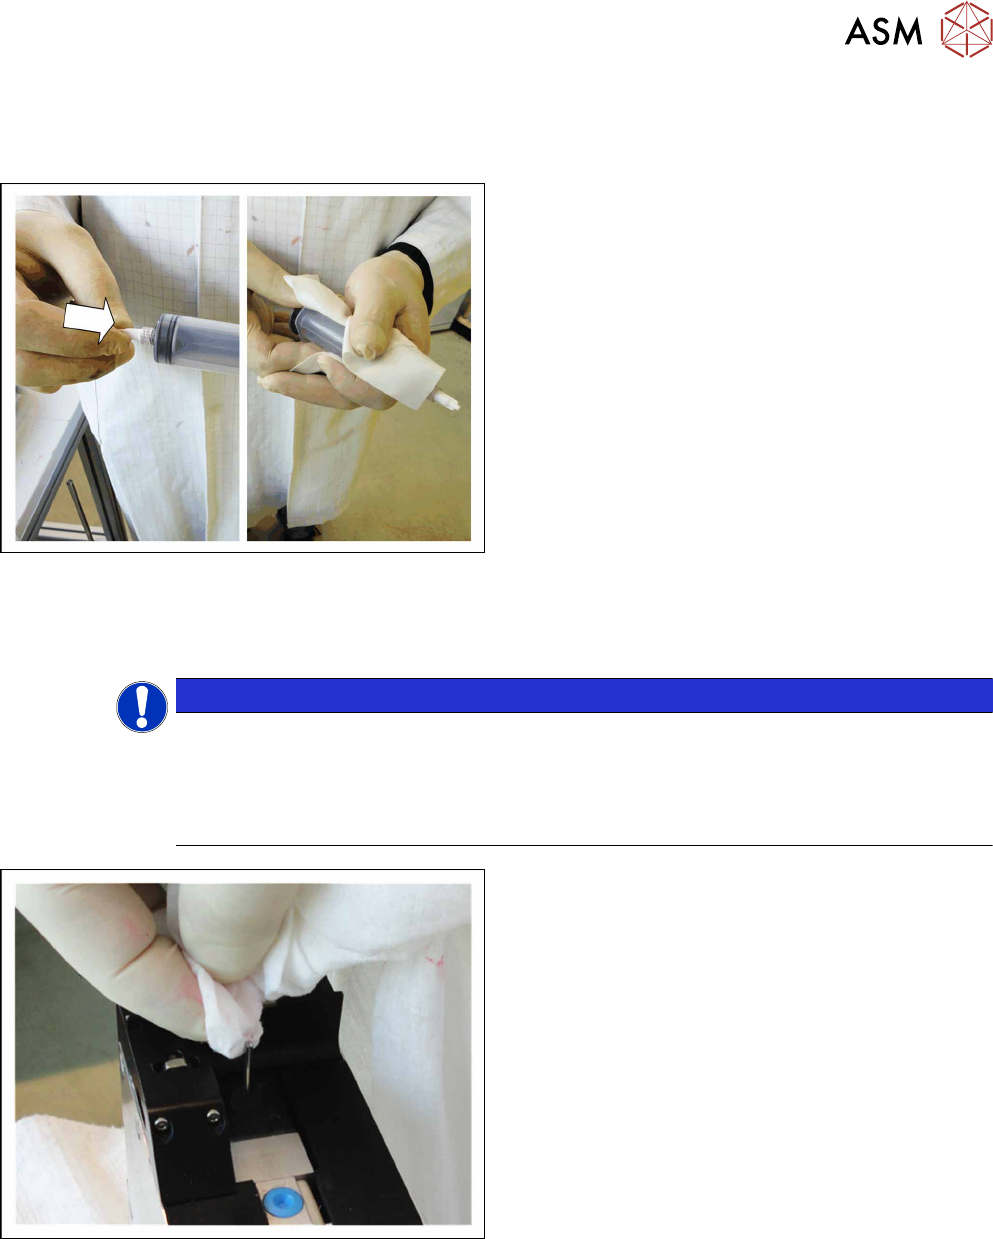
If you do not need the syringe for a longer period:
► Place the cap on the nozzle at the tip of the syr-
inge.
► Wipe the syringe with a cleansing tissue.
5.4.3 Fitting the Gluing Unit
5.4.3.1 Inserting the O Rings at the Plunger
NOTICE
Replacing O-rings
Damaged O-rings are no longer able to fulfil their sealing function. As a result, the pressure
required at the jet valve can not be produced to its full extent and glue may protrude, con-
taminating the inside of the Glue Feeder.
We therefore recommend that you replace the O-rings each time you clean the gluing unit.
► Clean the jet plunger with a cleansing tissue and
a little glue remover.
5 Cleaning and Maintenance
5.4 Cleaning and Inspecting the Gluing Unit
80 User Manual SIPLACE Glue Feeder 05/2020
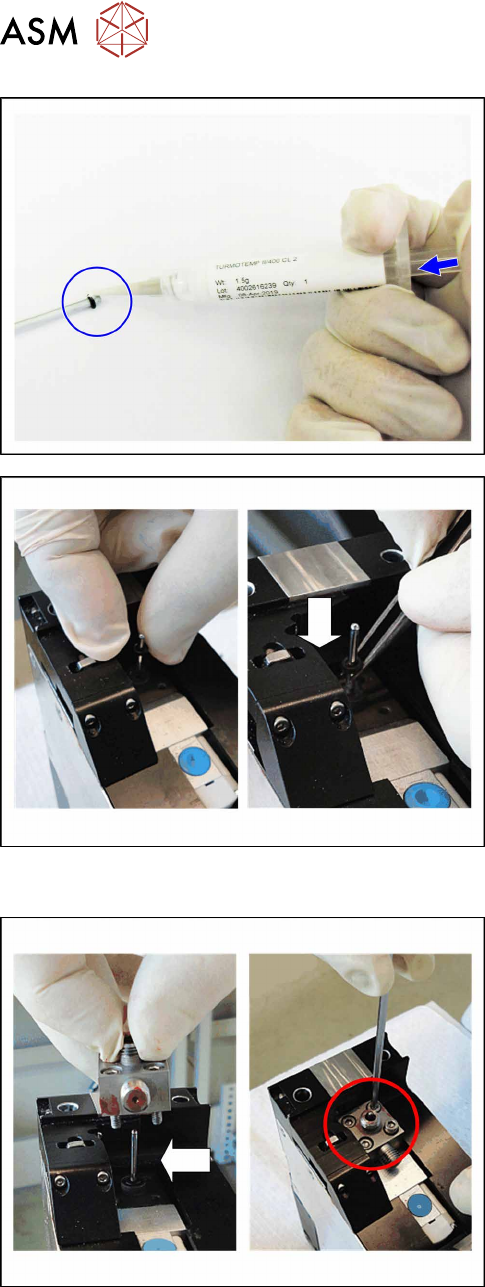
► Carefully push the O-ring plunger (item no.
03094179-xx) onto the size 2.5 Allen key.
► Open the tip of the grease gun (Turmotemp
II/400 CL2, item no. 03095880‑xx).
► Guide the Allen key with the O-ring to the tip of
the grease gun, carefully press the piston of the
gun and coat the O-ring with a little grease.
► Fit the greased O-ring over the jet plunger and
use a pair of tweezers to carefully push it as far
as the end stop.
► Clean the jet plunger with a cleansing tissue, so
that there are no glue residues on the jet plunger,
above the first O-ring.
► Fit the second O-ring (without greasing it) over
the jet plunger and use a pair of tweezers to
carefully push it as far as the end stop, so that
the second O-ring is directly above the first one.
5.4.3.2 Fastening the Jet Block
► Carefully place the jet block vertically onto the jet
plunger from above, with the thread pointing to-
wards the back.
► Press the jet block onto the top O-ring.
Attention
:
Take care that the O-ring audibly engages into
the jet block.
► Align the jet block straight in relation to the back,
so that the cartridge pipe can be correctly
screwed into place.
► Fasten the jet block with the 4 screws shown.
Use a size 2.5 Allen key to help you and tighten
the screws cross-wise.
5 Cleaning and Maintenance
5.4 Cleaning and Inspecting the Gluing Unit
User Manual SIPLACE Glue Feeder 05/2020 81
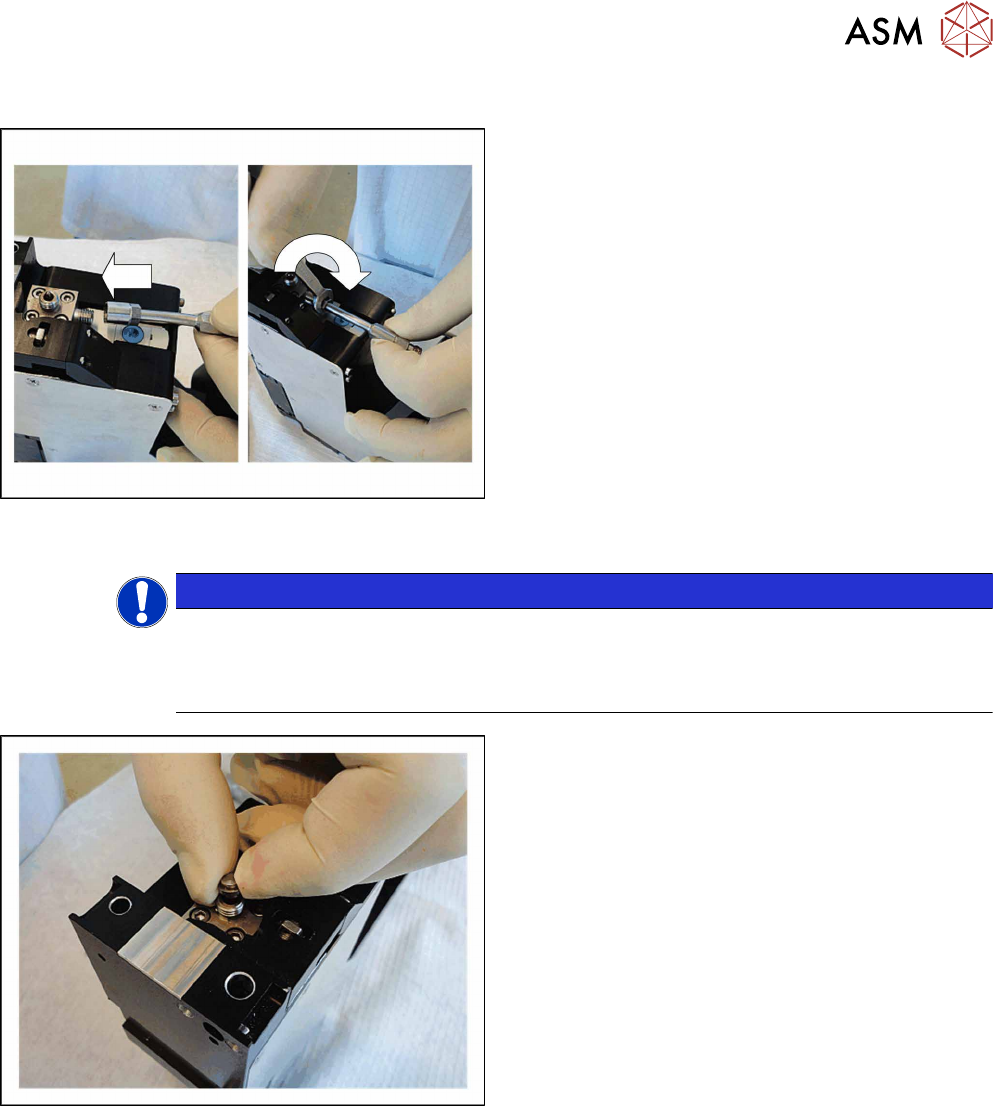
5.4.3.3 Attaching the Cartridge Pipe
► Place the cartridge pipe from behind onto the
thread of the jet block.
► Use a size 8 mm open-ended wrench to turn and
fasten the cartridge pipe in a clockwise direction.
► Align the cartridge pipe centrally and straight in
relation to the back, so that the cartridge can be
correctly screwed into place.
► Fix the cartridge pipe with one hand in this posi-
tion and then screw the lock tight.
5.4.3.4 Fitting the Dispenser Nozzle
NOTICE
Flat nozzle and needle nozzle
Depending upon its purpose, the glue feeder can be used with either a flat or needle
nozzle. The procedure for fitting the dispenser nozzle is the same in both types and is illus-
trated using the example of the flat nozzle in the following section:
► Place the dispenser nozzle centrally onto the
thread of the jet block.