TR7007M_SII_Hardware_en_v1-0-1.pdf - 第87页
Test Research, Inc. TR7007M SII User Guide – Hardware 77 Figure 120 : EzLink Load Configura tion Finish ed
Test Research, Inc.
76 TR7007M SII User Guide – Hardware
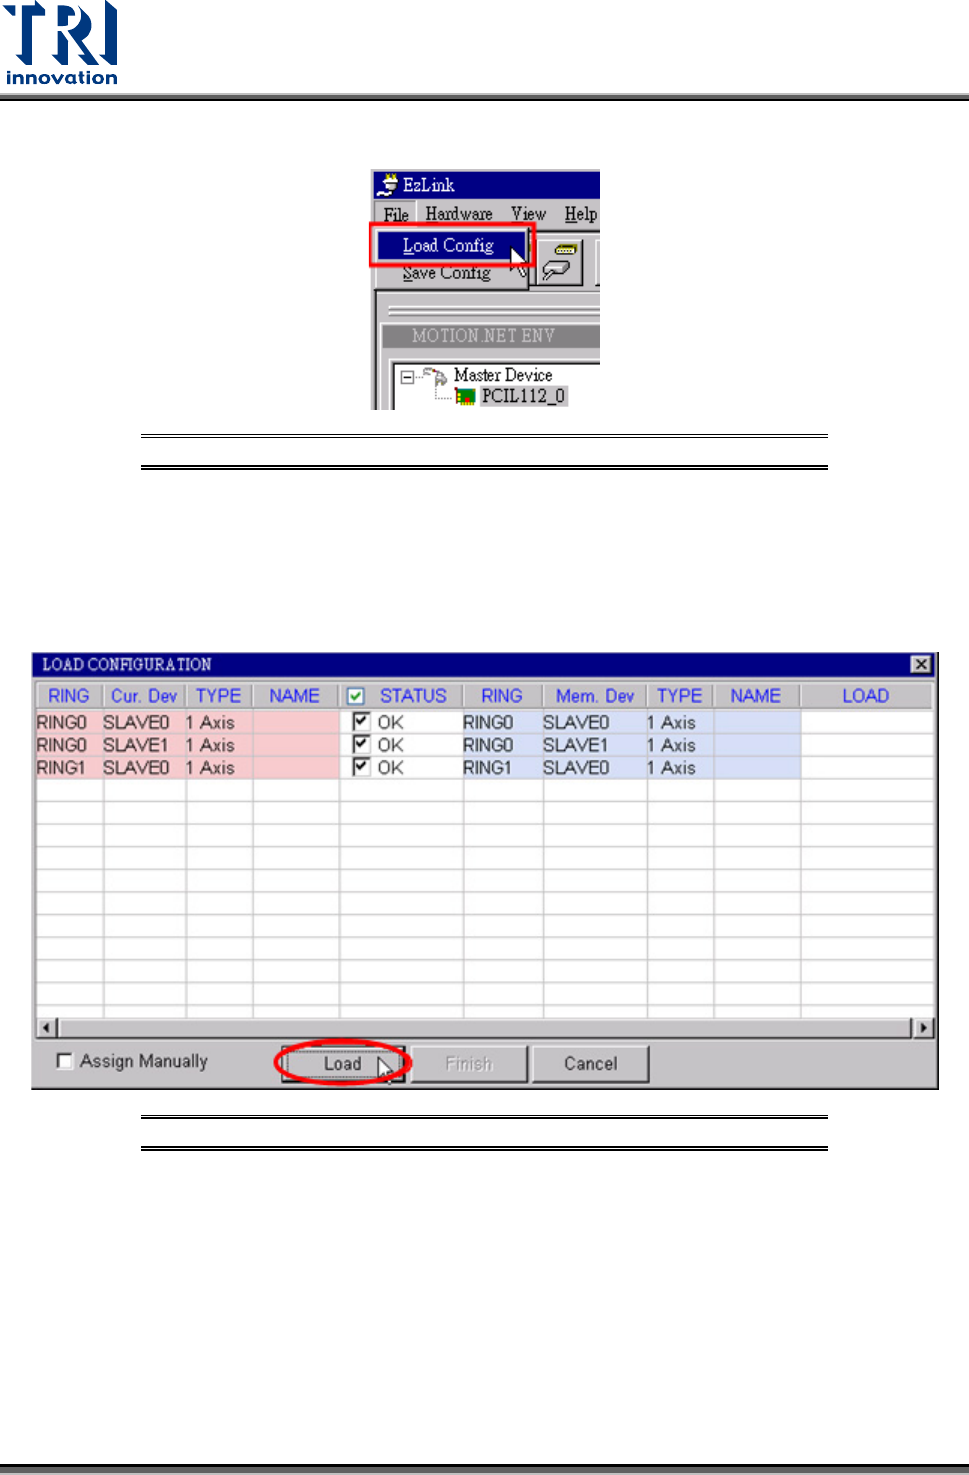
A. Select FILE > LOAD CONFIG from the EzLink main menu list
Figure 118: EzLink-File/Load Config.
B. Select the file to be loaded. For TR7550, user should select [TR7500LinearMotor] in
[Ezlink_32] folder; for TR7066/7007/7700, user should select [TR7066/7007/7700] in
[Ezlink_64] folder.
C. Select any slave device from the list and click on the LOAD button. This will
automatically load all the device’s axes.
Figure 119: EzLink Load Configuration Screen
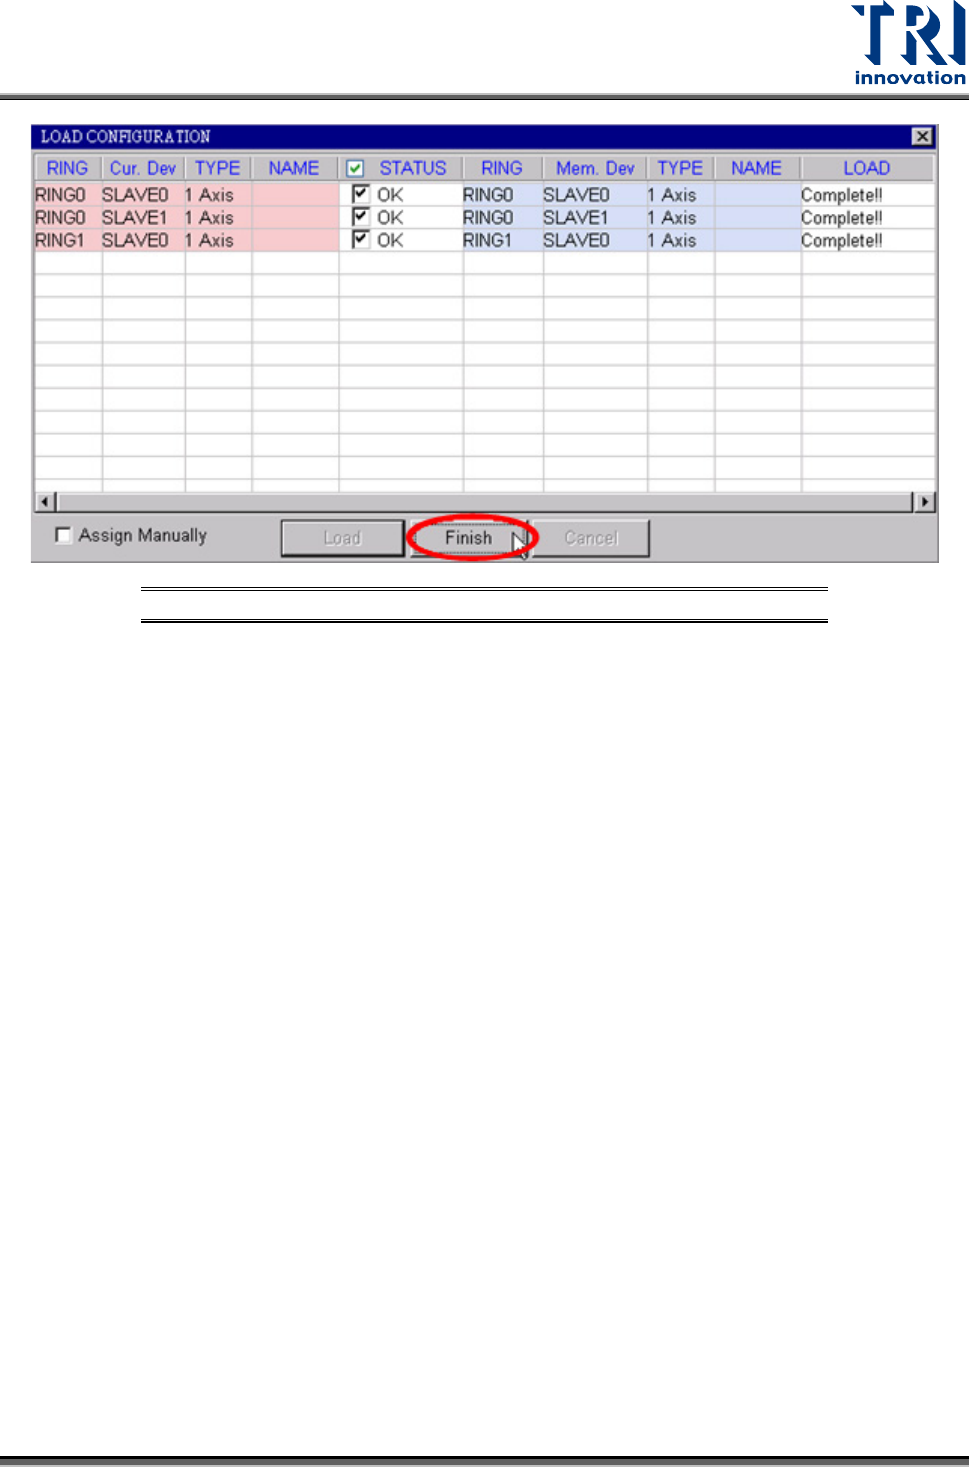
D. Once all slave devices have been loaded successfully, click on the FINISH button to
close the window.
Test Research, Inc.
TR7007M SII User Guide – Hardware 77
Figure 120: EzLink Load Configuration Finished
Test Research, Inc.
78 TR7007M SII User Guide – Hardware
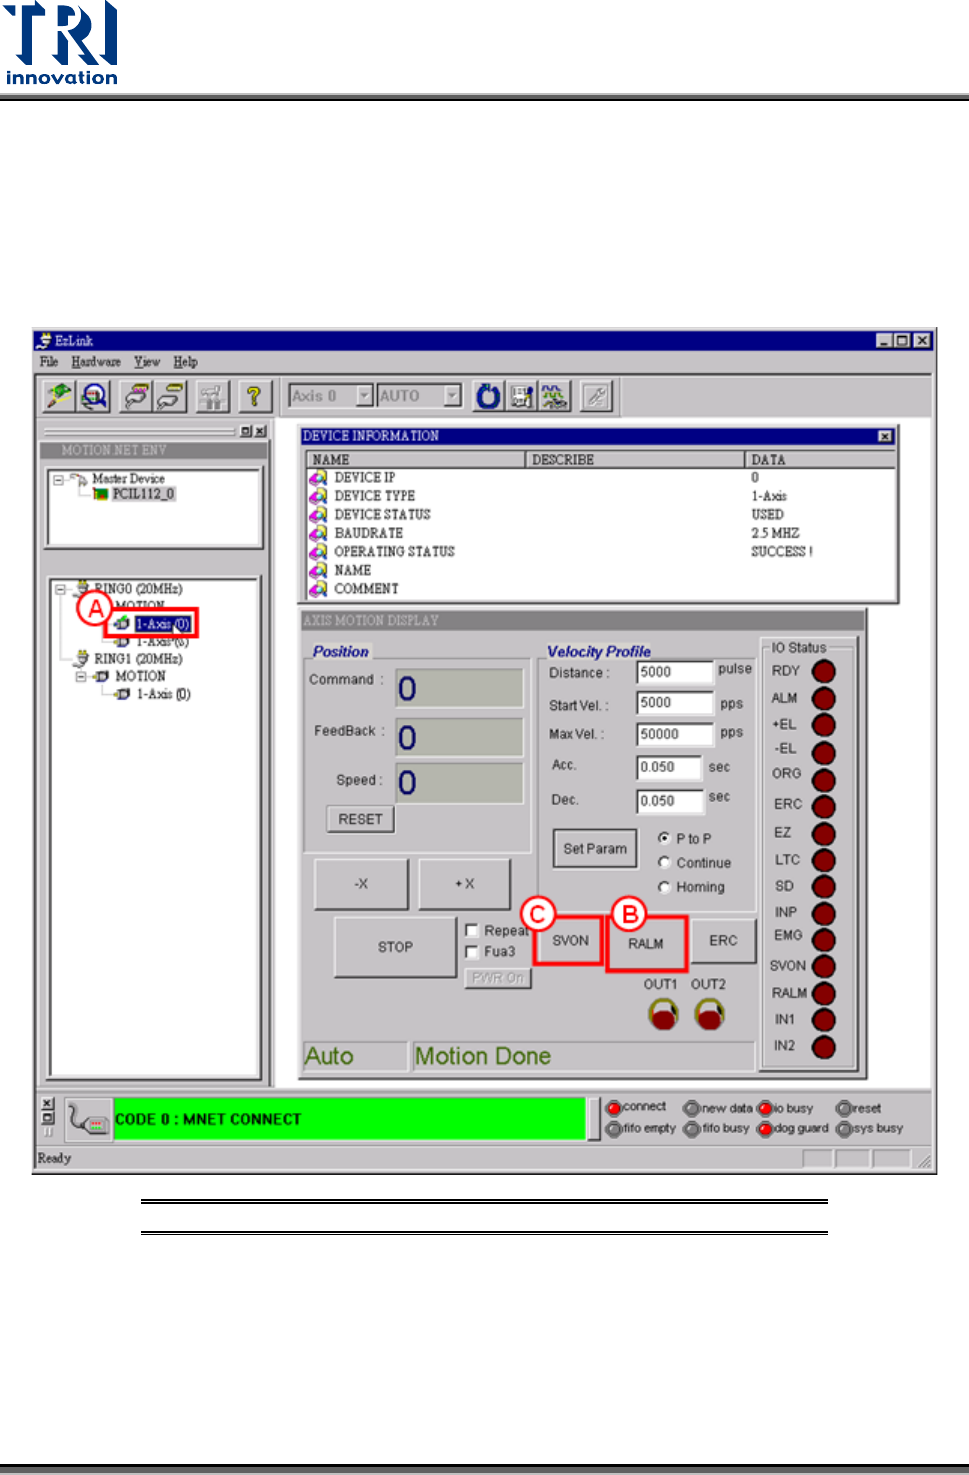
7) X Axis Magnetic Pole Check
A. Click [1-Axis (0)] icon to open X axis motion display windows.
B. Click [RALM] icon to clear alarm messages.
C. Click [SVON] icon to start magnetic pole check. This moves the servo motor a short
distance at a time. Repeat until magnetic pole check finishes.
Figure 121: X Axis Magnetic Pole Check
D. If the magnetic pole check fails, there is a servo error in which the [ALM] signal is on
and the [SVON] signal still off. If magnetic pole check is successful, click on [RALM]
button and the [ALM] signal will turn off and [SVON] signal will turn on. Then the X
axis is ready to move.