00195398-0103-AI-01005Paket_DE_EN.pdf - 第63页
Asse mb ly In st ruct i on s 0100 5- Pac ket Edi t io n 12 /200 7 63 Æ G o to "W aiting time during pickup" and ent er the value 10 ms (only f or C&P 12 head). NOTE: If SIPLACE D1/ D2/D4 is used together wi…
Assembly Instructions 01005-Packet
Edition 12/2007
62
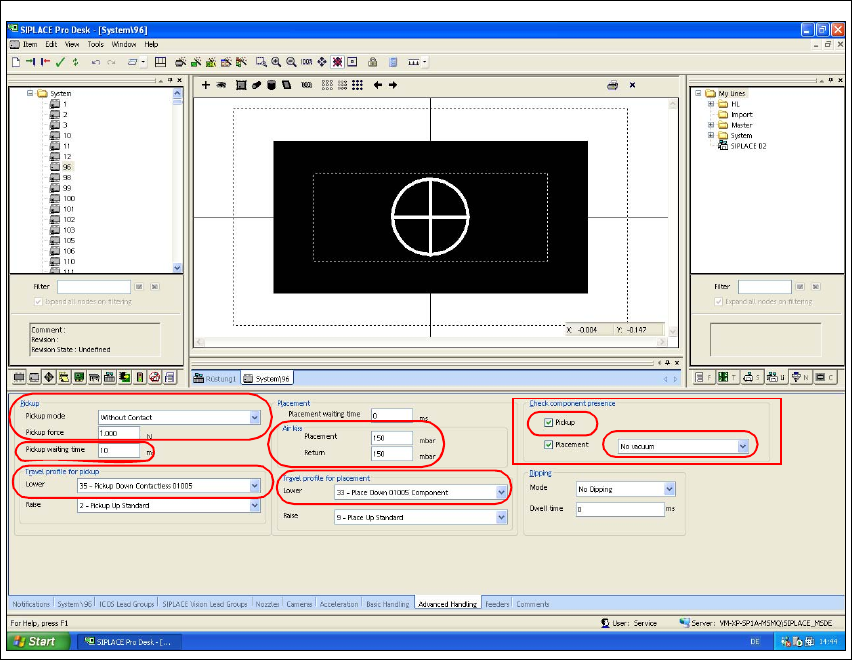
3.7.2.2 Controlling and Configuring Advanced Settings, where necessary
Æ Select the "Advanced Edits" tab.
Æ Go to "Check component process" and select the list field
"No vaccum". Then activate the checkbox "Pickup".
Æ Go to "Pickup Mode" and select the list field "No Contact".
Æ Enter 1.0 N at "Pickup Force".
Æ Check the standard settings for the travel profiles (travel profiles 33 or 34 for verified placement
and 35 for verified pickup) and make corrections, if necessary.
Fig. 38 SIPLACE Pro "component shape editor" - "advanced edits" tab
Æ Go to the "Air Kiss" option to check the settings for air kiss. Make edits only when necessary
in accordance with the following values:
– Air kiss values for placement (only C&P head)
– 0 mbar: no air kiss
– 1- 50 mbar: short air kiss (approx. 4ms)
– 51-150 mbar: medium air kiss (approx. 12ms)
– > 150 mbar: long air kiss (approx. 37ms)
Assembly Instructions 01005-Packet
Edition 12/2007
63
Æ Go to "Waiting time during pickup" and enter the value 10 ms (only for C&P 12 head).
NOTE:
If SIPLACE D1/D2/D4 is used together with the SIPLACE X-series, you need to create and main-
tain a second component shape for 01005 in conjunction with the C&P 20 head, where necessary.
In case the 01005-component is placed with the C&P 20 head, the "Waiting time during pickup"
option must be adjusted to the value 0 ms! 3
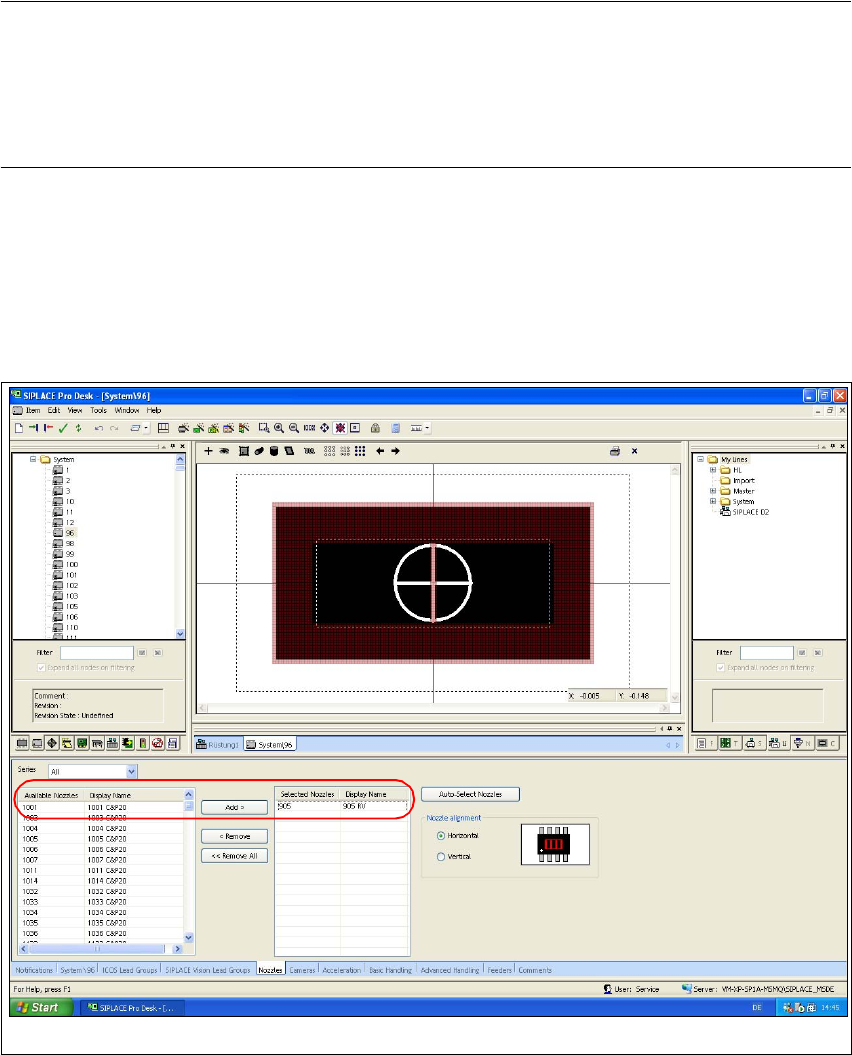
3.7.2.3 Assigning Nozzles
Æ Select the "Nozzles" tab.
Æ Select from the list of the available nozzles the "905" type and use the "Add >" button to add
this entry to the list auf the selected nozzles.
Fig. 39 SIPLACE Pro "component shape editor" - "nozzles" tab
Assembly Instructions 01005-Packet
Edition 12/2007
64
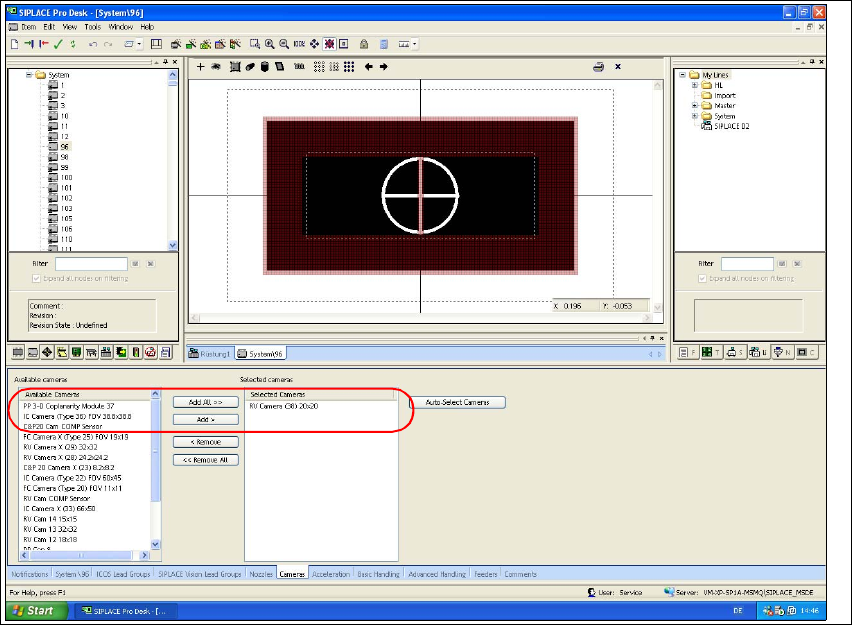
3.7.2.4 Assigning the Camera
Æ Select the "Cameras" tab.
Æ Select from the list of the available cameras the "RV Camera (38) 20x20" type and use the
"Hinzufügen >" button to add this entry to the list of the selected cameras.
Fig. 40 SIPLACE Pro "component shape editor" - "cameras" tab