00195642-01_IM-SetupCenter-3.0_EN.pdf - 第83页
Installation Motorola / Symbol MC70 Scanner Configura tion Steps to pe rform after Installation Installation Manual SIPLACE Setup Center V3.0 83 X Right click on a barcode to open the co ntext menu: Edit : Additional b…
Installation
Steps to perform after Installation Motorola / Symbol MC70 Scanner Configuration
82 Installation Manual SIPLACE Setup Center V3.0
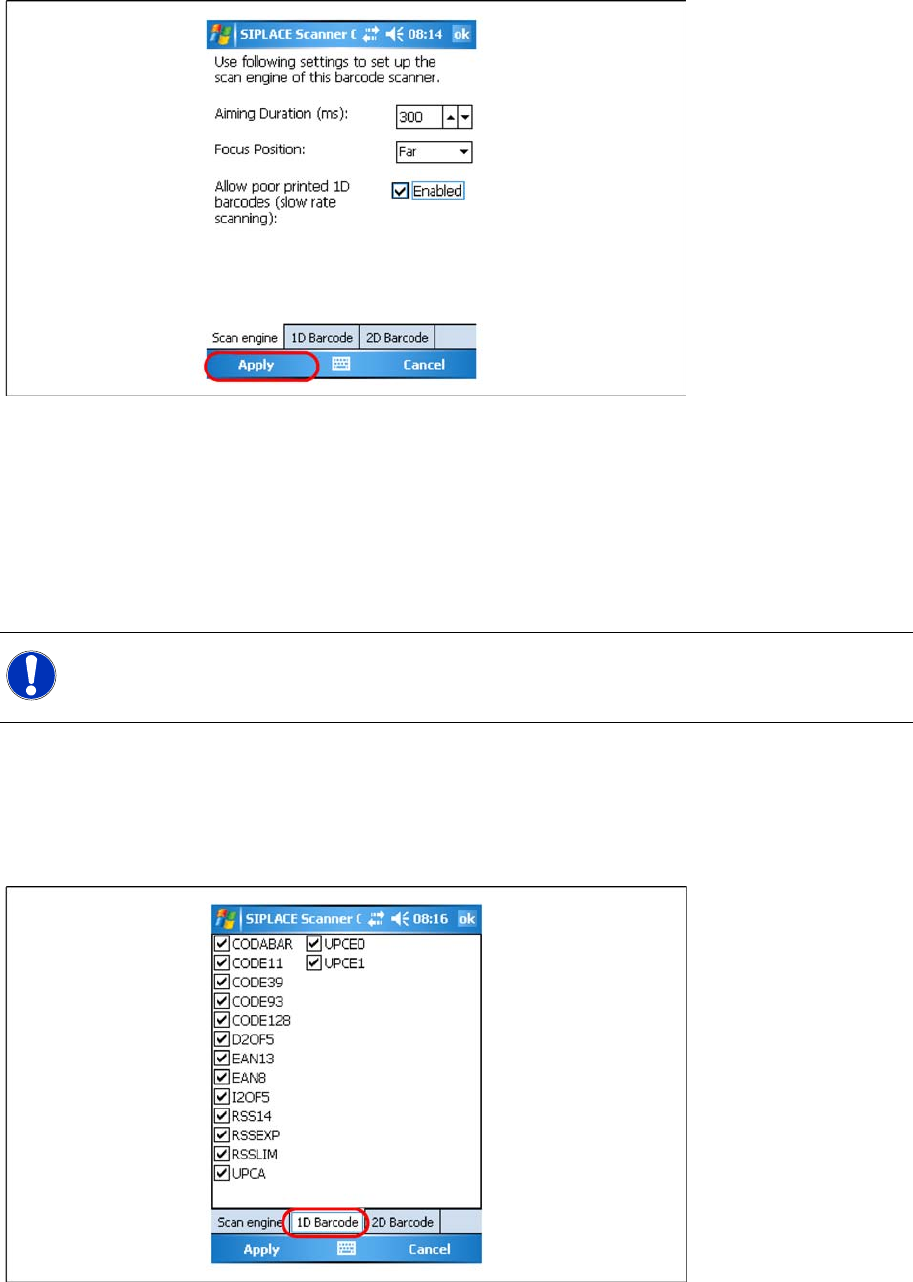
You can change the following scan parameters here:
Aiming Duration (ms):
Sets the time, how long a user is able to target a barcode with target laser.
Focus Position:
– Far: You have to focus a barcode in scan range of about 23 cm (9 inches).
– Near: You have to focus a barcode in scan range of about 13 cm (5 inches).
Allow poor printed 1D barcodes (slow rate scanning):
Use this setting, if most of your barcodes cannot be read in case of light damage.
X Press Ok or Apply to save the settings.
Setting 1D or 2D barcodes for MC70 Scanner
X Choose the allowed 1D barcodes for your MC70 Scanner here.
NOTE:
This setting is depending on barcode size. If you have problems to read your 1D barcodes with
small size, change the setting to “Near”.
Installation
Motorola / Symbol MC70 Scanner Configuration Steps to perform after Installation
Installation Manual SIPLACE Setup Center V3.0
83
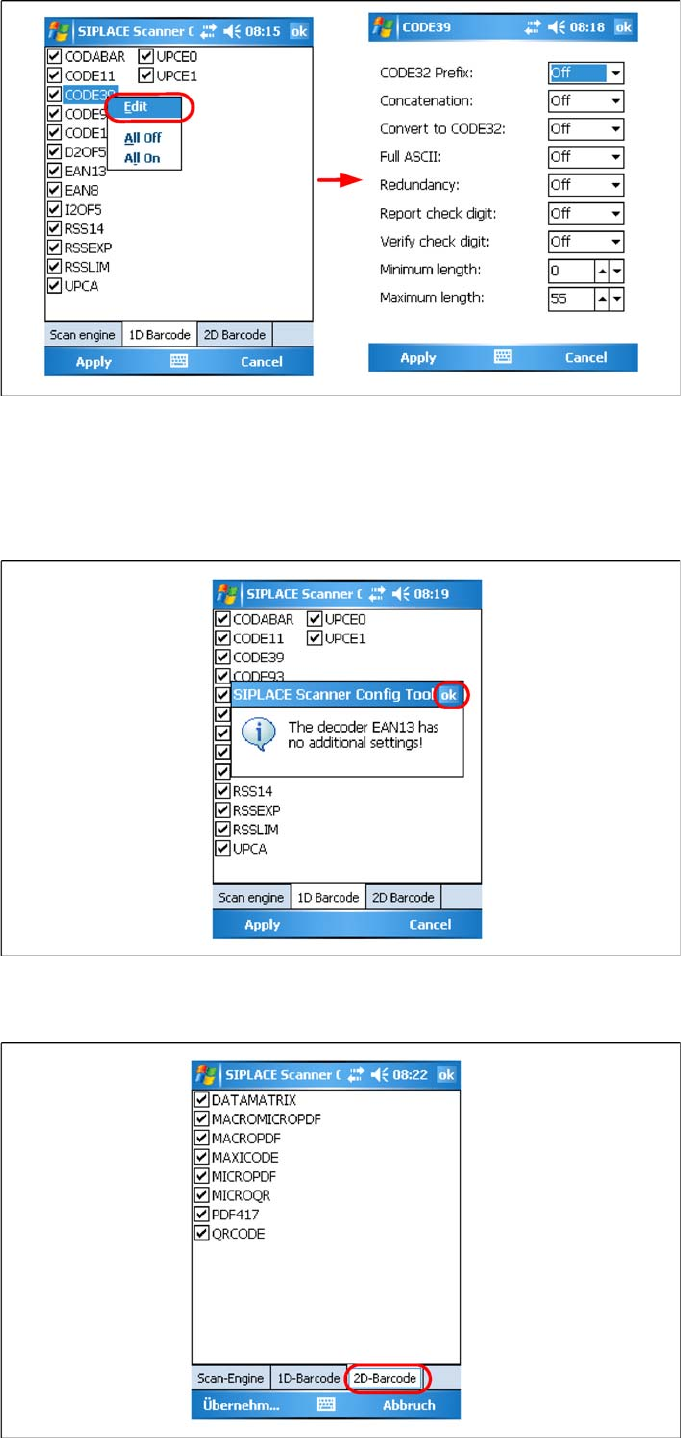
X Right click on a barcode to open the context menu:
Edit: Additional barcode settings
All Off: Select none of the barcodes in the list
All On: Select all the barcodes in the list
X If there is no addional settings for this barcode available, press Ok to close the window.
X Press Ok or Apply to save the settings.
Installation
Testing the Installation SIPLACE Setup Center Configuration
84 Installation Manual SIPLACE Setup Center V3.0
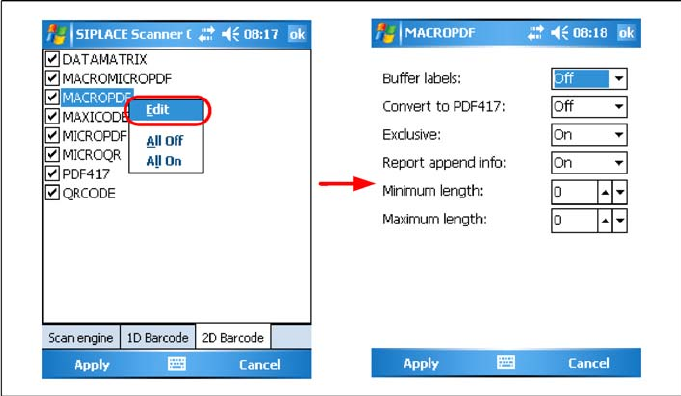
X Choose the allowed 2D barcodes for your MC70 Scanner here.
X Right Click on a barcode to open the context menu:
Edit: Further barcode configuration
All Off: Select all the barcodes in the list
All On: Select none of the barcodes in the list
X Press Ok or Apply to save the settings.
6.4.5 SIPLACE Setup Center Configuration
Setup Center GUI requires to be configured before it can be used. The configuration can be found via
the main menu Options → Settings. For detailed information, please refer to User Guide SIPLACE
Setup Center 3.0 (item no. 00195647-xx).
6.4.6 Settings on the SIPLACE Pro
In order to use Setup Center you should make settings on the programming system SIPLACE Pro. For
detailed information, please refer to User Guide SIPLACE Setup Center 3.0 (item no. 00195647-xx).
6.4.7 Barcode Label Wizard
The Barcode Label Wizard enables you to print out barcodes needed for the operation of the SIPLACE
Setup Center. For detailed information, please refer to User Guide SIPLACE Setup Center 3.0 (item no.
00195647-xx).
6.5 Testing the Installation
Connect the station to the Setup Center PC to the COM interface.
Make sure, the station is on (yellow LED is active).
If Setup Center is already running open the configuration dialog, otherwise start Setup Center.
Select the COM port in the configuration dialog of SIPLACE Setup Center and apply settings.
Press the Enter button twice on the scanner.
Now the main menu text "SIPLACE Setup Center" is displayed on the scanner.
6.6 Troubleshooting
If it is not possible to solve a problem during installation of SIPLACE Setup Center, please send the file
SIPLACESetupCenterSetupLog.html
and all similar "log" named files to the SIEMENS Service.