YC8_Mainte_E.pdf - 第51页
3-2 3 Periodic maintenance items 1.1.2 Cleaning T ype 64A and 65A nozzles n Required tools • Air blow tool (option) • IP A (isopropyl alcohol) • Fine brush (toothbrush, etc.) • Cleaning rag (clean rag) • Precision slotte…
3-1
3
Periodic maintenance items
1. Weekly inspection
This section mainly describes weekly inspection and cleaning.
1.1 Head
1.1.1 Cleaning Type 63A nozzle
n
Required tools
• Air blow tool (option)
• IPA (isopropyl alcohol)
• Fine brush (toothbrush, etc.)
c
e
1
Remove the nozzle from the head.
Always first press the emergency stop button
and then remove the nozzle from the head.
The machine must be in emergency stop to
ensure safety during work.
2
Clean the nozzle.
Immerse the nozzle in isopropyl alcohol and
then clean it with a fine brush.
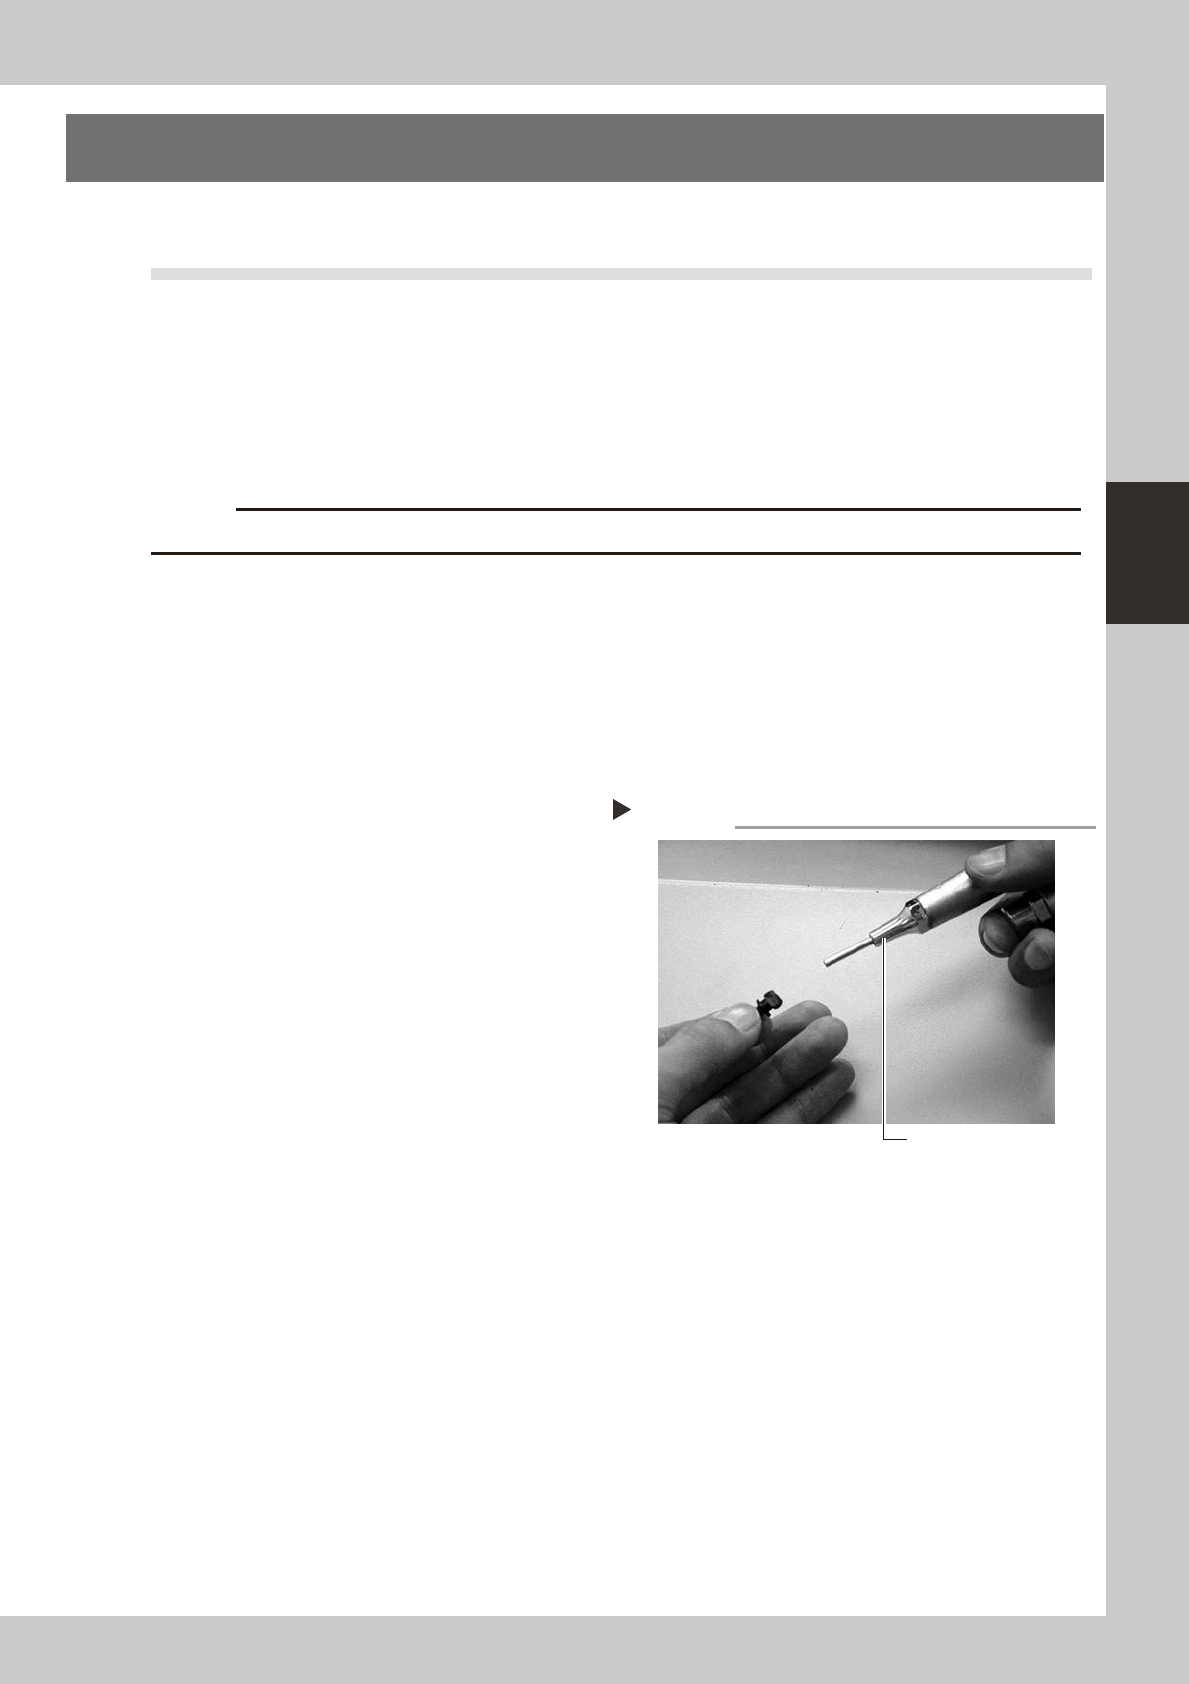
3
Blow air through the nozzle.
Using an air blow tool, blow air through the
nozzle.
53301-N8-00
Blowing air through the nozzle
Step 3
Air blow tool
3-2
3
Periodic maintenance items
1.1.2 Cleaning Type 64A and 65A nozzles
n
Required tools
• Air blow tool (option)
• IPA (isopropyl alcohol)
• Fine brush (toothbrush, etc.)
• Cleaning rag (clean rag)
• Precision slotted screwdriver
c
e
1
Remove the nozzle from the head.
Always first press the emergency stop button
and then remove the nozzle from the head.
The machine must be in emergency stop to
ensure safety during work.
2
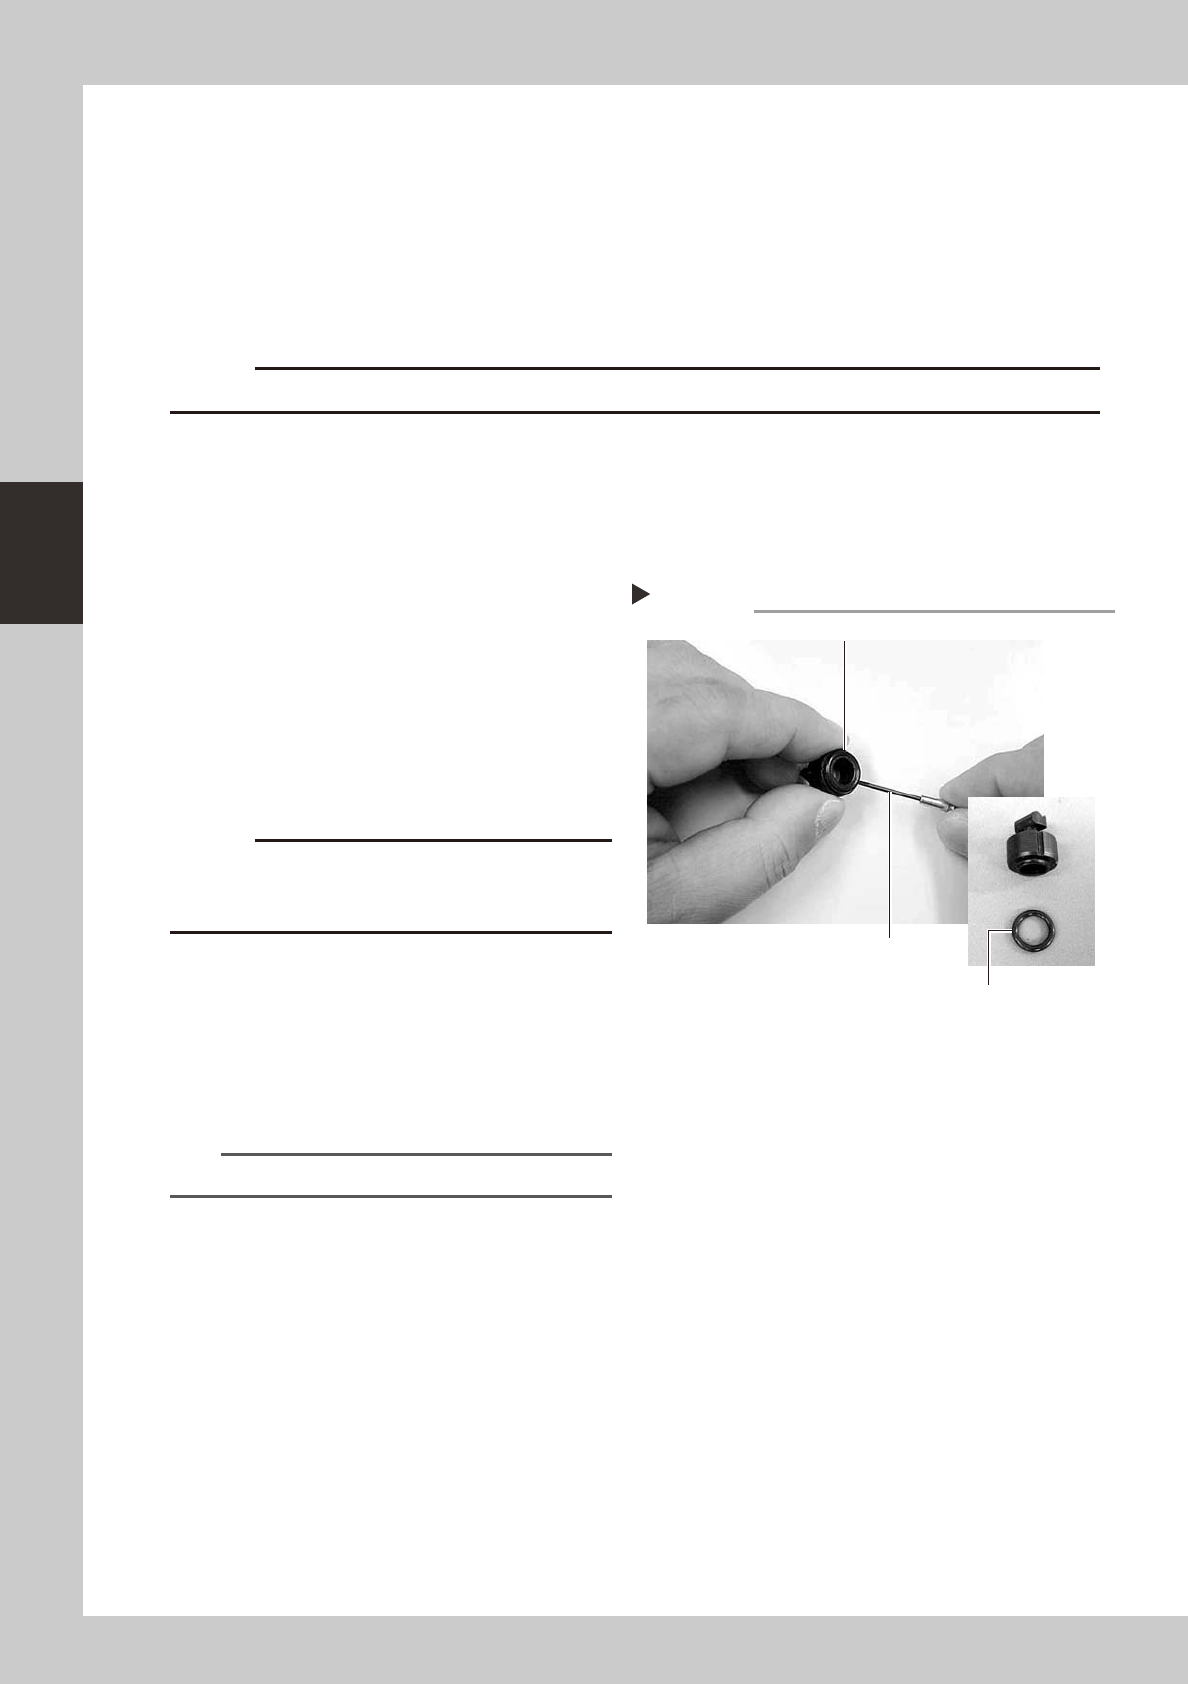
Remove the O-ring.
Using a precision slotted screwdriver, remove
the O-ring from the nozzle tip while being
careful not to damage the O-ring.
53308-L6-00
3
Clean the nozzle.
Immerse the nozzle in isopropyl alcohol and
then clean it with a fine brush. Wipe the
O-ring with a cleaning rag.
c
when immersed in alcohol.
4
Blow air through the nozzle.
Using an air blow tool, blow air through the
nozzle.
5
Reattach the nozzle to the head.
Fit the O-ring to the nozzle tip and reattach
the nozzle to the head.
n
NOTE
Replace the O-ring if it is worn or damaged.
Removing O-ring from the nozzle
Step 2
Removed O-ring
Precision slotted screwdriver
Remove O-ring.
3-3
3
Periodic maintenance items
1.1.3 Inspecting the nozzle holding force
Periodically inspect the nozzle holding condition of the leaf springs.
• If the holding force of the nozzle leaf springs is unstable, this may adversely affect the pickup, recognition, and
mounting.
• If the roller lock is loose, this may adversely affect the nozzle holding force.
• If the roller is scratched, this may cause recognition errors.
n
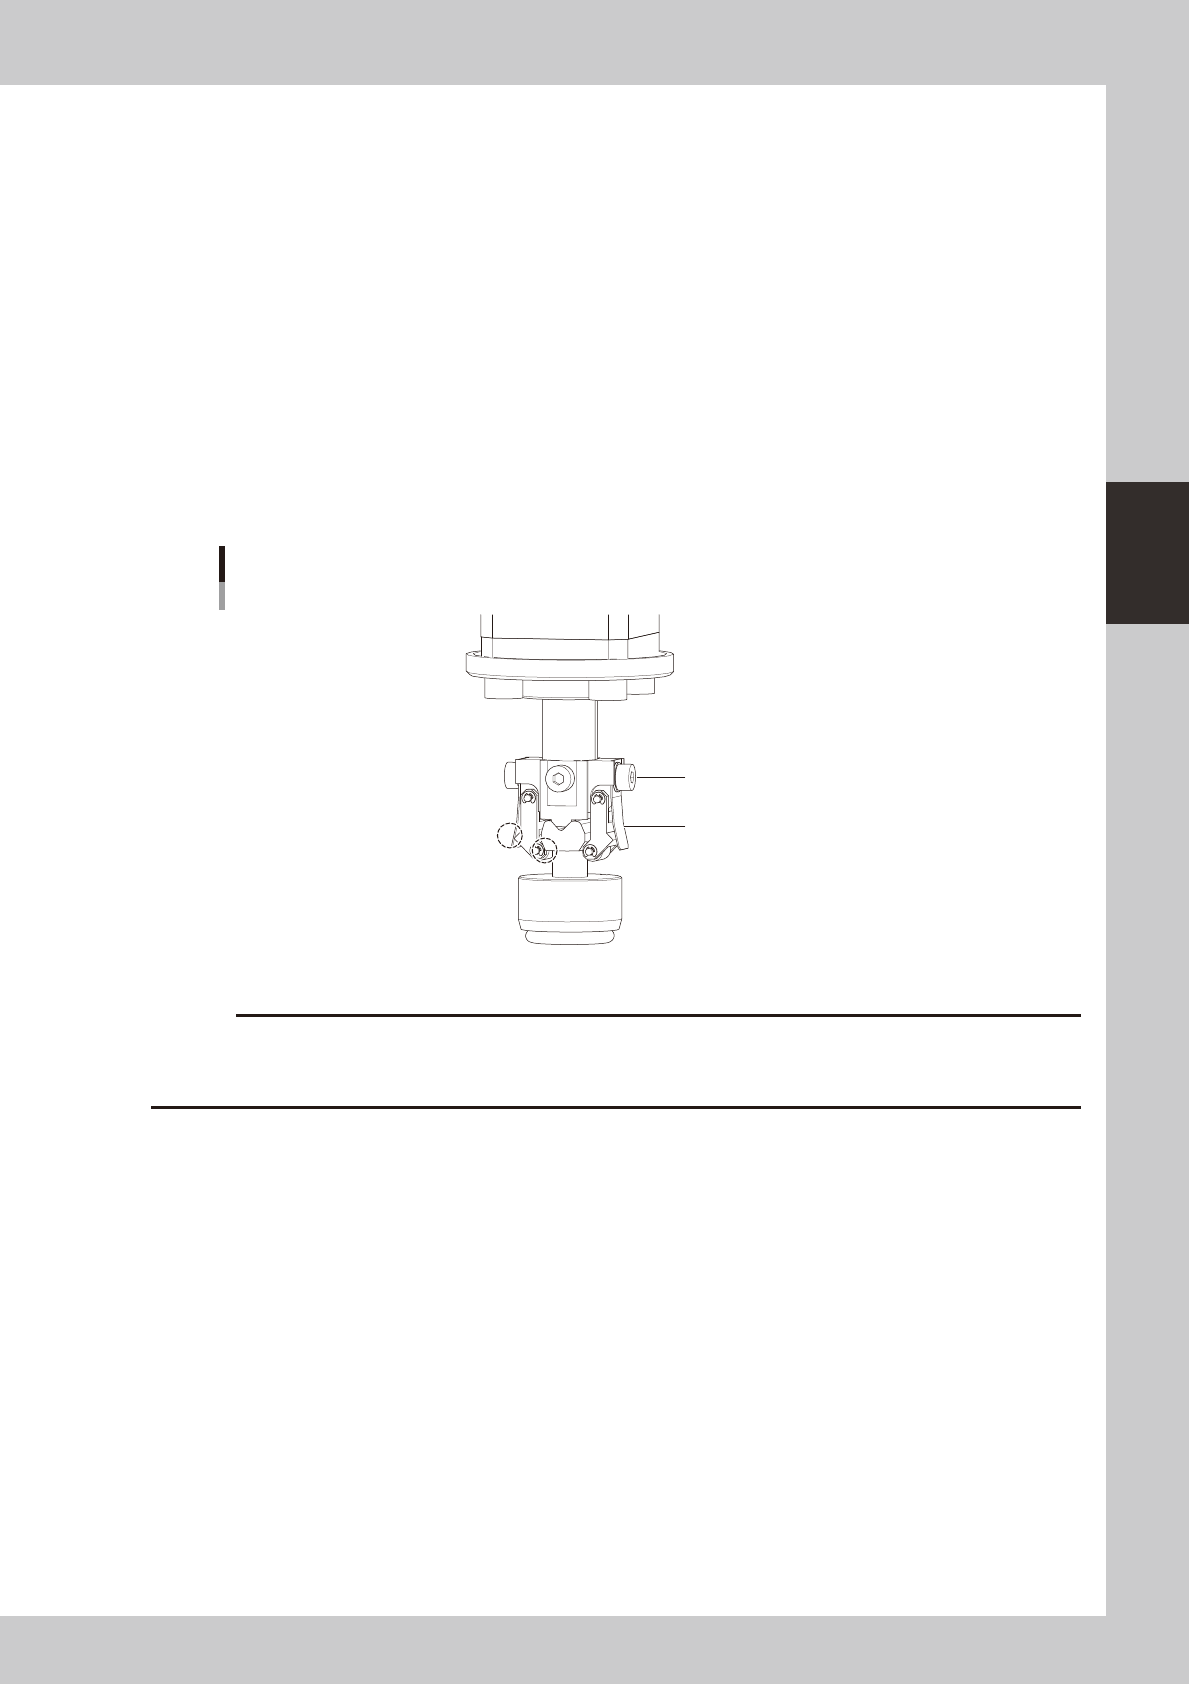
Leaf spring and roller inspection points
Check the following points by removing the nozzle and reattaching it to the nozzle holder.
• The leaf spring has enough holding force.
• With the nozzle attached, there are no gaps between the leaf springs and the rollers and between the rollers and the
nozzle
• No nozzle leaf springs are deformed.
• No screws are loose.
• No rollers are scratched.
Checking the leaf spring condition
Screw should
be tightened.
Leaf spring should not be
warped or deformed.
There should be
no gap.
53303-N8-00
c