YC8_Mainte_E.pdf - 第58页
3-9 3 Periodic maintenance items 3 Clean the ball screws. 1. Move the head (or conveyor rails) to one end of each axis (X, Y and W axes). 2. Wipe away the old grease and dirt from the entire ball screw with a lint-fr ee …
3-8
3
Periodic maintenance items
2.2.1 Cleaning and greasing the ball screw
n
Required tools
• Square cloth
• Phillips screwdriver
• Hex wrench (3mm)
• Lint-free cleaning cloth or paper towel
• Grease gun
• Specified grease: NSL
c
Always wear protective goggles and gloves when using grease.
e
1
Make the preparations for the
work.
1. Press the emergency stop button to put
the machine in the emergency stop
state.
2. Put a square cloth on the conveyor
plate.
2
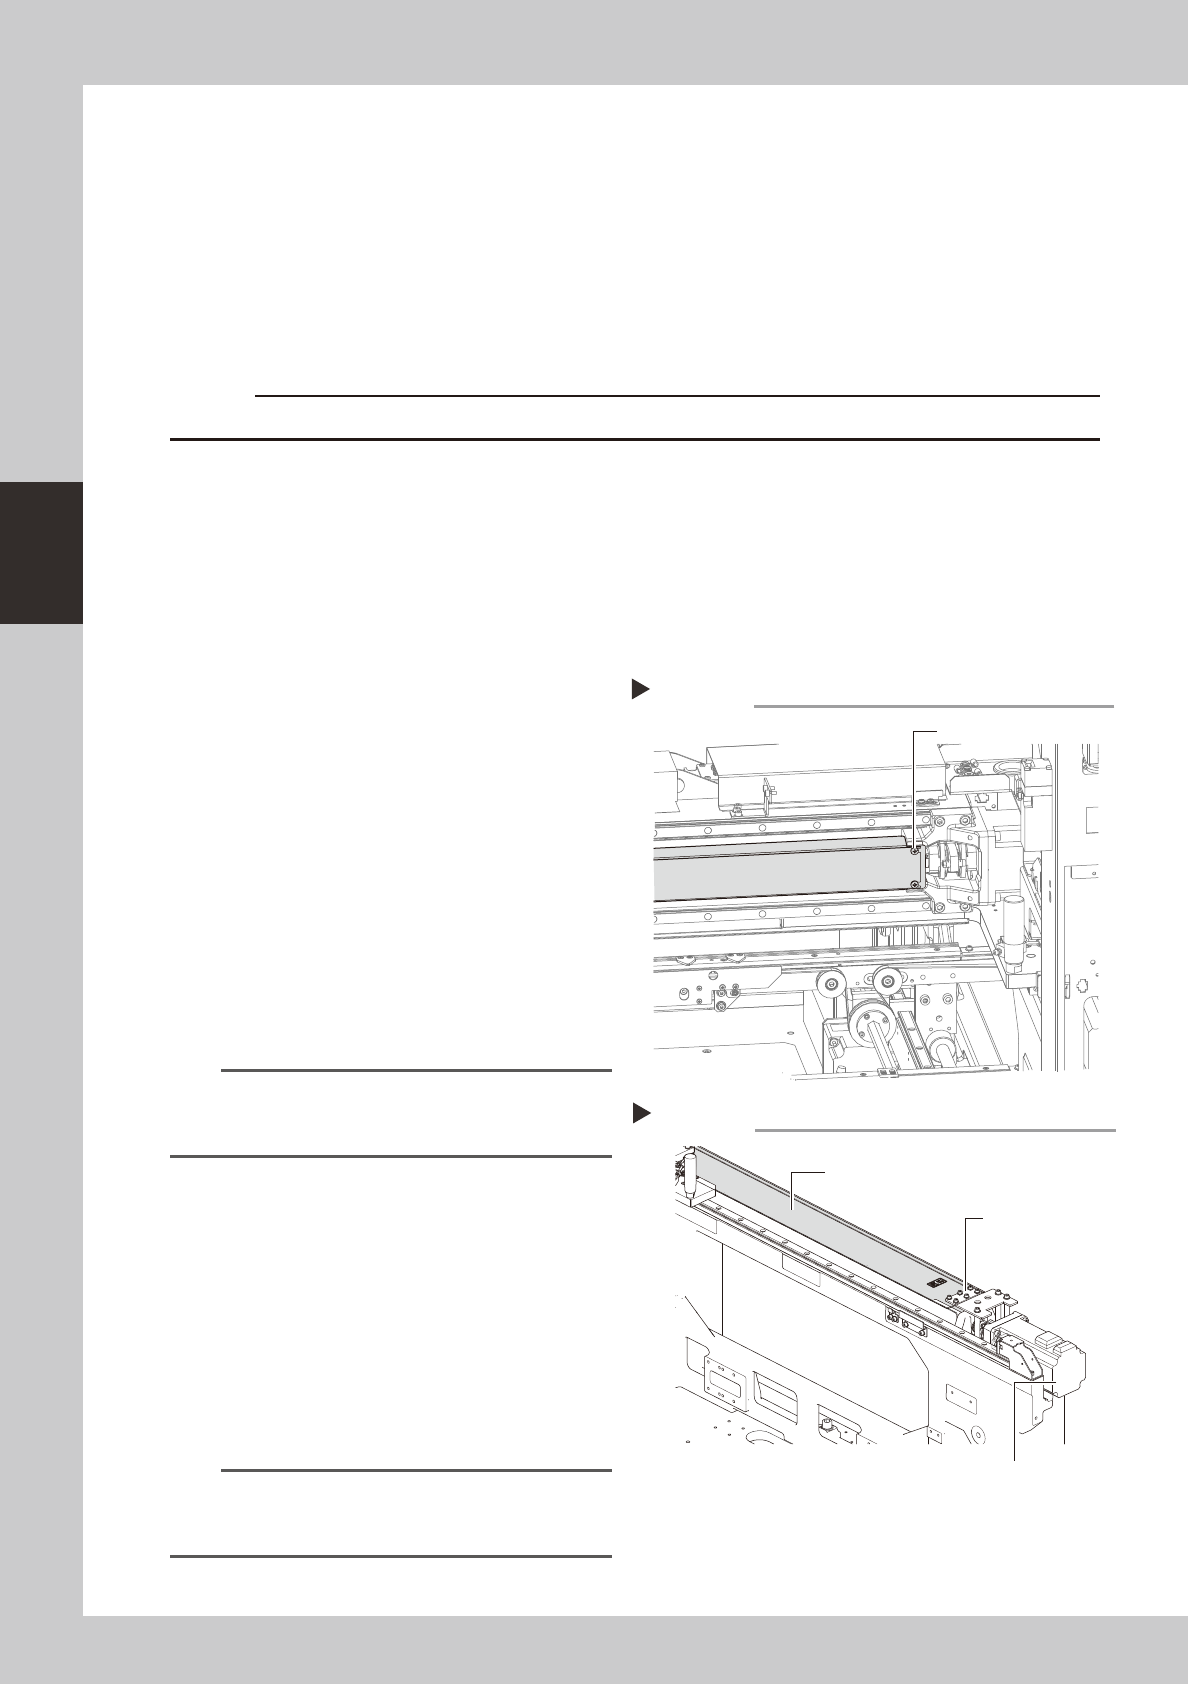
Remove the grease spattering
prevention covers.
Remove the grease spattering prevention
covers on the X, Y1 and Y2 axes.
X-axis
1. Use a Phillips screwdriver to remove the
screws securing the left side of the
grease spattering prevention cover.
2. Move the head all the way to the left
side and remove the screws securing the
right side of the grease spattering
prevention cover.
3. Remove the grease spattering prevention
cover by pulling it to the right.
53307-N8-00
TIP
When reattaching the X-axis grease spattering
prevention cover, use the reverse order of the above
procedure.
Y-axes
1. Use the hex wrench to remove the bolts
securing the rear side of the grease
spattering prevention cover.
2. Move the head all the way to the rear
side and remove the bolts securing the
front side of the grease spattering
prevention cover.
3. Remove the grease spattering prevention
cover by pulling it to the front.
53308-N8-00
TIP
When reattaching the Y-axis grease spattering
prevention covers, use the reverse order of the above
procedure.
Removing the Y-axis grease spattering prevention cover
Y-axis grease spattering prevention cover
Step 2
Y-axis grease
spattering prevention
cover mounting bolt
Y-axis motor
Removing the X-axis grease spattering prevention cover
Phillips screwdriver
Step 2
3-9
3
Periodic maintenance items
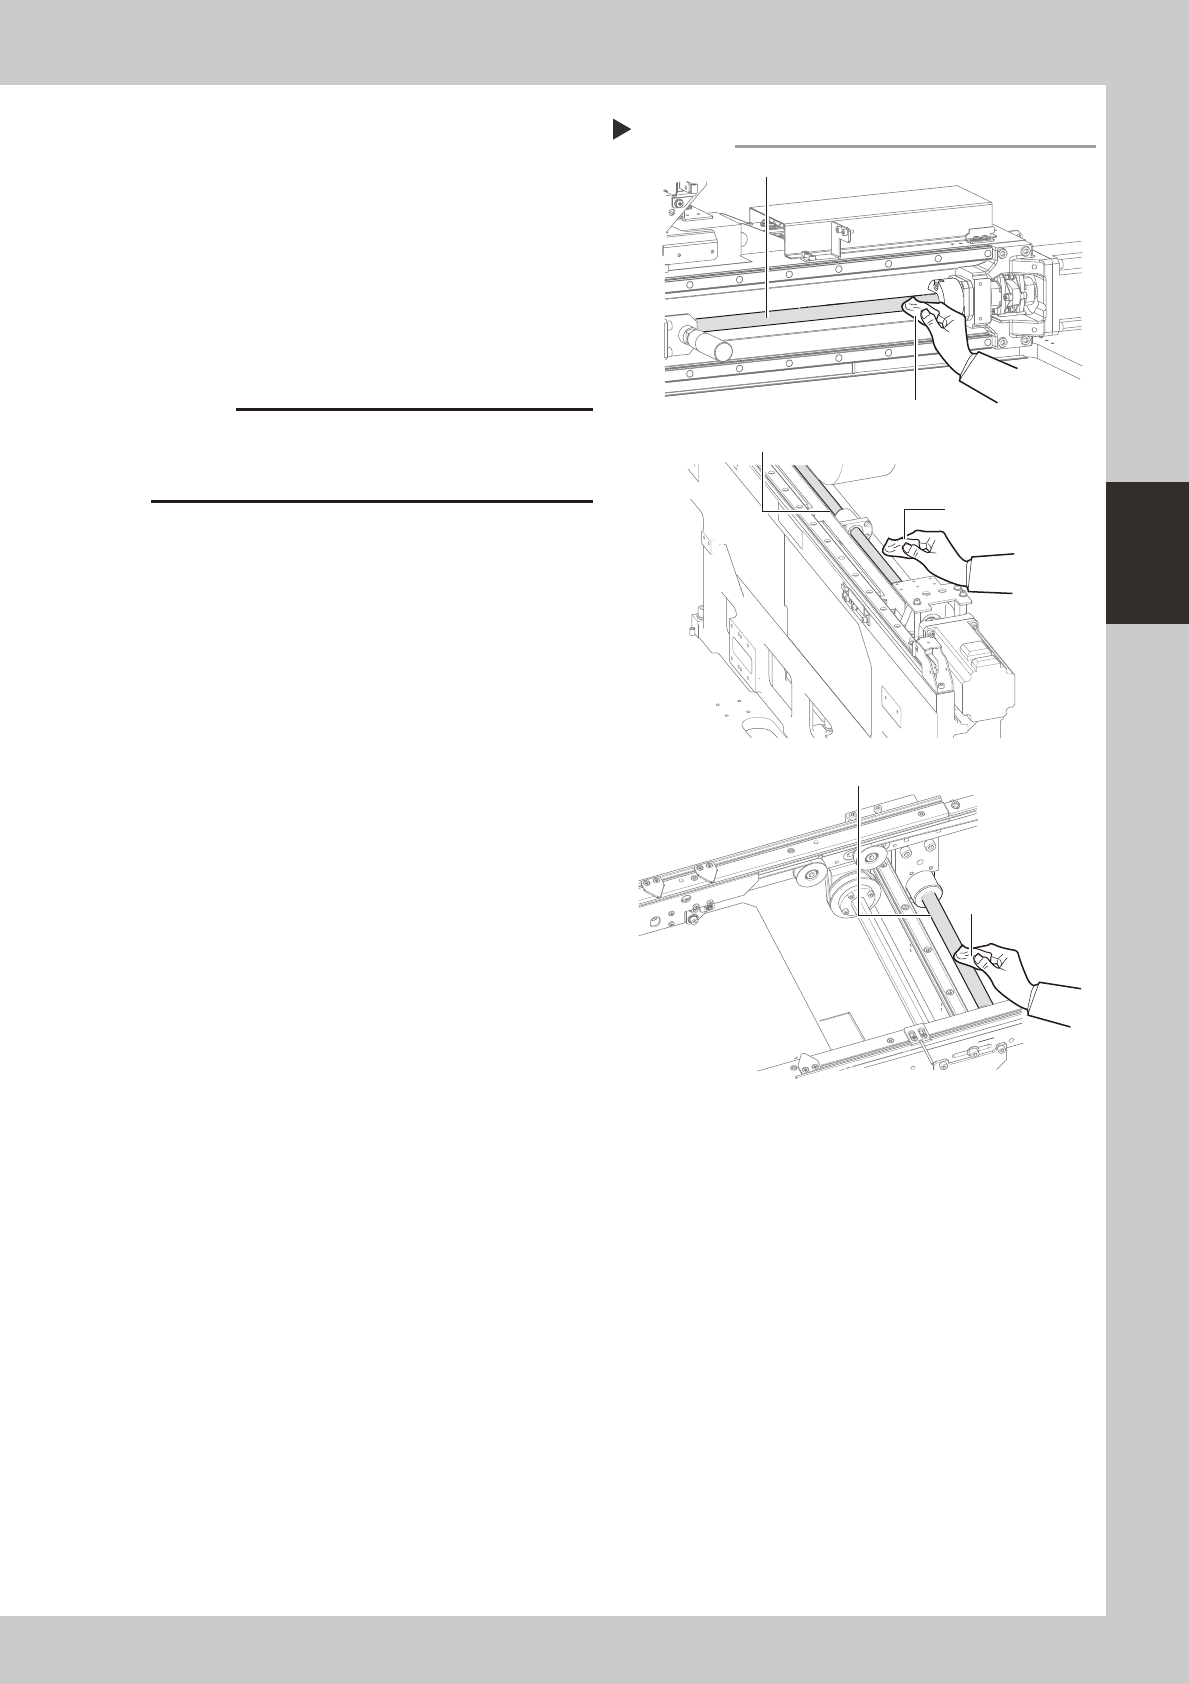
3
Clean the ball screws.
1. Move the head (or conveyor rails) to one
end of each axis (X, Y and W axes).
2. Wipe away the old grease and dirt from
the entire ball screw with a lint-free
cleaning cloth or paper towel.
3. Move the head (or conveyor rails) to the
opposite side of each axis (X, Y and W
axes) and wipe the ball screw.
53309-N8-00
c
Wipe away the old grease and dirt in the lead groove of
the ball screw. Also check that no debris or residue
remains in the lead groove.
Cleaning the ball screws
Step 3
W-axis ball screw
Y-axis ball screw
X-axis ball screw
lint-free cleaning cloth
lint-free cleaning cloth
lint-free cleaning cloth
X-axis
Y-axis
W-axis
3-10
3
Periodic maintenance items
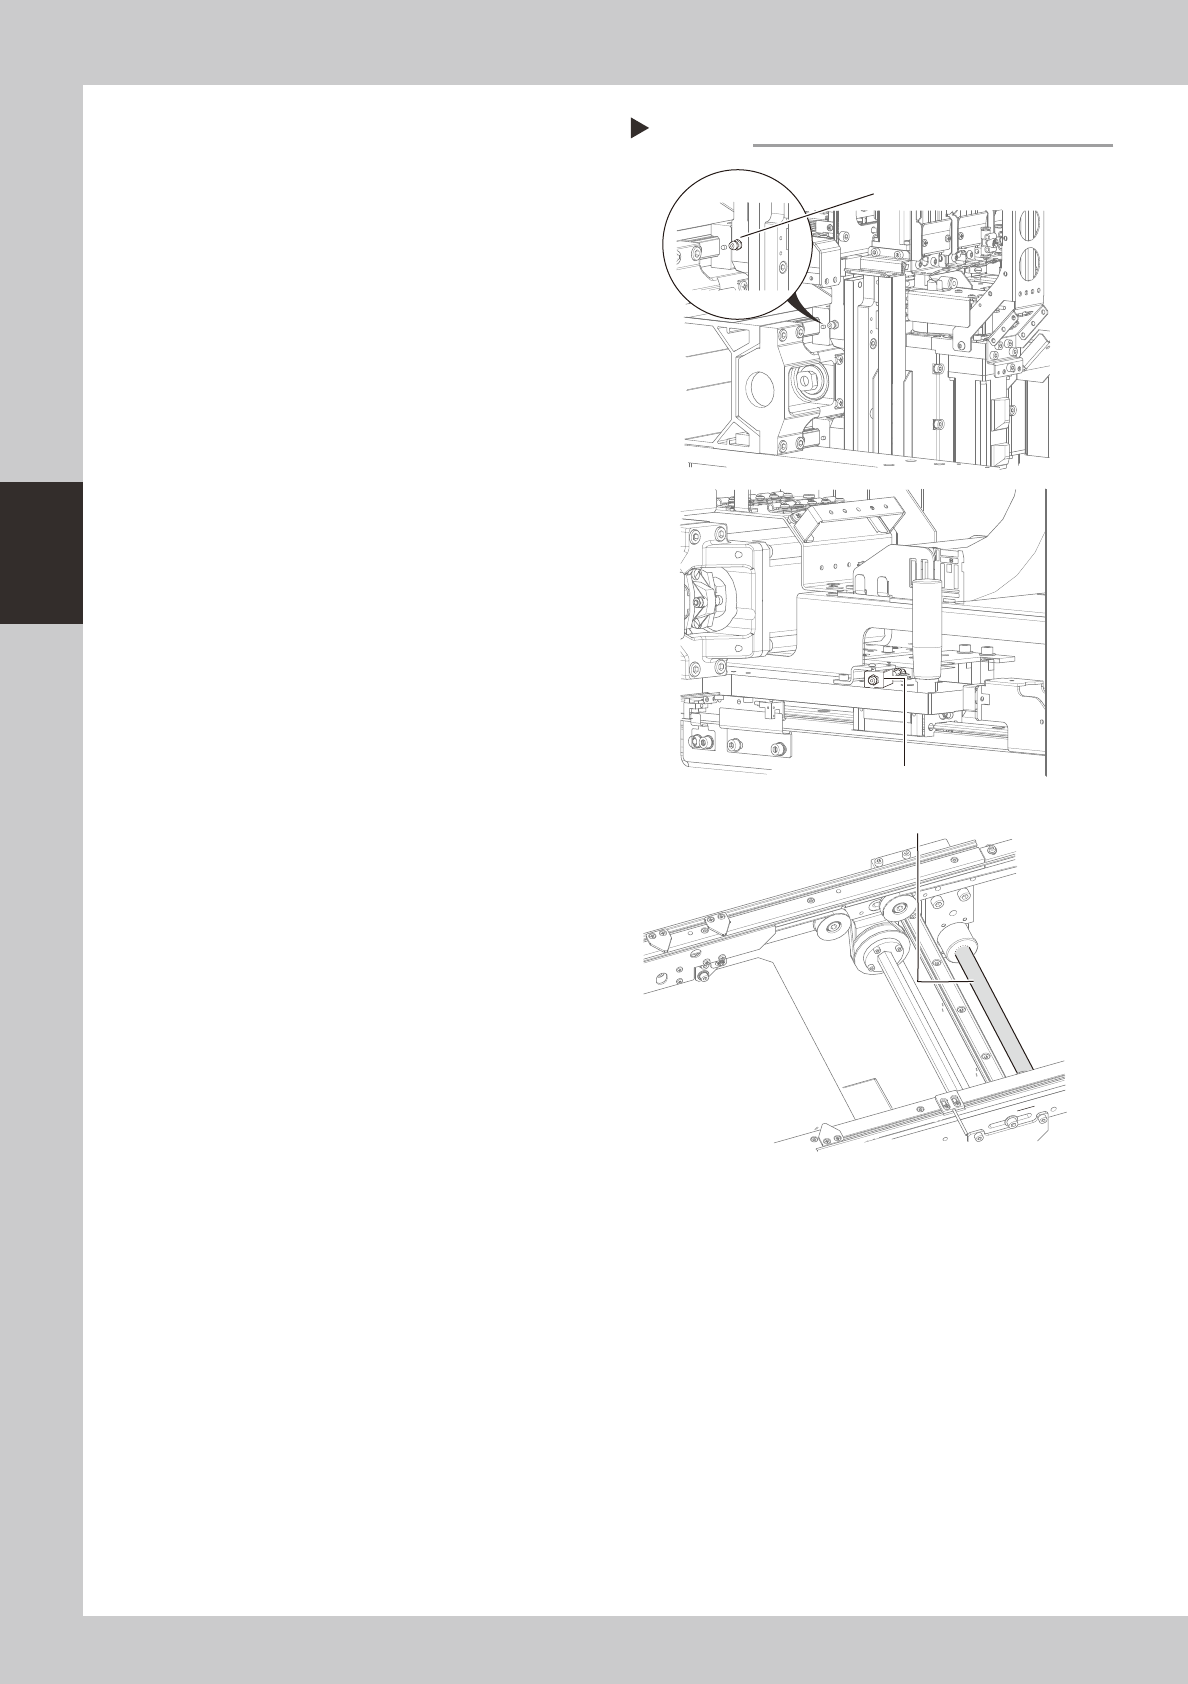
4
Apply grease to the ball screws.
1. X-axis, Y-axis
Use the grease gun to supply the
specified grease (NSL) to the grease
nipples.
Then move the head back and forth by
hand along each axis and wipe away
excess grease.
2. W-axis
Apply the specified grease (NSL) by hand
uniformly over the surface and lead
groove of the ball screw.
53310-N8-00
5
Reattach the covers.
Reattach the grease spattering prevention
covers in the reverse order of the removal
procedures.
Greasing the ball screws
Step 4
Grease nipple for
X-axis ball screw
Grease nipple for
Y-axis ball screw
X-axis
W-axis
W-axis ball screw
Y-axis