YC8_Mainte_E.pdf - 第64页
3-15 3 Periodic maintenance items 2.3.3 Inspecting, cleaning and greasing the PU (push-up) shaft (option) T he push-up shaft is designed to prevent flexing or warping of the board during clamping and is important because…
3-14
3
Periodic maintenance items
2.3.2 Cleaning and greasing the hexagon spline
n
Required tools
• Lint-free cleaning cloth or paper towel
• Specified grease: NSL
c
Always wear protective goggles and gloves when using grease.
e
1
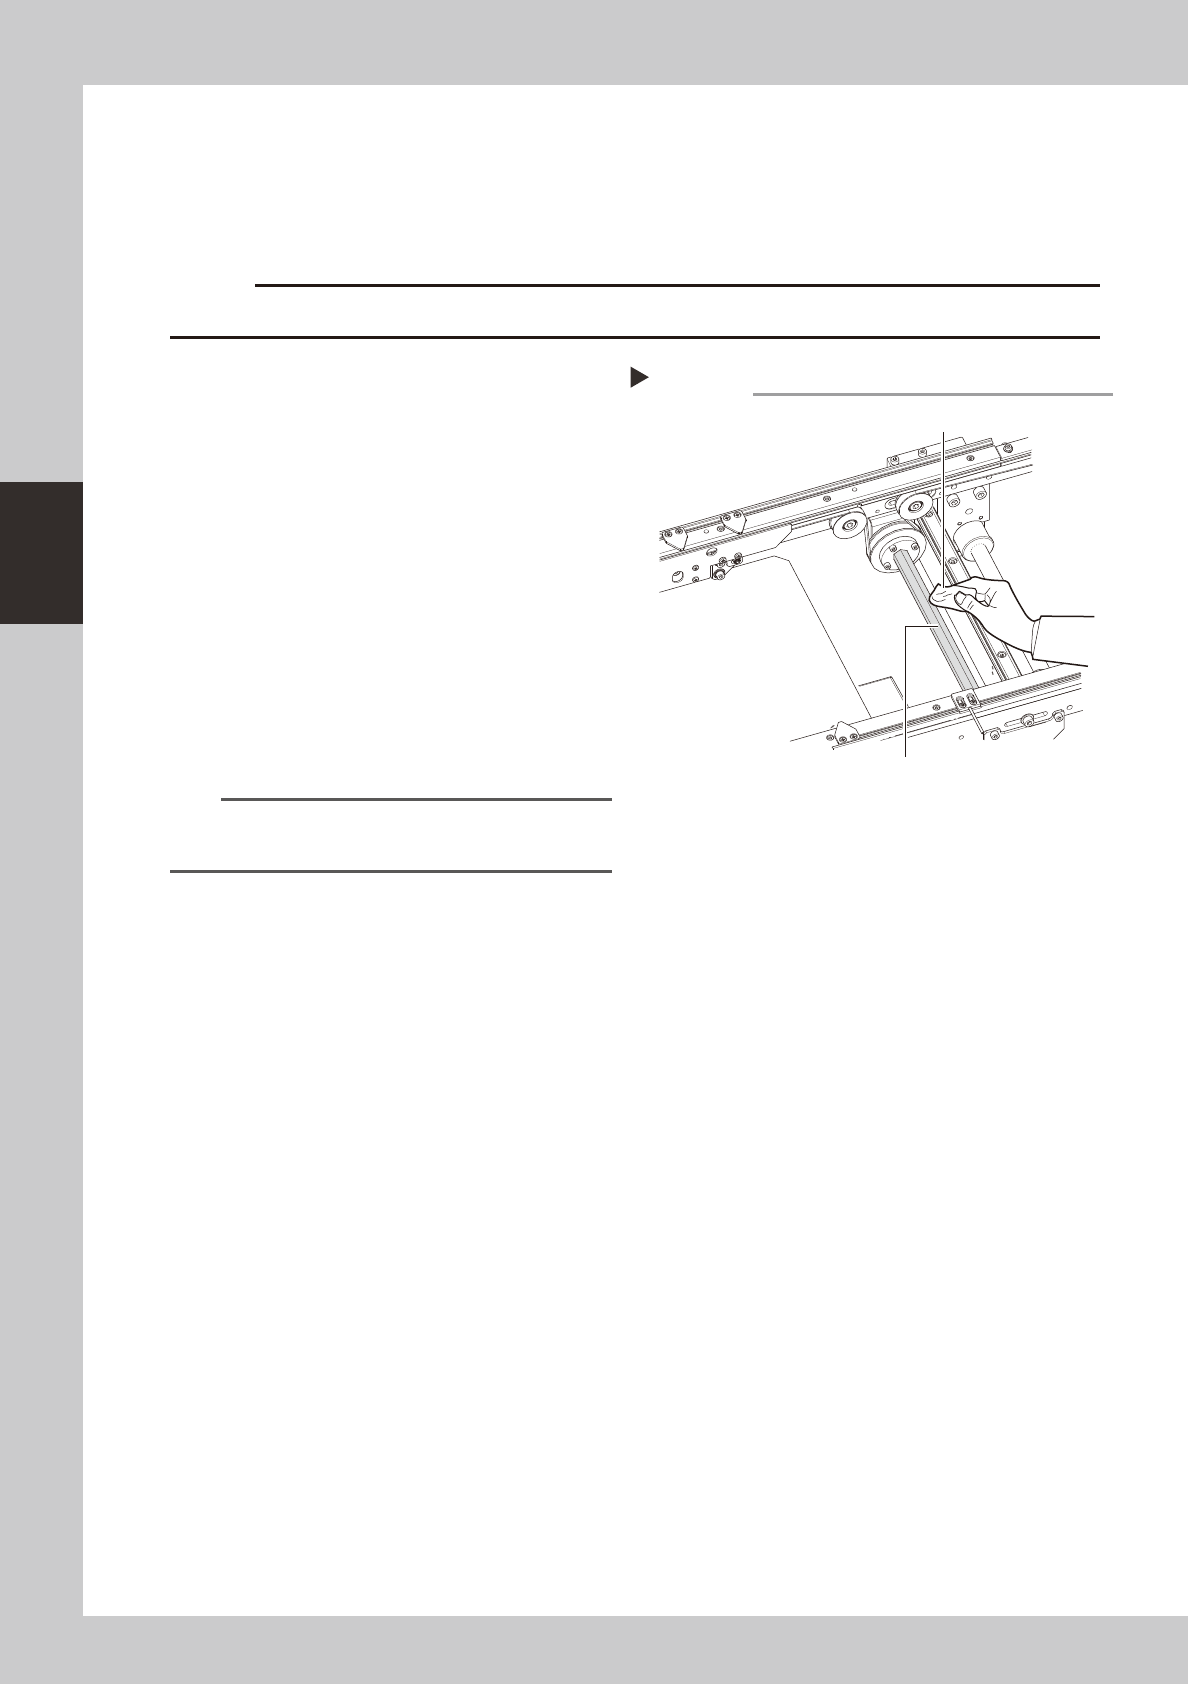
Clean the hexagon spline.
1 Set the board width to its maximum level
with manual operation and put the
machine in the emergency stop state.
2 Wipe away the old grease and dirt from
the entire hexagon spline with a lint-free
cloth or paper towel.
3 Cancel the emergency stop and make
the board width narrower. After that,
wipe also the remaining portions.
53317-N8-00
2
Apply grease.
Apply the specified grease (NSL) by hand
uniformly over the surface of the hexagon
spline.
n
NOTE
In the same manner as described in step 1, apply the
grease to the entire hexagon spline.
Cleaning the hexagon spline
Step 1
Hexagon spline
lint-free cloth or paper towel
3-15
3
Periodic maintenance items
2.3.3
Inspecting, cleaning and greasing the PU (push-up) shaft (option)
The push-up shaft is designed to prevent flexing or warping of the board during clamping and is important
because it prevents depressing of the board during component mounting.
The push-up shaft also prevents deviations in the component mounting accuracy due to the board depressing
during component mounting, so it is important to regularly clean and inspect the push-up shaft to ensure it
operates correctly.
c
cleaning of the push-up shaft by the user will void the warranty.
n
Required tools
• Hex wrench (3mm)
• Specified grease: NSL
c
Always wear protective goggles and gloves when using grease.
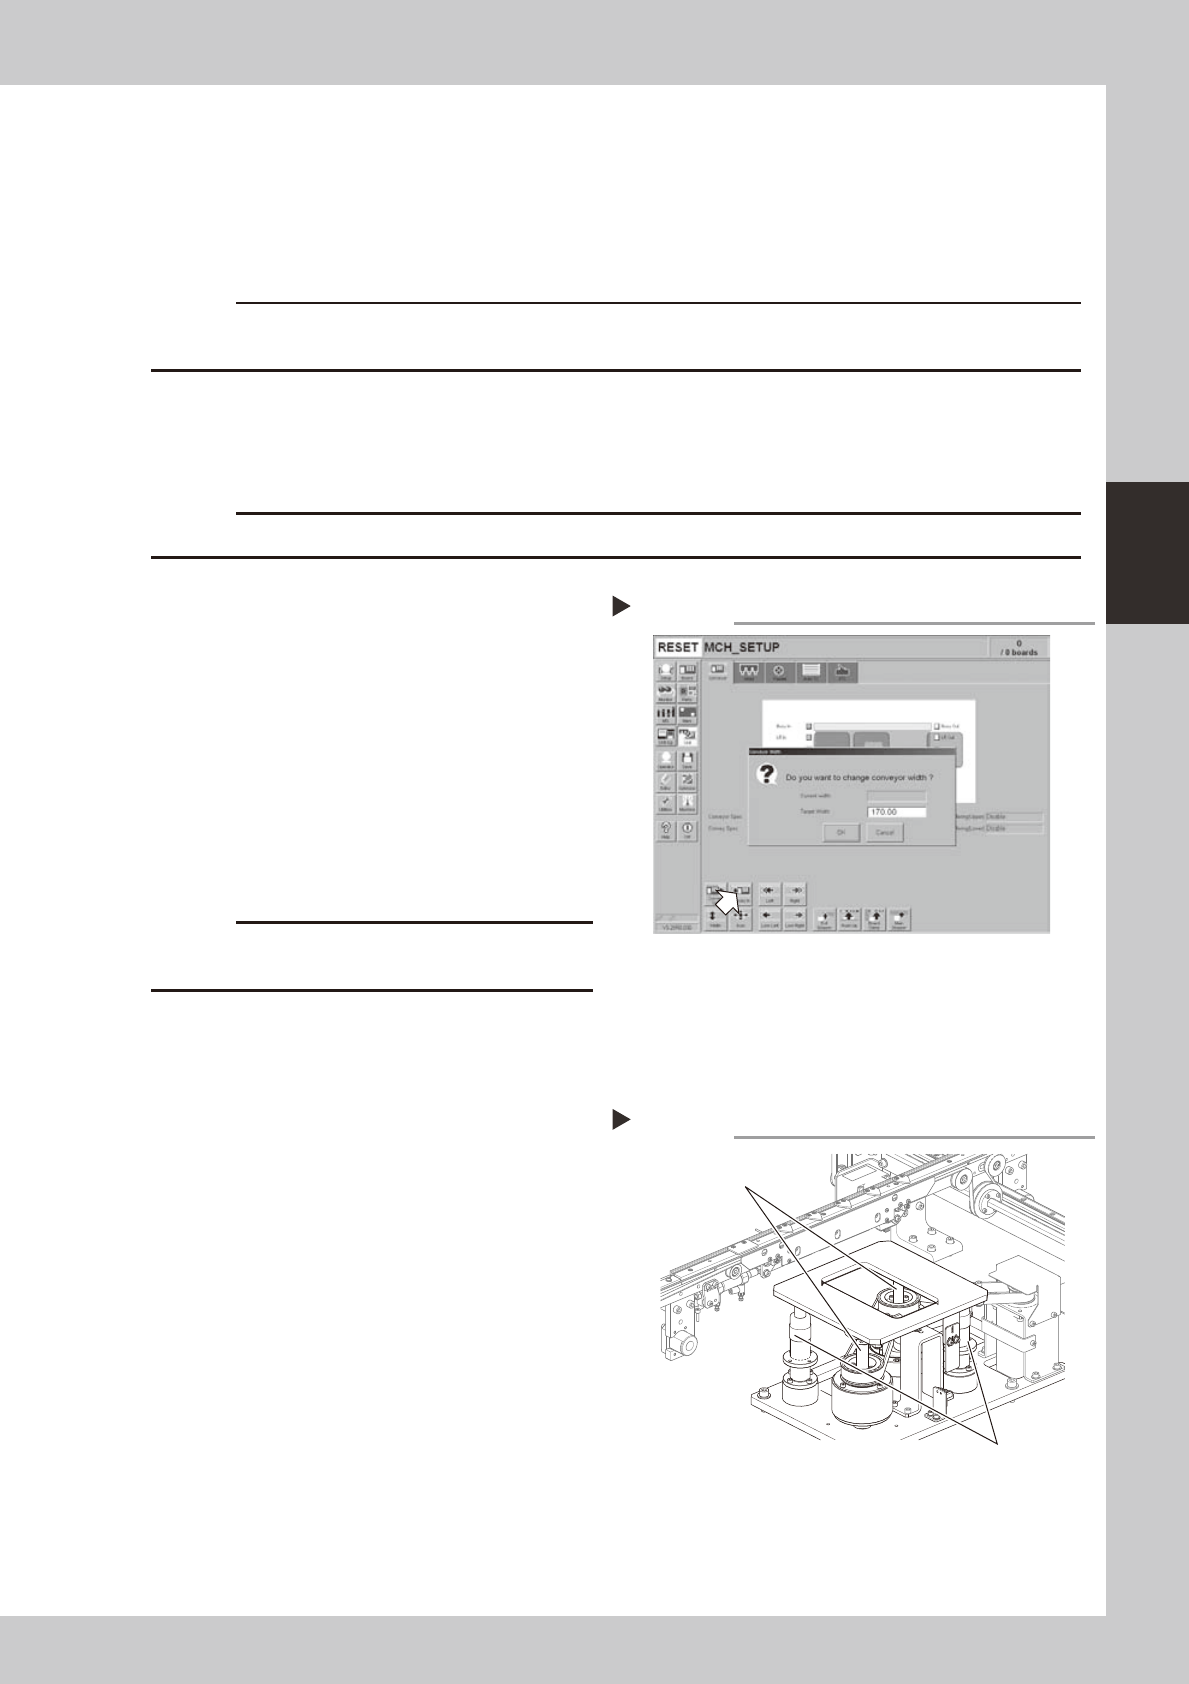
1
Set the conveyor width to
maximum.
Press the [Width] button to display the
"Conveyor Width" dialog. Enter the maximum
conveyor width from the specifications and
press [OK]. The conveyor is changed to the
width that was just entered.
54304-N8-00
e
2
Remove the push-up plate.
Press the emergency stop button and then
remove the push-up plate using a hex
wrench.
c
The push-up plate is heavy so use plenty of caution
during handling.
3
Raise the push-up unit.
Cancel emergency stop and raise the
push-up unit manually.
e
4
Remove the old grease by hand.
After pressing the emergency stop button,
thoroughly remove the old grease from the
two ball screws and the two ball guides by
hand.
5
Apply the new grease by hand.
Ball screw
Apply as much as 2 cm of new grease to
your finger, and rub it evenly into the ball
screw grooves.
Ball guide
Apply as much as 2 cm of new grease to
your finger, and coat it evenly on the ball
guides.
53318-N8-00
Setting the conveyor width
Step 1
Applying the grease
Step 5
Ball guides
Ball screws

3-16
3
Periodic maintenance items
6
Raise and lower the push-up unit
manually.
After cancel emergency stop, raise and
lower the push-up unit several times
manually to spread the grease evenly. After
the grease is well spread, raise the push-up
unit and leave it in that state.
e
7
Wipe away excess grease by hand.
After pressing the emergency stop button,
wipe away excess grease by hand.
Again raise and lower the push-up unit
several times manually and if there is no
problem then lower the push-up unit.
8
Reinstall the pushup plate to its
original position.
Reinstall in the reverse procedure of step 2.
c
The push-up plate is heavy so use plenty of caution
during handling.