00198596-02_JC_3M_C&P20P2M3_EN.pdf - 第12页
2 3-monthly C&P20 P2/M3 Remove the holding circuit / orifice plate 2 min 2 / 2 Refer to safety instructions in user manual before commencing Maintenance! NOTICE! ESD guidelines are to be followed! Tool: T21, T32, T44…
2 3-monthly C&P20 P2/M3 Remove the holding circuit / orifice plate 2 min 1 / 2
Refer to safety instructions in user manual before commencing Maintenance!
NOTICE! ESD guidelines are to be followed! Tool:
T21, T32, T44, T78
Wear Part:
W10, W32
Consumables:
www.asm-smt.com
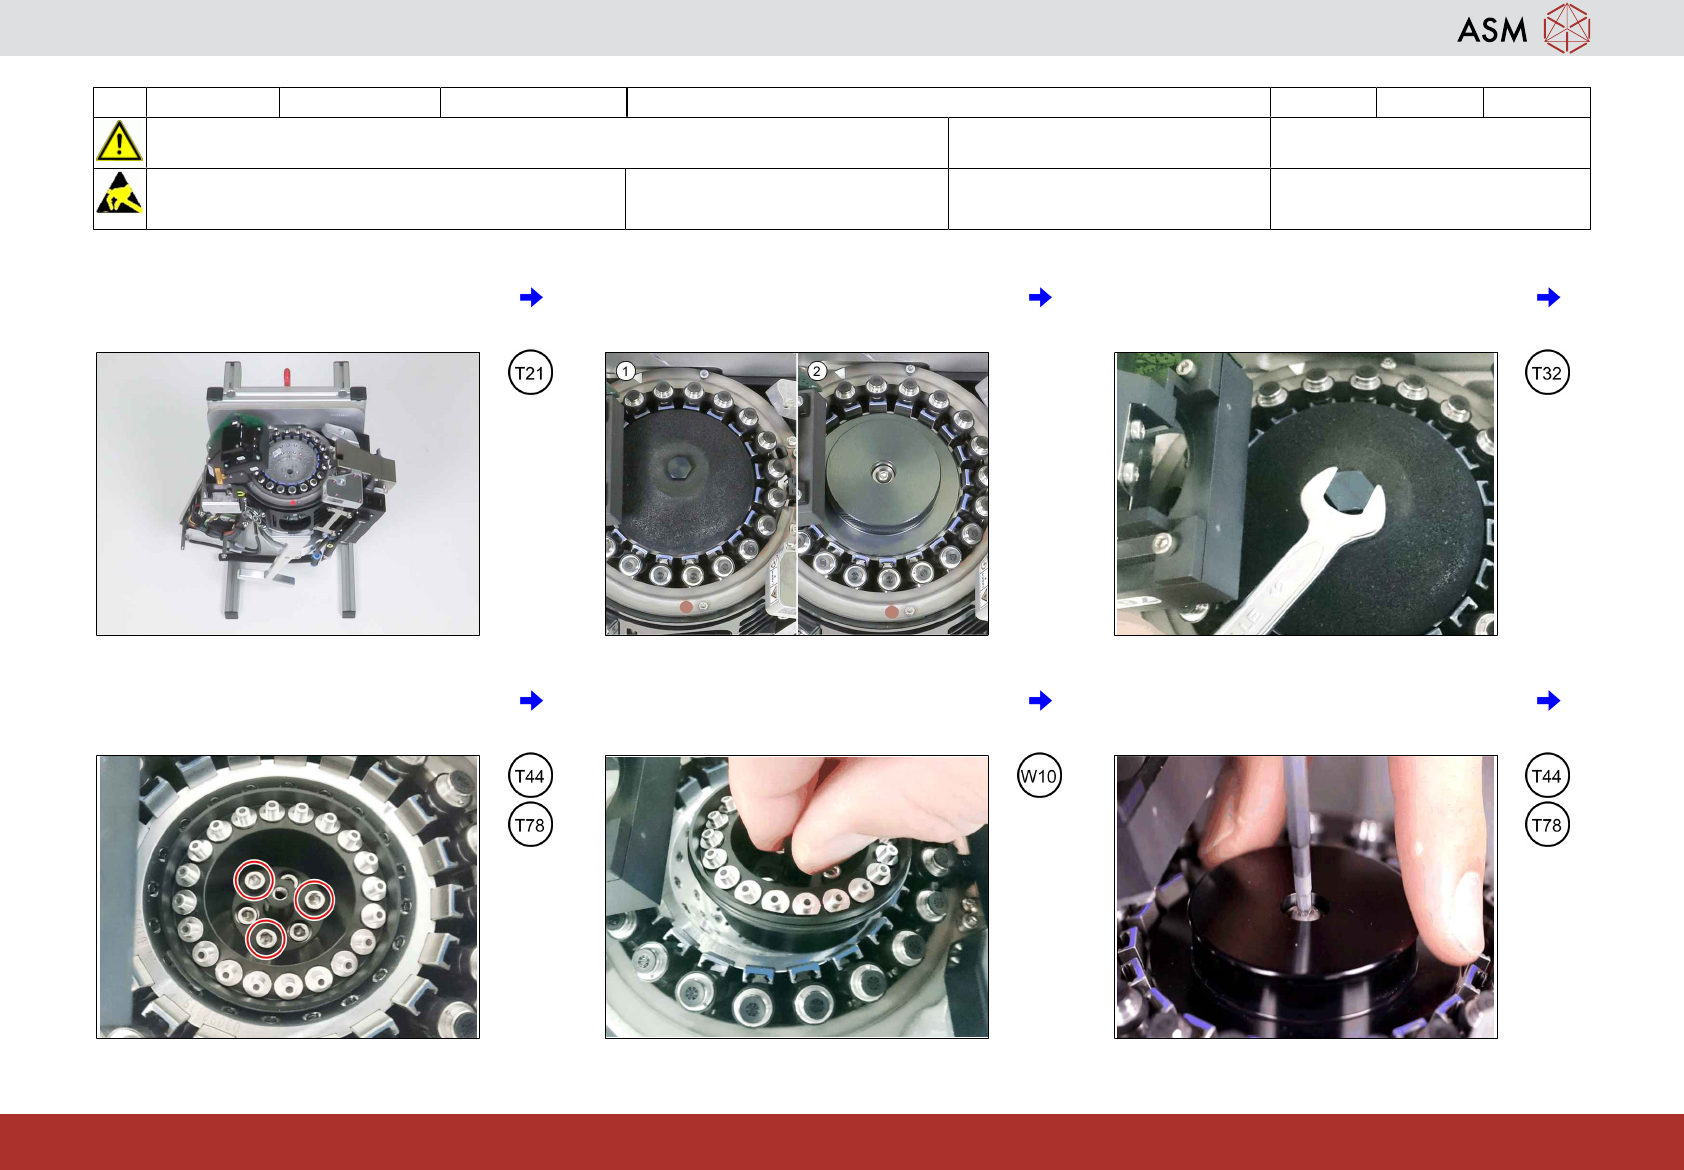
1 Put the head stand in the upright position
and turn the head upside down.
2 To remove the holding circuit(1) proceed
with next step. For the orifice plate(2) pro-
ceed with step 6.
3 Dismantle the silencer.
4 Remove the three protruding screws from
the holding circuit.
5 Remove the holding circuit with the seal to
clean it and proceed with next task. See
appendix "Maintain the holding circuit".
6 Dismantle the cover.
2 3-monthly C&P20 P2/M3 Remove the holding circuit / orifice plate 2 min 2 / 2
Refer to safety instructions in user manual before commencing Maintenance!
NOTICE! ESD guidelines are to be followed! Tool:
T21, T32, T44, T78
Wear Part:
W10, W32
Consumables:
www.asm-smt.com
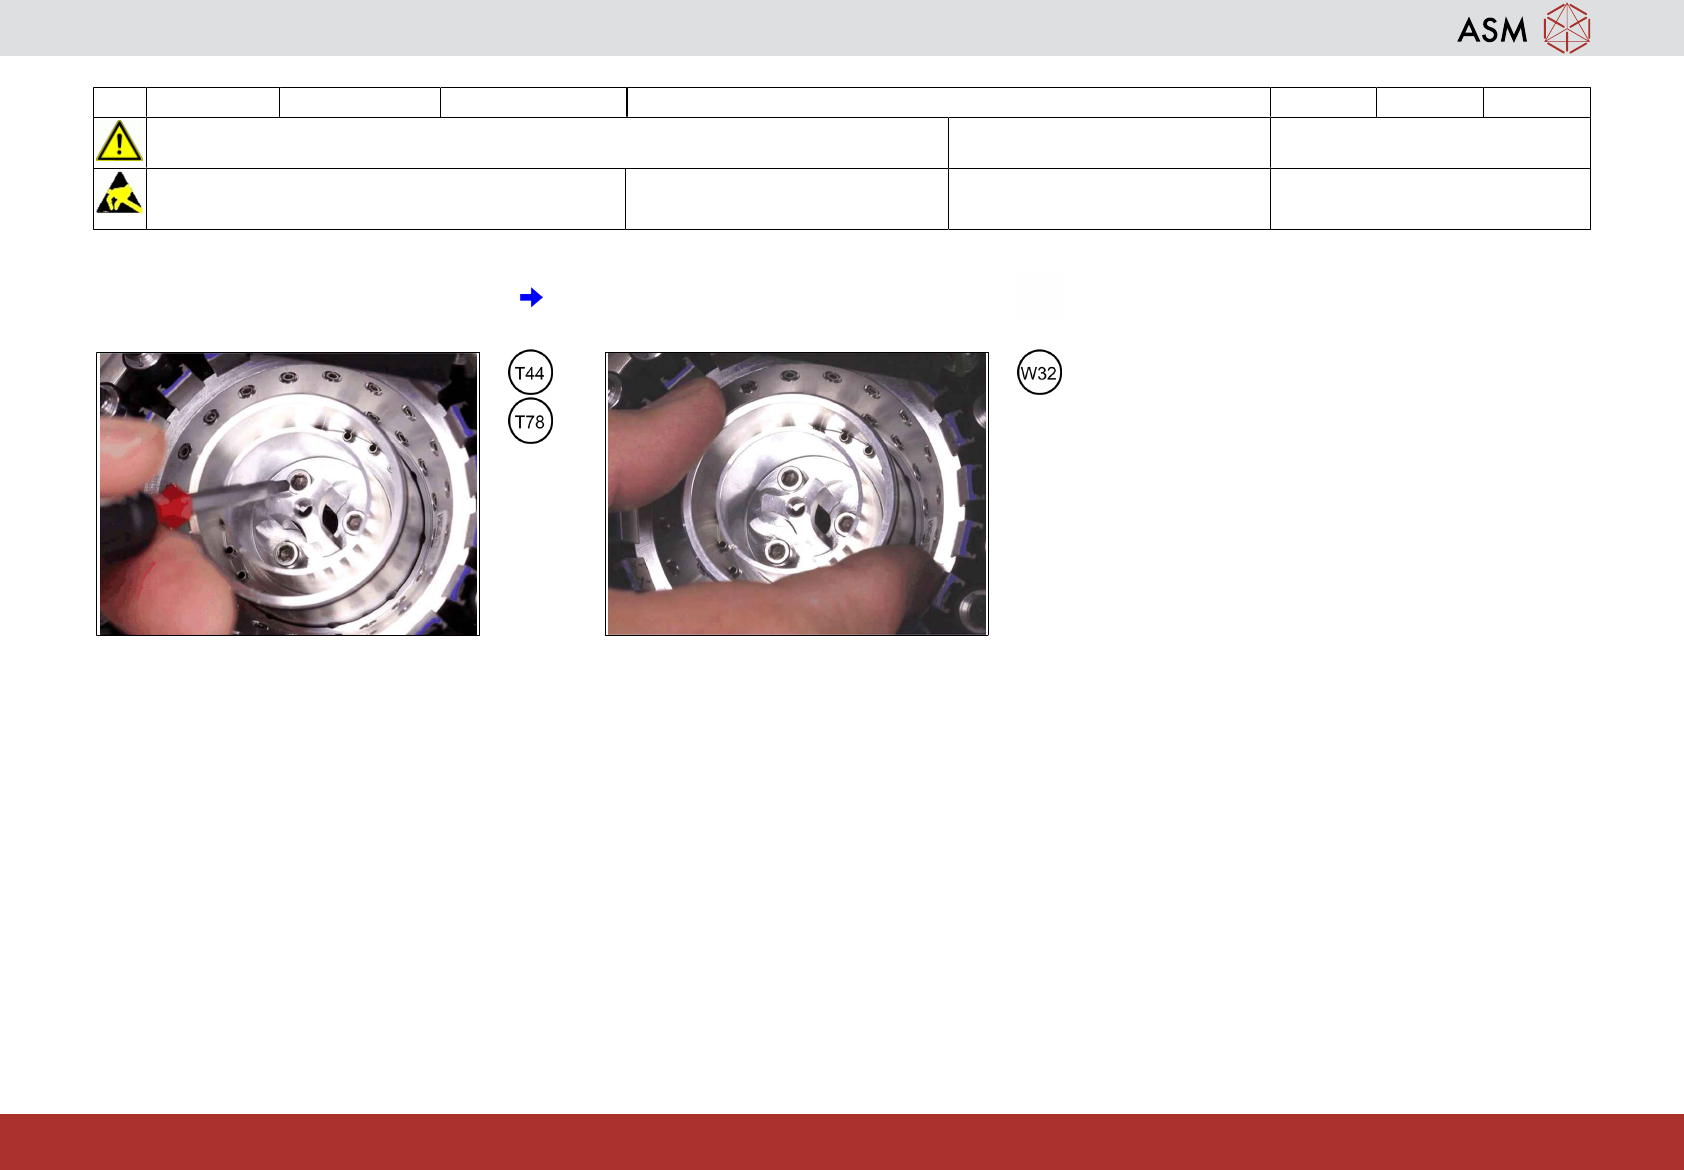
7 Remove the three protruding screws from
the orifice plate.
8 Remove the orifice plate with the seal to
clean it and proceed with next task. See
appendix "Maintain the aperture ring".
3 3-monthly C&P20 P2/M3 Clean the return unit 1 min 1 / 1
Refer to safety instructions in user manual before commencing Maintenance
NOTICE! ESD guidelines are to be followed Tool:
T21
Wear Part: Consumables:
C3, C5, C22
www.asm-smt.com
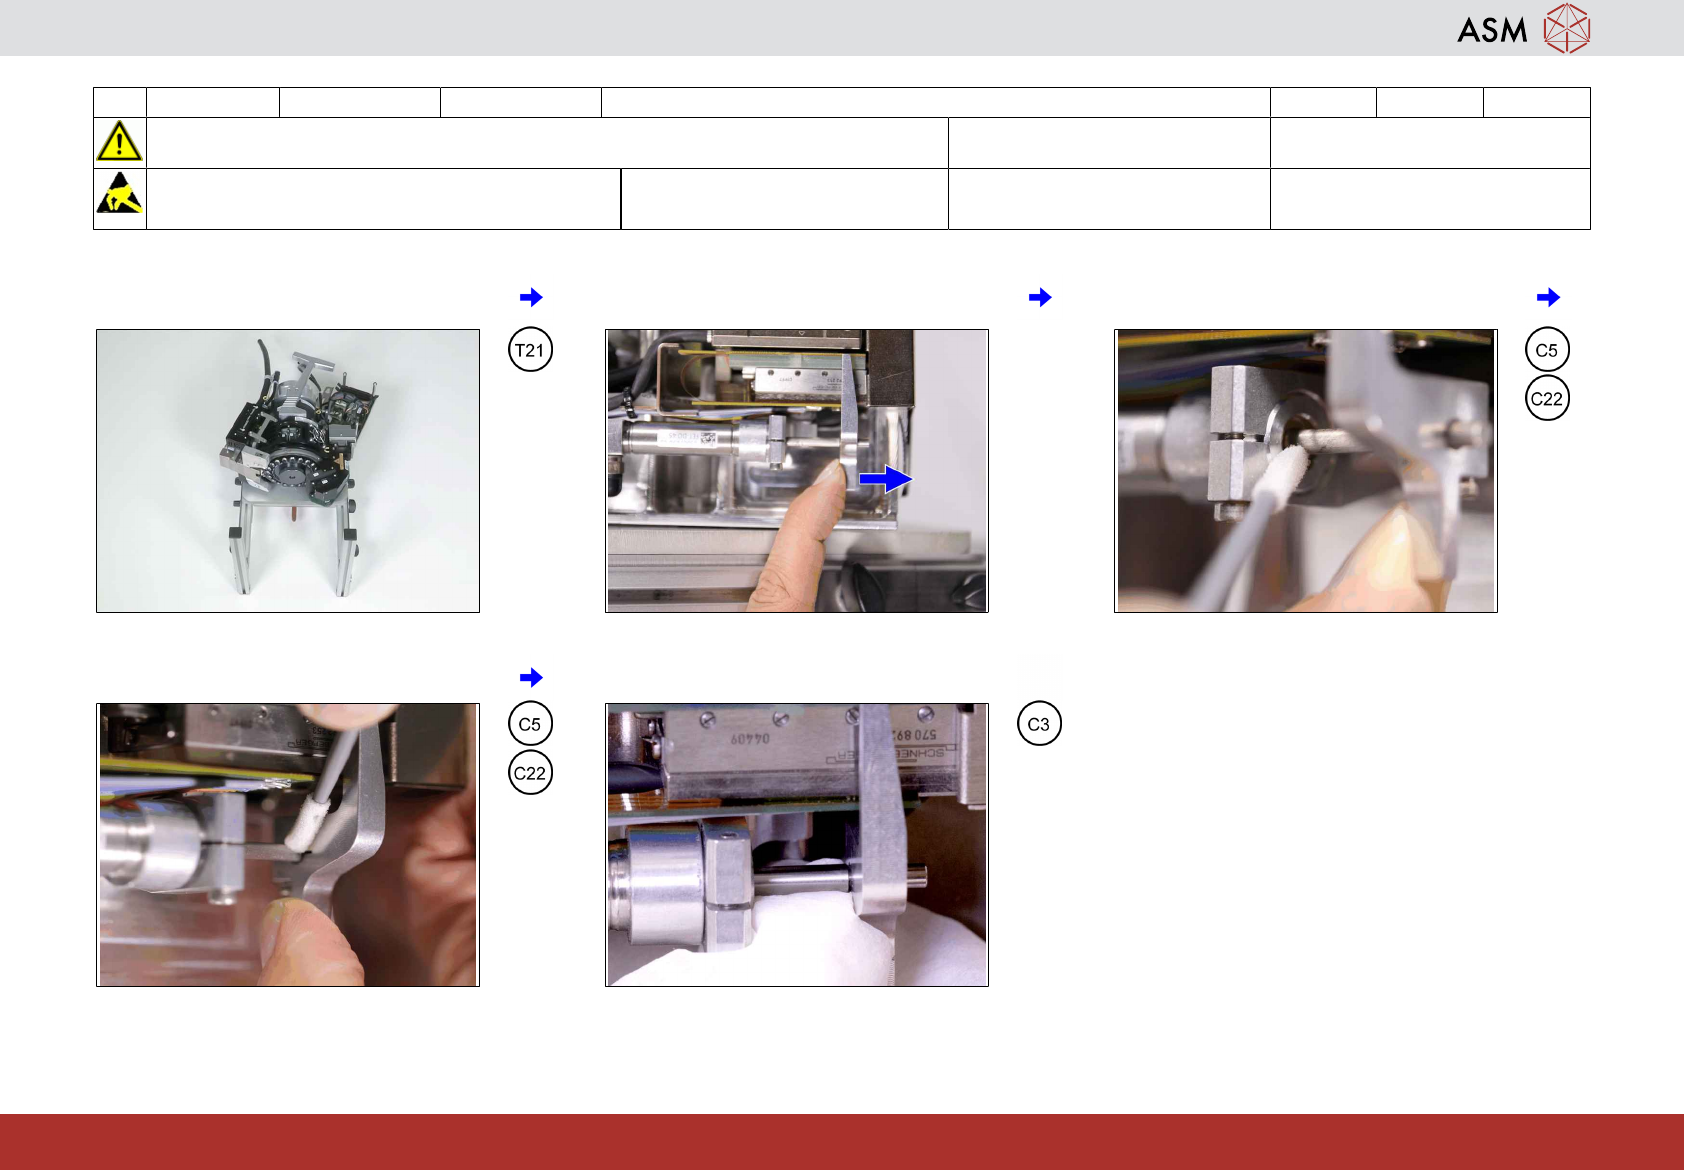
1 Turn the head right side up and put the
headstand flat on the table.
2 Pull out the return cylinder. 3 Clean the upper contact area.
4 Clean the lower contact area. 5 Clean the shaft of the return unit.