00198596-02_JC_3M_C&P20P2M3_EN.pdf - 第18页
5 3-monthly C&P20 P2/M3 Clean / lubricate the Z-axis linear guide 6 min 2 / 5 Refer to safety instructions in user manual before commencing Maintenance NOTICE! ESD guidelines are to be followed Tool: T7, T21-T23, T47…
5 3-monthly C&P20 P2/M3 Clean / lubricate the Z-axis linear guide 6 min 1 / 5
Refer to safety instructions in user manual before commencing Maintenance
NOTICE! ESD guidelines are to be followed Tool:
T7, T21-T23, T47, T77, T96-T98
Wear Part: Consumables:
C10, C22
www.asm-smt.com
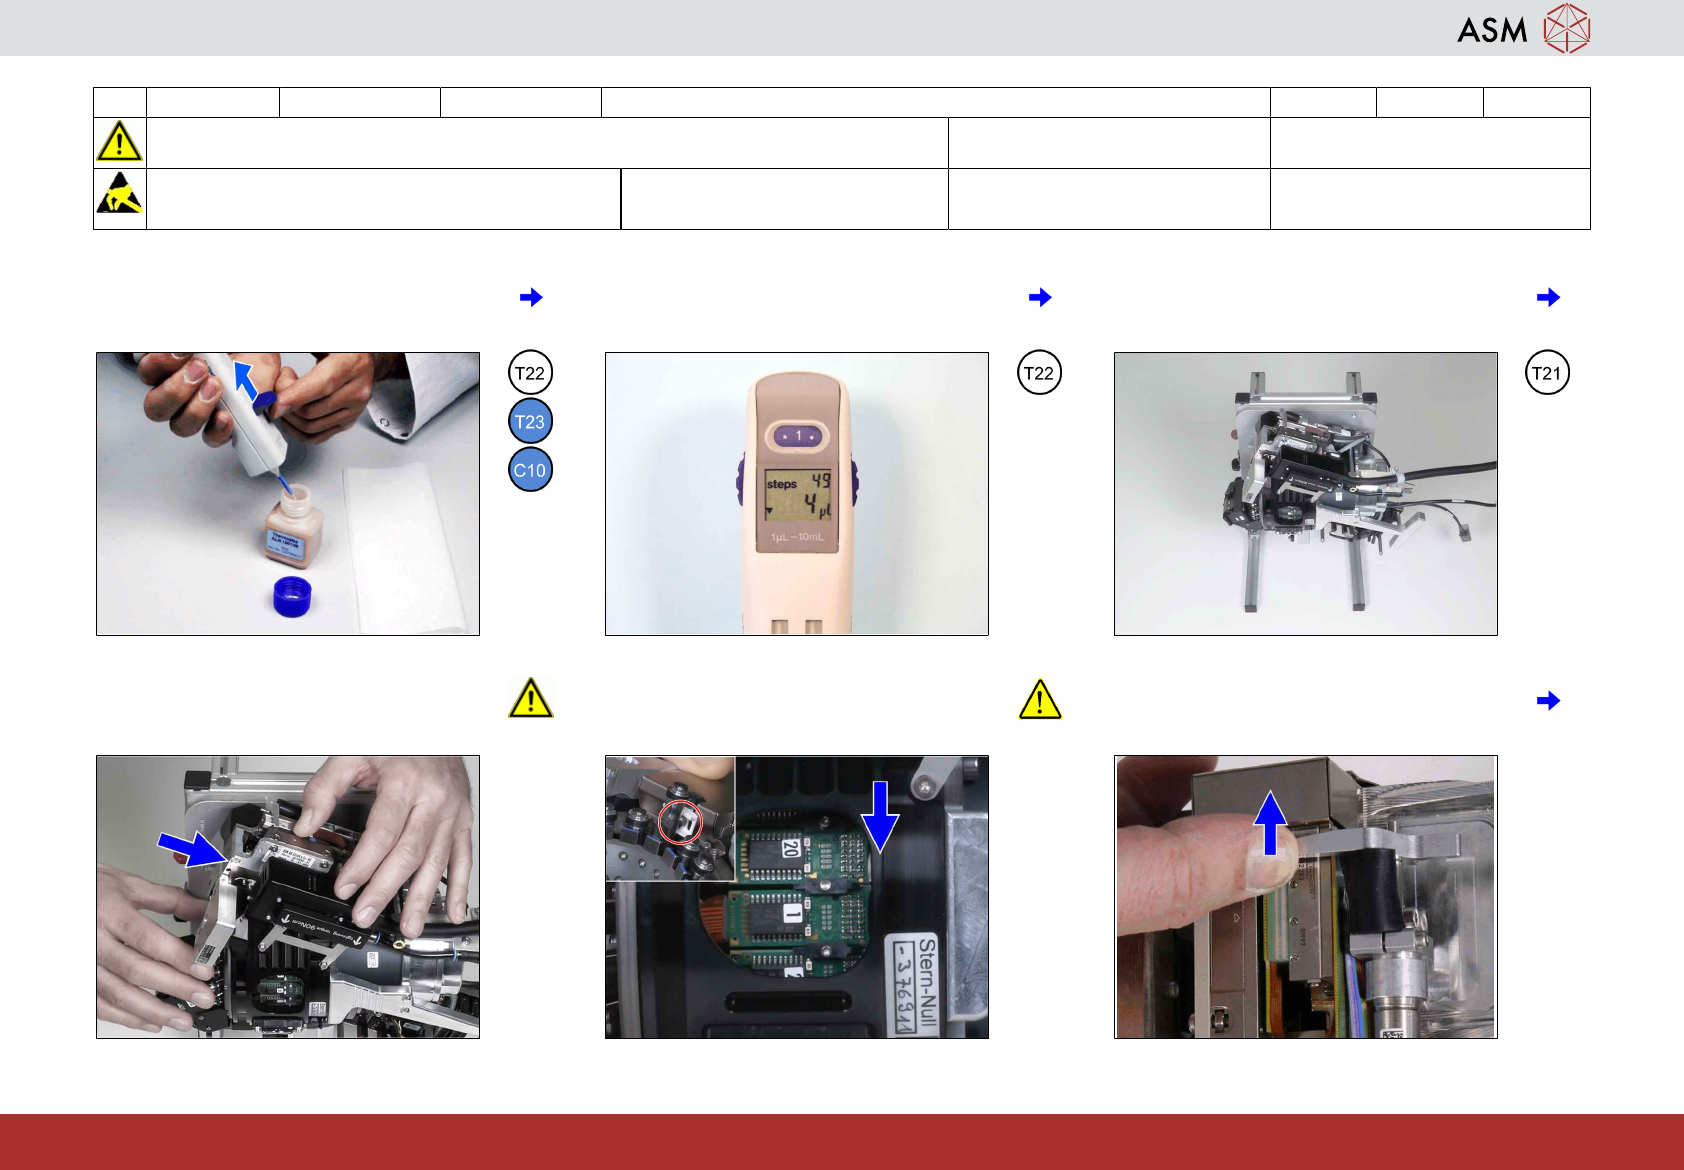
1 Prepare the multipette. See appendix
"Prepare the multipette.
2 Turn the wheel and adjust 4 µl. 3 Put the head stand in the upright position
and turn the head upside down until the Z-
axis points 45° to the side.
4 Ensure the Z-Axis is moved into the head
before turning the star as otherwise the Z-
Axis jaw can be damaged.
5 Align the star with the Z-axis to ensure the
DP bearing sits properly in the Z-axis jaw!
6 Move the Z-axis out of the head and hold
it there.
5 3-monthly C&P20 P2/M3 Clean / lubricate the Z-axis linear guide 6 min 2 / 5
Refer to safety instructions in user manual before commencing Maintenance
NOTICE! ESD guidelines are to be followed Tool:
T7, T21-T23, T47, T77, T96-T98
Wear Part: Consumables:
C10, C22
www.asm-smt.com
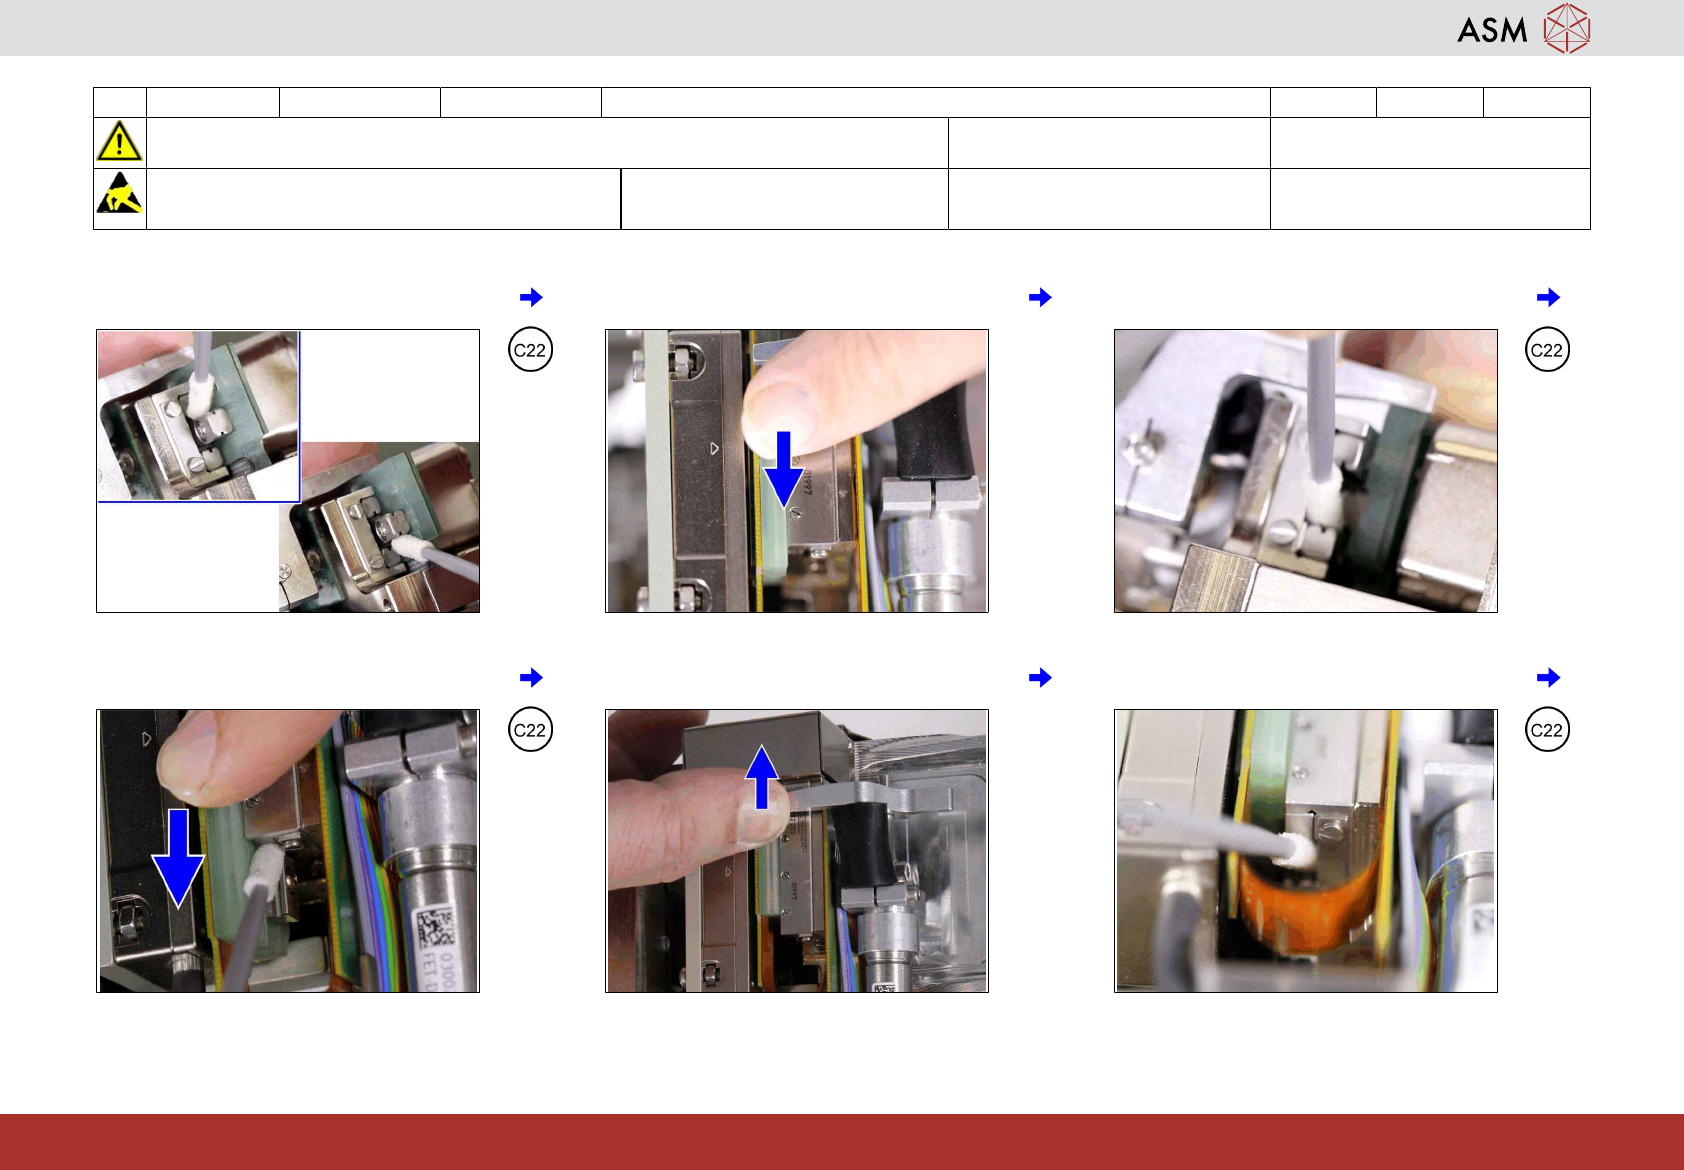
7 Dry clean the guide rail on both sides at
the bottom.
8 Move the Z-axis into the head and hold it
there.
9 Dry clean the carriage on both sides at the
bottom.
10 Keep the Z-axis in the head and clean the
guide rail at the top.
11 Move the Z-axis out of the head and hold
it there.
12 Dry clean the carriage at the top.
5 3-monthly C&P20 P2/M3 Clean / lubricate the Z-axis linear guide 6 min 3 / 5
Refer to safety instructions in user manual before commencing Maintenance
NOTICE! ESD guidelines are to be followed Tool:
T7, T21-T23, T47, T77, T96-T98
Wear Part: Consumables:
C10, C22
www.asm-smt.com
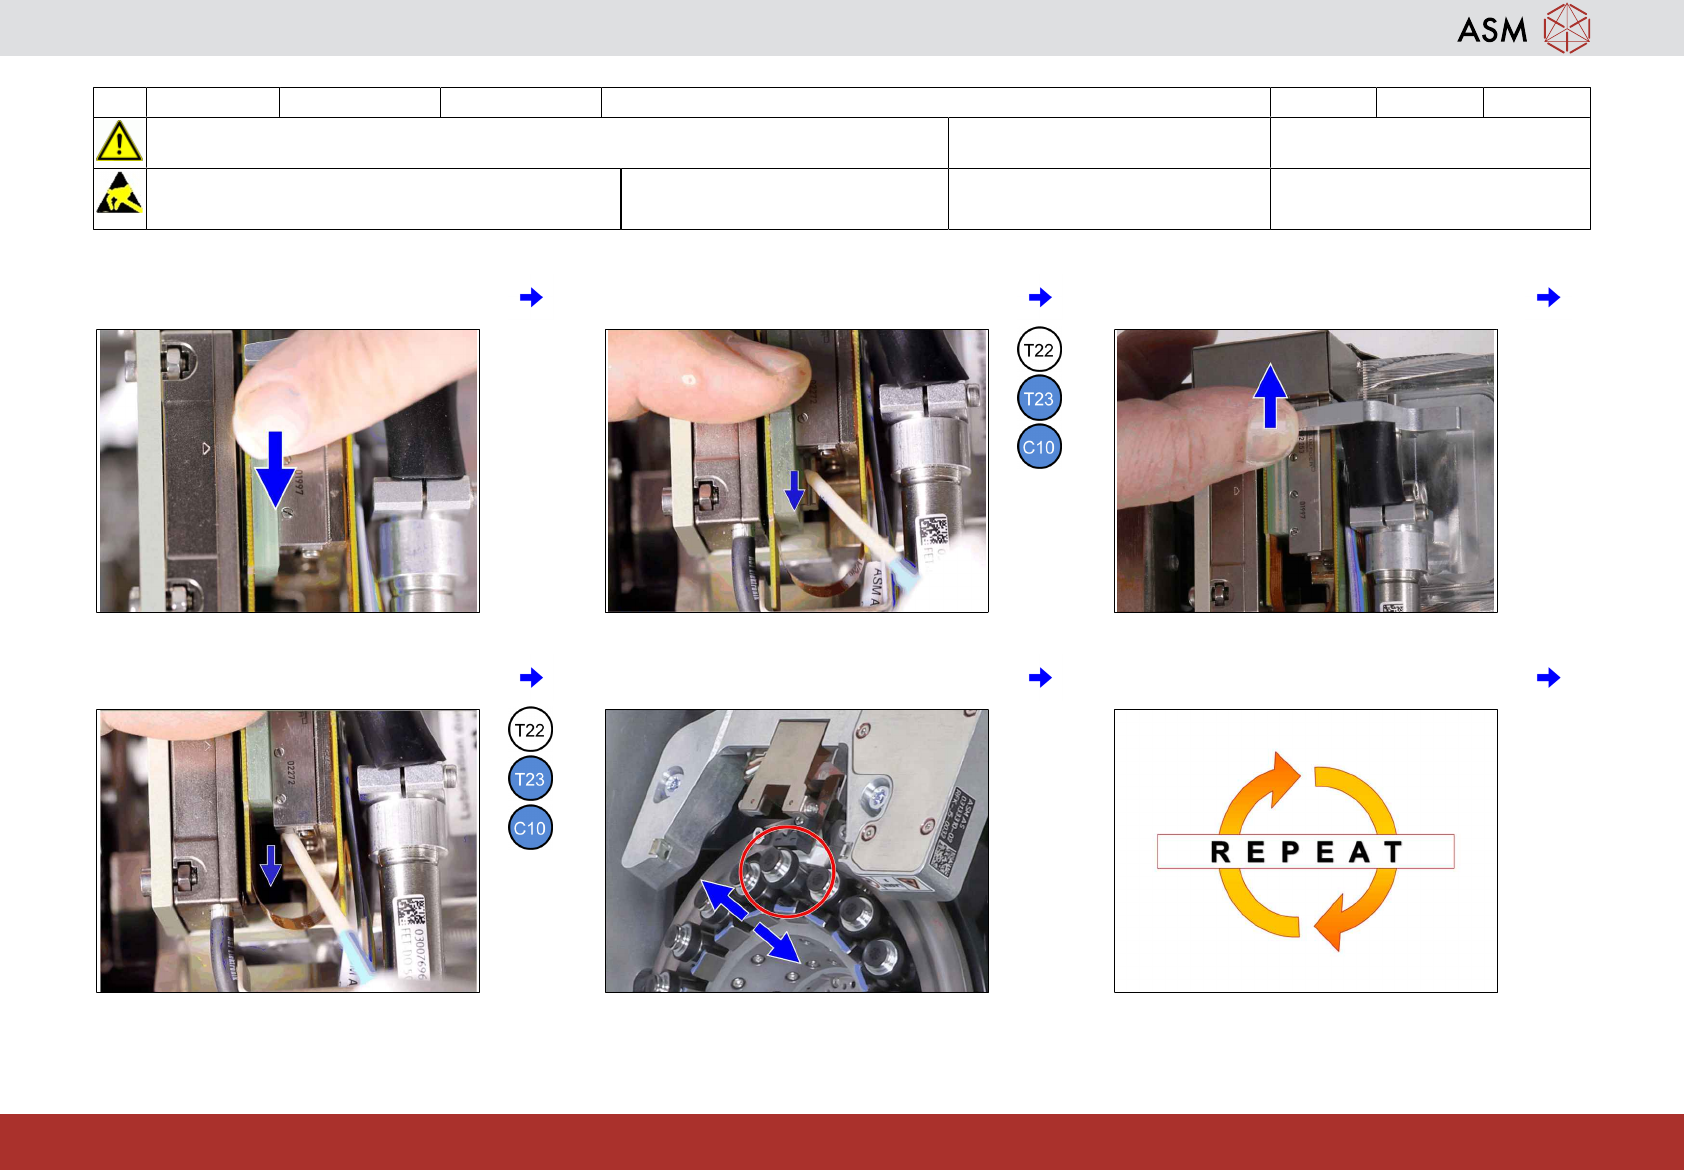
13 Move the Z-axis into the head and hold it
there.
14 Apply 1 x 4 μl with a slight motion to the
guide rail at the top.
15 Move the Z-axis out of the head and hold
it there.
16 Apply 1 x 4 μl with a slight motion to the
carriage at the top.
17 Move the Z-axis 5 times up and down. 18 Repeat steps 13 to 17 one more time.