00198596-02_JC_3M_C&P20P2M3_EN.pdf - 第41页
11 3-monthly C&P20 P2/M3 Mount the holding circuit / orifice plate 8 min 1 / 4 Refer to safety instructions in user manual before commencing Maintenance NOTICE! ESD guidelines are to be followed Tool: T21, T44, T78 W…
10 3-monthly C&P20 P2/M3 Replace the filter disks 5 min 2 / 2
Refer to safety instructions in user manual before commencing Maintenance
NOTICE! ESD guidelines are to be followed Tool:
T21, T66
Wear Part:
W8
Consumables:
www.asm-smt.com
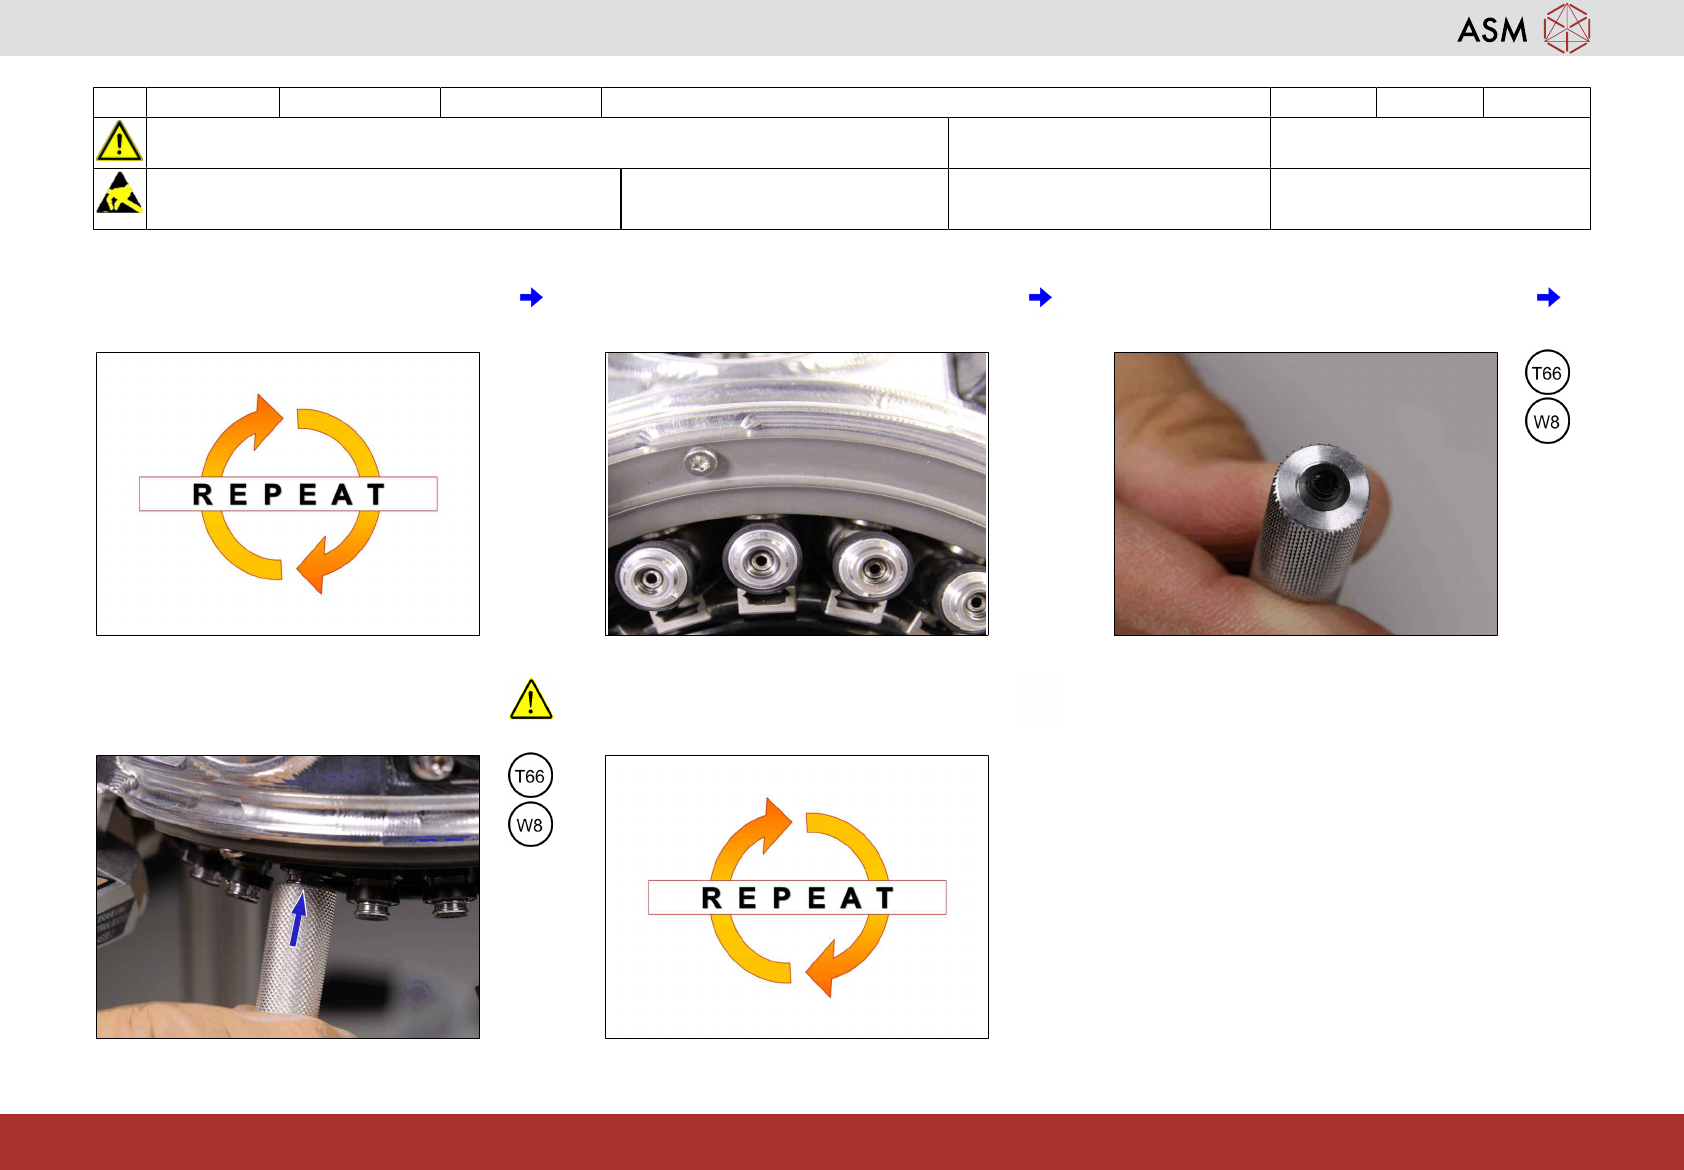
7 Repeat step 2 to 6 for each segment. 8 Make sure all filter discs are removed
completely. If not carefully remove it using
pointed pliers.
9 Place the new filter disk at the handle of
the tool.
10 Press the filter disk centrally onto the DP
until it recognizably catches. Ensure the
correct seating of the filter disk.
11 Repeat step 9 to 10 for all segments.
11 3-monthly C&P20 P2/M3 Mount the holding circuit / orifice plate 8 min 1 / 4
Refer to safety instructions in user manual before commencing Maintenance
NOTICE! ESD guidelines are to be followed Tool:
T21, T44, T78
Wear Part:
W10, W18
Consumables:
C3, C5, C11, C22
www.asm-smt.com
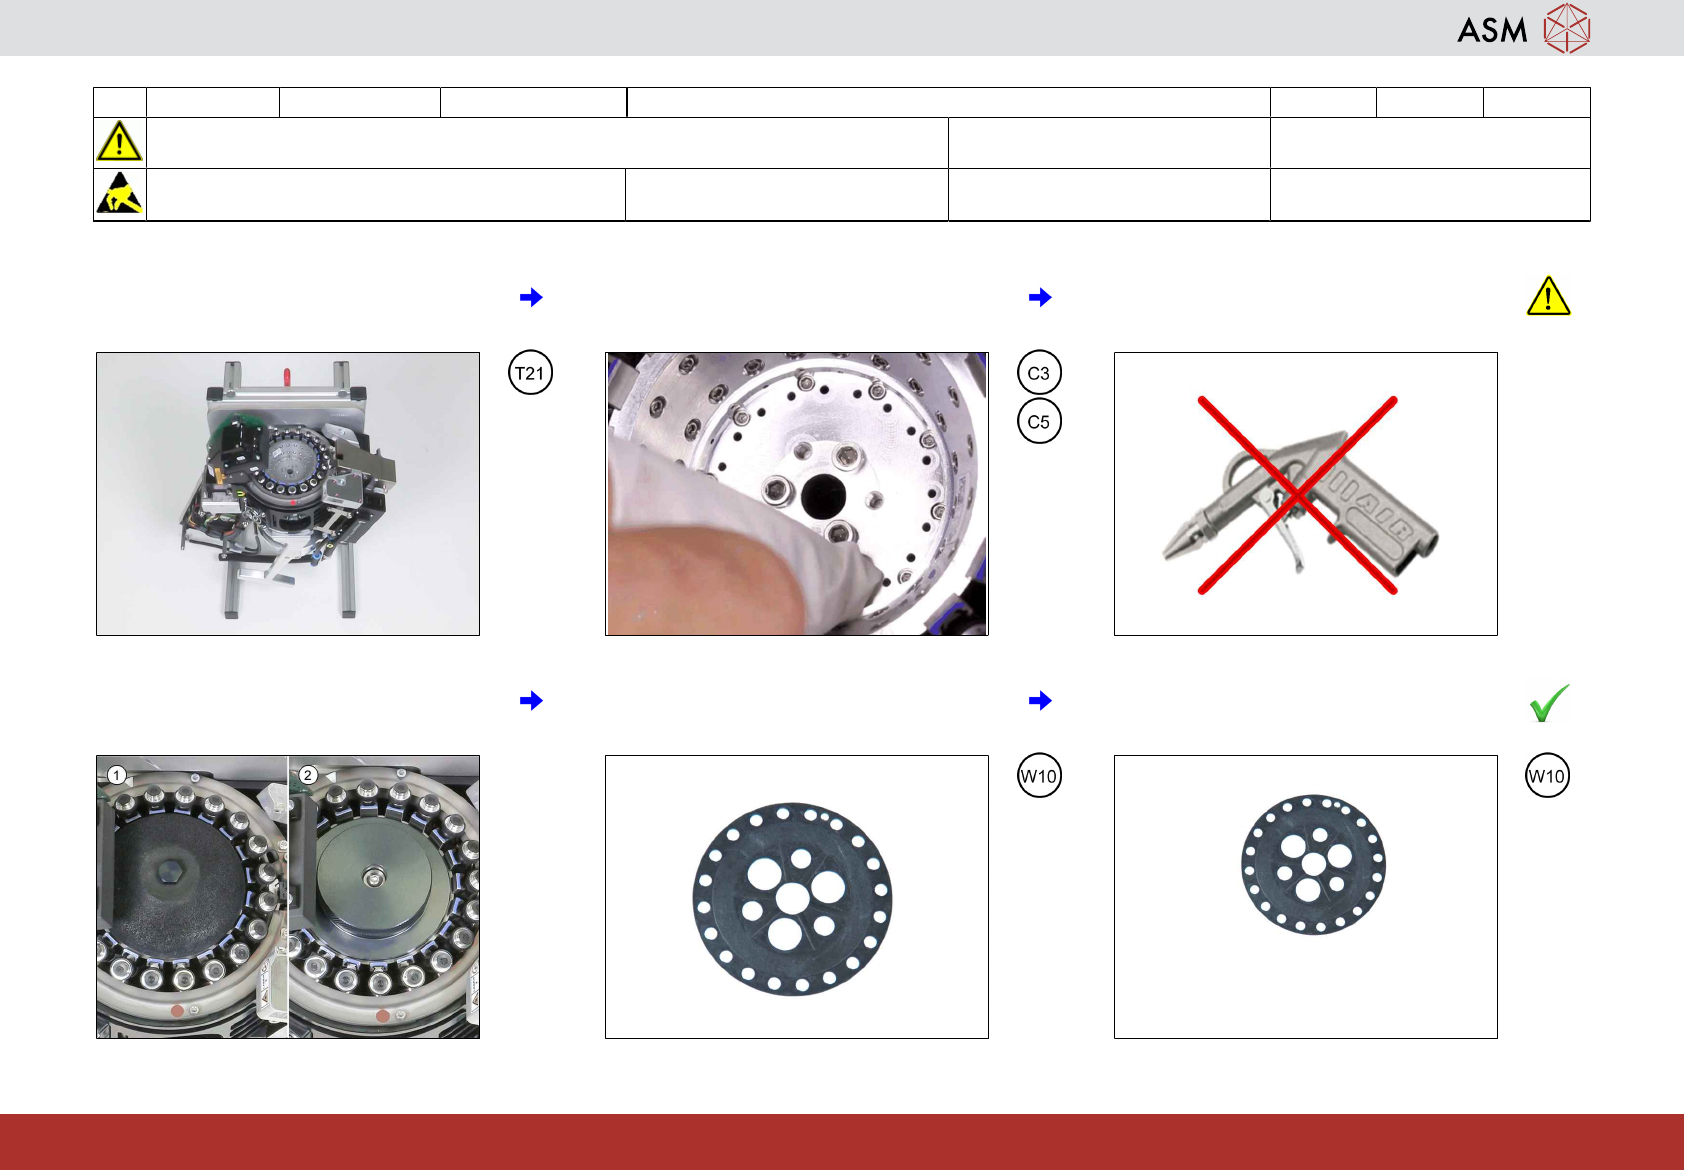
1 Turn the head upside down. 2 Clean the seating of the holding circuit /
orifice plate.
3 Never use forced air to clean the seating
as otherwise the hoses to the DPs might
go off.
4 To mount the holding circuit (1) proceed
with next step. For the orifice plate pro-
ceed with step 16.
5 Check the seal for dirt and damage. 6 If OK proceed with step 8.
11 3-monthly C&P20 P2/M3 Mount the holding circuit / orifice plate 8 min 2 / 4
Refer to safety instructions in user manual before commencing Maintenance
NOTICE! ESD guidelines are to be followed Tool:
T21, T44, T78
Wear Part:
W10, W18
Consumables:
C3, C5, C11, C22
www.asm-smt.com
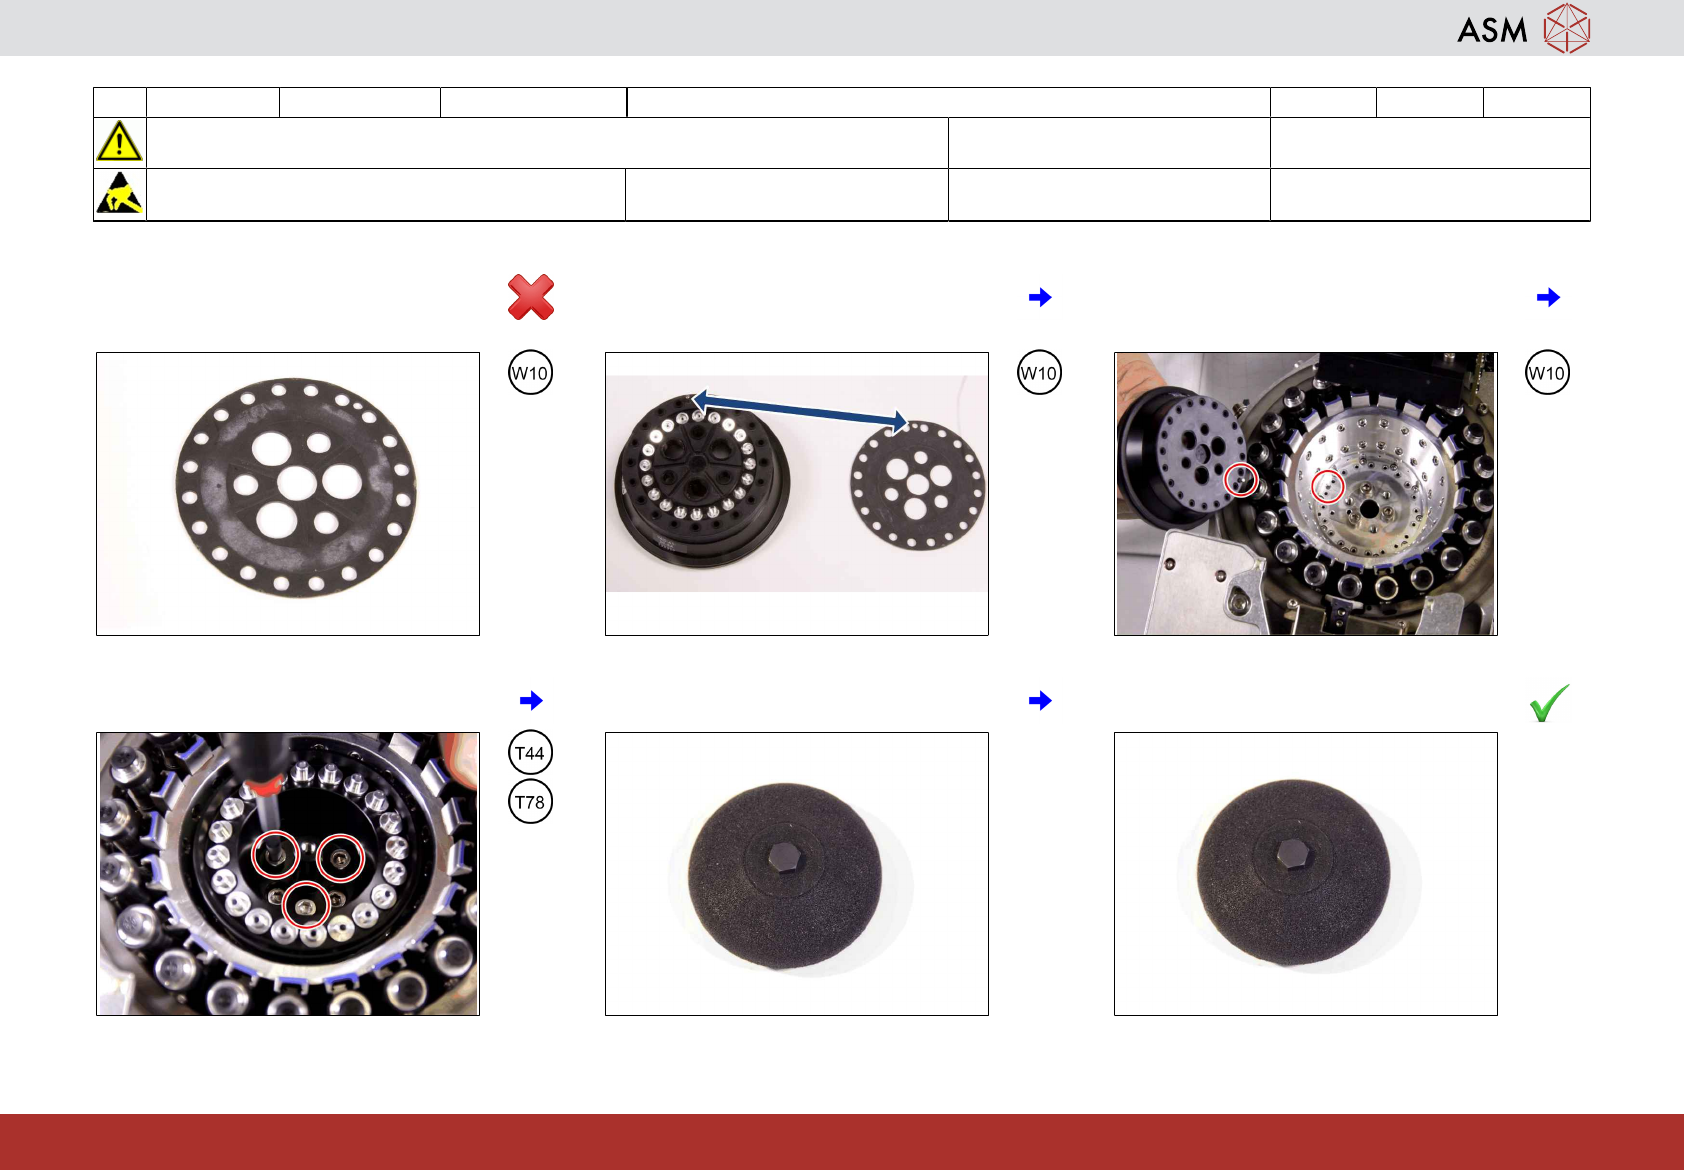
7 If not OK replace it with a new one. 8 Place the seal properly on a maintained
holding circuit.
9 Insert the maintained holding circuit with a
seal attached into the star carrier. Take
care of the correct fitting pin position.
10 Fasten the three protruding fixing screws
with a torque of 0.25 Nm.
11 Check the silencer for dirt or damages. 12 If OK proceed with step 14.