00198596-02_JC_3M_C&P20P2M3_EN.pdf - 第55页
17 3-monthly C&P20 P2/M3 Appendix: Prepare the multipette 5 min 1 / 3 Refer to safety instructions in user manual before commencing Maintenance NOTICE! ESD guidelines are to be followed Tool: T22, T23 Wear Part: Cons…
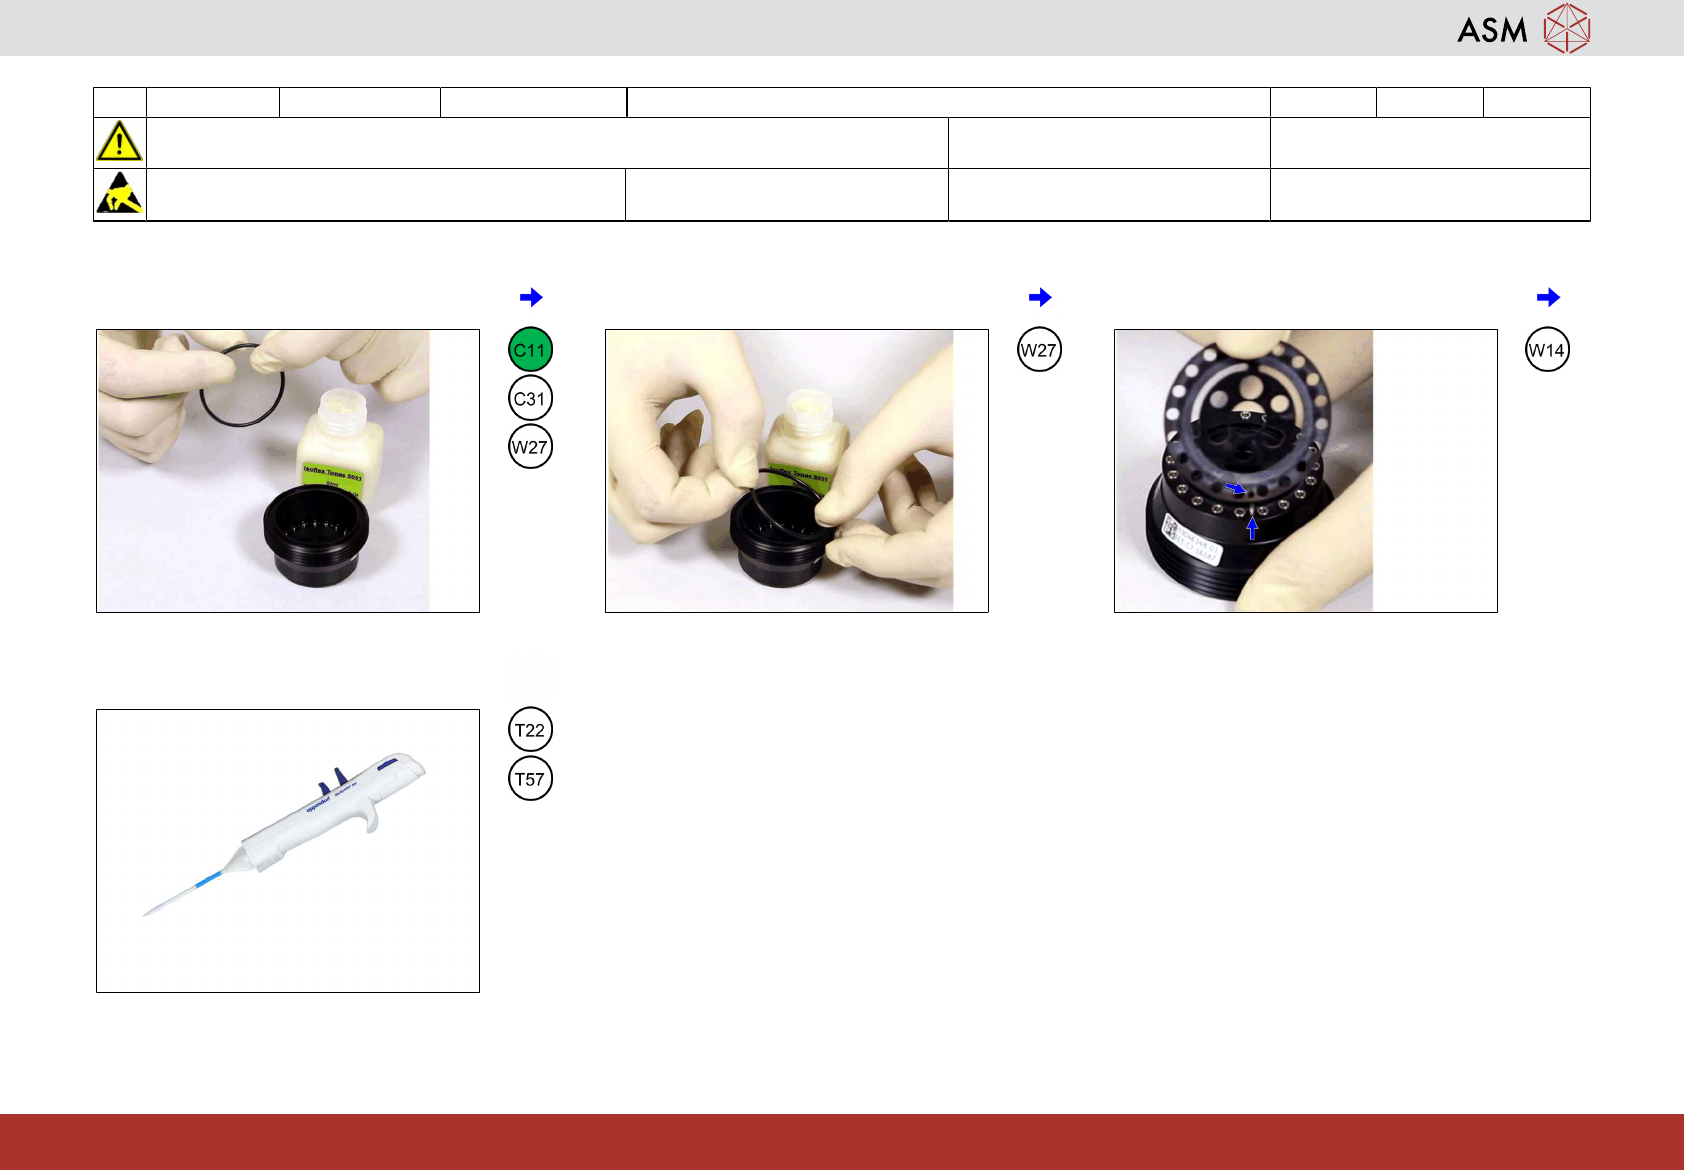
16 3-monthly C&P20 P2/M3 Appendix: Maintain the aperture ring 35 min 2 / 2
Refer to safety instructions in user manual before commencing Maintenance
NOTICE! ESD guidelines are to be followed Tool:
T22, T53, T57, T92
Wear Part:
W14, W27
Consumables:
C5, C11, C19, C31
www.asm-smt.com
7 Lubricate the O-Ring 8 Insert the O-ring in the aperture ring. 9 Place the seal properly at the cleaned
aperture ring.
10 Clean-up the multipette. See "Appendix:
Clean-up the multipette".
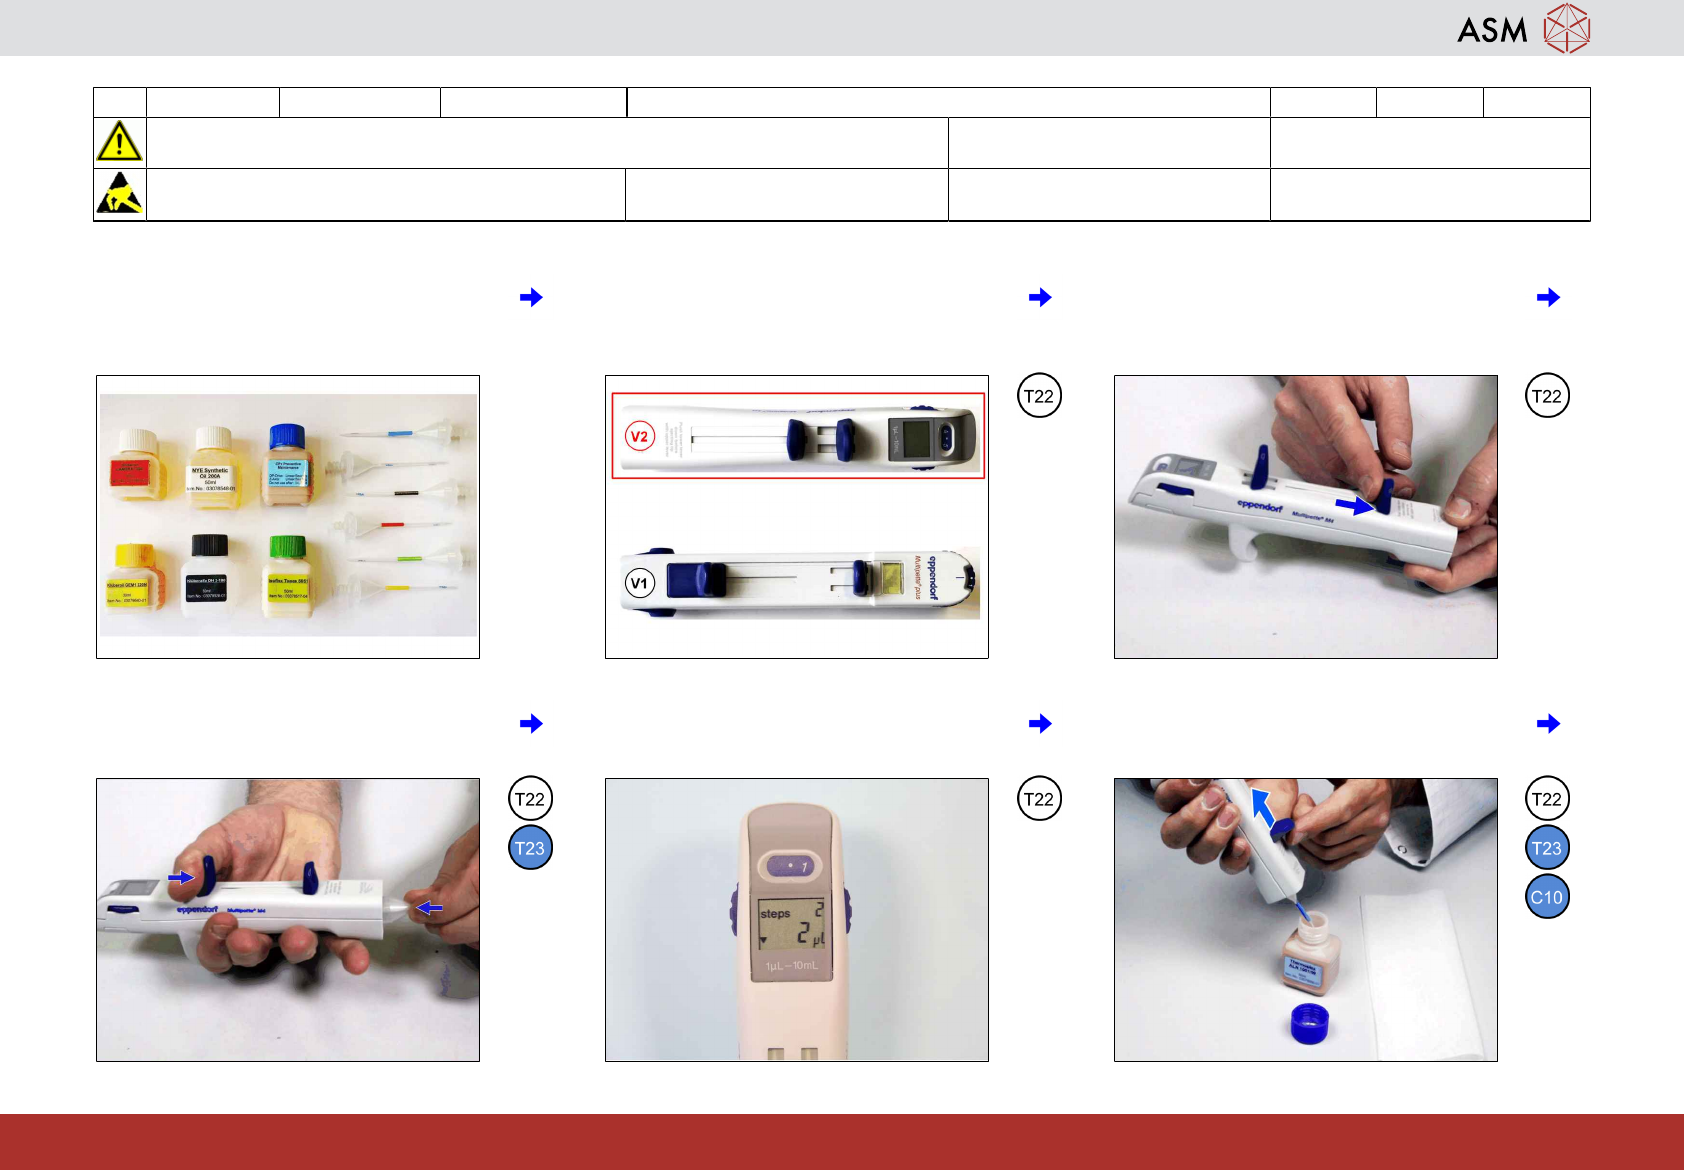
17 3-monthly C&P20 P2/M3 Appendix: Prepare the multipette 5 min 1 / 3
Refer to safety instructions in user manual before commencing Maintenance
NOTICE! ESD guidelines are to be followed Tool:
T22, T23
Wear Part: Consumables:
C3, C10
www.asm-smt.com
1 The following description is made by way
of example with blue oil and combitip. For
the oil and combitip to be used, see the in-
dividual task.
2 Prepare multipette V2. For multipette V1
proceed with Step 9.
3 Push down the filling lever and keep it
there.
4 Push the application lever and press the
needed combitip onto the mulitipette until
it engages.
5 Release the lever and turn the wheel to
the volume required for the task.
6 Check the expiration date of lubricant at
the back of the flask and fill-up the multi-
pette.
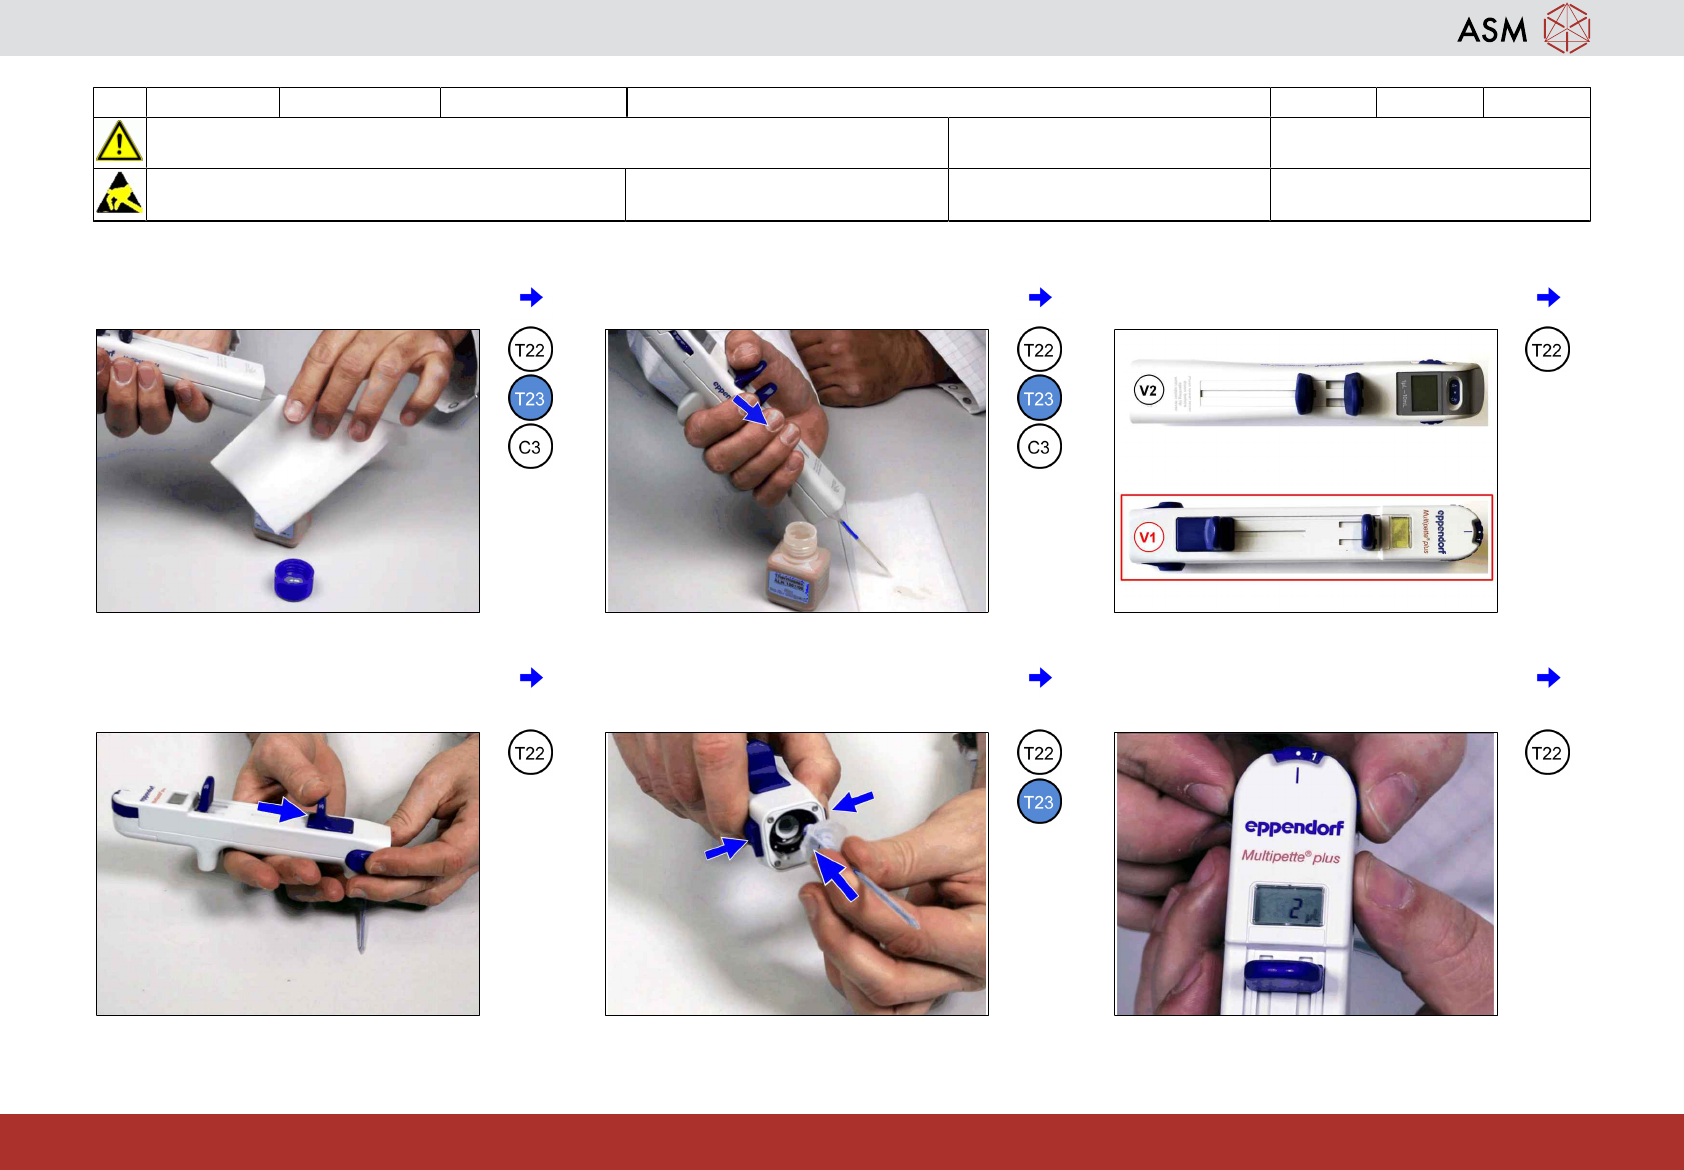
17 3-monthly C&P20 P2/M3 Appendix: Prepare the multipette 5 min 2 / 3
Refer to safety instructions in user manual before commencing Maintenance
NOTICE! ESD guidelines are to be followed Tool:
T22, T23
Wear Part: Consumables:
C3, C10
www.asm-smt.com
7 Clean the combitip outside from contamin-
ation.
8 Push the application lever till oil comes out
and wipe of the tip of the combitip.
9 Prepare multipette V1.
10 Push down the filling lever and keep it
there.
11 Push the locking and press the needed
combitip onto the mulitipette until it en-
gages.
12 Release the lever and turn the wheel to
the volume required for the task.