00900068-02_SM_ASM_ProcessLens_EN.pdf - 第53页
ASM Proces sLens Single - l ane 03/2020 Edit ion 53 3.19 Changing the TSP40 0 3.19.1 Removing the TSP400 Ke y: 1) TSP4 00 Figure 3- 63 : TSP400 Require ment: ● Machine is switche d off . 1. Disconnect all con nectors of …
ASM ProcessLens Single-lane 03/2020 Edition
52
Installation
Follow the removal instructions in reverse order for installation.
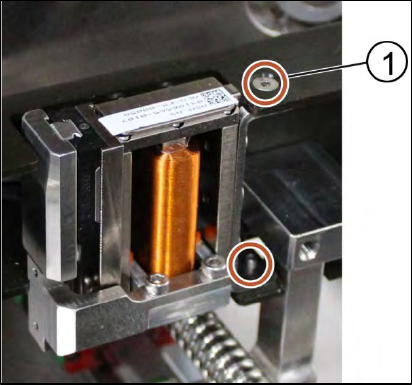
3.18.2 Changing the stopper of the stopper and sensors rail
Key:
1) Screw (2 x)
Figure 3-62: Stopper
Requirement:
● Machine is switched off.
1. Remove the cover of the stopper and sensors rail by unscrewing 10 x screws using an Allen
key size 2.0 (small screws).
2. Furthermore unscrew 4 x screws using an Allen key size 2.5 (large screws).
3. The cover is removed.
4. Remove the stopper by unscrewing the screws (2 x) using an Allen key size 2.0.
5. Put the stopper back in place and tighten the screws (2 x).
6. Put the cover back onto the stopper unit and tighten the screws (14 x).
Installation
Follow the removal instructions in reverse order for installation.

ASM ProcessLens Single-lane 03/2020 Edition
53
3.19 Changing the TSP400
3.19.1 Removing the TSP400
Key:
1) TSP400
Figure 3-63: TSP400
Requirement:
● Machine is switched off.
1. Disconnect all connectors of the board.
2. Unscrew all screws (16) using an T shaped Allen key size 2.5.
3. Remove the circuit board.
3.19.2 Replacing the TSP400
Requirement:
● Machine is shut off.
● TSP400 is dismantled.
1. Place the new TSP400 into the box.
2. Tighten the screws (16 x).
ASM ProcessLens Single-lane 03/2020 Edition
54
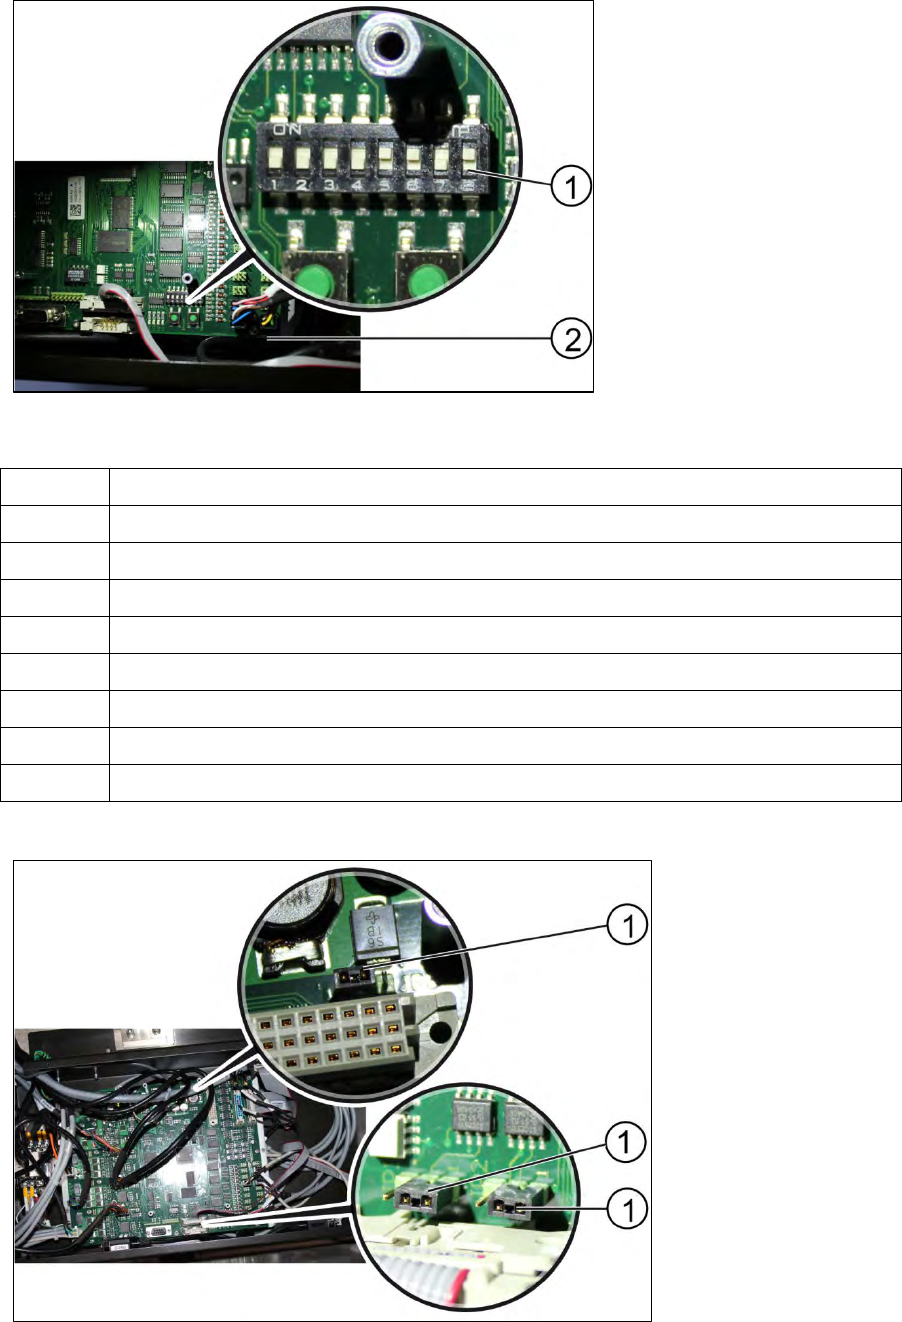
Key:
1) Switches
2) TSP400
Figure 3-64: Switch at TSP400
3. Check whether the switches on the circuit board are in the right "ON" or "OFF" position.
Number Position of the switch (ON/OFF)
1 OFF
2 OFF
3 OFF
4 OFF
5 ON
6 ON
7 OFF
8 ON
Table 3-3: Position of the switch at the TSP400
Key:
1) Jumper
Figure 3-65: Jumpers at TSP400
4. Check that the jumpers are in place as shown in the picture above.