00900068-02_SM_ASM_ProcessLens_EN.pdf - 第57页
ASM Proces sLens Single - l ane 03/2020 Edit ion 57 Before st arting t he calibr ation proce dures, r eset m achine k inem atics to def ault val ues. 4.1 Cali brations - 2D and 3D Cali bration The obj ectives are: • Z ax…
ASM ProcessLens Single-lane 03/2020 Edition
56
4 Machine - Calibrations
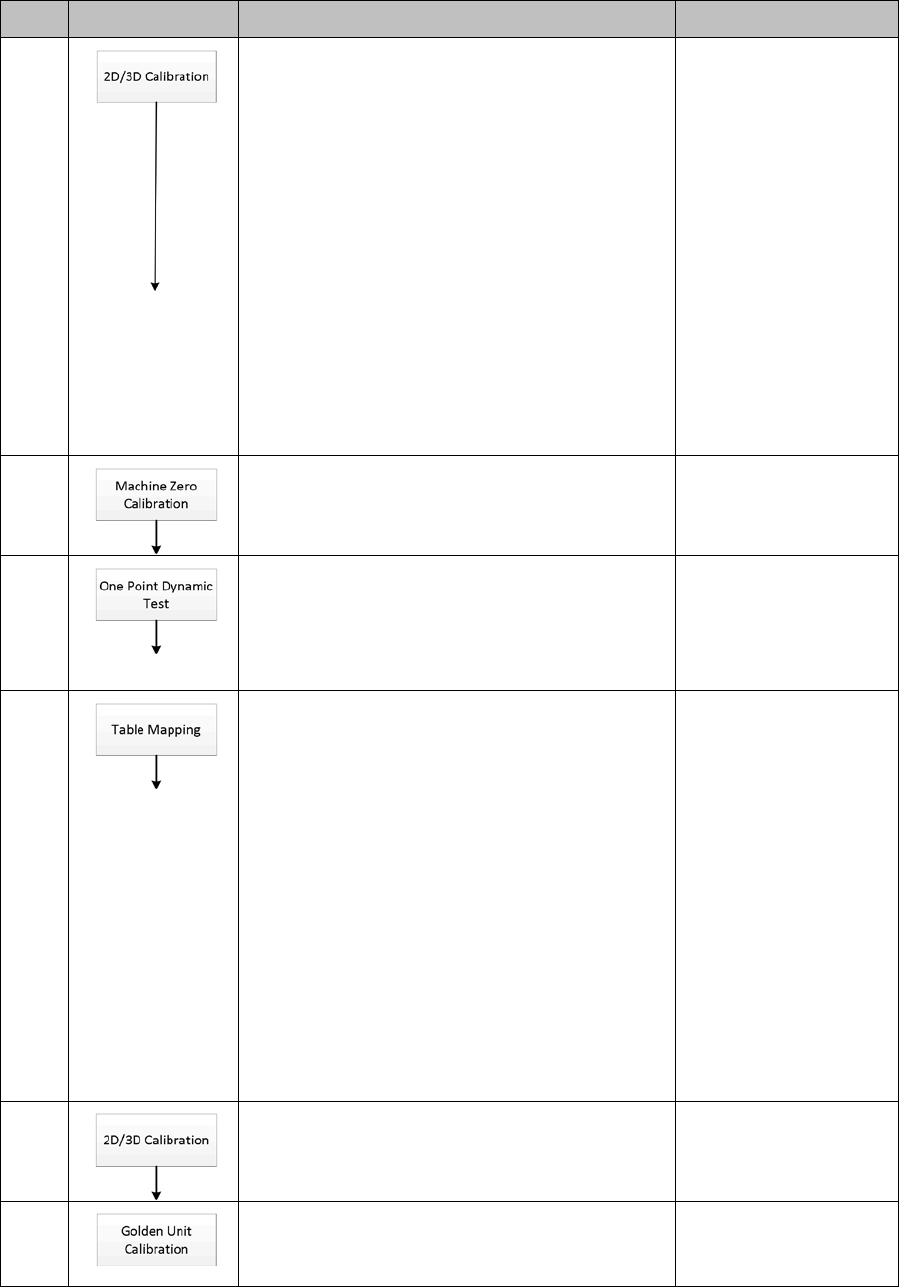
The calibration sequence and tests´ objectives of the ProcessLens are listed below.
Step Procedure Functional check Tooling
1.
•
Verify the 2D and 3D optical focal planes
• Grating check
• Scale
• Rotation
• Zero reference
• Resolution specification: 3.716 +/- 1%
(3.6788 to 3.7532) um/pixel
• Camera Rotational specification: not
exceeding ± 0.5°
2D/3D Calibration tool
2.
•
Capture the zero position of the machine
None
3.
•
Positional accuracy check of stop position
after a move
• Objective: Delta offset from target ≤ 10µm
One Point Dynamic jig
4.
•
XY mapping
• Gantry alignment
• Objective: Delta of Gantry to fiducials´
positions ≤ 20µm
Note:
1. Left to Right and Right to Left Mapping
procedures are same.
Left-Right Transport - input mapping
plate from left
Right-Left Transport - input mapping
plate from right
2. ONLY perform when necessary
SIPLACE Mapping
plate Version 5
Coaxial light
5.
•
Same as in Step 1
2D/3D Calibration tool
6.
•
Height calibration Objective: Cg and Cgk >
1.33 for all the 9 areas of the FOV
Certified height
ceramic target
ASM ProcessLens Single-lane 03/2020 Edition
57
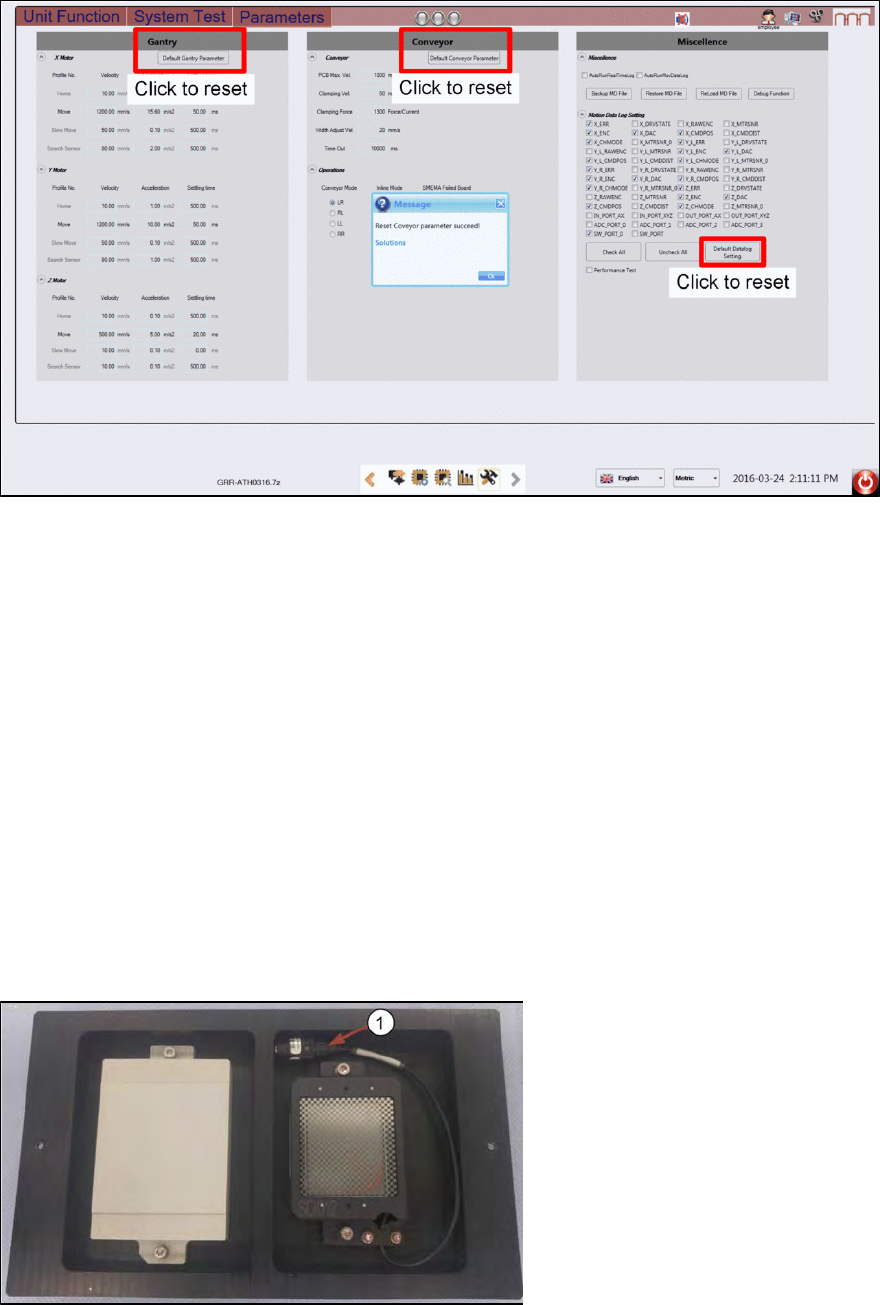
Before starting the calibration procedures, reset machine kinematics to default values.
4.1 Calibrations - 2D and 3D Calibration
The objectives are:
•
Z axis Calibration: Auto Focus
•
Calibrate camera to gantry XY rotation
•
2D Calibration
•
3D Calibration
One side of the calibration tool is for 3 dimensional and the other 2 dimensional. The 2D target is
wired with a lighting module.
2D and 3D Calibration tool
1. Check the calibration tool. Clean with a lint free cloth if necessary.
2.
Coil the 2D light cable into the cavity as shown.
1) 2D back light cable and
connector.
3D Calibration Target 2D Calibration Target
ASM ProcessLens Single-lane 03/2020 Edition
58
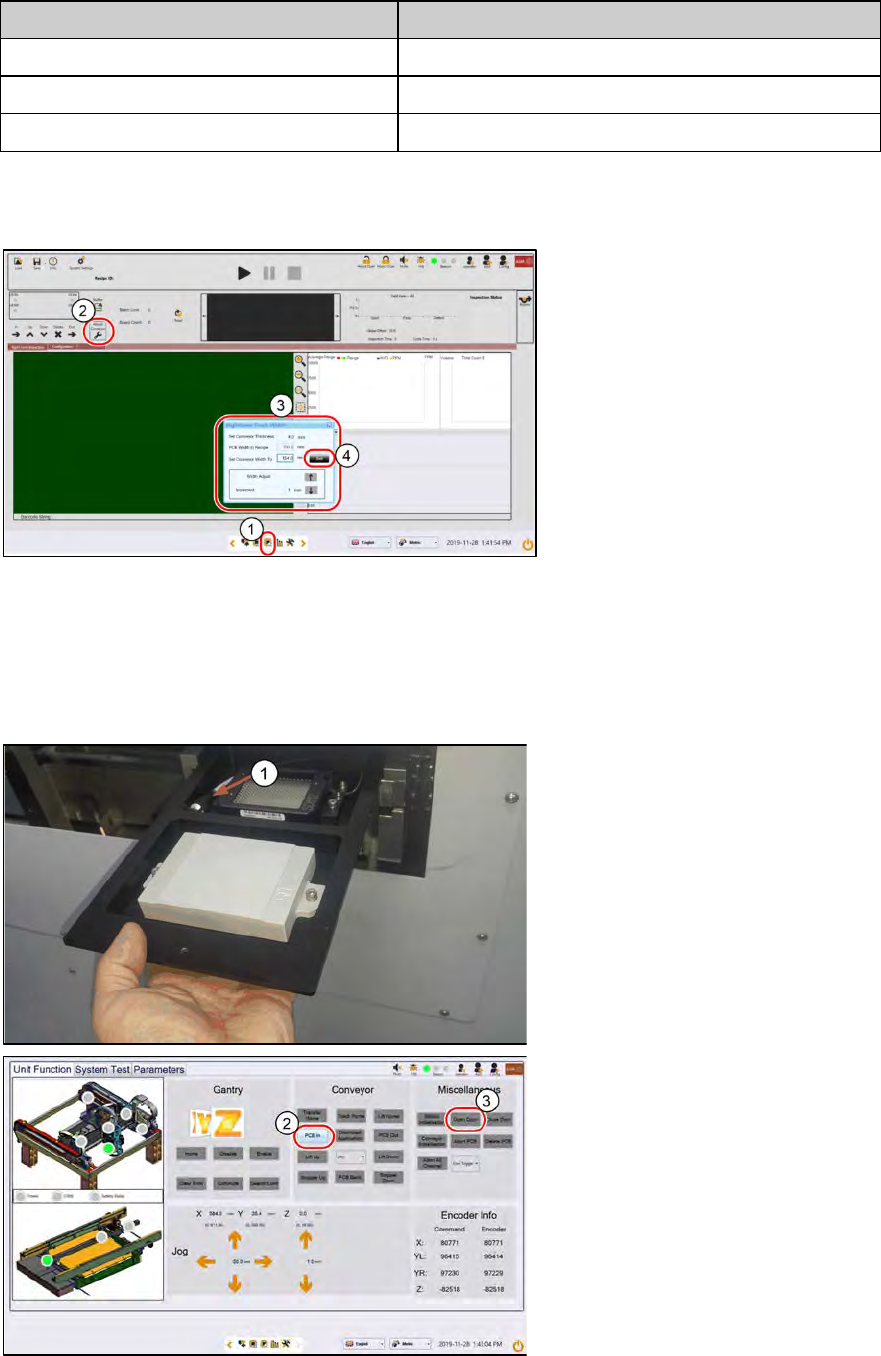
2D and 3D cal fixture info
Mechanical feature
Dimension
Length:
260 mm
Width:
154 mm
Hight:
4 mm
Step 1
1.
Go to Inspection Page.
2.
Click Adjust Conveyor.
3.
Set the following:
– Thickness, 4mm.
– Width, 154mm
4.
Click Set..
The conveyor starts to adjust to
154mm width.
Step 2
1. Place the 2D and 3D target onto
the inlet section in the orientation
shown below. The 2D target
should be loaded head in first.
Ensure the 2D lighting cable is in
the cavity.
2.
At Conveyor, click PCB In. The
target loads into the inspection
section, stops at the stopper and
clamps.
3.
At Miscellaneous, click Open
Door. Open the machine cover.