00900068-02_SM_ASM_ProcessLens_EN.pdf - 第61页
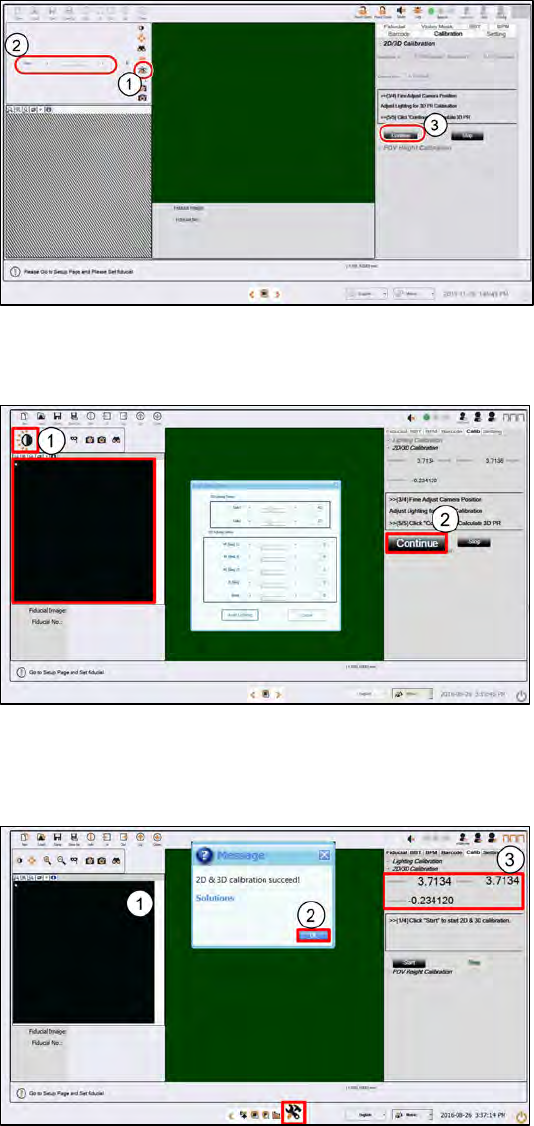
ASM Proces sLens Single - l ane 03/2020 Edit ion 61 Step 7 1. Click on Focus ic on . 2. Adjust to value 5 0~60 . The m achine tak es about 4 0s to adjust the Side 1 a nd Side 2 lighting. T he fring e pattern in the FOV w…
ASM ProcessLens Single-lane 03/2020 Edition
60
Step 5
1.
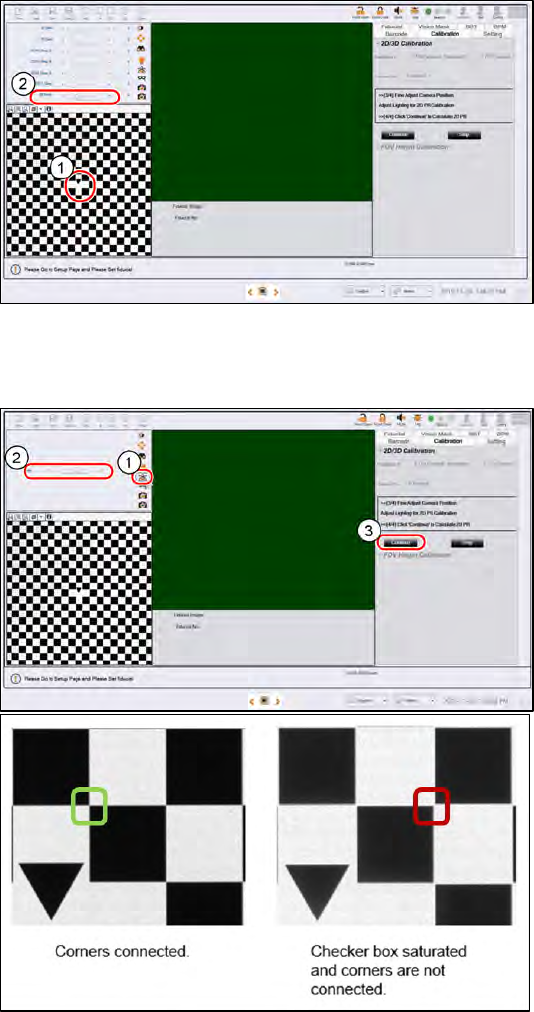
Click on the tip of the inverted
triange of the 2D target to centre
the FOV.
2.
At the Lighting Box
menu, adjust
the Back light if necessary. 15 is
default. A value of 10 to 20 is
good to use. There should be
good contrast between the black
patterns and the white
background. Set all other lighting
values at 0.
Step 6
1.
Click on Focus icon.
2.
Adjust to value 50~60.
The machine takes about 40s to
adjust the Side 1 and Side 2
lighting. The fringe pattern in the
FOV will disappear, this is OK.
a. When perform 2D calibration,
user can zoom in the image to
check if the lighting is too
bright and the image
saturated.
b. As you can see from image
below, the corners should be
connected and the “White
regions” are not totally white
but have lower gray level
value.
3.
Click Continue to start 2D
calibration, calibration takes about
30s to complete.
ASM ProcessLens Single-lane 03/2020 Edition
61
Step 7
1. Click on Focus icon.
2.
Adjust to value 50~60.
The machine takes about 40s to
adjust the Side 1 and Side 2
lighting. The fringe pattern in the
FOV will disappear, this is OK.
3.
Click Continue to start the 3D
calibration. The calibration takes
about 30s to complete.
Step 8
1.
Click Auto Lighting.
The machine takes about 40s to
adjust the Side 1 and Side 2
lighting. The fringe pattern in the
FOV will disappear, this is OK.
2.
Click Continue to start 3D
calibration.
Step 9
1.
A successful 3D calibration takes
about 30s to complete.
2.
A message box will pop up.
Click OK.
3.
Check the calibration results:
● Both Resolution X and Y
should be between 3.6788
and 3.7532 µm/pixel inclusive
(3.716µm ± 1%).
● Camera Rotation should be
between -0.5° to 0.5°
inclusive
(±0.5°).
ASM ProcessLens Single-lane 03/2020 Edition
62
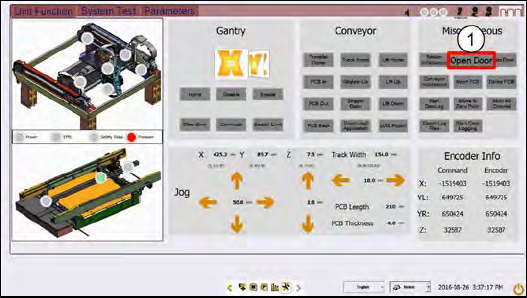
Step 10
1.
At the Miscellaneous, click
Open
Door. The machine unlocks the
cover.
2.
Unplug the lighting cable and
remove the 2D and 3D calibration
target.
If the 2D and 3D calibration fails:
1. Clean the 2D glass target surface with a clean hair brush.
2. Dust off the 3D glass target surface with a clean hair brush.
Dust and fingerprints cause light diffusion and hence calibration failure.
3. Check if the DLP is working properly.