00900068-02_SM_ASM_ProcessLens_EN.pdf - 第74页
ASM Proces sLens Single - l ane 03/2020 Edit ion 74 Step 7 1. Clean the m apping p late us ing a piece of lint fr ee cloth an d alcoho l. Dust and f ingerpr ints ca n d is tort images and cause the m apping to fail. 2. A…
ASM ProcessLens Single-lane 03/2020 Edition
73
Step 5
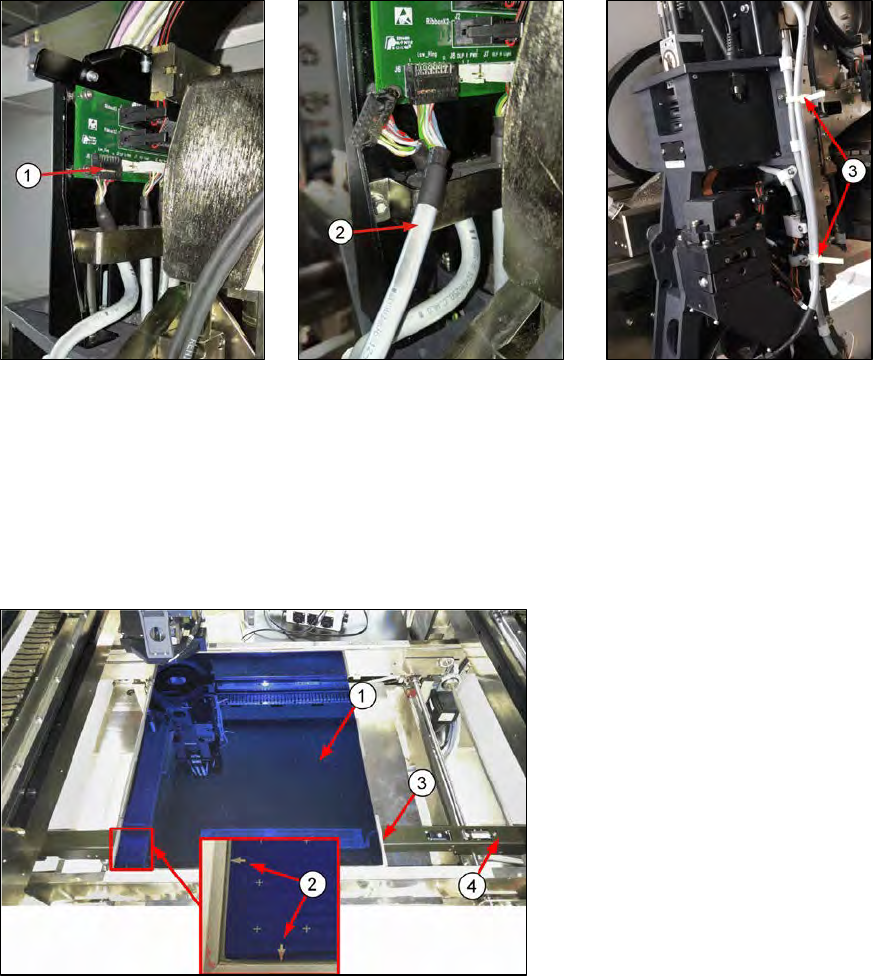
Move the camera head module to the left for easy access.
1. Gently pull out low ring light
connector by holding onto
the connector´s body. Do
not pull using the wires.
Use a flat fead screwdrive
to pry if necessary.
2. Plug-in the coaxial light
cable.
3. Secure the coaxial light
cable with cable ties to
prevent flapping when the
cameras move.
Step 6
1.
Put in the mapping plate.
2.
Refer to bottom left hand corner
of the plate. The arrows on the
long side is pointing towards the
left and the arrows on the short
side of the plate is pointing
towards the front.
3.
Leading edge.
4.
Pull the sensor bar to the front
and position under the leading
aluminium edge of the plate.
ASM ProcessLens Single-lane 03/2020 Edition
74
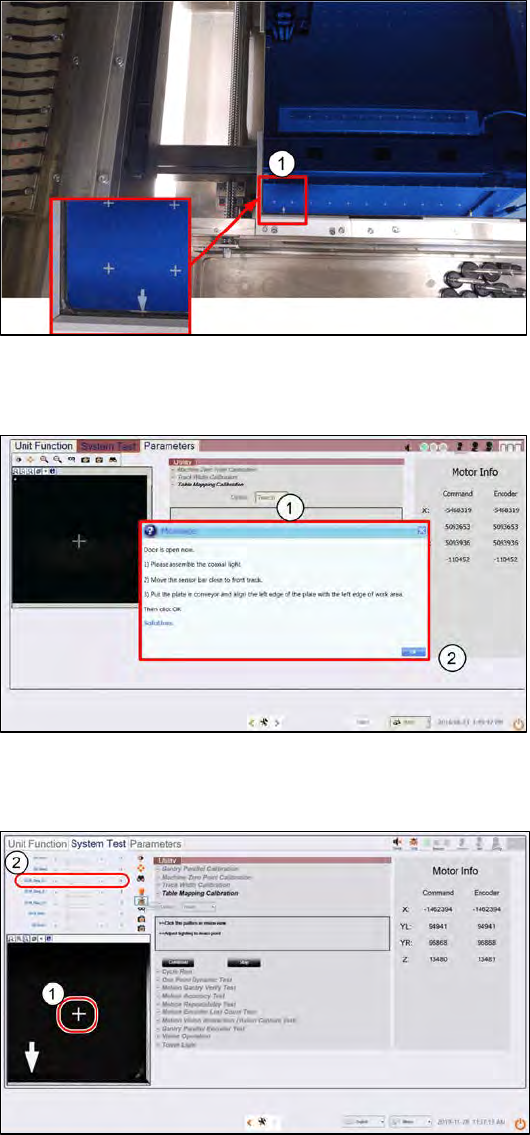
Step 7
1.
Clean the mapping plate using a
piece of lint free cloth and alcohol.
Dust and fingerprints can distort
images and cause the mapping to
fail.
2.
Align the left edge of the mapping
plate to the left edge of the
conveyor´s front top clamp.
Step 8
1.
Close the machine cover.
2.
Click OK. The machine locks the
cover, the table raises to clamp
the plate, and th
e camera starts to
move to the bottom right corner of
the plate.
Step 9
1.
The plate´s bottom right hand
cross fiducial comes into view.
Click on the cross to centre the
cross to the FOV.
2.
Set 2D M-Ring_G light between
10 ~ 20 (recommend 15) and all
other lighting values to 0.
ASM ProcessLens Single-lane 03/2020 Edition
75
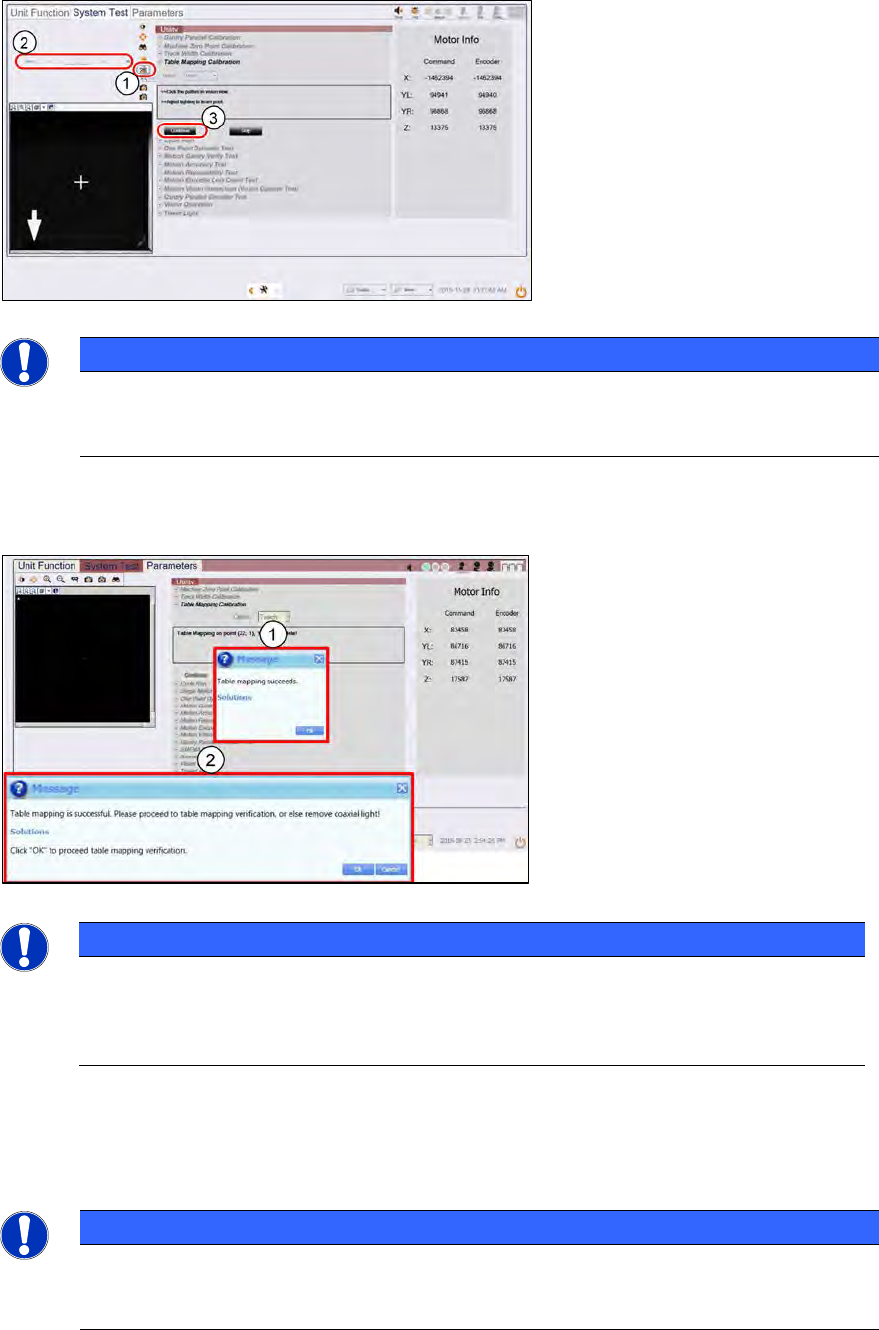
Step 10
1.
Click on Focus icon.
2.
Set value between 50 ~ 60.
3.
Click Continue to start the teach
table mapping process.
The progress of the mapping is
continuously reported.
NOTICE
After about 31.5 minutes, at 50% completion, the table towers, the stopper rises, and the
plate will move forward to the stopper to continue the second stage of the mapping. Do
not be alarmed by this sudden movement. No user intervention is required.
Step 11
1.
After about 63 minutes, a
message pops up to report if the
teach process is completed.
Click OK.
2.
At the next message,
click OK to continue with
verification (see section “4.4.2
Table Mapping: Verify”)
or Cancel to end mapping teach.
NOTICE
If the mapping fails, clean the plate and repeat the procedure. Mapping failures are
caused by a failure to read a fiducial on the plate – usually caused by fingerprint
smudges on the fiducials. Verification of the mapping results is necessary after a
successful Teach.
1. Lower the conveyor lift cable.
2. Open the machine cover.
3. Remove the mapping plate.
4. Uninstall the coaxial light.
5. Reconnect the Low Ring light connector.
6. Open the machine cover.
NOTICE
The mapping information is stored in
C:\system\Log\TableMapping_timestamp*.log file (approx. 459KB).
The Delta of Gantry to fiducials` positions should be ≤ 20µm (0.020mm).