00900068-02_SM_ASM_ProcessLens_EN.pdf - 第77页
ASM Proces sLens Single - l ane 03/2020 Edit ion 77 Step 2 1. Click Open Door . Open the cover and rem ove an y support p ins f rom the table. 2. Close the co ver then click Confirm to continue. 3. Wait while th e conve …
ASM ProcessLens Single-lane 03/2020 Edition
76
4.4.2 Table Mapping: Verify
● For verification of positional accuracy of the camera across the work area.
● Verify saves time. It takes only 5.5 minutes compared to 63 minutes in Teach.
● The procedure is similar to the Teach procedure.
● Verify the table mapping again if:
– The machine is already calibrated but is moved.
– The positional accuracy of the camera across the work area is suspect.
– Maintenance is performed on the gantry axes e.g. greasing.
Step 1
1. Go to DiagnosticPage
2.
Click System Test.
3.
Go to Utility, Table Mapping
Calibration
4.
Under Option, select Teach.
5.
Click Start.
6.
A message asking for the
mapping data file pops up.
7.
Copy the "mp_mess.dat" file to
the "c:\system\AS Table
Map Offset\" folder.
Switch back to ProcessLens GUI,
click Yes.
ASM ProcessLens Single-lane 03/2020 Edition
77
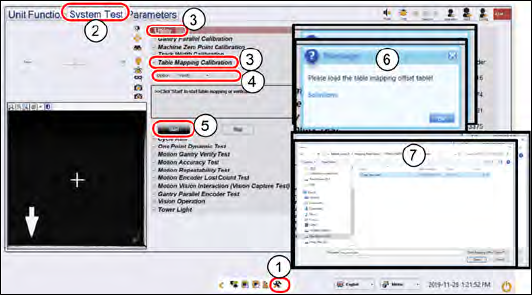
Step 2
1.
Click Open Door.
Open the cover
and remove any support pins from
the table.
2.
Close the cover then click
Confirm to continue.
3.
Wait while the conveyor adjust to
a width of 560mm.
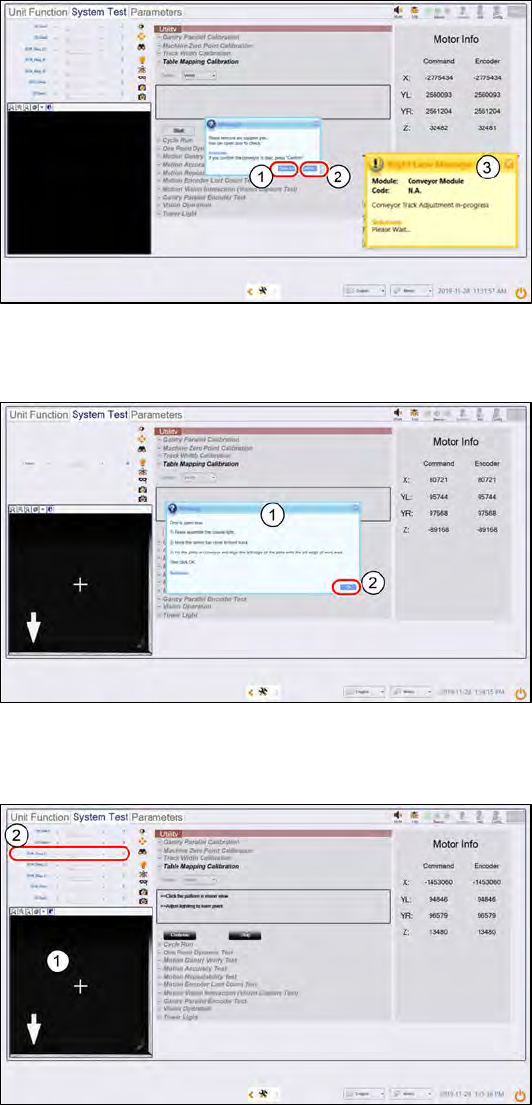
Step 3
1.
A message pops up after the
conveyor width reaches 560mm.
Open the machine cover.
2.
Install the Coaxial Light Assembly
and position the Mapping Plate on
the conveyor.
3.
Click OK.
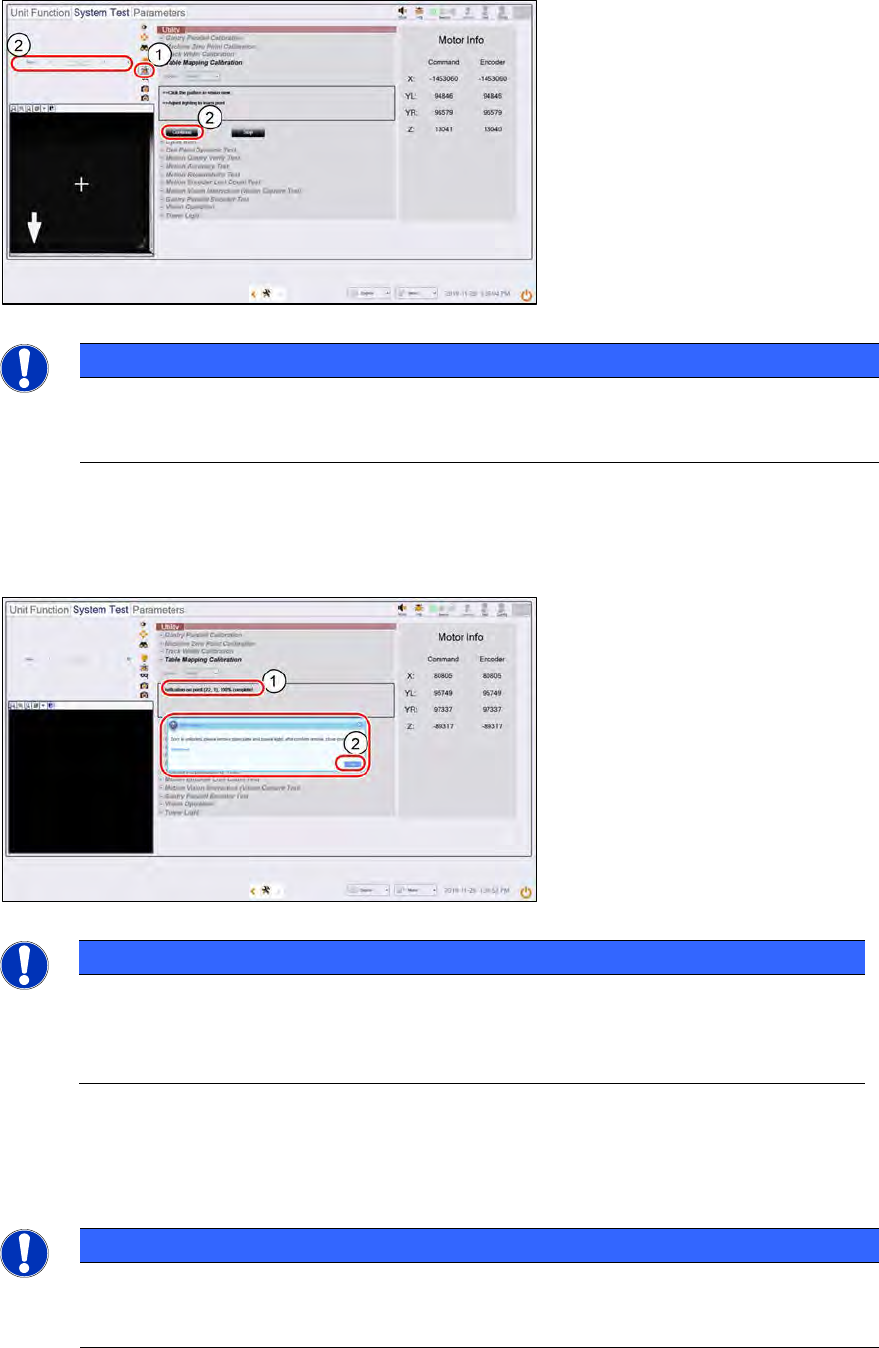
Step 4
1.
The plate´s bottom right hand
cross fiducial comes into view.
Click on the cross to centre the
cross to the FOV.
2.
Set 2D M_Ring_G light to 15
(recommendation) and all other
lighting values to 0.
ASM ProcessLens Single-lane 03/2020 Edition
78
Step 5
1.
Click on Focus icon.
2.
Adjust Focus between 50 ~ 60
(recommended).Click Continue
to
start the teach table mapping
process. The progress of the
mapping is continuously reported.
NOTICE
After about 3 minutes, at 50% completion, the table towers, the stopper rises, and the
plate will move forward to the stopper to continue the second stage of the mapping. Do
not be alarmed by this sudden movement. No user intervention is required.
Step 6
1. A successful verification takes
about 5.5 minutes to complete.
2.
A message pops up asking for the
removal of the coaxial light and
mapping plate. .
Click Ok once completed.
NOTICE
If the mapping fails, clean the plate and repeat the procedure. Mapping failures are
caused by a failure to read a fiducial on the plate – usually caused by fingerprint
smudges on the fiducials. Verification of the mapping results is necessary after a
successful Teach.
1. Lower the conveyor lift cable.
2. Open the machine cover.
3. Remove the mapping plate.
4. Uninstall the coaxial light.
5. Reconnect the Low Ring light connector.
6. Open the machine cover.
NOTICE
The mapping information is stored in
C:\system\Log\TableMapping_timestamp*.log file (approx. 459KB).
The Delta of Gantry to fiducials` positions should be ≤ 20µm (0.020mm).