00196641-01_IM_OIS_SIS 8.0_DE EN.pdf - 第14页
Installation Manual OIS 8.0 Installationsanleitung OIS 8.0 Only those users who are members of the relevant us er group are permitted to switch to a gi ven operating level. The following users are created and as signed t…
OIS 8.0 Installation Manual
OIS 8.0 Installationsanleitung
3.2.2 Installing Monitoring Service
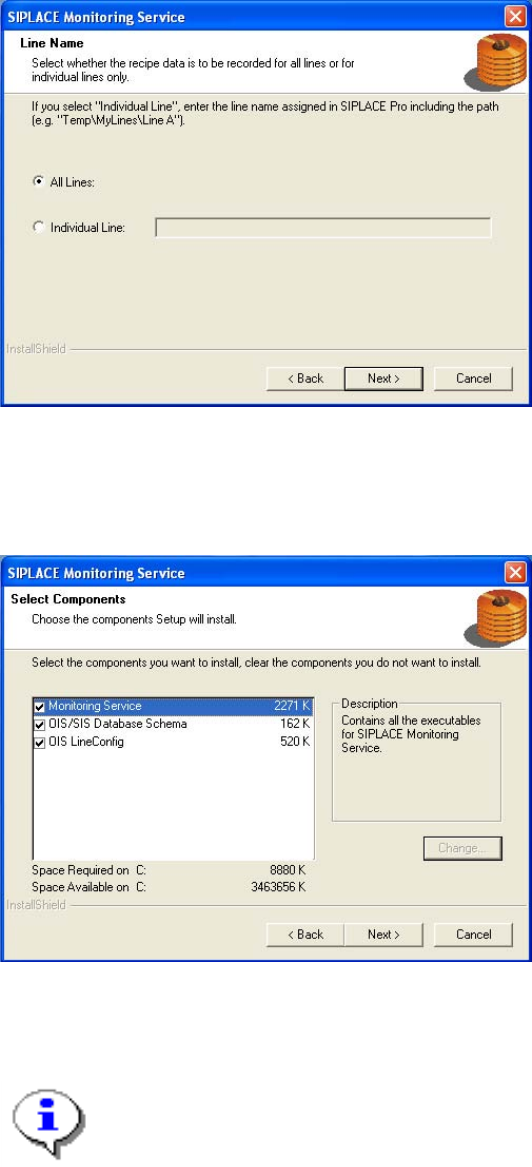
¾ Select the line(s) for which the recipe data is to be recorded.
¾ Continue by clicking the Next> button.
¾ Select the components you want to install.
¾ Continue by clicking the Next> button.
Note:
It is possible to install the component OIS LineConfig on any other computer in the network.
If installed elsewhere, that computer needs the SIPLACE Pro Interface.
The operating levels of the OIS system are mapped to operating system user accounts. The following two
user groups are created in the User Manager on the OIS Server computer for this purpose.
• OisEngineers for the operating level Line engineer
• OisAdministrators for the operating level Administrator
13 von 48

Installation Manual OIS 8.0
Installationsanleitung OIS 8.0
Only those users who are members of the relevant user group are permitted to switch to a given operating
level.
The following users are created and assigned to the user groups by default during installation:
• OisEngineer for the operating level Line engineer, is a member of the user group OisEngineers
• OisAdministrator for the operating level Administrator, is a member of the user group
OisAdministrators
The next two dialog boxes allow you to assign a password to each user.
¾ Enter the password for the OisEngineer. The default password is "SmallSiplace.1".
¾ Enter the password again to confirm.
¾ Continue by clicking the Next> button.
¾ Enter the password for the OisAdministrator. The default password is "Siplace.1".
¾ Enter the password again to confirm.
¾ Continue by clicking the Next> button.
14 von 48
OIS 8.0 Installation Manual
OIS 8.0 Installationsanleitung
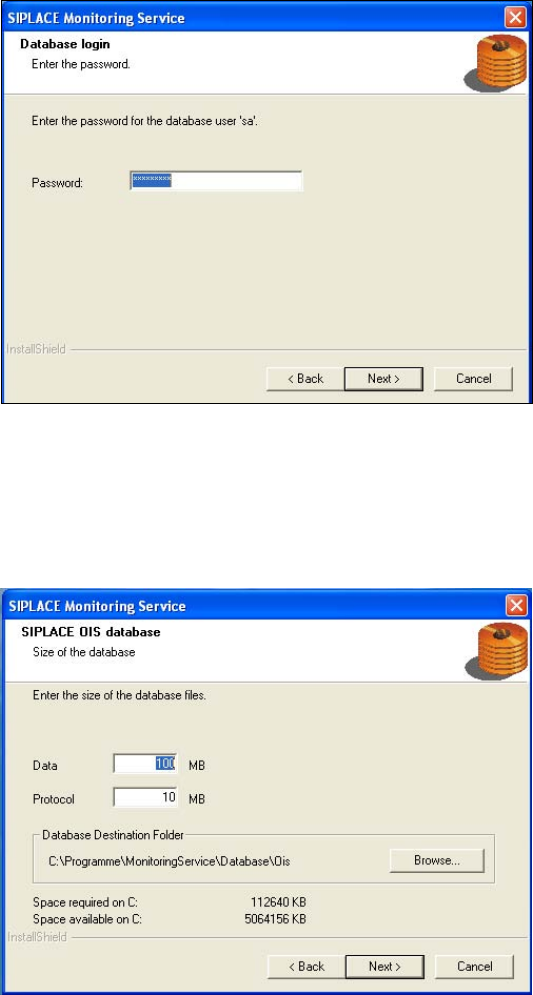
The installation routine must log in to the SQL-Server as system administrator (sa) in order to set up or
update the database schema.
¾ Enter the system administrator password.
¾ Continue by clicking the Next> button. If you don't yet have a database, you'll see the following
dialog:
¾ Click Browse... if you want to choose another installation directory for the database.
¾ Enter the starting file size for the database files. The default values are generally acceptable, and
the files are allowed to grow as your database expands.
¾ Continue by clicking the Next> button.
15 von 48