00197569-01_MM_DLM34_Kunde_en.pdf - 第38页
Major Maintenance Maintenance Tasks for DLM 4.1.2 Tools, Consumables, Spare and We ar Parts 38 Maintenance Manual SIPLACE Placement Heads DLM3/DLM4 See also 3.2.2 Too ls, Consumab les, Spare and Wear Parts [ ➙ 26] To…

Major Maintenance
4.1.2 Tools, Consumables, Spare and Wear Parts Maintenance Tasks for DLM
Maintenance Manual SIPLACE Placement Heads DLM3/DLM4 37
Wear parts Item no.
Star brake assembly DLM/RVC 03001653- xx
PAS-LX-12 distributor plate, complete 00368211- xx
Silencer for C&P head 03003134Sxx
O-ring for distributor 8*1 NBR 70 B 00201179Sxx
O-ring vacuum distributor 3*1,2 NBR 70 B 00320057Sxx
O-ring vacuum generator 10*1,5 NBR 70 B 00320047Sxx
O-ring vacuum generator 14*1,5 NBR 70 B 00320048Sxx
O-ring vacuum generator 8*1 Viton 75 00350661Sxx
O-ring vacuum generator 10*1 Viton 75 00350662Sxx
Synchroflex toothed belt 2.5 T2/90 (turning station) 00320041Sxx
O-ring turning station 16*2 E70B 00320043Sxx
Toothed belt T2 /DLM1 (Z axis DLM) 00334936Sxx
Vacuum nozzle diameter 1.0 00319423Sxx
For vacuum pump operation:
O-ring vacuum generator 30*1 00343022Sxx
Vacuum nozzle diameter 1.5 (rework for vacuum pump) 03003156- xx
For compressed air operation:
Vacuum nozzle diameter 1.5 00319420Sxx
Recommended spare parts Item no.
Star brake assembly DLM/RVC 03001653Sxx
PAS-LX-12 distributor plate, complete 00368211Sxx
Vacuum generator assembly 03003236Sxx
Distributor 00319827Sxx

Major Maintenance
Maintenance Tasks for DLM 4.1.2 Tools, Consumables, Spare and Wear Parts
38 Maintenance Manual SIPLACE Placement Heads DLM3/DLM4
See also
3.2.2 Tools, Consumables, Spare and Wear Parts [ ➙ 26]
Tools Item no.
Extension / straight 03043440- xx
Extension / with joint (170 x SK3) 03042635- xx
ESD wriststrap TYP.OK/WRS 00320279- xx
Universal placement head mounting rack 03056231- xx
Antistatic tweezers, type Bernstein 5
-
192 00377393- xx
Antistatic tweezers, type Bernstein 5
-
195 00377394- xx
TorqueVario-S screwdriver (1.0-5.0 Nm) 03078400- xx
Bit holder for TorqueVario screwdriver 03078706- xx
Extension / straight TX20 03073256- xx
Hexagon socket head cap screwdriver 0.7-2 00320265- xx
Torx Allen screwdriver TX8 03080081- xx
Calibration tool version SST23 03034148- xx
Set of Allen keys 00376492- xx
Set of Phillips screwdrivers 00319064- xx
Angled tweezers 00096487- xx
Oil dispenser Z axis with STRUCTVIS GHD 7 ml 00367071- xx
Cleaning tools for encoder disk 03049704Sxx
Pliers for fitting plastic hose 2MS-PK-3/4 00346929- xx
Calibration tool version 3 03010565- xx
Additionally required documentation Item no.
If required, service manual for removal and installation of placement head
in your machine.
► Note: You need more tools etc.
Assembling instruction for "component sensor" [00193356-xx], if required 00193356- xx
If required, assembly instructions "Universal placement head mounting
rack"
00196371- xx
Maintenance manual "Greasing the valve plunger with tool" 00195066- xx
Major Maintenance
4.1.3 Preparatory Steps Maintenance Tasks for DLM
Maintenance Manual SIPLACE Placement Heads DLM3/DLM4 39
4.1.3
4.1.3 Preparatory Steps
Preparatory Steps
Preparing the Head Mount
Preparing the Head Mount
► Assemble the head mount. For details, refer to the assembly instructions "Universal placement head
mounting rack" [DE+EN: 00196371-xx].
Vacuum test
► Set the nozzles for the current nozzle configuration down in the nozzle changer.
► Before you begin maintenance work, perform a vacuum test. Use the calibration nozzles for this. If
vacuum value irregularities occur at certain segments, take a closer look at these during mainte
-
nance work. Note down the numbers of the problematic segments for later reference.
Removing the placement head
► Dismantle the placement head and remove it from the placement machine. For details, refer to the
service manual.
► Fit the placement head onto the head mount.
► Dismantle the front part of the head. For details, refer to the service manual.
4.1.4
4.1.4 Performing Maintenance Tasks
Performing Maintenance Tasks
4.1.4.1
4.1.4.1 Cleaning the Turning Station Read Unit
Cleaning the Turning Station Read Unit
CAUTION
ESD
► Connect the assembly mount ESD connection to an ESD connection at the workplace.
► Always observe the ESD regulations described in the user manual.
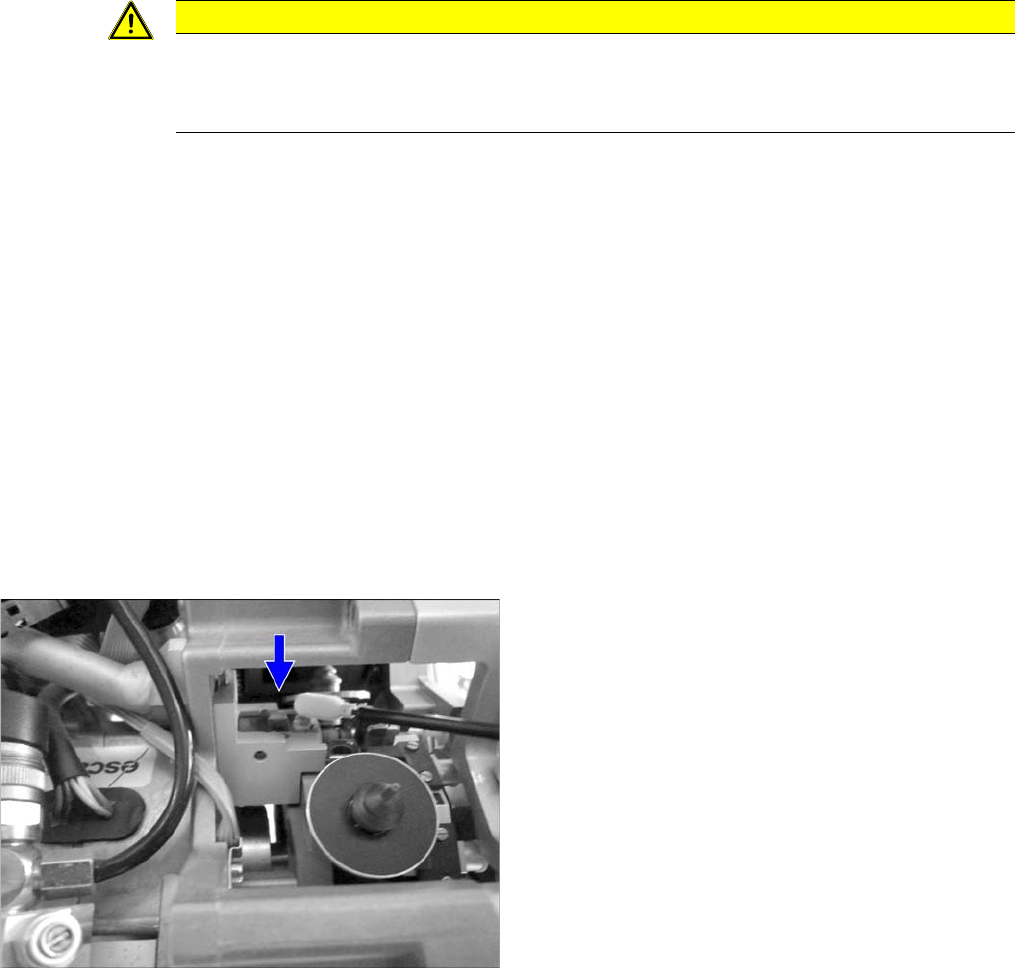
► Remove one sleeve.
► Clean the read unit lens with a cottonwool bud mois
-
tened with ethanol.
► Fit the sleeve back into place.