4OM-1075-002.pdf - 第84页
2. Easy T roubleshooting Described below is how to troubleshoot simple problems that can be solved by the machine operator . When the operator cannot solve a problem, he/she should get in con- tact with the supervisor (a…

*4 Description
Displayed are the contents of the error.
*5 Date and Time
Displayed are the date and time of error occurrence.
*6 Number of Pages
Displayed are the total number of pages and the number of the
current page.
Example: (3/5)
Total Number of Pages : 5
Number of Current Page : 3
*7 [Prev] and [Next] Buttons
[Prev] Button: When pressed, this button opens the previous page.
[Next] Button: When pressed, this button opens the next page.
*8 [Clear Alarm] Button
When pressed, this button cancels an alarm (sound) only.
*9 [RETURN] Button
When pressed, this button cancels an alarm (sound) and closes
the "ERROR" window. The original window resumes.
*10 [Minimize] Button
When this button is pressed, the "ERROR" window is minimized
and moves to the bottom left of the window.
Double-click the minimized window to return it to the size it was
before it was minimized.
• Reset Procedure from "ERROR" Window
(1) Take a note of "Error ID", "Item (Error Name)", and "Description" in
the "ERROR" window.
Note: When you have forgotten an error message, refer to the list
of errors in the "RECALL" window. (Operation Sequence:
[RECALL] Button (Submenu) Æ "RECALL" Window
(Submenu)).
(2) Press the [RETURN] button to resume the original window.
(3) Use the error ID as an index and refer to "3. Troubleshooting after
"ERROR" Window (Error ID)" and "4. Troubleshooting after "ER-
ROR" Window (Recognition Error ID)" for correct operations to re-
set the machine to its normal condition.
0107-001 2-5
AHB01ETRP
1.4 "ERROR" Windows
2. Easy Troubleshooting
Described below is how to troubleshoot simple problems that can be
solved by the machine operator.
When the operator cannot solve a problem, he/she should get in con-
tact with the supervisor (a person in charge of machine management).
2.1 Power Operation Impossible
Table 4B2
Symptom When the [POWER ON] button on the operation panel is pressed, the ma-
chine is not powered.
Cause (Cause 1) The [POWER ON] button on the operation panel is not held down
for more than 1 seconds.
(Cause 2) The power breaker is set to "OFF".
(Cause 3) The lamp of the [POWER ON] button on the operation panel illumi-
nates in red.
(Cause 4) The power breaker is tripped.
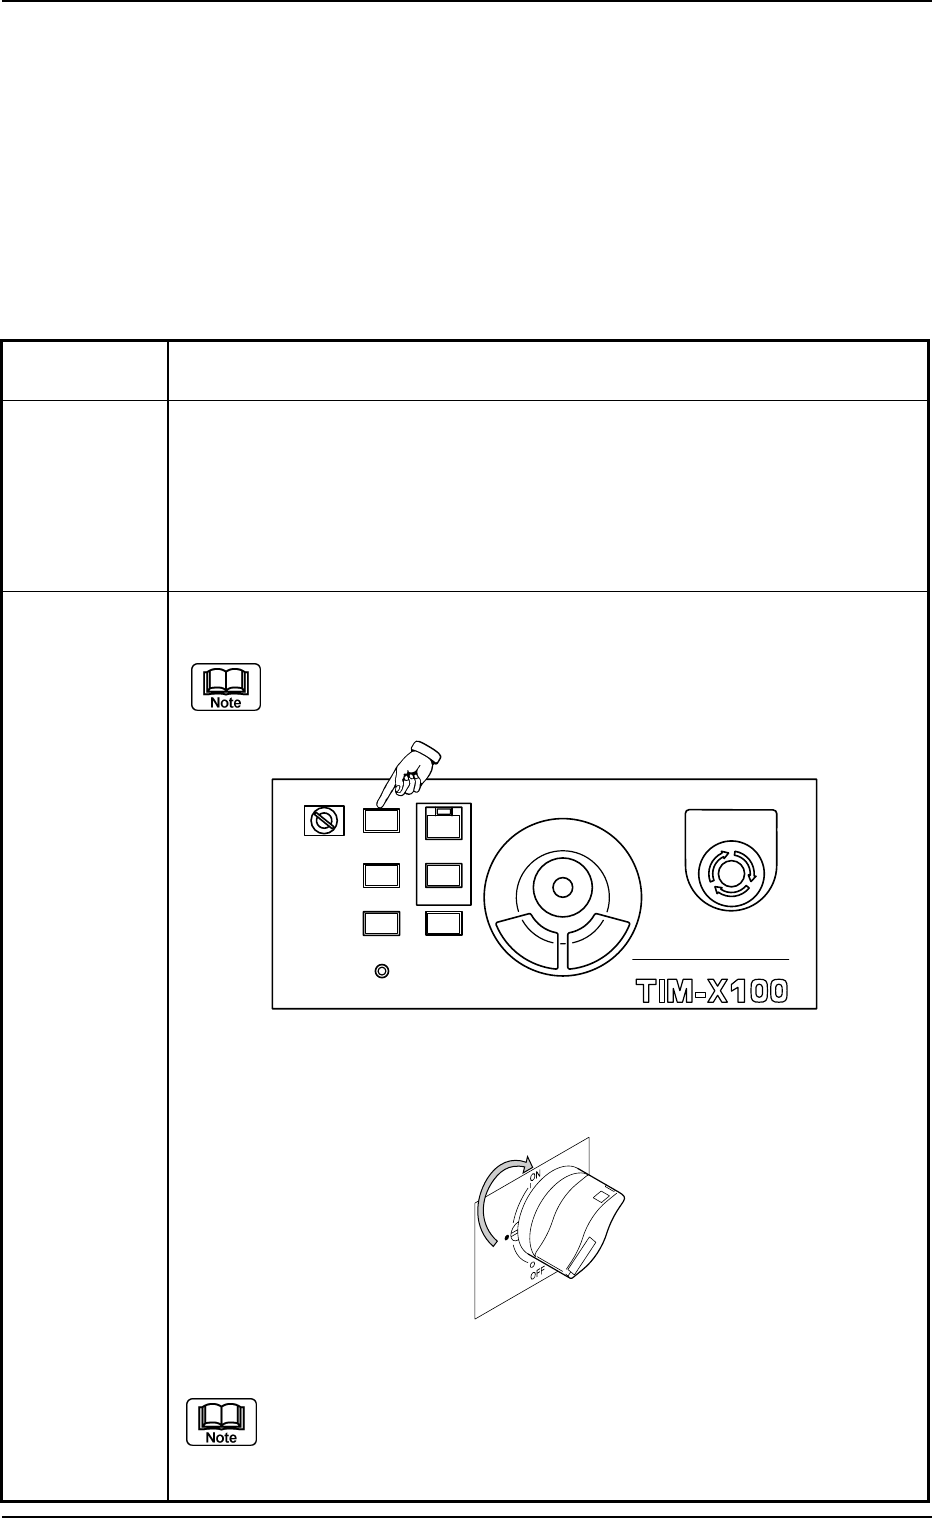
Remedy (Remedy 1) Hold down the [POWER ON] button on the front or the rear op-
eration panel for more than 1 seconds.
When power is supplied, the lamp of the [POWER ON] button illumi-
nates in yellowish green.
Fig. 4B4 Front Operation Panel
(Remedy 2) Set the power breaker to "ON".
Fig. 4B5
Turn on or off the working lamp switch beside the front or the rear
operation panel. If the working spot lamp illuminates or extin-
guishes, it indicates that the machine is powered.
2. Easy Troubleshooting
0308-004 2-6 AHB01ETRP
MULTI FUNCTIONAL MOUNTER
STOP
LOCK
OPERATION
RUN SETUP
START
ENABLE
PNL CHANGE
READY
POWER ON
EMERGENCY

(Remedy 3) • Wait until the program is started completely.
• Cancel the "Emergency Stop" mode to reset the machine to
its normal condition.
Refer to "2.3 [EMERGENCY STOP] Button Pressed" for
details.
• Close the front or the rear safety door.
• Set the main air pressure to the specified one "0.4 MPa (4.1
kgf/cm
2
)".
Refer to "1.1.1 Confirmation of Power Supply and Air Pres-
sure" in "Section 3" of "Vol. 1" for details.
(Remedy 4) Turn on the power breaker while holding down the [RESET] but-
ton (red).
2.2 Nothing Displayed on Touch Screen
Table 4B2-1
Symptom Nothing is displayed on the touch screen.
Cause (Cause 1) The screen saver function is activated.
(Cause 2) Power is not supplied from the source.
Remedy (Remedy 1) Touch a part of the touch screen. The foreground activities will
occur in any running application.
(Remedy 2) Refer to "2.1 Power Operation Impossible" for details and follow
the remedial procedure.
0206-003 2-7 AHB01ETRP
2.1 Power Operation Impossible