YesAX V3.1.2 - Software User Manual - 第102页
10 -8 General Inspection Methodolog y The Reposition Camera After Retry Failed chec kbox, if checked, would shift the camera in a pre-defined distance if the retry still fails. The camera will move to the place where the…
General Inspection Methodology 10-7
User needs to select Top camera in Edit Mark Parameters dialog to be able to check barcode.
Barcode inspection is for reading the board’s serial number from a barcode. Train a special part
and name it “BARCODE” (set its RefID to BARCODE). Then add a mark inspection box for the
part and select Bar Code as the decision algorithm.
In the Bar Code Parameters dialog the Code Type group selects the type of barcode to read.
In the Verify group you can enable/disable the code length verification and also set the code
length to verify. Code types such as Code 39 do not have a checksum mechanism, thus incorrect
parameter setup could result in a wrong data string being read. The verify code length is a self
verifying mechanism provided that the length of the serial number is known in advance. In
addition to verifying the length, it is also possible to supply a Mask string to verify the content of
the code. For example, if the code must start with AF follow by 4 digits, then a mask of
“AF????” can be used to verify the content.
The Is Half of a Barcode checkbox is for reading barcodes larger than the field of view of the
camera. See 10.2.3.2 Barcode Stitching.
The Is 2
nd
Part checkbox is for reading serial numbers composed from two separate barcodes. In
these cases, two separate Mark inspection boxes should be trained; one on each barcode. On the
second barcode box, the Is 2
nd
Part checkbox should be checked. The software will concatenate
the string from two barcodes to form the board’s or block’s serial number.
In other instances, the data string in the barcode contains more than the board serial number. For
example, in a 10 digit barcode the first 6 characters may represent the board’s assembly number
and the last 4 characters represent the board’s serial number. In this case, we can set the Serial
number reporting start parameter to 7 and length to 4 to extract just the board serial number
from the barcode data string.
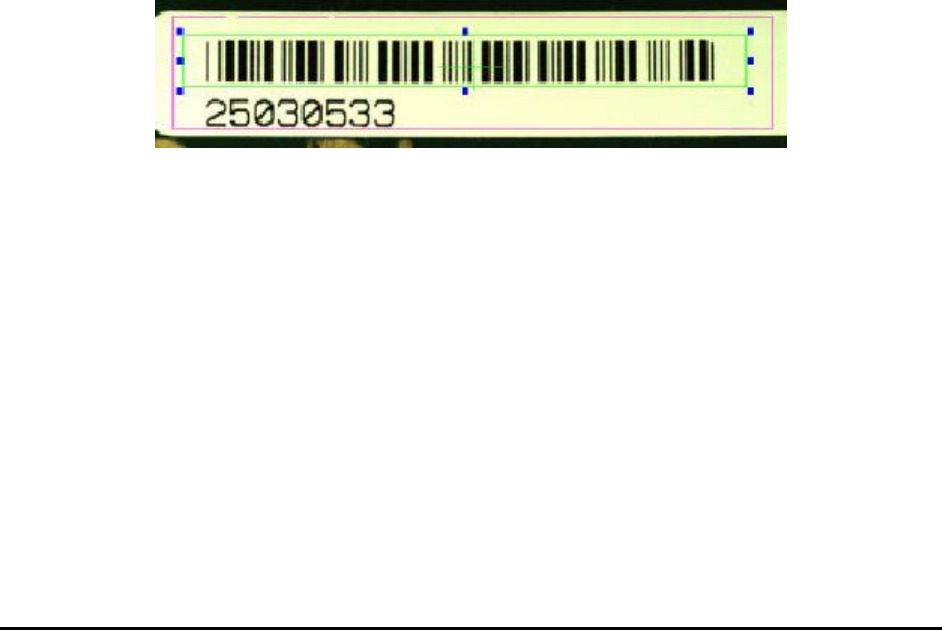
In setting up the region of interest for barcode reading it is important to leave several bar spaces
in the beginning and at the end of the barcode as shown above. The barcode algorithm needs
those white areas in the image to determine the start of the barcode. Also, in cases where the
contrast of the barcode is not high (e.g. when the background is not white) the user may need to
use a binarize preprocess for the barcode reading to function correctly. Lastly, barcode is rotation
sensitive. A barcode oriented horizontally as above needs to have a part rotation of 0 degree. A
vertically oriented barcode should have a part rotation of 90 or 270 degrees.
The Auto Skip After Retry Failed checkbox, if checked, would create the barcode result in a
specific format if the retry of barcode reading still fails. The result string will begin with
“@AutoSkip” followed by the current date and time information and end with another “@”.
10-8 General Inspection Methodology
The Reposition Camera After Retry Failed checkbox, if checked, would shift the camera in a
pre-defined distance if the retry still fails. The camera will move to the place where the barcode
string can be seen so that the user can type the barcode in the corresponding field. The shifting
distance can be set in YesAX.ini file, under Barcode session. The names are “RePosDx” and
“RePosDy”, respectively. The unit is in micron.
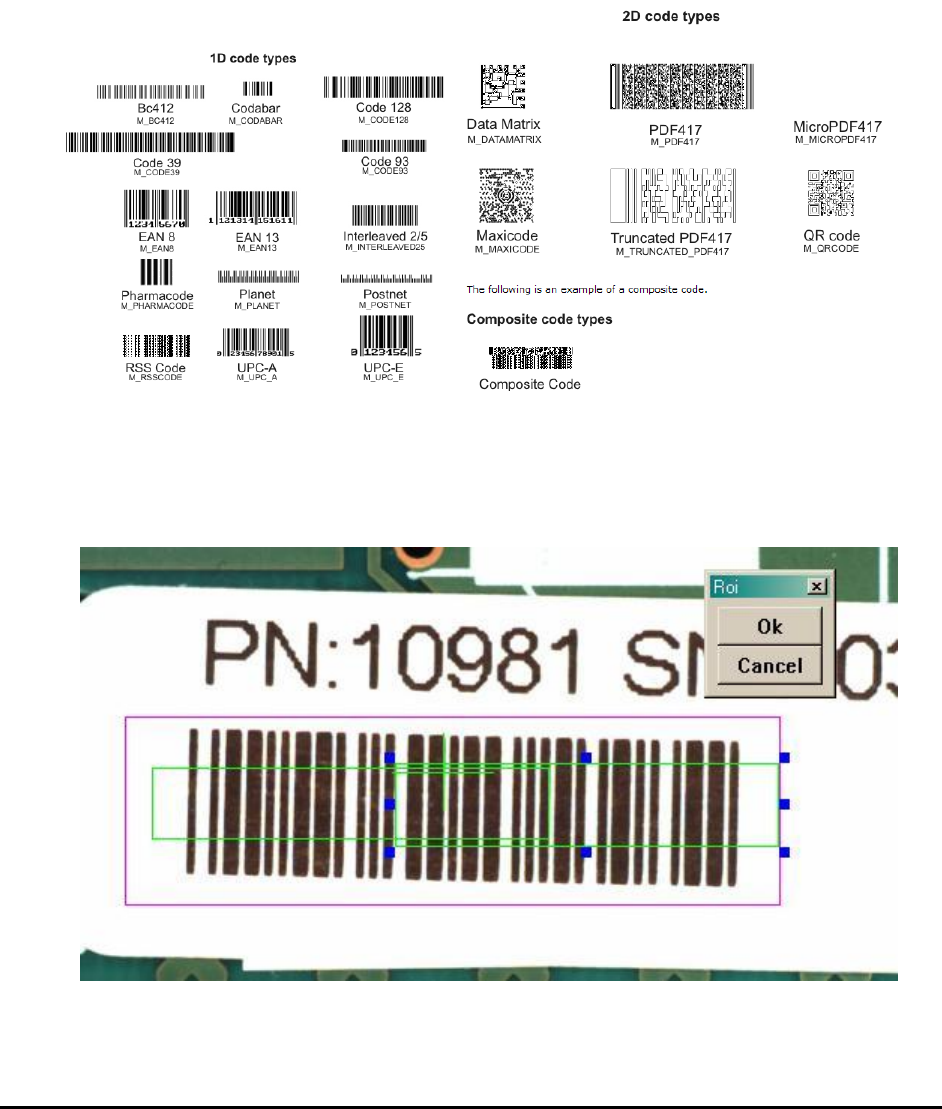
10.2.3.1 Barcode Types
Below are some examples of the supported code types.
10.2.3.2 Barcode Stitching
YesAX software has the ability to read barcodes larger than the field of view of the top camera.
The software stitches two images together before performing the barcode read operation. To
utilize the feature user should train two marking boxes each for half of the barcode.
General Inspection Methodology 10-9
The two boxes must overlap to allow the stitching operation to work. Both marking should have
Decision algorithm set to Barcode. In the Bar Code Parameters dialog, the Is half of a barcode
checkbox needs to be checked.
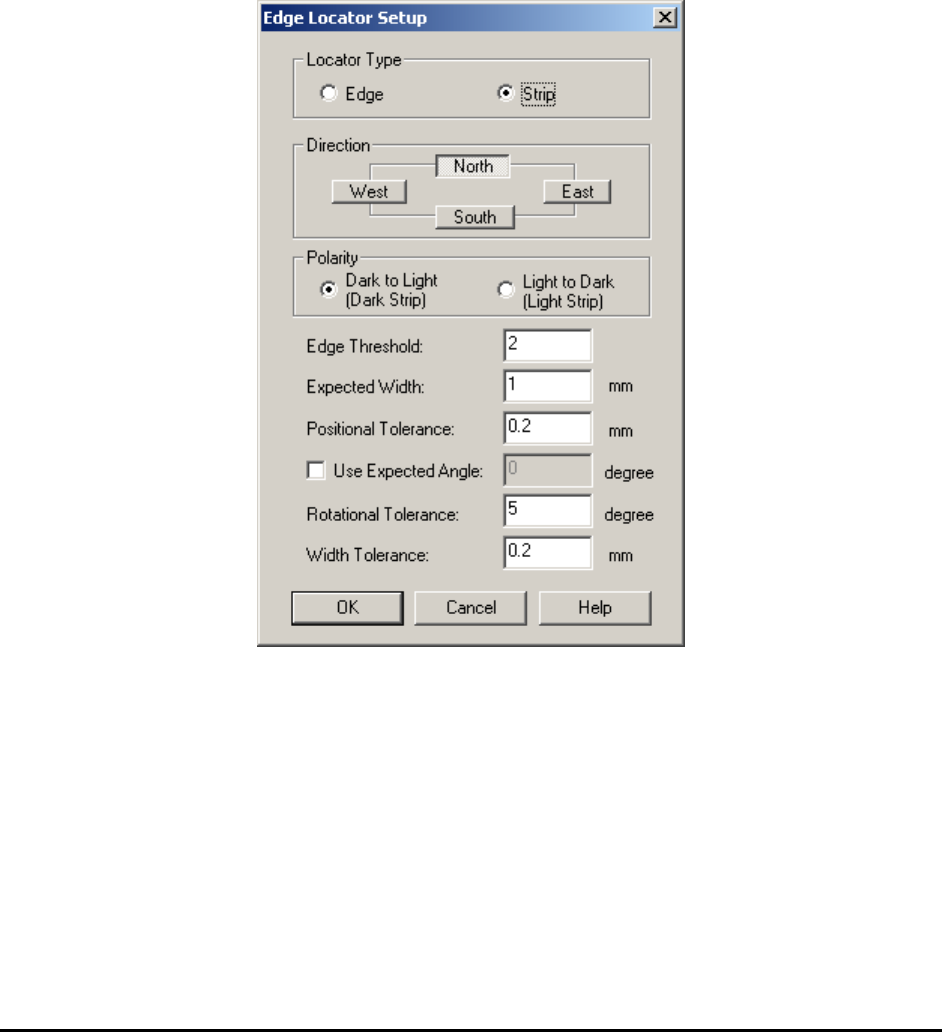
10.2.4 Edge Locator Parameters
Another decision algorithm for mark is Edge Locator. The edge locator locates edges’ position
and angle down to ¼ pixel resolution.
Available only when Edge Locator is selected as the decision algorithm menu item.
Select Edge Locator Params.. from the Mark pop-up menu to open the Edge Locator Setup
dialog.
The Locator Type group selects whether the Edge Locator looks for an edge or strip. A strip is
defined as a pair of edges of the opposite polarity.
The Direction parameter selects the direction for the edge or strip. The West and East directions
select vertical edges and the North and South director are for horizontal edges. The Direction
must be set before Polarity can be set. The search operation should always start from the outside
moving toward the center. For example if the direction is west, search operation goes from left to
right. If direction is East search operation goes from right to left.
The Polarity check box specifies the polarity. For an Edge locator the polarity could be set to
either from Dark to Light or from Light to Dark. For a Strip locator the polarity could be set to
either a Dark Strip or a Light Strip.