YesAX V3.1.2 - Software User Manual - 第219页
Panelized Board Inspection 16 -5 16.2 Block Array The copy and paste procedure described in the previous section works well for large blocks, but for boards with large numbers of small panels, it may be too time consumin…
16-4 Panelized Board Inspection
16.1.5 Update Block
The Update Block command propagates any changes made to the master block through the rest
of the blocks.
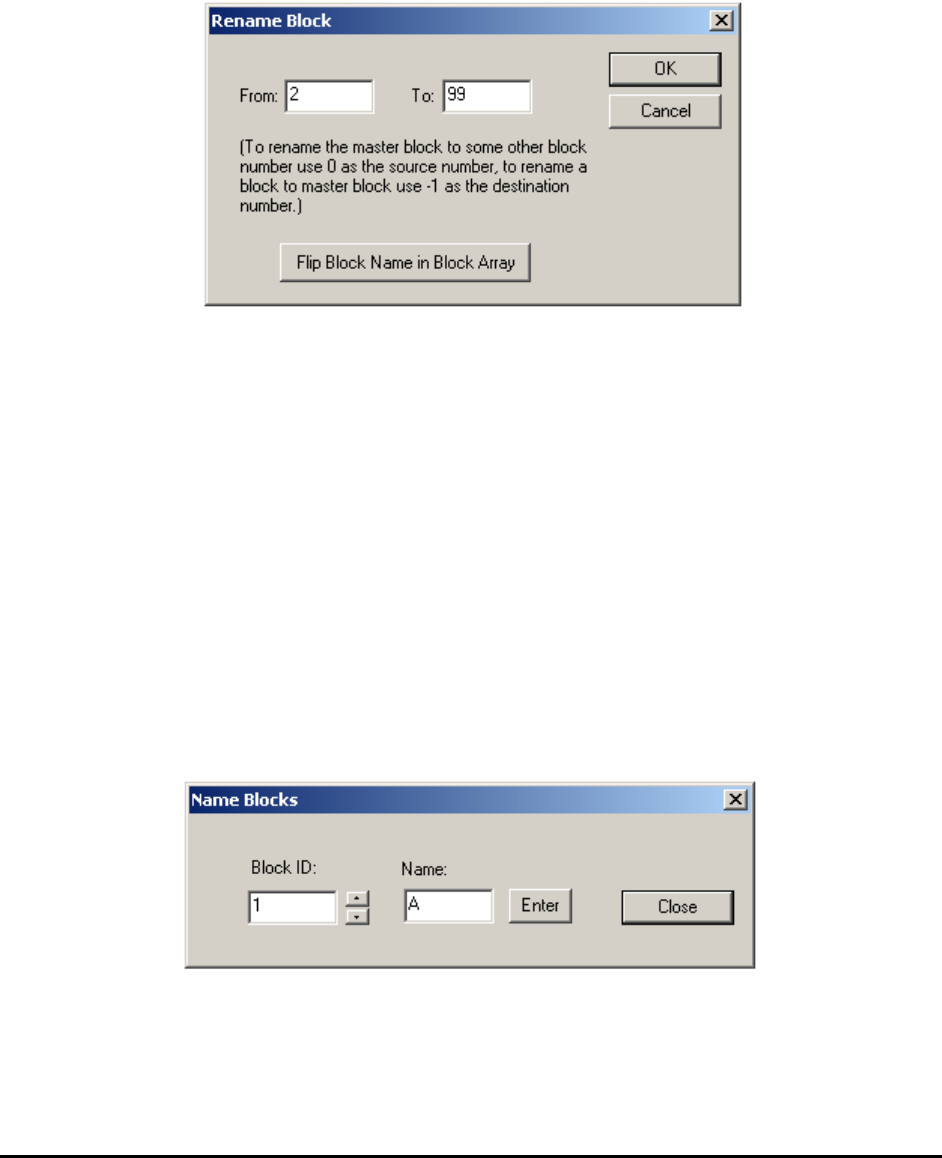
16.1.6 Rename Block
The Rename Block function renames the block ID.
If you need to swap the position of block 2 and 3, you can:
1. Rename block 2 to 99.
2. Rename block 3 to 2.
3. Rename block 99 to 3.
The Flip Block Name in Block Array function renames all the blocks on the selected side of the
recipe. You can rename the block IDs for the bottom side of a board to match that of the top side.
16.1.7 Move Block
The Move Block function moves one block at a time to fine adjust the positions.
16.1.8 Name Block
The Name Block function assigns alphanumerical names to each block; rather than block 1,2,3,4
you could have block names such as A,B,C,D. The block name affects the SPC data log names.
The intended usage for this function is to allow you to rename the blocks to match their specific
naming convention.
16.1.9 Delete Block
The Delete Block function can delete any region on the board. This function operates on either
the Map View or Video View, depending on which is currently in the active state.
Panelized Board Inspection 16-5
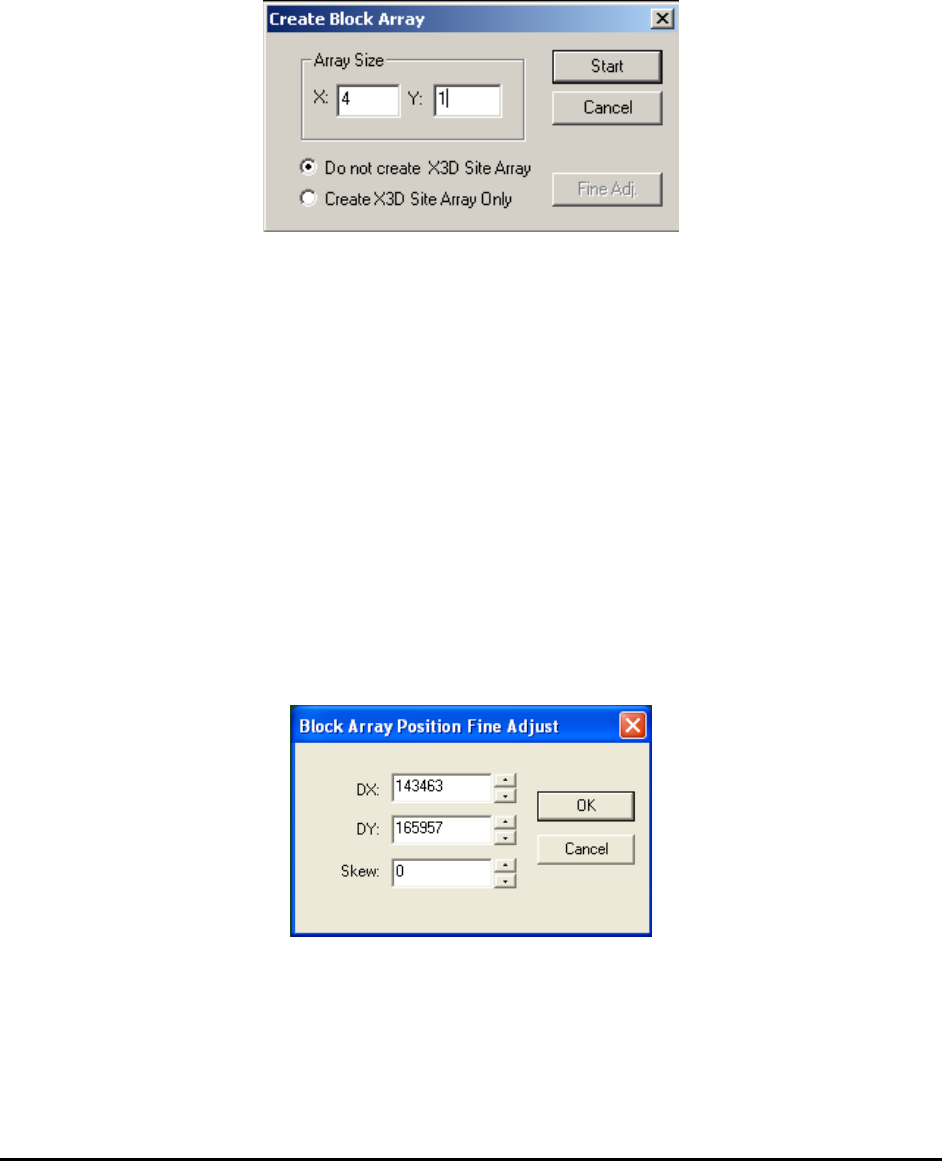
16.2 Block Array
The copy and paste procedure described in the previous section works well for large blocks, but
for boards with large numbers of small panels, it may be too time consuming to carry out. For a
board with a 6 by 6 array of small panels, the Block Array feature is ideal for creating the
inspection recipe. To use the block array feature, first copy the block, then select Create Block
Array from the Edit menu.
Enter the array size and press OK. The software prompts the user to move to the “reference
position” on the bottom left block. After accepting the position, the software prompts to move to
the same position on the bottom right block. After accepting the bottom right block position, the
software prompts to move to the same position on the top left block. With the three positions, the
software creates the X and Y offset for the block and creates the 36 blocks in a 6 by 6 array.
For X2 AXI system or any 2D inspection, select the Do not create X3D Site Array option so
when you copy the block, only components are copied.
For X3 AXI system and 3D inspection, there are two choices. When the Do not create X3D Site
Array option is selected, only components on the master block are copied to other blocks. When
the Create X3D Site Array Only option is selected, only 3D sites are copied to other blocks. So
for a 3D inspection which contains 3D sites, the create block array procedure should be done
twice, to make sure both components and 3D sites are copied to other blocks.
After the block array is created, you can fine-tune the positions of the X, Y and Skew offset by
pressing the Find Adj button on the Create Block Array dialog. The Block Array Position Fine
Adjust dialog displays.
You can also use the Walk Through process (see Section 14.3) to fine-tune the position for each
block.
16-6 Panelized Board Inspection
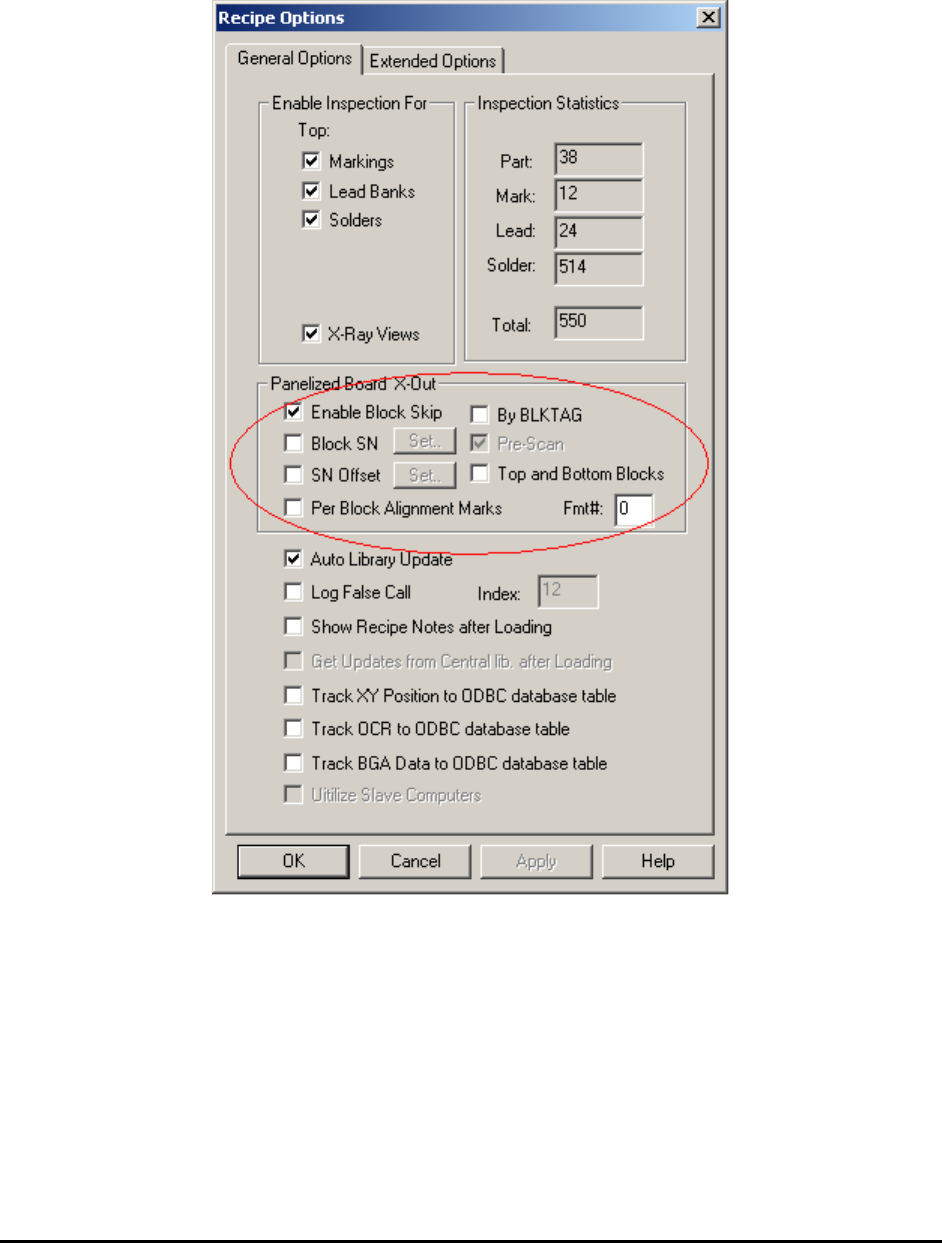
16.3 BLKTAG and X-out
One or more panels may be unpopulated (X Out) on a panelized board. Go to Vision>Recipe
Option from the Main Menu
The Enable Block Skip option enables the system to skip the unpopulated areas.. With the By
BLKTAG disabled you can interactively select the block or blocks needed to be skipped from
the map view every time a new board is loaded. If By BLKTAG is enabled, the system searches
for a marker for the block. If the marker is there, the block is inspected. A block marker can be
trained by training a part with a Ref.ID of xx-BLKTAG. For example, the block label for block
1 would be 01-BLKTAG. To skip a block, place a label to cover its block marker.