YesAX V3.1.2 - Software User Manual - 第238页
在线预览 YesAX V3.1.2 - Software User Manual PDF 文档。
User Administration 20-1
20 - User Administration
To provide inspection traceability, the software tracks all users of the software. The login user
name is on every defect report and SPC data record. A user can have one or more of the 5 types
of privileges: Operate, Build, QA, Program and Admin. The first 4 types of privileges
correspond to the 4 activity modes of the software. For example, users with Operate privileges
can operate the machine in Operator mode, users with Program privileges can create and
modify inspection recipes, etc. and the Admin privilege is for users who are given the right to
administer other users.
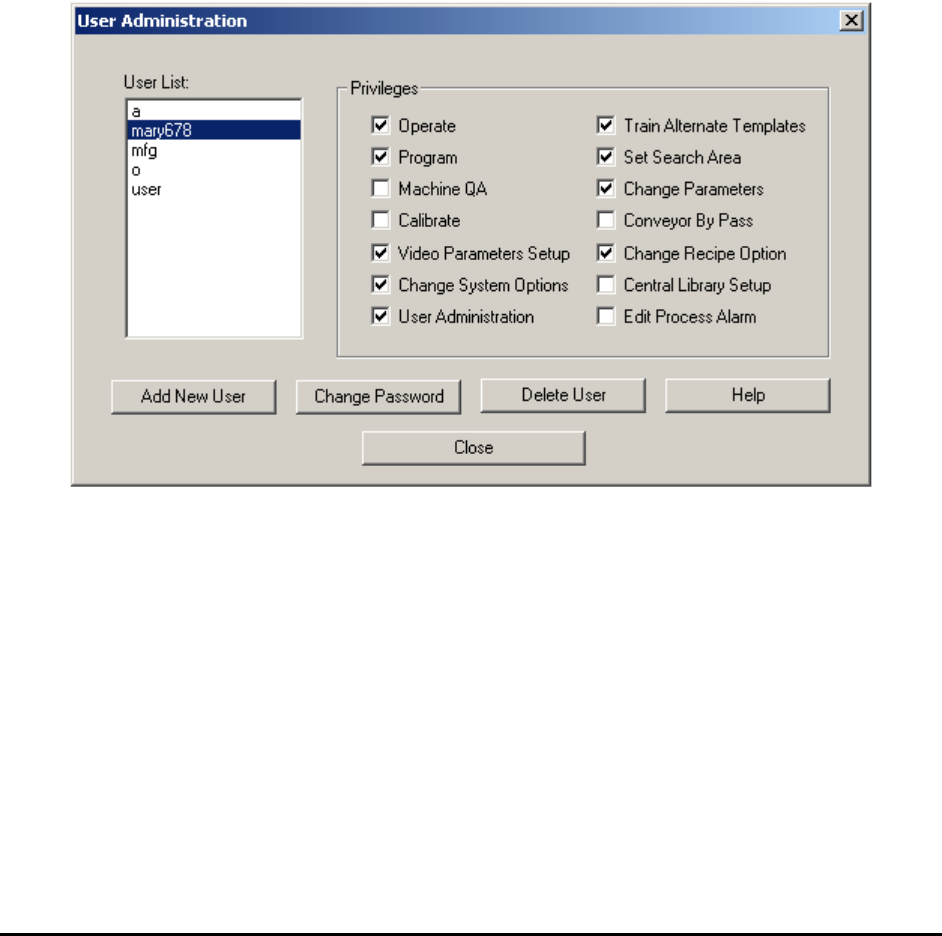
Admin users can launch the User Administration dialog (shown below) from the Switch mode
dialog. A valid user has a name and a password. A valid user name contains between 1 and 15
alphanumeric characters without spaces. A valid password contains between 0 and 15
alphanumeric characters, therefore a blank password is allowed.
Amongst the 4 activity modes, Operator and Recipe Programmer mode can have additional
selectable privileges. The following privileges can be added to operator mode: Train Alternate
Templates, Set Search Area, Change Parameters, Conveyor By Pass and Change Recipe
Options. The following privileges can be added to the Programmer mode: Video Parameters
Setup, Change System Options, Central Library Setup and Edit Process Alarm.
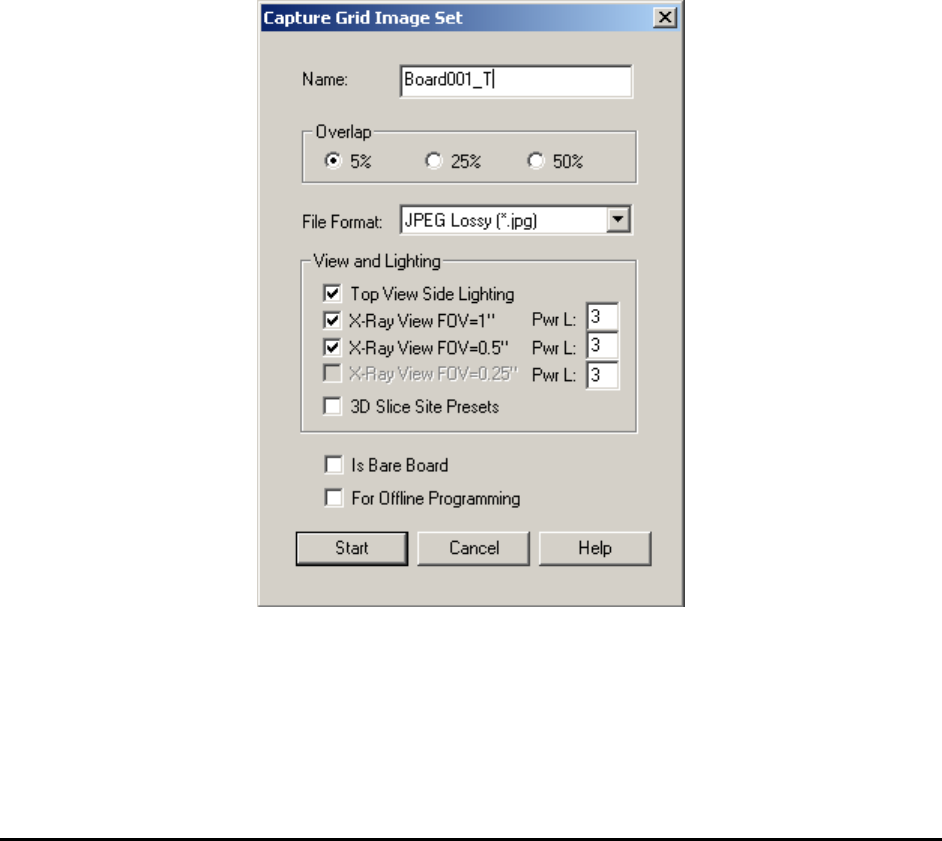
Image Set and Image Archive 21-1
21 - Image Set and Image Archive
The Image Set is a collection of images captured from one particular board. It is like an
electronic copy of the board. The software can run an inspection on the Image Set of the board
as if it were running a live mode inspection. The Image Archive is a collection of Image Sets
organized according to the inspection recipe. Offline programming and offline defect review
features are made possible by using Image Sets.
YesAX supports five image formats for an Image Set: TIFF, bitmap, JPEG, JPEG 2000 and Raw
Bayer. An Image Set can be captured in 2 ways; grid or inspection paths. The Grid Image Set is
captured by moving the camera in a grid pattern over the board. Inspection path Image Set is
captured during board inspection by selecting one of the Image Archive options in the Run
Inspection dialog. Comparatively, the Grid Image set captures more information of the board and
it can be captured before the creation of the inspection recipe. The disadvantage of the Grid
Image Set is that it is larger and takes more time to capture.
To capture the Grid Image Set, select Image Set>Capture Image Set from the File menu. The
Capture Grid Image Set dialog displays.
Select an overlap value, image file format, camera view and lighting for the Image Set to be
captured. For X3 AXI systems, if there are 3D sites defined for the current recipe, you can also
enable the 3D Slice Site Presets option and capture a full image set for all 3D sites.
When an inspection recipe is loaded, its associated Image Set is listed in the Image Archive
window of the List View.