YesAX V3.1.2 - Software User Manual - 第265页
Calibration and Verification 25 -5 The Self Test X-ray dialog of X2 AXI system lists a total of 9 tests. On the left is the action button for the test. Clicking it starts the automated test procedure. The middle box show…

25-4 Calibration and Verification
25.9 Calibrate X-ray
The X2/X3 AXI system has separate calibration and verification functions to calibrate and verify
the functionalities of the X-ray imaging system. An additional calibration board is needed to
complete the tasks.
25.9.1 Align Source to II
This step aligns the X-ray source mount on the Z-axis with the X-ray Image Sensor (For X2, it is
Image Intensifier (II). For X3, it is a flat panel detector). It ensures the center of the view does
not shift when the X-ray source moves up and down on the Z axis while doing a zooming
operation.
The alignment procedure is guided step by step by message prompt dialogs. The Z axis is
mounted with 3 points in contact with the base. There are push-pull mechanisms on the two front
screws; adjusting them can achieve proper alignment.
25.9.2 Calibrate Offset
This step calibrates the offset from the vision camera to the X-ray camera. Because the offset
could be slightly different at different Z levels, this step only serves to achieve a rough offset. To
use the Self-Test fine adjust feature, go to the Details page for each test on the Self-Test X-ray
dialog and select the Adjust button to finish the calibration of the offset.
25.9.3 Calibrate Uniformity
Since X-ray is a point source, the image intensity may not be even across the entire field of view.
This step tries to calibrate out those variations.
25.9.4 Run Self-Test X-ray
This is the same as the vision calibration. In X-ray calibration the software provides a
comprehensive set of self-testing features that automatically verify all essential calibration
parameters.

Calibration and Verification 25-5
The Self Test X-ray dialog of X2 AXI system lists a total of 9 tests. On the left is the action
button for the test. Clicking it starts the automated test procedure. The middle box shows the
status of the test. It can be UNTEST, PASS or FAIL. The right buttons, when clicked, launch
detailed dialogs that list the test results. In many cases, they also allow you to tweak the
parameters to bring them back within specification. For X3 AXI system, Self-Test X-ray dialog
is actually a little bit different from that of X2 AXI system.
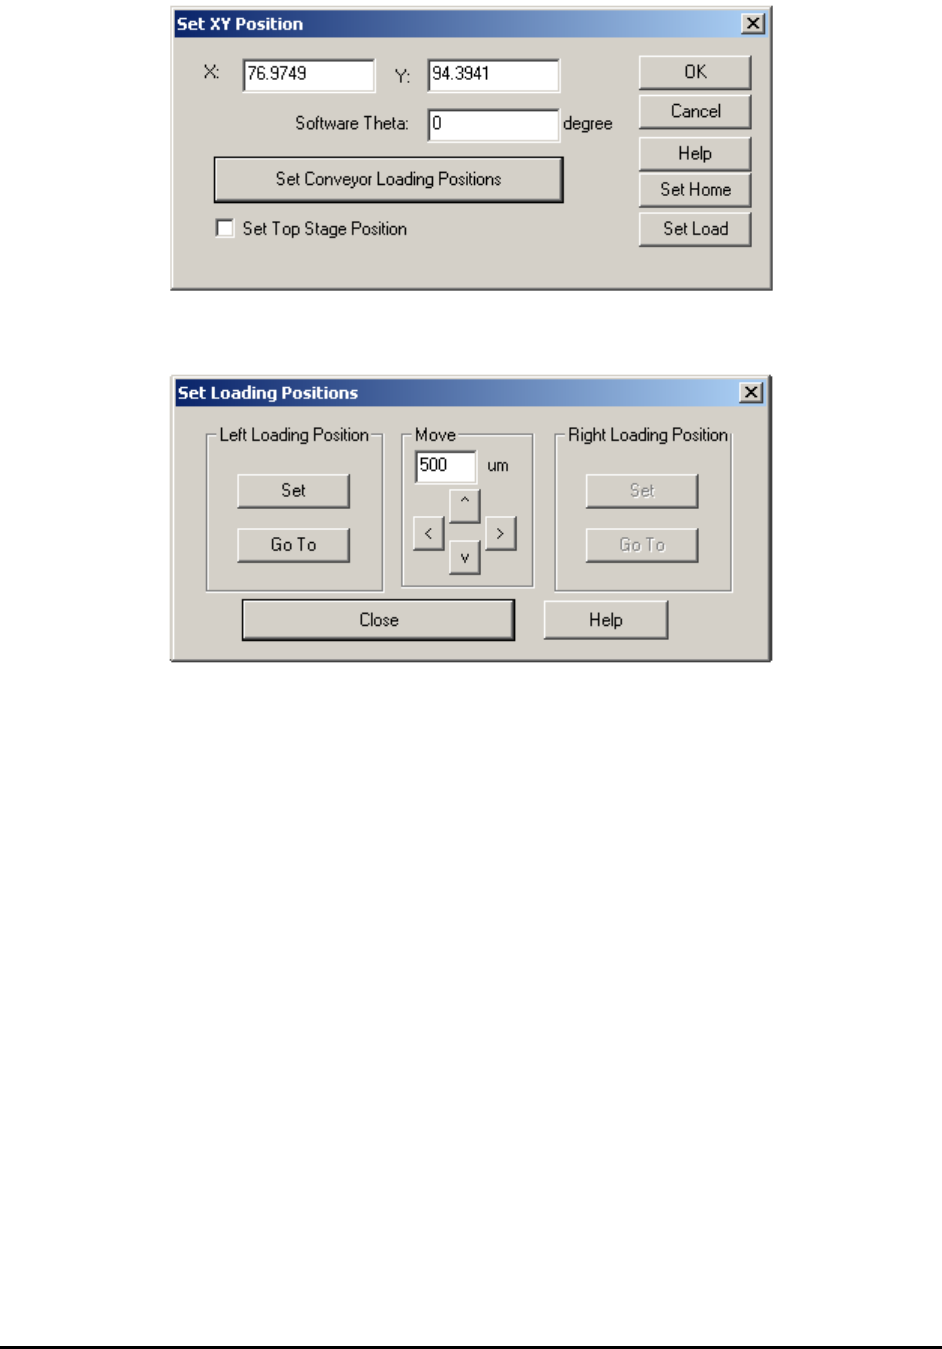
25.9.5 Align Conveyor Loading Positions
The X2/X3 AXI system has the conveyor carried by the XY stage. Set the left and right loading
position for the conveyor to match the position of the shutter doors and the position of the
incoming and outgoing conveyors. Select Set Position from the Test menu to launch the Set XY
Position dialog. Press the Set Conveyor Loading Positions button. The X3 AXI system also has
the X-ray detector carried by the top XY stage. To set top XY stage position, enable the Set Top
Stage Position checkbox. If the Set Top Stage Position option is unchecked, this dialog will
work for the conveyor XT stage only.
25-6 Calibration and Verification
Press the Set Load button to launch the Set Loading Positions dialog. The Set Loading Positions
dialog allows you to verify and set the loading positions.
The Set button sets the current position as the corresponding loading position. The arrow buttons
in the middle jog the XY stage in small increments to facilitate fine adjustments.