YesAX V3.1.2 - Software User Manual - 第51页
Inspection and De fect Revie w Step by S tep 5-5 With this option selected the system will not save any image s. Save Only Images with Failed Parts With this option selected the system will only save images of failed par…
5-4 Inspection and Defect Review Step by Step
This is the appropriate selection when using a hand held barcode reader since it generates an
output via the keyboard interface. If the serial number of the board follows certain pattern
user can setup a SN Mask to verify that pattern. For example if the serial number must
always starts with AF and follows by 4 digits. Then a mask of “AF????” can be use to ensure
correct number is entered.
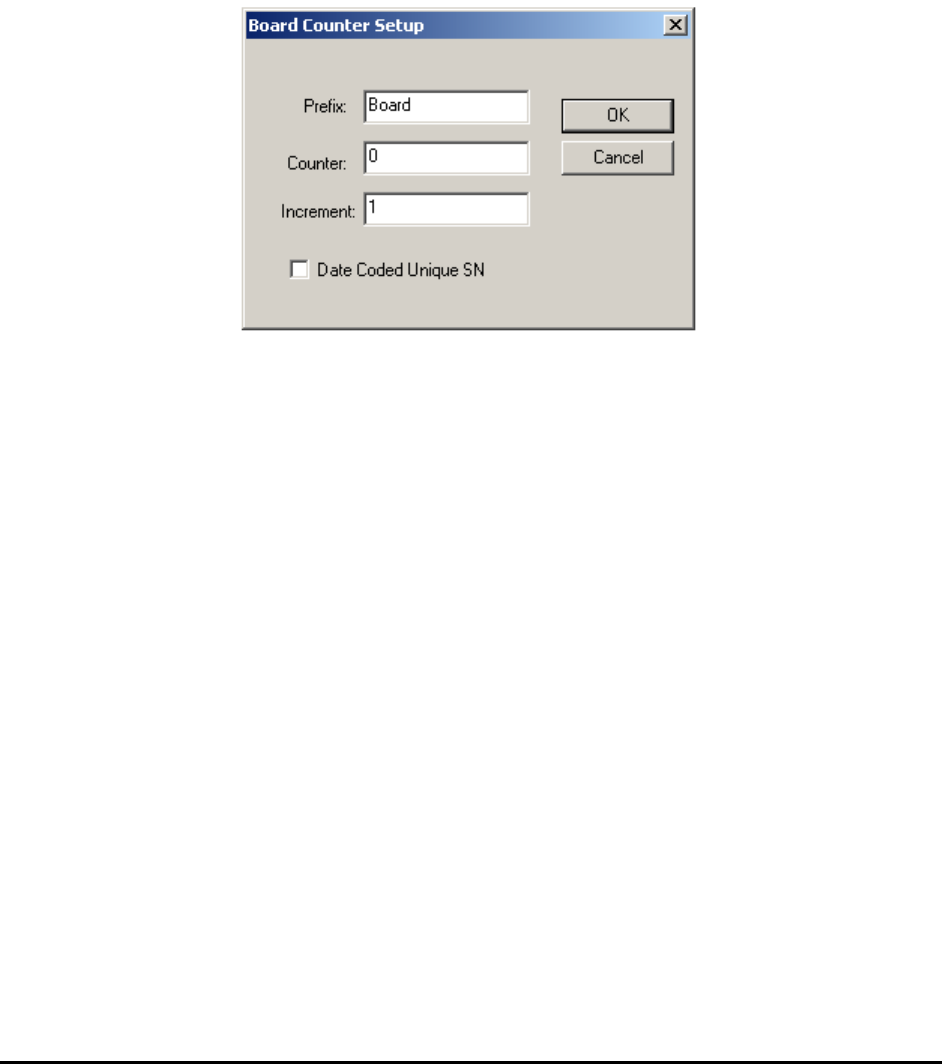
Board S/N Auto Counter
The software will automatically generate a serial number for the board. You can instruct the
software to compose the serial number by pressing the Set Button. The Set Button brings up
the Board Counter Setup dialog.
The software will generate the next serial number: Board001
The Data Coded Unique SN checkbox enables a feature for the software to generate serial
number base on the date. The number generated will be unique and non-repeating for all the
boards inspected on the AXI machine. If there are more than one AXI machine in the same
facility user should use the Prefix field to identify individual machine.
Camera Barcode Read
With this option selected the system will use one of the cameras to read the barcode from the
board. The recipe needs to have the part with Reference ID “BARCODE” in the part list.
Bottom Barcode Reader
This selection will enable if the optional bottom side barcode reader is installed. When this
item is selected the software will get the board’s SN using the bottom barcode reader. Refer
to section 18.3 for this optional accessory.
Upstream Barcode Reader
This option can be used when the upstream conveyor has a barcode scanner attached to it.
The board SN will be scanned before entering the machine. This option is disabled unless the
upstream barcode reader option is enabled and parameters are setup in the system option
dialog.
In the Image Archive group there are 3 radio buttons and 1 checkbox.
Do Not Save Any Images

Inspection and Defect Review Step by Step 5-5
With this option selected the system will not save any images.
Save Only Images with Failed Parts
With this option selected the system will only save images of failed parts.
Create IS Board for Passing Boards
If enabled, this feature will create an IS
Save All Images
With this option selected the system will save all images. For offline defect review, save at
least the defect images.
For offline defect review, save at least the defect images.
In the Reporting group there are six checkboxes and one button.
Print Board Report
With this option selected the system will print a board report without previewing.
Preview Board Report
With this option selected the system will preview a board report onscreen before printing.
Restart
This option is only available when the Preview Board Report option is selected. If enabled,
this option allows the user to optionally restart the inspection process while previewing
defects on screen.
Electronic Board Report
With this option selected the system will create defect reports in JPEG format in the recipe’s
report folder.
Create Individual Defect Images
With this option selected the system will create images for each individual defects in the
recipe’s report folder.
SPC Data Log
With this option selected the system will create a summary report.
Enter WO and Others Button
Use to update the SPC data record with a work order number and two user definable fields.
Press the Enter WO and Others button to open the Enter Work Order dialog box.
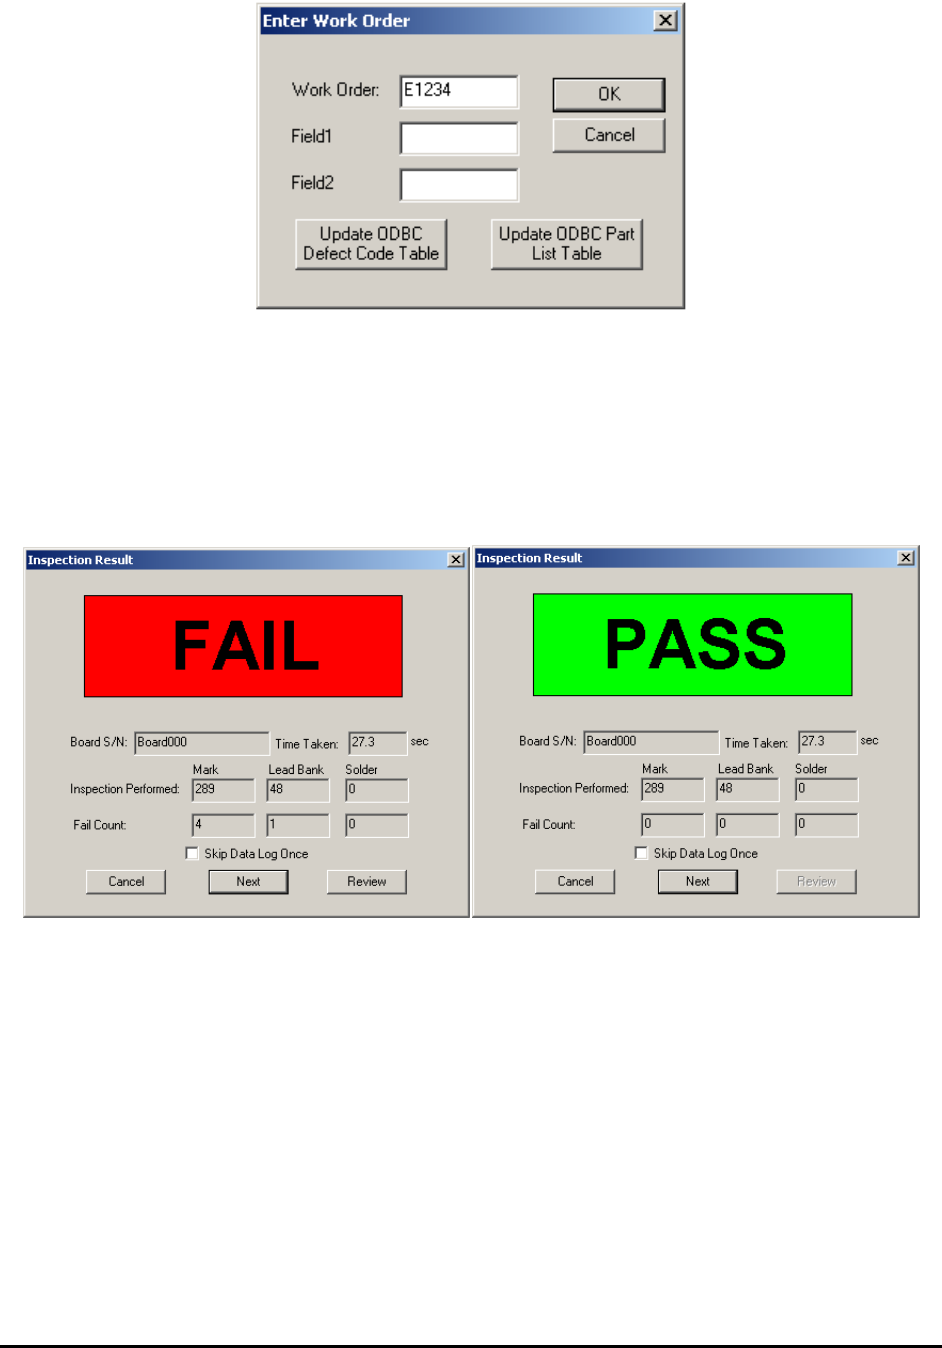
5-6 Inspection and Defect Review Step by Step
The Update ODBC Defect Code Table button when pressed will update the DefectCode table
in the ODBC database using on the information from the defect.ini file. The Update ODBC
Part List Table button creates a PartList table for the current recipe in the database.
Pressing the Ok button on the Run Inspection dialog will start the inspection process. The
process involves locating the fiducials and inspecting all the parts based on the recipe. At the end
of the inspection the Inspection Result dialog appears. Based on the inspection results the dialog
will show “Fail” or “Pass”
5.3 Step3: Review the Defect
Defect review can be done online or offline. The online review process starts with pressing the
Review button in the Inspection Result dialog. The machine steps through each defect and
displays the Review Failed Parts dialog as shown below.