00191025-01.pdf - 第443页
9 Maintenance SIPLACE 80S /F/G User’s Manual 9.6 IC Head (SIPLACE 80F) Edition 07/97 from Software Version SR.010.xx 9 - 84 Fig. 9.6.9 Maintaining the nozzles Key to Fig. 9.6.9 (The item numbers of t he nozzles and diaph…
SIPLACE 80S/F/G User’s Manual 9 Maintenance
Edition 07/97 from Software Version SR.010.xx 9.6 IC Head (SIPLACE 80F)
9 - 83
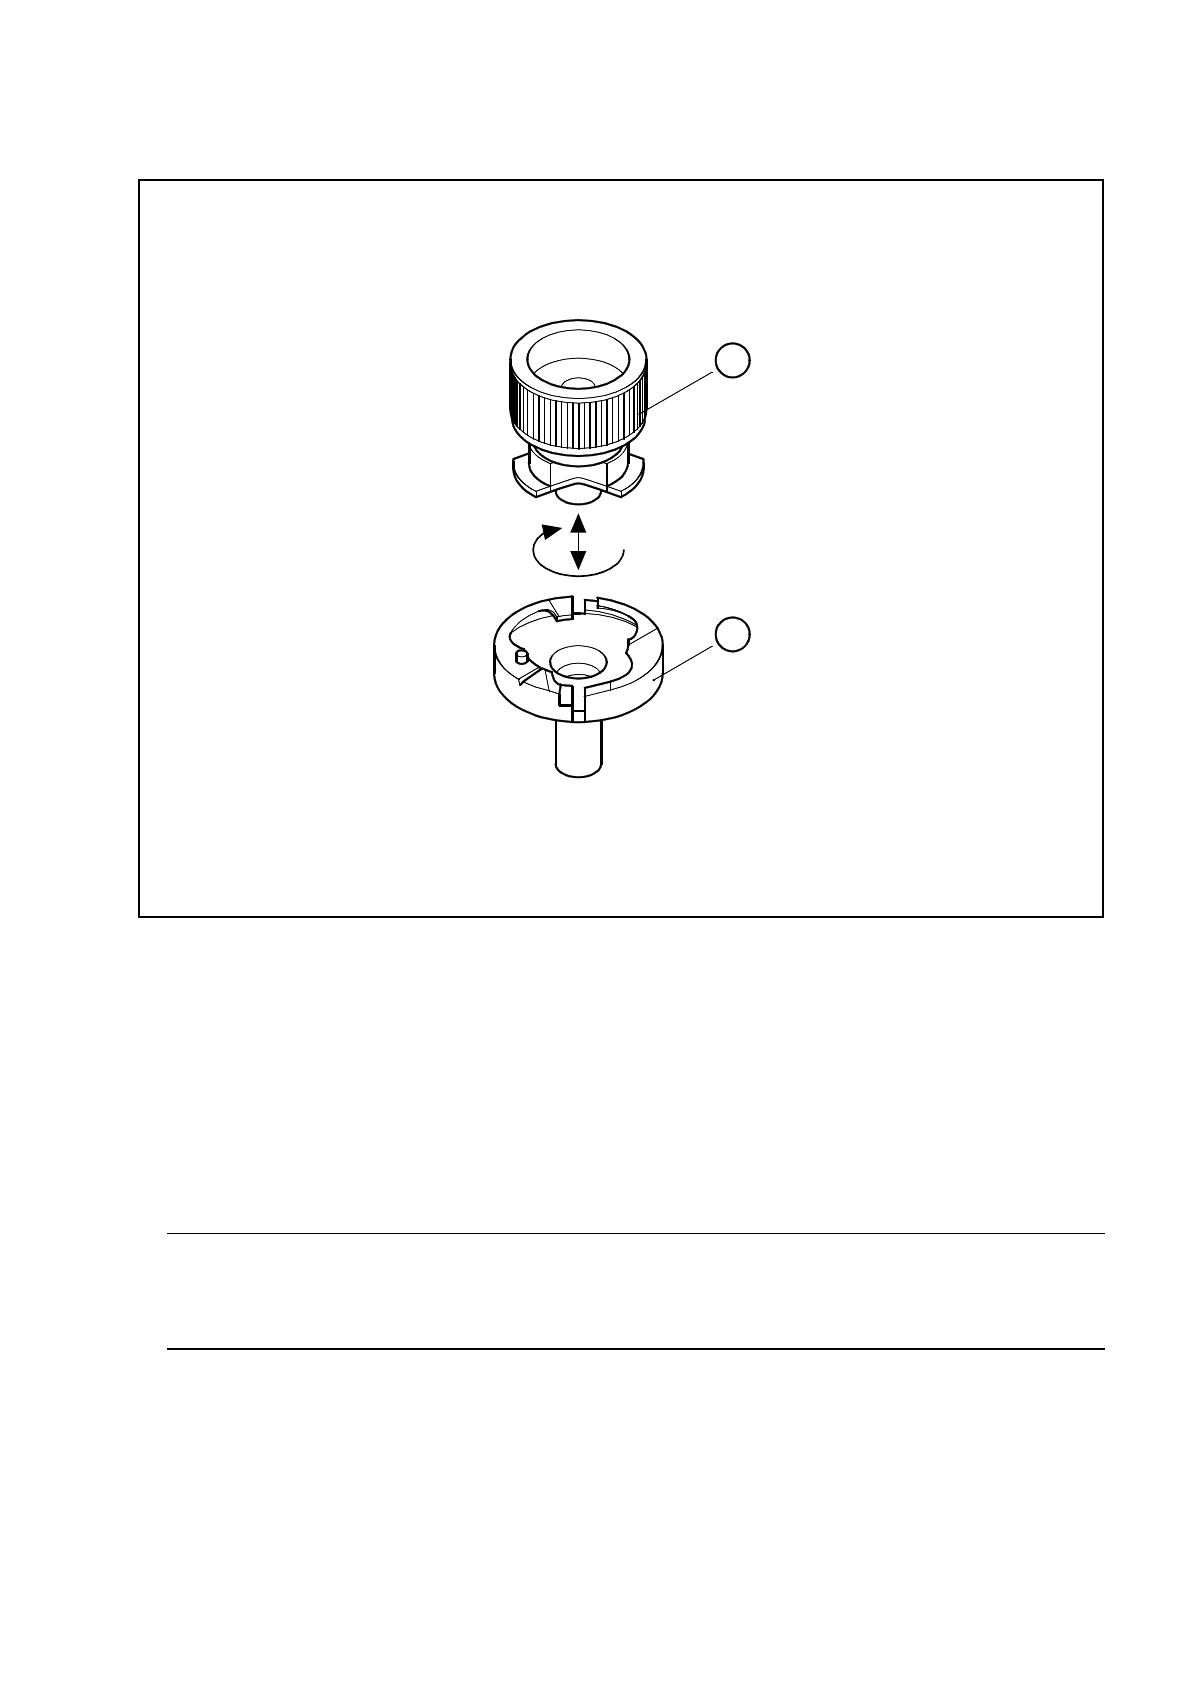
Fig. 9.6.8 Removing the nozzle from the nozzle changer
9.6.6.2 Checking and Maintaining the Nozzles
●
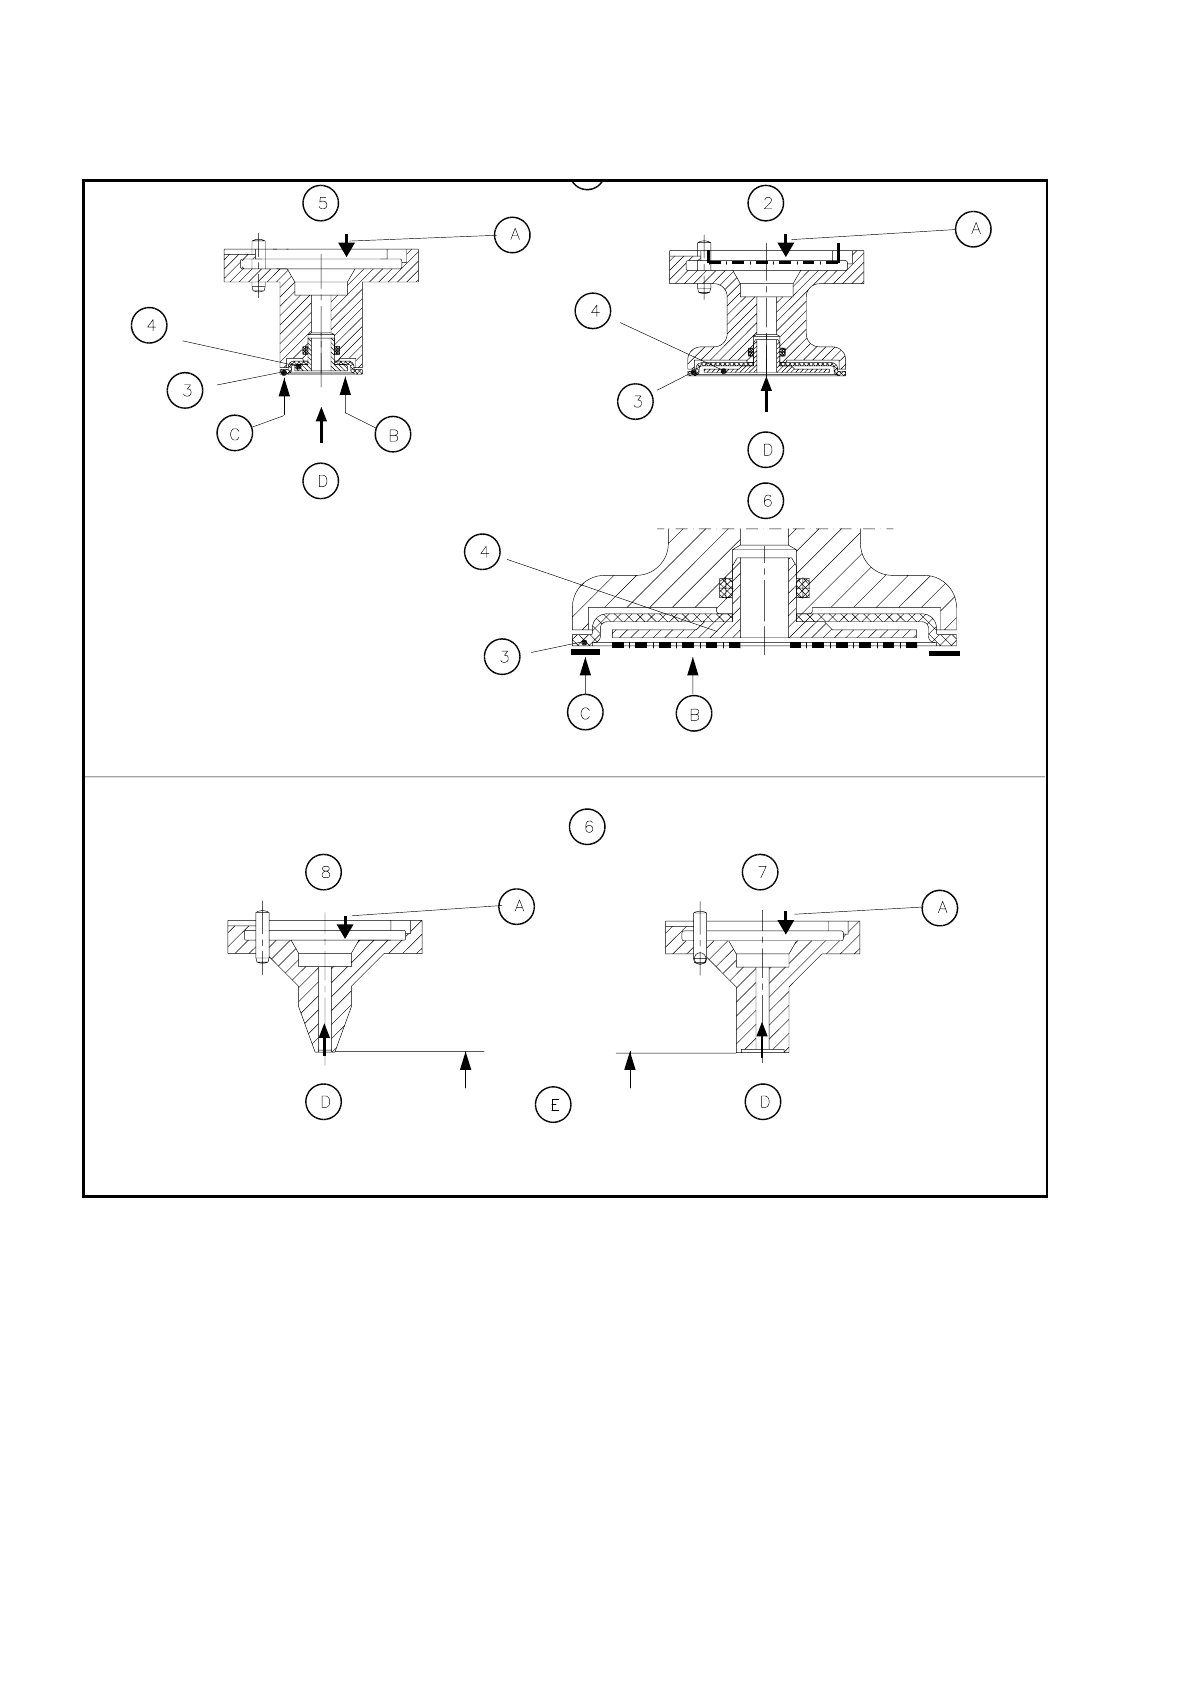
Carry out maintenance of the nozzles as shown in Fig. 9.6.9.
●
Check the nozzles and the diaphragms and replace any damaged diaphragm.
Please refer to Fig. 9.6.10 for the procedure for replacing diaphragms. The item numbers for the dia-
phragms are given in Tab. 9.6.1, Page 87. For maintenance of the diaphragms you will require talcum
powder (see Tab. 9.2.9, Page 14).
NOTE
Rubbing over with talcum prevents components sticking to the diaphragm after being set down on the
board. The diaphragm must not come into contact with spirit or alcohol.
●
Check the suction faces of the nozzles without diaphragm: if you detect damage use the corresponding
new nozzles. For the item numbers, see Fig. 9.6.11, Page 9 - 87.
1
2
9 Maintenance SIPLACE 80S/F/G User’s Manual
9.6 IC Head (SIPLACE 80F) Edition 07/97 from Software Version SR.010.xx
9 - 84
Fig. 9.6.9 Maintaining the nozzles
Key to
Fig. 9.6.9
(The item numbers of the nozzles and diaphragms will be found in Tab. 9.6.1, Page 87.)
1 Maintenance of the nozzles with diaphragm
2 Nozzle, type 419
3 Diaphragm
4 Sleeve
5 Nozzle, type 418
6 Enlarged view
7 Maintenance of the nozzles without diaphragm
8 Nozzle, type 417
9 Nozzle, type 416
SIPLACE 80S/F/G User’s Manual 9 Maintenance
Edition 07/97 from Software Version SR.010.xx 9.6 IC Head (SIPLACE 80F)
9 - 85
Sequence of work in
Fig. 9.6.9
A Clean the annular surfaces all over with a dry brush.
B Dry clean the annular surface of the sleeve.
C Rub the annular surface of the diaphragm sparingly with talcum.
D Clean the suction hole.
E Check the suction surface.
9.6.6.3 Replacing the Diaphragm of the Nozzles
●
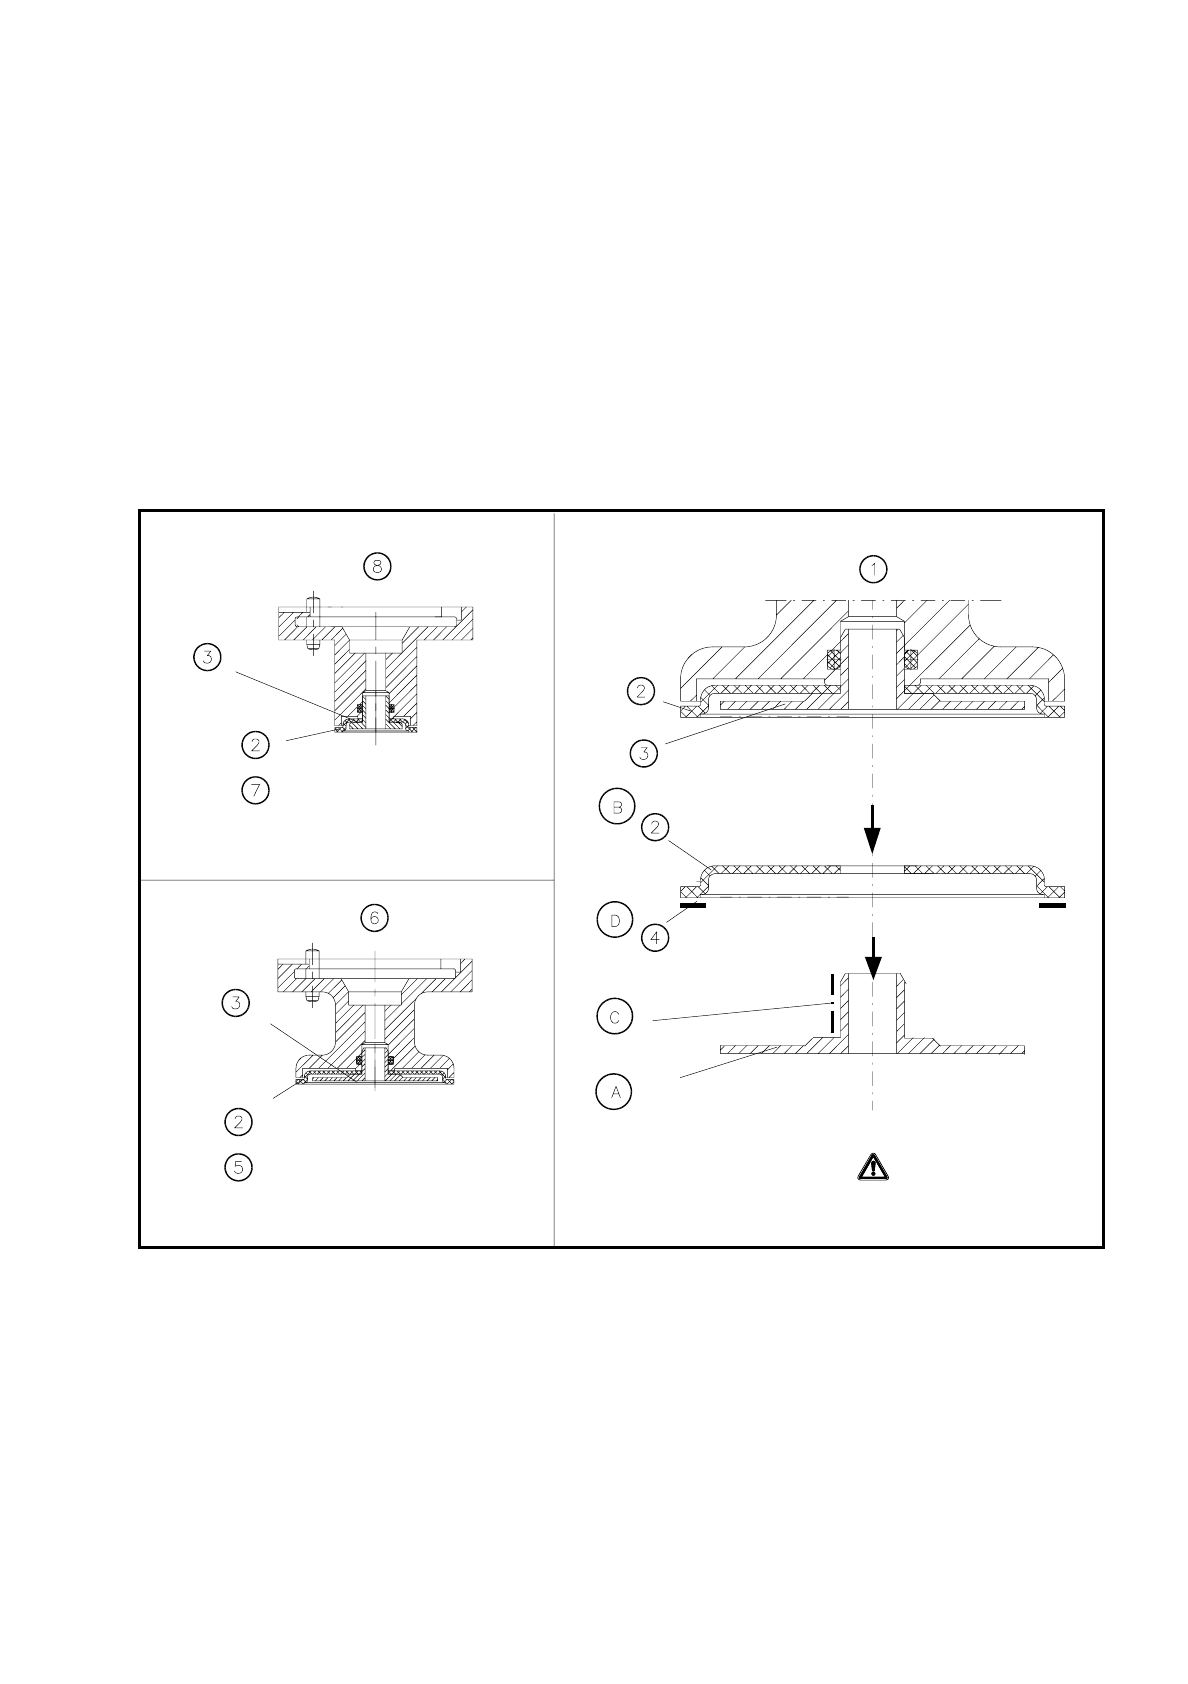
Replace the diaphragm if damaged. All relevant details are shown in the following diagram.
Fig. 9.6.10 Replacing the diaphragm of the nozzles
Key to
Fig. 9.6.10
(The item numbers of the nozzles and diaphragms will be found in Tab. 9.6.1, Page 87.)
1 Removing the diaphragm (enlarged view)
2 Diaphragm
3 Sleeve
4 Annular surface