00191025-01.pdf - 第471页
10 SIPL ACE G SIPLACE 80S /F/G User’s Manual 10.1 Introduction to Glueing Edition 07/97 from Software Version S R.010.xx 10 - 4 Fig. 10.1.1 Flow chart - glueing Gluein g poi nt optimiz ation Switch on - see S ection 3 Lo…

SIPLACE 80S/F/G User’s Manual 10 SIPLACE G
Edition 07/97 from Software Version SR.010.xx 10.1 Introduction to Glueing
10 - 3
10.1 Introduction to Glueing
10.1.1 General
Section 10 describes functions of the SIPLACE G only.
The functions described in the "SIPLACE 80" sections are in part identical with the functions of the SIPLACE
G and can therefore be used as they are. Additional or varying functions of the SIPLACE G are dealt with in
this section or reference is made to the corresponding section in "SIPLACE 80".
If functional modifications or supplements to the SIPLACE 80 are made at a later date, Section 10 „SIPLACE
G“, will be revised accordingly.
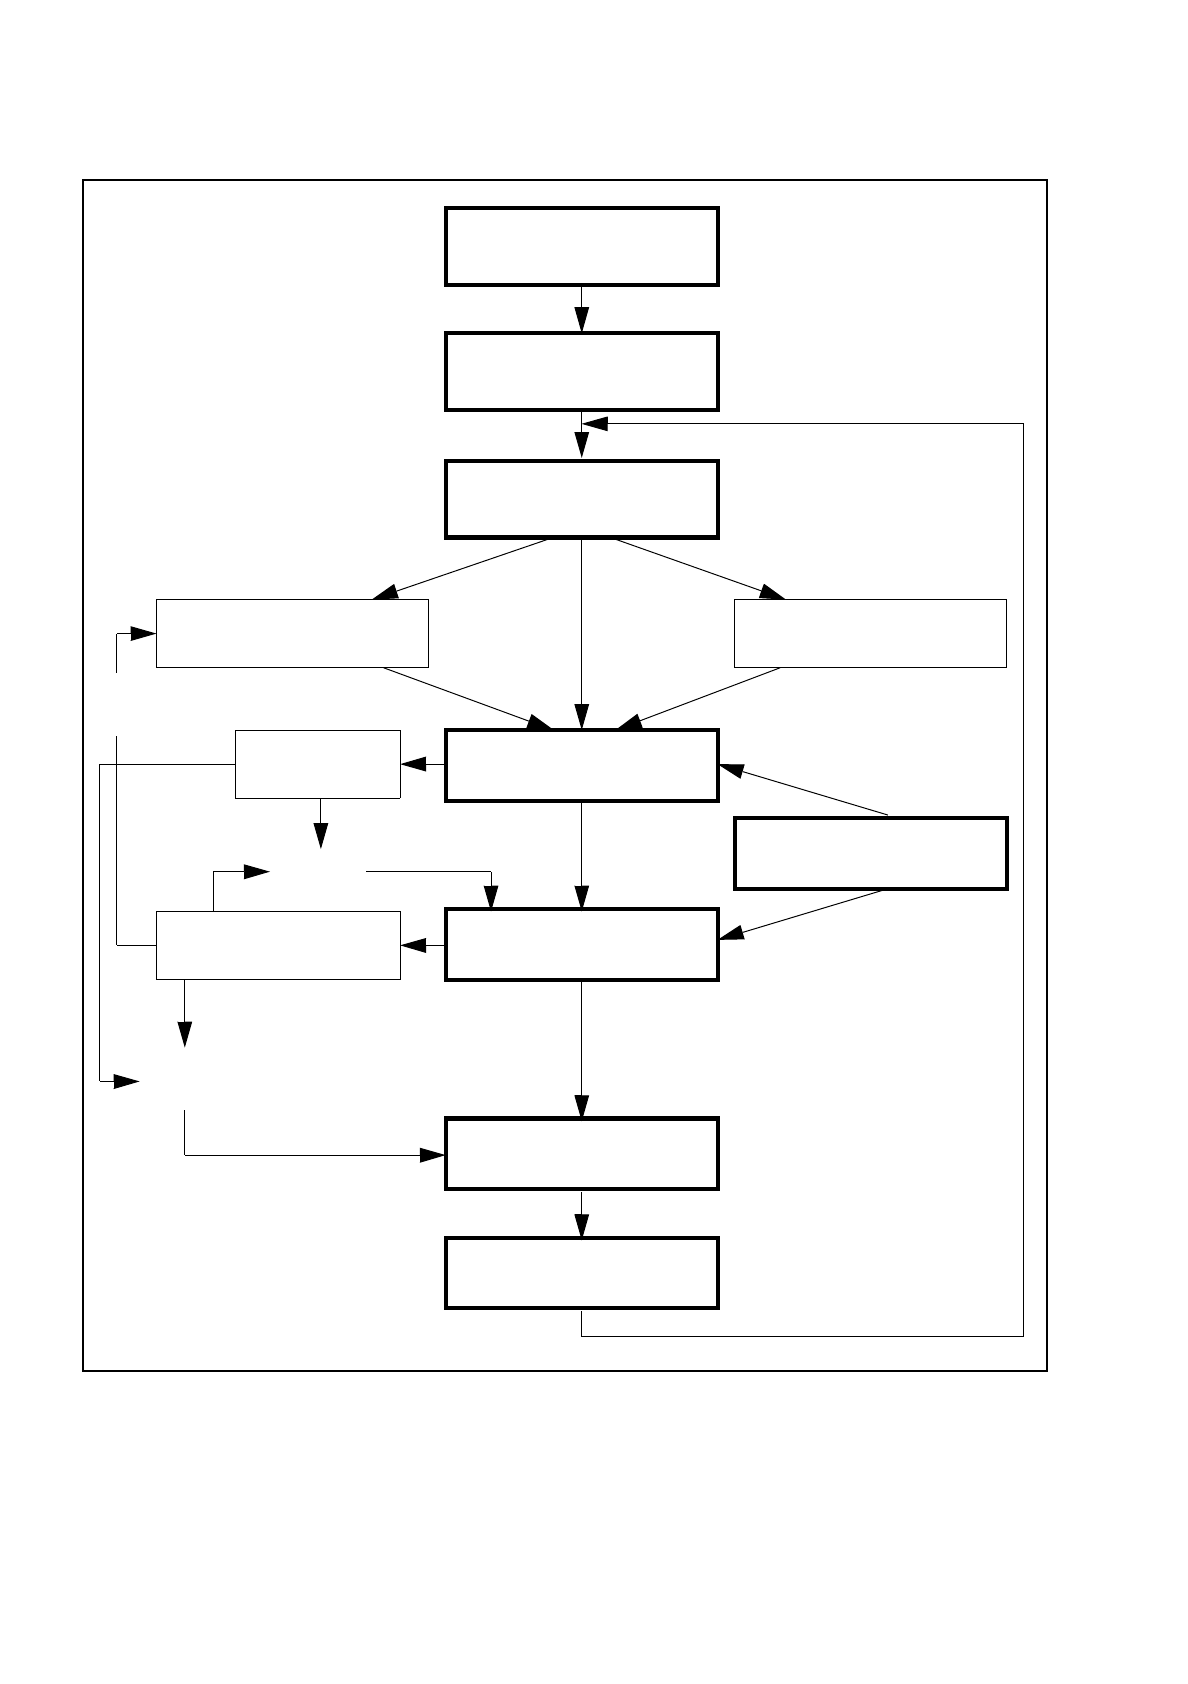
10.1.2 Flow Chart: Glueing
Figure 10.1.1 which follows shows the flow chart for the functions "Glueing". This flow chart applies to the
SIPLACE G.
10 SIPLACE G SIPLACE 80S/F/G User’s Manual
10.1 Introduction to Glueing Edition 07/97 from Software Version SR.010.xx
10 - 4
Fig. 10.1.1 Flow chart - glueing
Glueing point
optimization
Switch on - see Section 3
Loading cluster data
Setting up glue cartridge Approach glue cleaning pad
PCB handlingFiducial error
Glueing
Cartridge empty
machine error
Machine options
Cartridge
empty?
Continue
glueing
PCB to output conveyor
New cluster
Abort
glueing
SIPLACE 80S/F/G User’s Manual 10 SIPLACE G
Edition 07/97 from Software Version SR.010.xx 10.2 Main Menu
10 - 5
10.2 Main Menu
NOTE
The menus and activities described in this subsection will only be required and released when no line
computer is connected and when the function "without LC" has been selected from the selection menu "LC
mode". When a line computer is connected, cluster control takes place via the line computer.
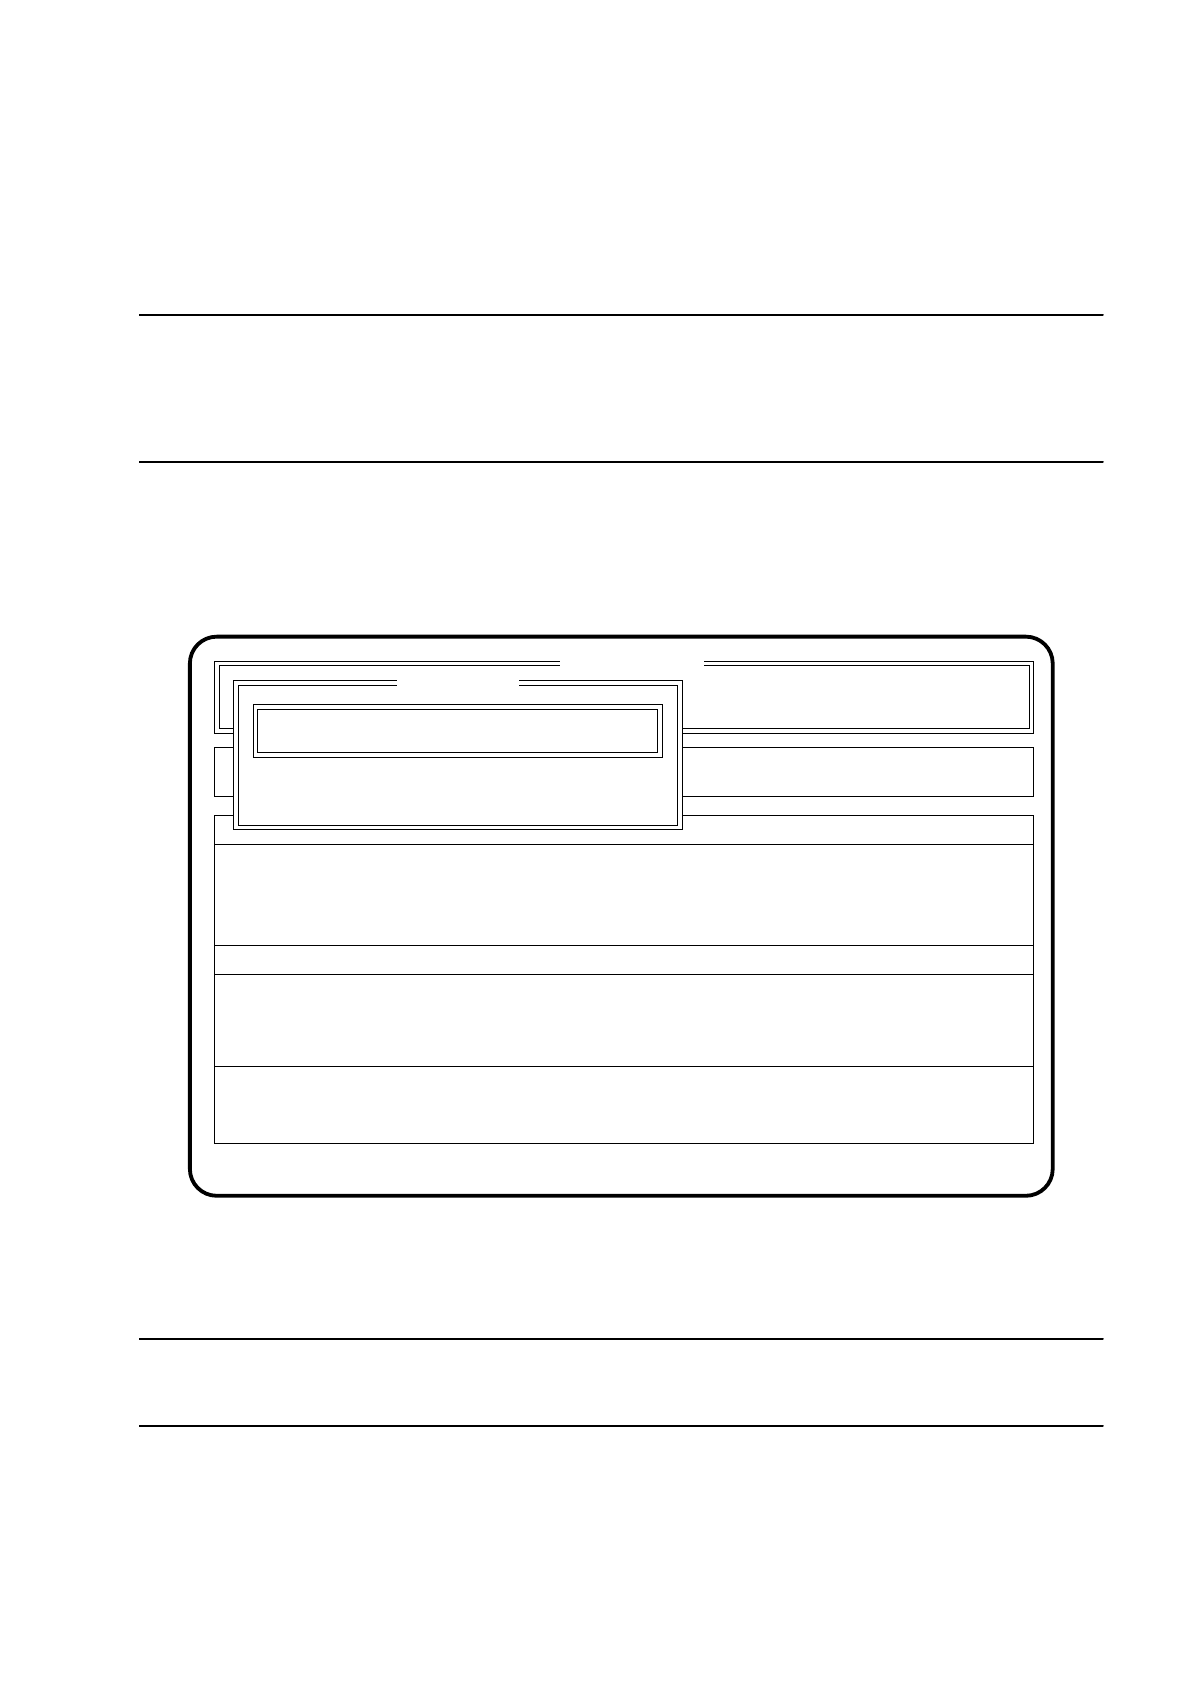
10.2.1 First Loading of Cluster Data after Switching the Machine On
After the machine starts there appears automatically the menu "New cluster".
Fig. 10.2.1
●
Use the keyboard to input the name of the cluster which is to be processed.
●
Confirm your input with the
Return key
("Status:" Wait for data).
NOTE
The cluster must be on the hard disk together with the associated fiducial data.
The data are now loaded from the hard disk and the main menu appears. The names of the cluster are
displayed in the second box of the main menu.
●
Press the
Esc key
if you wish to quit the menu without making an entry.
SI 80G V 10.x
Rüstung :
Machine options
Software options
Single functions
Vision system
Error
State
Action
:
:
:
Visionsystem
Neuer Nutzen...
Schnittst. GESP.
Cluster name:
Esc: abort Ret: input
New cluster
New cluster ...
Wait for data