00191025-01.pdf - 第495页
10 SIPL ACE G SIPLACE 80S /F/G User’s Manual 10.5 Error Menus Edition 07/97 from Software Version S R.010.xx 10 - 28 10.5.4 Cartridge 1/2/3 Empty The error m enu "Car tridge 1/2/3 e mpty" is shown on the screen…

SIPLACE 80S/F/G User’s Manual 10 SIPLACE G
Edition 07/97 from Software Version SR.010.xx 10.5 Error Menus
10 - 27
Continue glueing
In order to continue the glueing process, use the cursor keys to select the menu item "Continue glueing"
and press the
Return key
. The machine checks whether there is a board on the center conveyor (glueing
area) and continues the glueing procedure. If there is not a board in the glueing area, under menu item
"Action" of the basic menu a request will be made.
PCB to output conveyor
When the function "PCB to output conveyor" is selected by means of the cursor keys and
Return key
, a
board which is on the center conveyor will be transported on to the output conveyor and left there for man-
ual removal. Any components which have already been picked up will remain on the placement head.
PCB to center conveyor
When the function "PCB to center conveyor" is selected by means of the cursor keys and the
Return key
, a
board which is on the input conveyor will be transported to the center conveyor, stopped and clamped.
10.5.3.2 Range of Functions - Line engineer
Once the
line engineer password
has been typed in the following additional functions will be displayed in the
transport errors menu:
Cycle mode
Use the cursor keys to move the cursor bar onto the menu item "Cycle mode". Then press the
Return key
.
For each step of the glueing sequence you must now press the start key.
10 SIPLACE G SIPLACE 80S/F/G User’s Manual
10.5 Error Menus Edition 07/97 from Software Version SR.010.xx
10 - 28
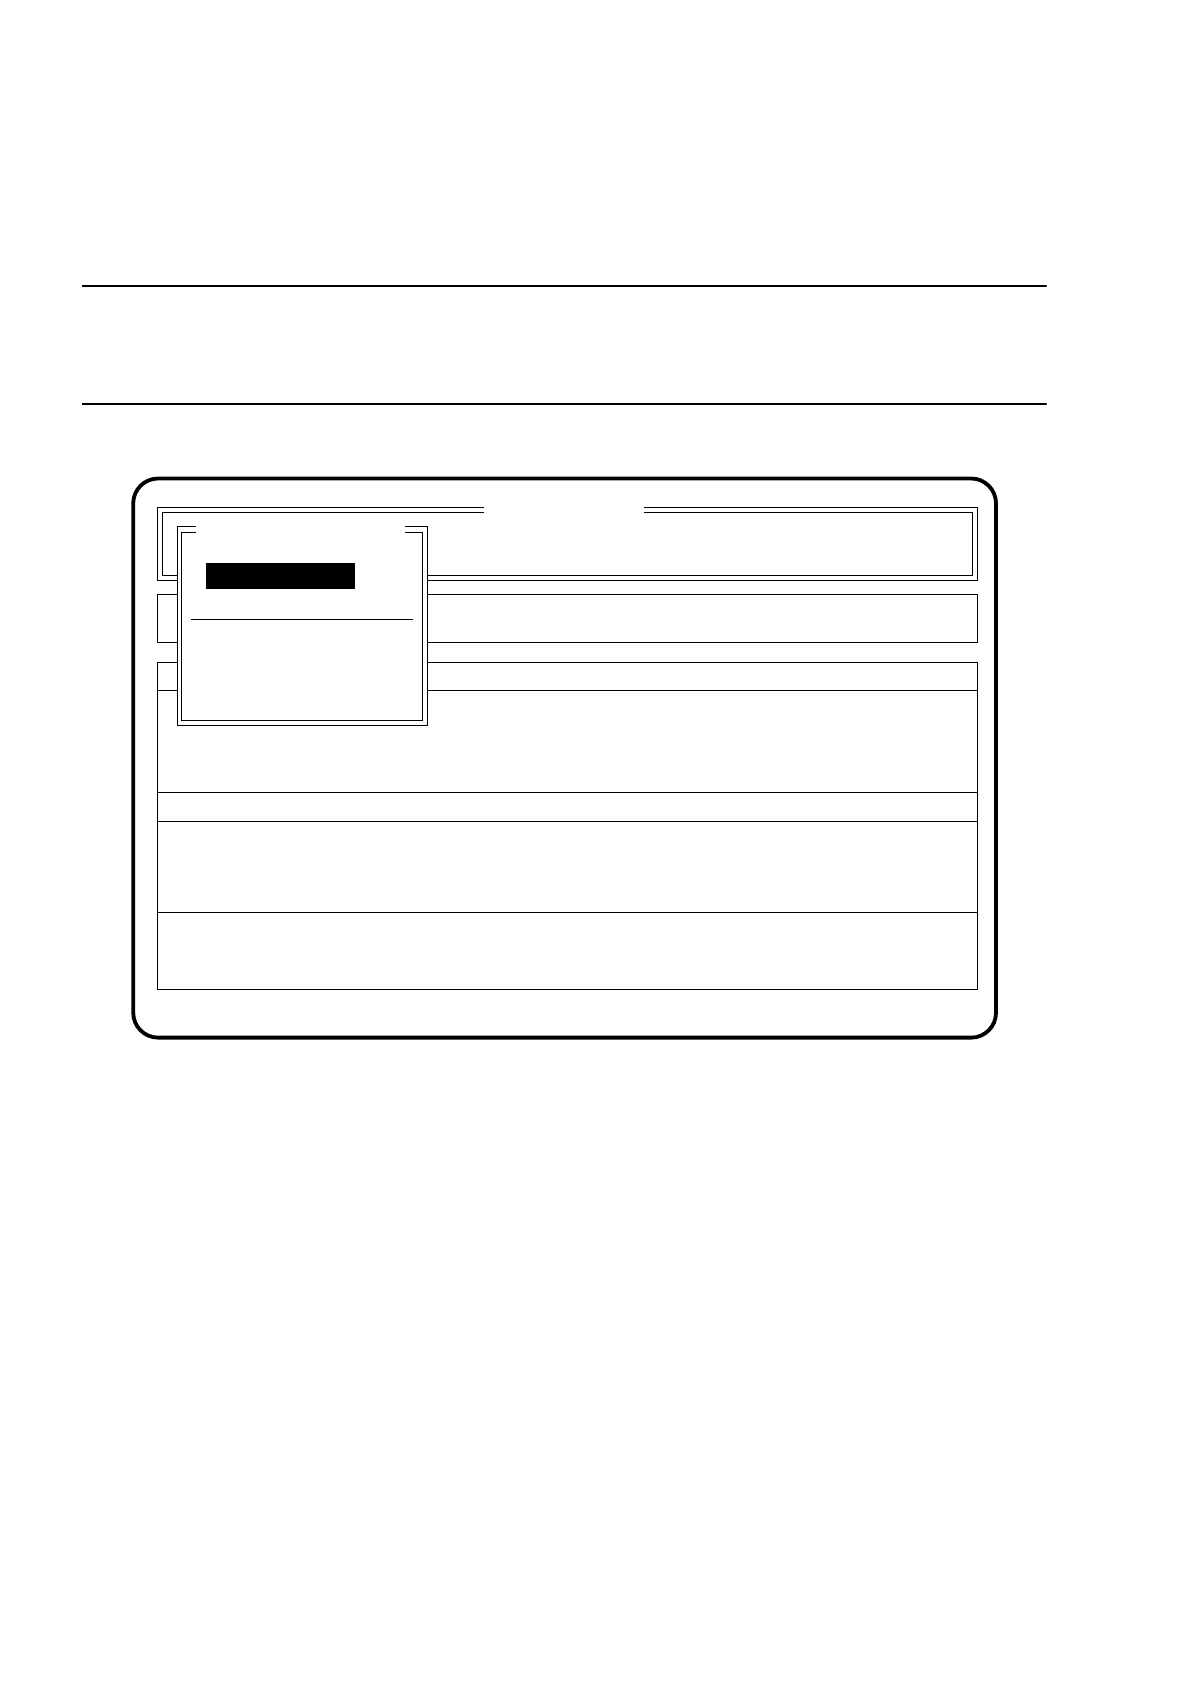
10.5.4 Cartridge 1/2/3 Empty
The error menu "Cartridge 1/2/3 empty" is shown on the screen when the cartridge in question is empty.
NOTE
If a cartridge becomes empty during glueing the message "Not enough glue for the next LP" will appear on the
screen.
Fig. 10.5.3
10.5.4.1 Range of Functions - Operator
Display errors
In order to display all of the errors which have occurred, use the cursor keys to select the menu item
"Display errors" and press the
Return key
. On the screen the menu described in Section 10.6 (Display
Functions): "Display errors" appears.
Abort glueing
In order to leave the error menu without continuing the glueing process, use the cursor keys to select the
menu item "Abort glueing" and press the
Return key
. The board on the conveyor will be moved on to the
output conveyor. The gantry will be brought into the stand-by position.
SI 80G V 10.x
Cluster: TEST
Neuer Nutzen
Display errors
Confirm errors
Machine options
Error
State
Action
:
:
:
Error treatment - cartridge empty
Abort glueing
Gantry functions
Display errors
Continue glueing
Cartridge 1/2/3 empty
Continue glueing

SIPLACE 80S/F/G User’s Manual 10 SIPLACE G
Edition 07/97 from Software Version SR.010.xx 10.5 Error Menus
10 - 29
Continue glueing
In order to continue the glueing process, use the cursor keys to select the menu item "Continue glueing"
and press the
Return key
. The machine will continue the glueing procedure at the glueing point where it
broke off.
10.5.4.2 Range of Functions - Line engineer
Once the
line engineer password
has been typed in the following additional functions will be displayed in the
menu "Cartridge 1/2/3 empty":
Cycle mode
Use the cursor keys to move the cursor bar onto the menu item "Cycle mode". Then press the
Return key
.
For each step of the glueing sequence you must now press the start key.
Gantry functions
Use the cursor keys to select the menu item "Gantry functions". Then press the
Return key
.
On the screen the menu described in Section 10.7.4 "Gantry": "Gantry functions" appears. In this menu
you can execute various functions of the gantry.
Entire head ref. run
Use the cursor keys to select the menu item "Entire head ref. run". Then press the
Return key
.
The glueing heads and the small gantry axes will then perform a reference run.
Glueing unit 1/2/3
Use the cursor keys to select the menu item "Glueing unit" for the glueing unit concerned. Then press the
Return key
.
On the screen the menu described in Section 10.7.4 "Gantry": "Glueing unit 1/2/3" appears. In this menu
you can execute various functions of that glueing unit.
Glueing parameters
Use the cursor keys to select the menu item "Glueing parameters". Then press the
Return key
.
On the screen the menu described in Section 10.4.1 "Glueing Parameters" appears.
Paper feed cleaning pad
Use the cursor keys to select the menu item "Paper feed clean. pad". Then press the
Return key
.
The cleaning pad will perform a defined paper feed.
Cleaning pad cycle
Use the cursor keys to select the menu item "Cleaning pad cycle". Then press the
Return key
.
The glueing head moves to over the cleaning pad and places all glueing points defined in the glue cleaning
pad data onto the cleaning pad. The glueing head then moves out of the area of the cleaning pad.