00194614-08 Trainingsdoku. SG X-Serie_X4i SW70x (AL2)_EN.pdf - 第403页
Modular Conveyor Conveyor Settings Lifting Table Functions 403 Student Guide SIPLACE X-Serie and X4I SW70x (AL2) B) Setting the play on the actuator: ► Disable the clamp and move the lifting table do wn. ► Measure the pl…
Modular Conveyor
Board Clamping Functions Conveyor Settings
Student Guide SIPLACE X-Serie and X4I SW70x (AL2) 402
Legend
Procedure
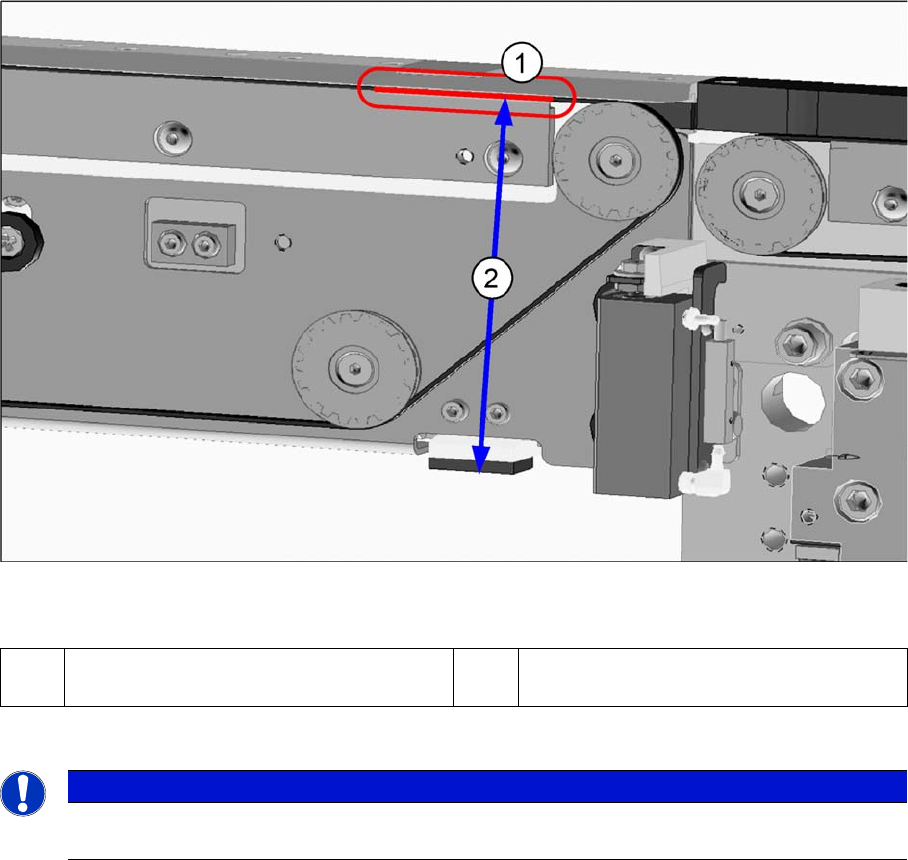
A) Checking the clamping play:
► Move the lifting table upwards, without the board.
► With the aid of a 0.1 mm feeler gauge, check the gap between the conveyor belt and the clamp (see
graphic above).
If the gap is greater than 0.1 mm, the determined distance between the belt and the clamping edge
on the actuator must be reset.
To do this, add the current distance between the actuator and the clamping plate to the distance
between the belt and the clamping edge!
► Move the lifting table down again.
(1) Conveyor belt play on the lower edge of the
clamp
(1) Distance 94.2 mm.
NOTICE
The play between the terminal strip and the upper edge of the conveyor belt may not be more
than 0.1 mm.
Modular Conveyor
Conveyor Settings Lifting Table Functions
403 Student Guide SIPLACE X-Serie and X4I SW70x (AL2)
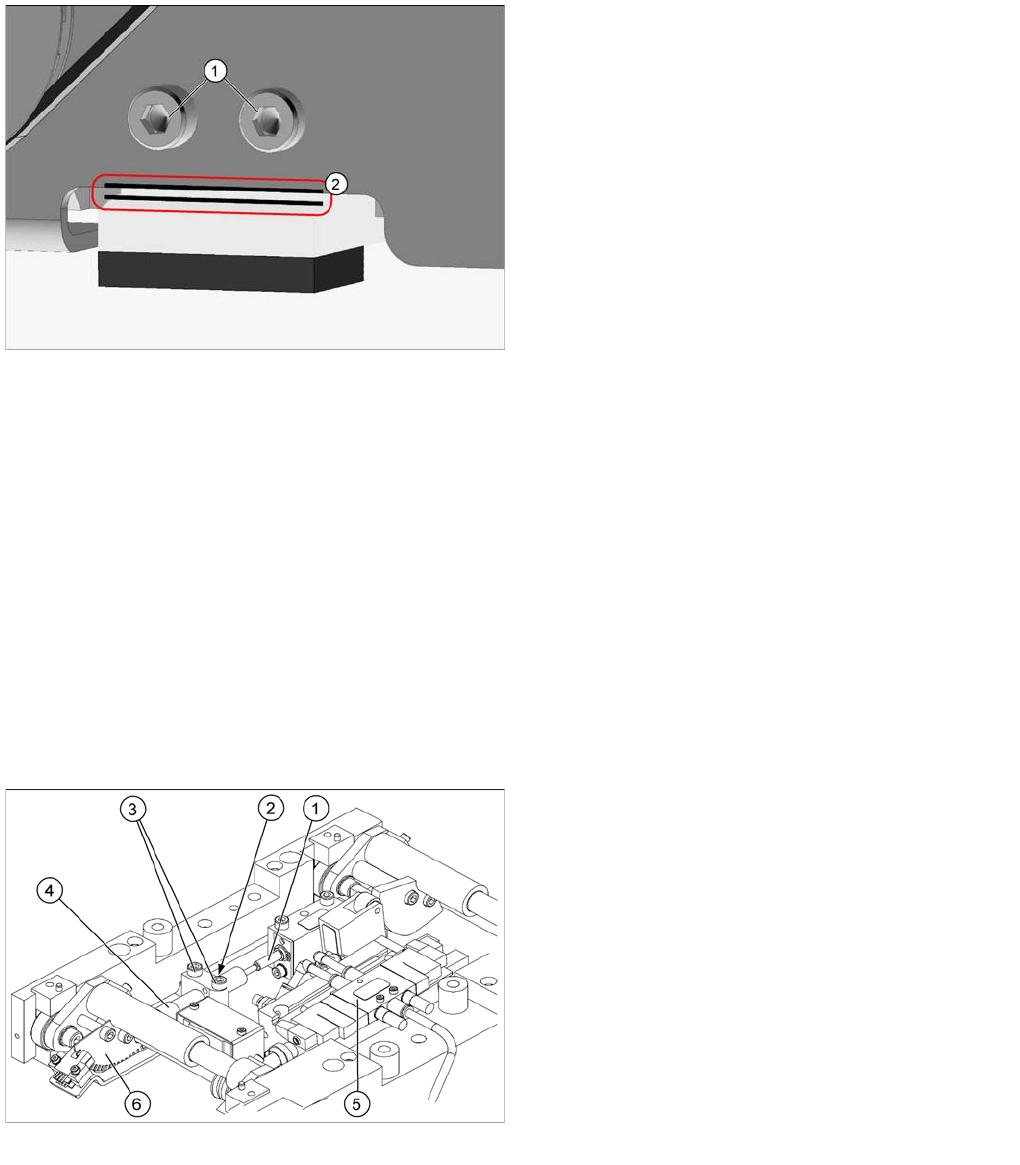
B) Setting the play on the actuator:
► Disable the clamp and move the lifting table down.
► Measure the play between the actuator and the side edge with a feeler gauge.
► Loosen the actuator screws.
► Adjust the distance with the help of a feeler gauge.
Add the clamp play to the measured play of the actuator.
► Tighten the actuator screws again.
► You now need to recheck the gap between the conveyor belt and the clamp when the lifting table
has moved up. (see above)
► If a problem occurs during board clamping, recheck this setting again. We recommend that you
check this setting every 3 months. When cleaning the machine, always make sure that you remove
all components from the conveyor belt.
Lifting Table Functions
11.3.8 Lifting Table Functions
Lifting table up function
Requirements for detecting that the lifting table is up:
▪ 30-35 pulses from the incremental disc
▪ Check performed by software (see "11.3.7 Board Clamping Functions" [ ➙ 399])
▪ Dynamic response for board clamping of approx. 500 ms
Legend
1. Actuator screwed fixtures
2. Measuring the play with the feeler gauge
Lifting table unit
Legend
1. Actuator
2. Lock nut damper
3. Fastening screws for mounting block
4. Damping unit
5. 3/5 way solenoid valve mounted on lifting table drive
cylinder
6. Fork-type light barriers / incremental disk
Modular Conveyor
Lifting Table Functions Conveyor Settings
Student Guide SIPLACE X-Serie and X4I SW70x (AL2) 404
Lifting table down function
Requirements for detecting that the lifting table is down:
▪ 30-35 pulses from the incremental disc
▪ Proximity switch on the lifting table cylinder
▪ Dynamic response for board release of approx. 480 ms
Adjustin g the Spee d of the Lifting Table (fr om SW701)
11.3.8.1 Adjusting the Speed of the Lifting Table (from SW701)
► If the travel times are not inside the tolerance range or if error messages appear during production,
adjust the travel times as follows:
► Adjust the valve on the lifting table cylinder, so that you get the following values:
► If malfunctions occur during the downwards movement or if the board is shaken, reduce the lowering
speed accordingly.
Time needed to move lifting table up with lifting table
plate
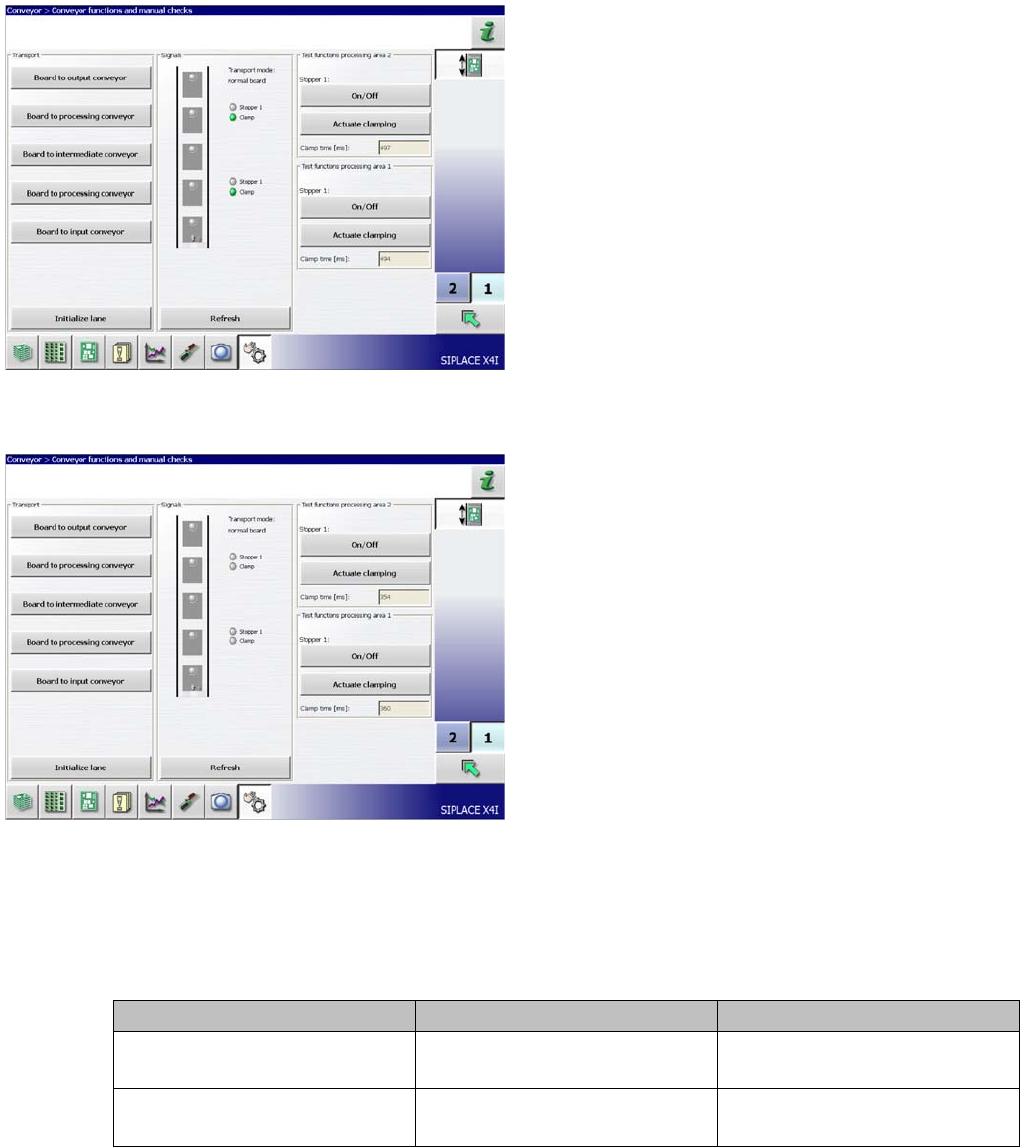
► Switch the machine on.
► In the Conveyor --> Conveyor functions and
manual checks menu, you can move the lifting
table up and down. The time is shown directly.
► Click on Actuate Clamp.
Time needed to move lifting table down with lifting table
plate
► The lifting table will be moved up and the travel time
will be displayed (see diagram).
► Press the Actuate Clamp button again to move
the lifting table downwards and to view the travel time
for the downwards movement.
Lifting Table Move upwards Move downwards
Lifting table (standard)
bumper: 20 mm
520 ms +/- 20 ms 480 ms +/- 20 ms
Lifting table (X4I)
bumper: 35 mm
430 ms +/- 20 ms 400 ms +/- 20 ms