IPS adjustment on the modules.pdf - 第107页
Edition 1 .0 IP S Adjustment for V ariou s Head T ypes on the Module < H12HS Q h ead > FK - 9F50 - 74 -0 E 5- 11 FUJI CORPORA TION 6. Press the upper b utton t o disp lay “ CU RR ENT BAC K ”. 7. Press the low er bu…
Edition 1.0
IP S Adjustment for V arious Head Types on the Module
< H12HSQ head>
FK-9F50-74-0E
5-10
FUJI CORPORATION
Adjusting t he c urrent val ue (grayscal e value) (ADJUSTMENT2)
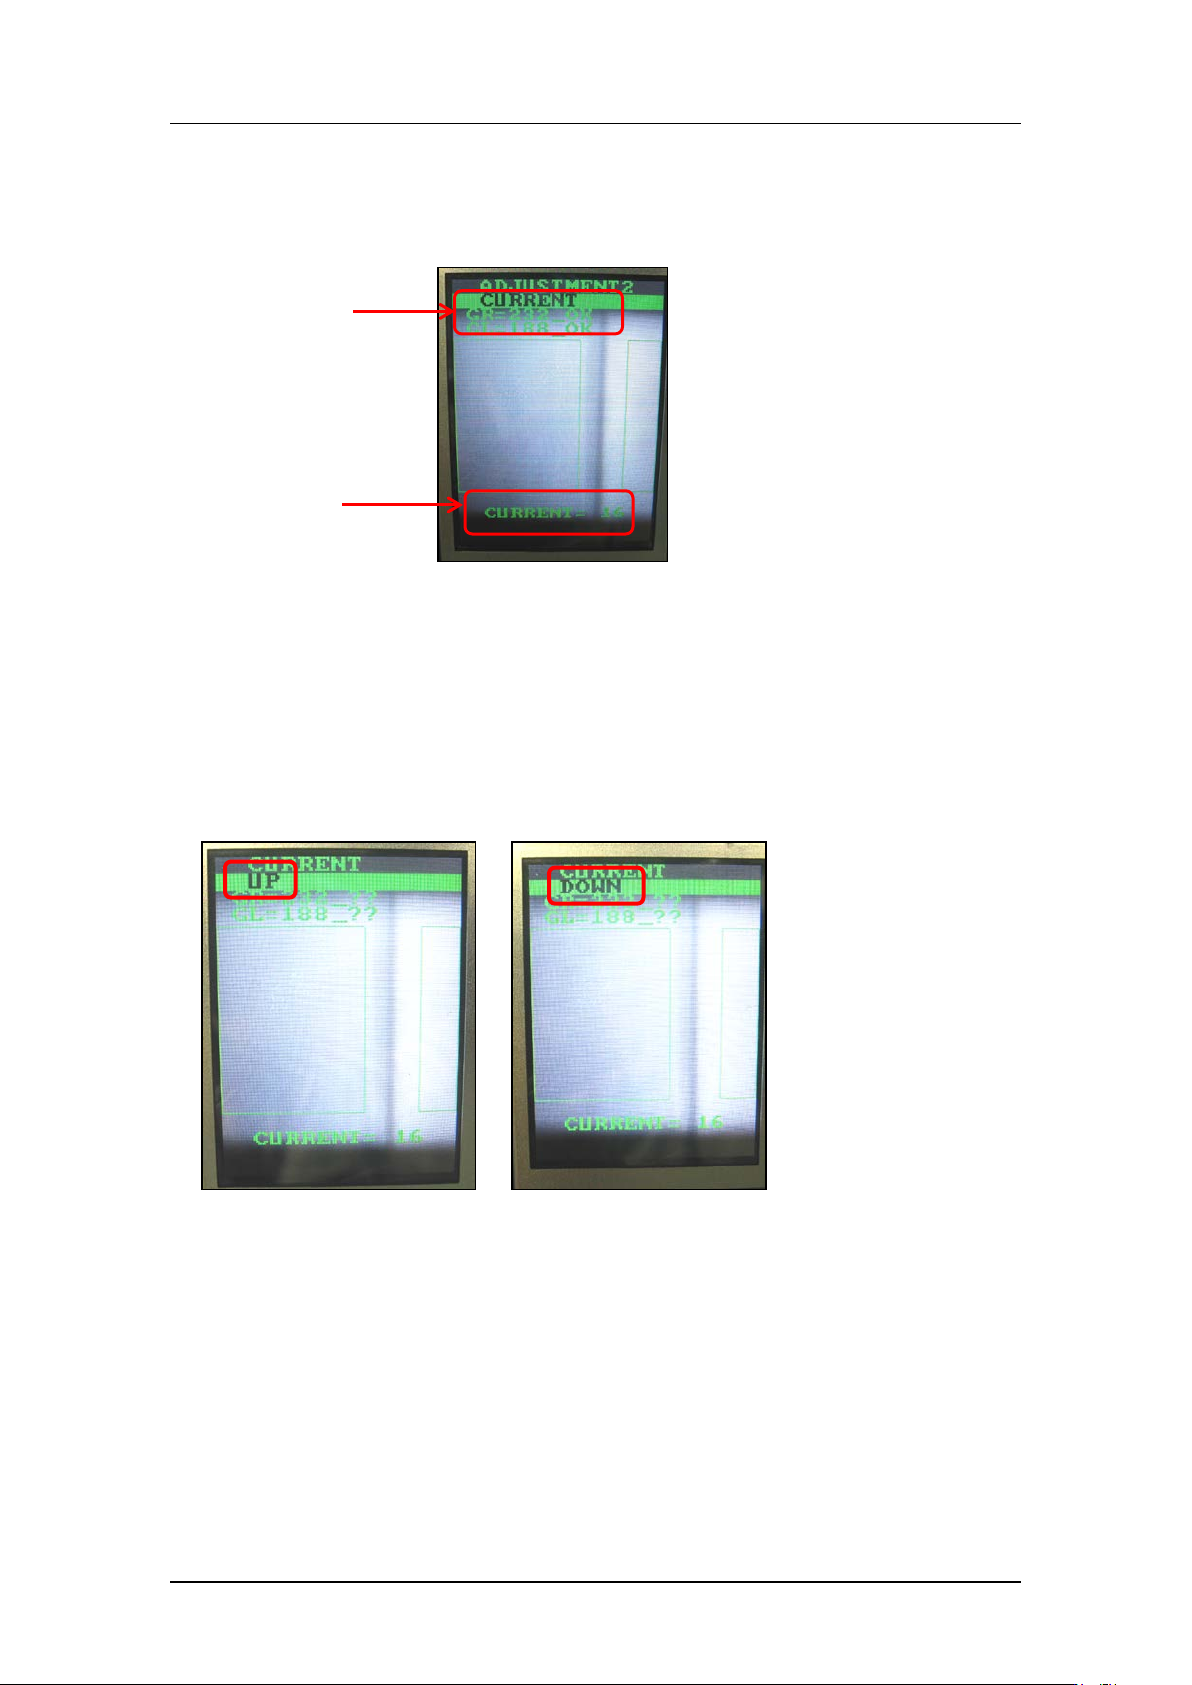
1. Remov e t he jigs . Pres s t he lower butt on t o display t he cur r ent and grays cale v alues.
2. Rotate the R-axis by hand to find the positions where the grayscale values (GR and
GL) are maximized and minimized. Check that the minimum and maximum grayscale
values are within the tolerance of 95~250. Also check that the current value is 24 mA
or less.
3. If the gray scal e values are not within t he targ et values, adjust them a s shown below.
4. Press the lower button to display “CURRENT, UP” or “CURRENT, DOWN” and adjust
the current value.
5. Rotate the R-axis through one full rotation and confirm that there is no position where
the variation in the grayscale values (GR and GL) is extreme. Pay particular attention
to the variation in grayscale values at the position where the fluorescent seal is joined.
If the var iation is large, cle an t he f luorescent s t ic ker and replac e it i f nece s sar y.
Grayscale
values
Current
values
CONFIDENTIAL
Edition 1.0
IP S Adjustment for V arious Head Types on the Module
< H12HSQ head>
FK-9F50-74-0E
5-11
FUJI CORPORATION
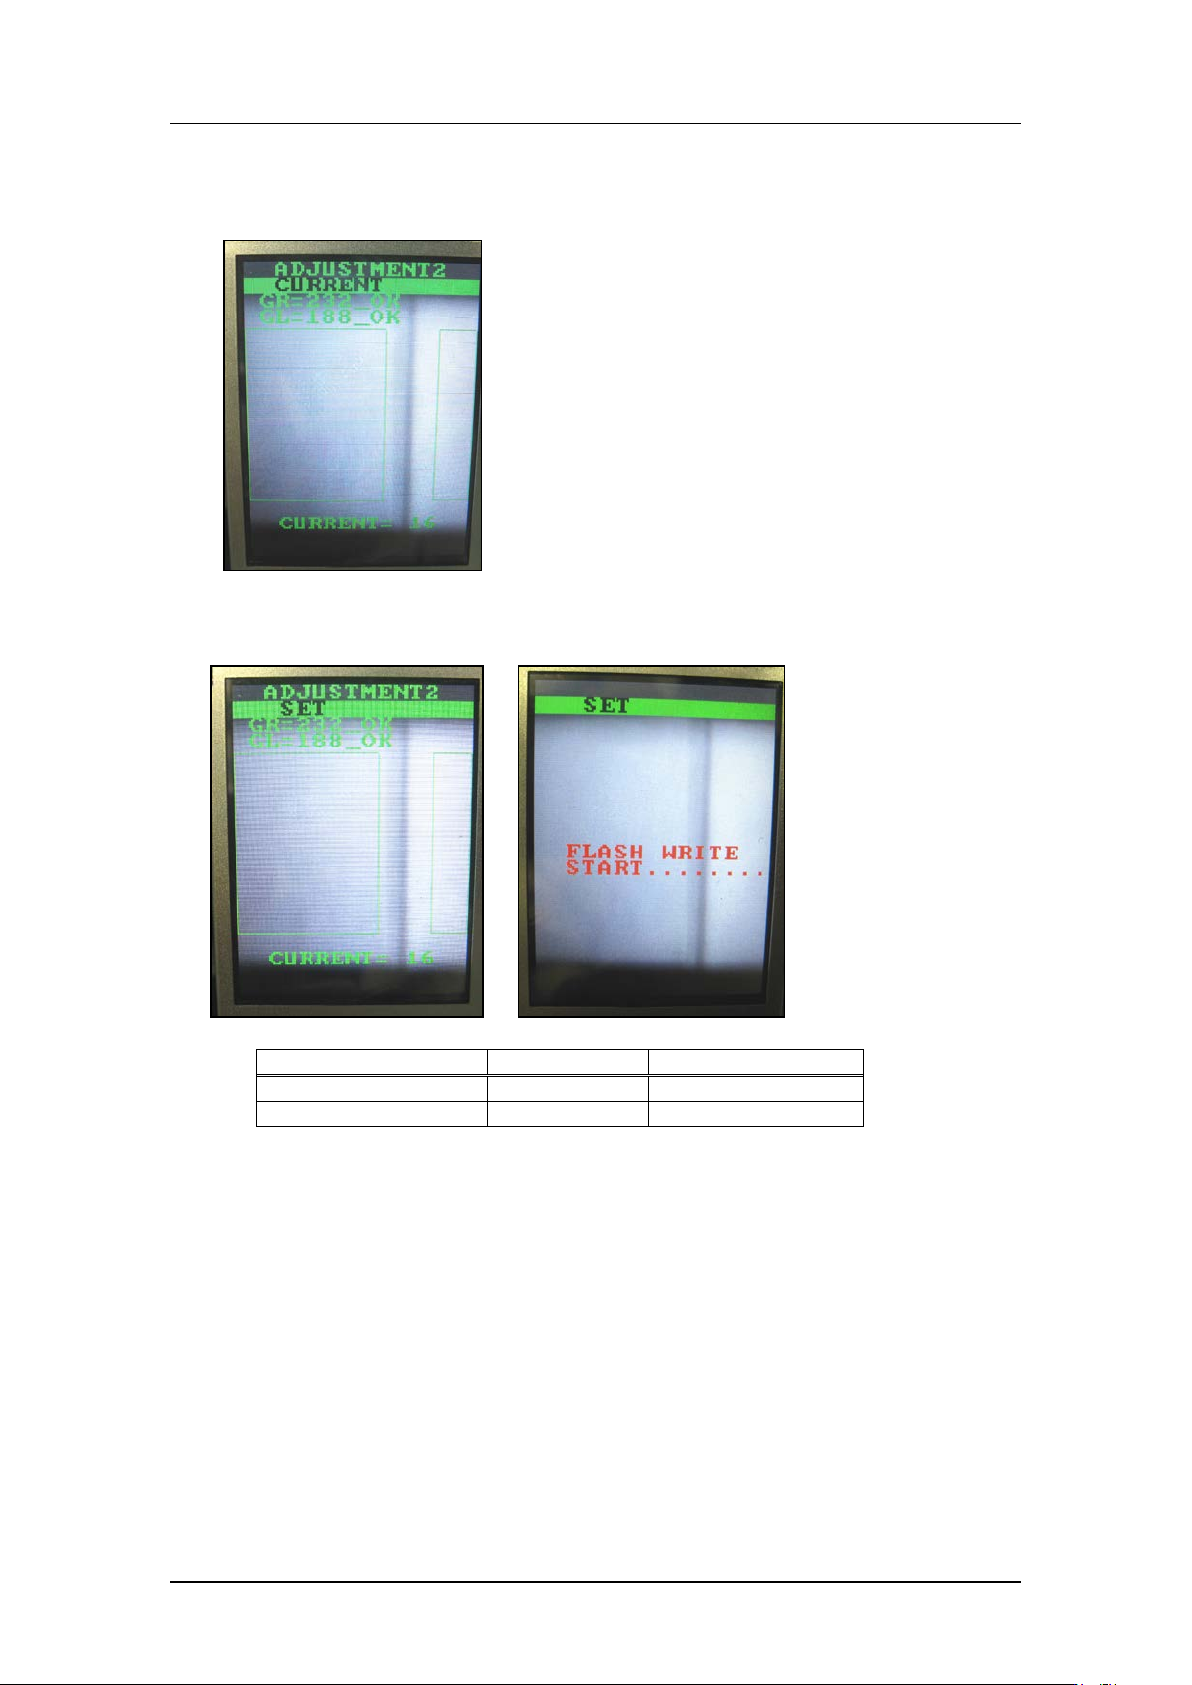
6. Press the upper button to display “CU RRENT BACK”.
7. Press the low er but t on t o return to “ADJUST M ENT2 CURRENT”.
8. Press the upper button to display “ADJUSTMENT2 SET” and then press the lower
button to save the sett ings.
Tolerance
Target value
GR, GL (Gray value)
95~250
120
CURRENT
24mA or l ess
Same as tolerance
CONFIDENTIAL
Edition 1.0
IP S Adjustment for V arious Head Types on the Module
< H12HSQ head>
FK-9F50-74-0E
5-12
FUJI CORPORATION
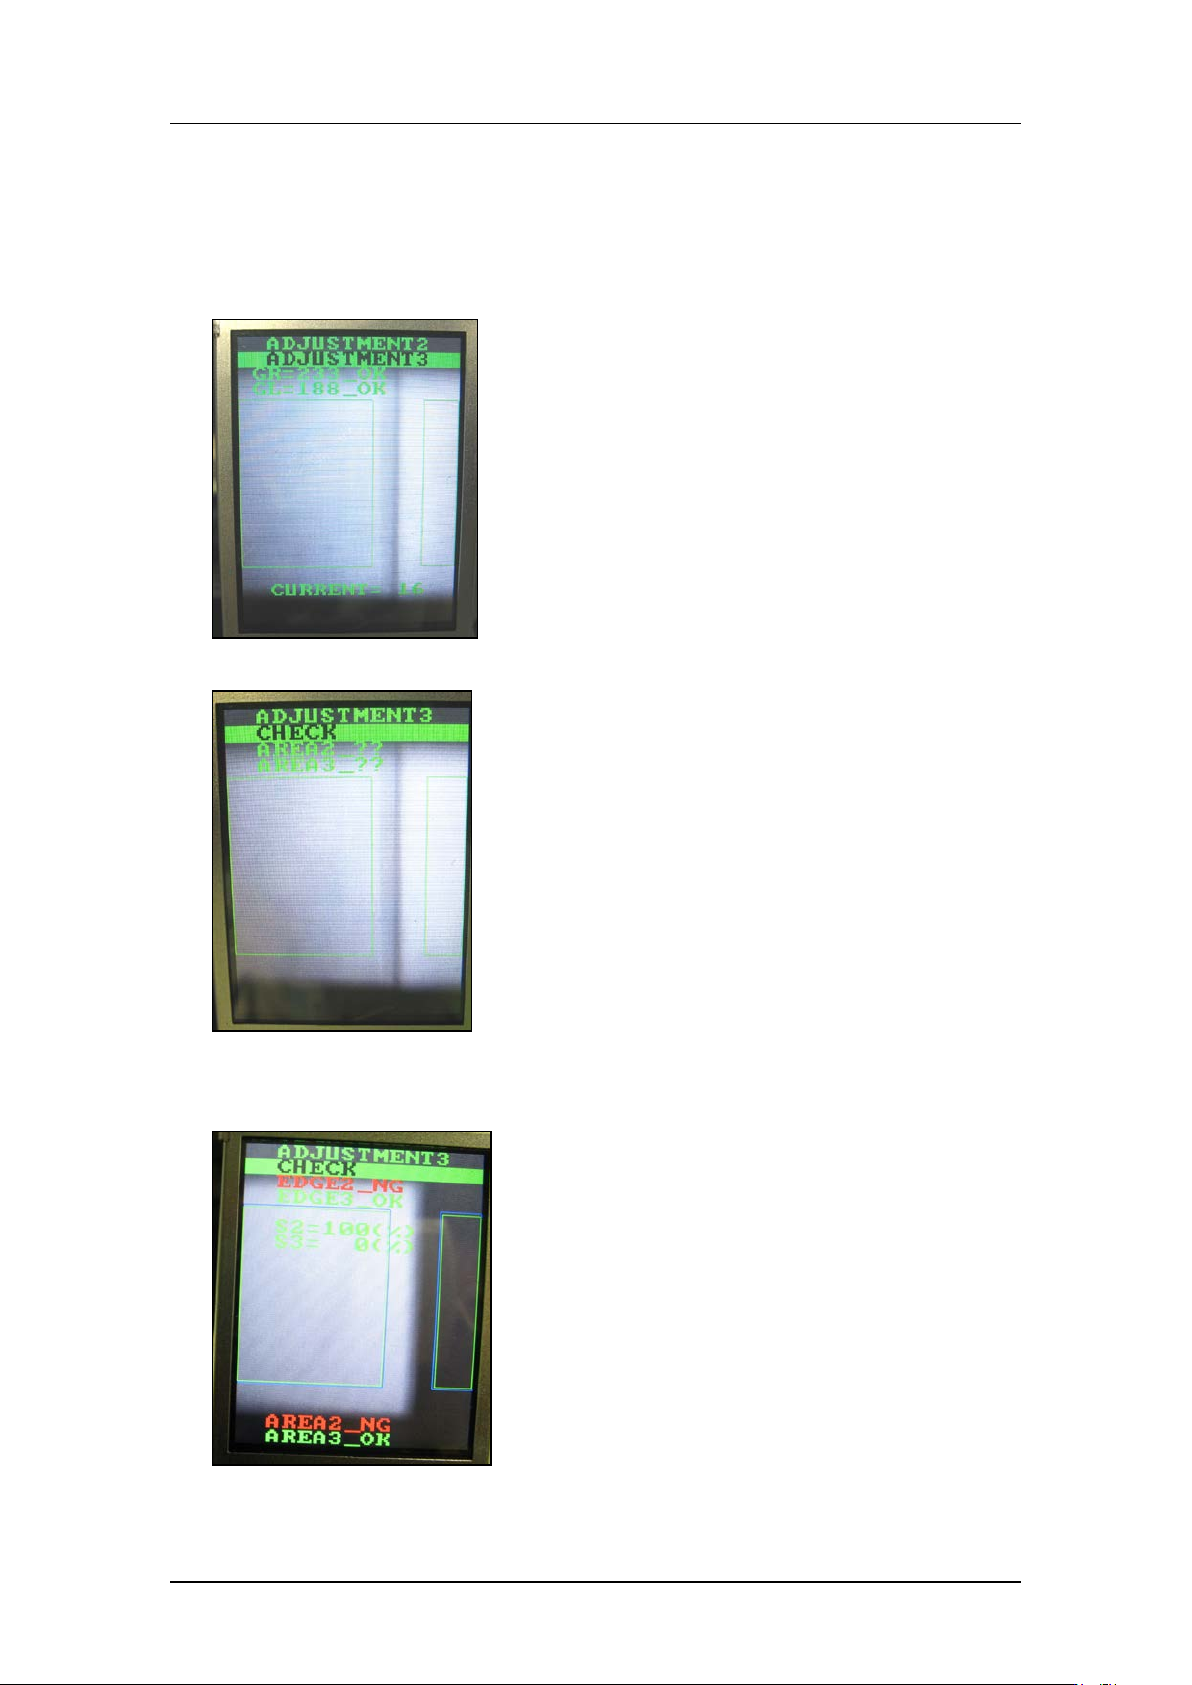
Checki ng t he fi e ld of vision (ADJUSTMENT3)
External l ight can affect the results, so be sure t o perform the pr ocedure in a shaded area.
1. Continuing from the procedure above, press the upper button to display
“ADJUSTMENT 2 ADJUSTMENT 3”.
2. Press the low er but t on t o display “ A DJUSTMEN T 3 CHECK”.
3. Block one of the glasses with some paper etc., and then press the lower button. (In the
example below, the right-hand glass as viewed from the front of the machine is
blocked).
CONFIDENTIAL