IPS adjustment on the modules.pdf - 第128页
Edition 1 .0 IPS Adjustment for V arious Head T ypes on the Module <H08MQ head > FK - 9F50 - 74 -0 E 6- 14 FUJI CORPORA TION 10. P ress and hold the lower button to display an ast erisk mar k next to both t he “ R …
Edition 1.0
IPS Adjustment for Various Head Types on the Module
<H08MQ head>
FK-9F50-74-0E
6-13
FUJI CORPORATION
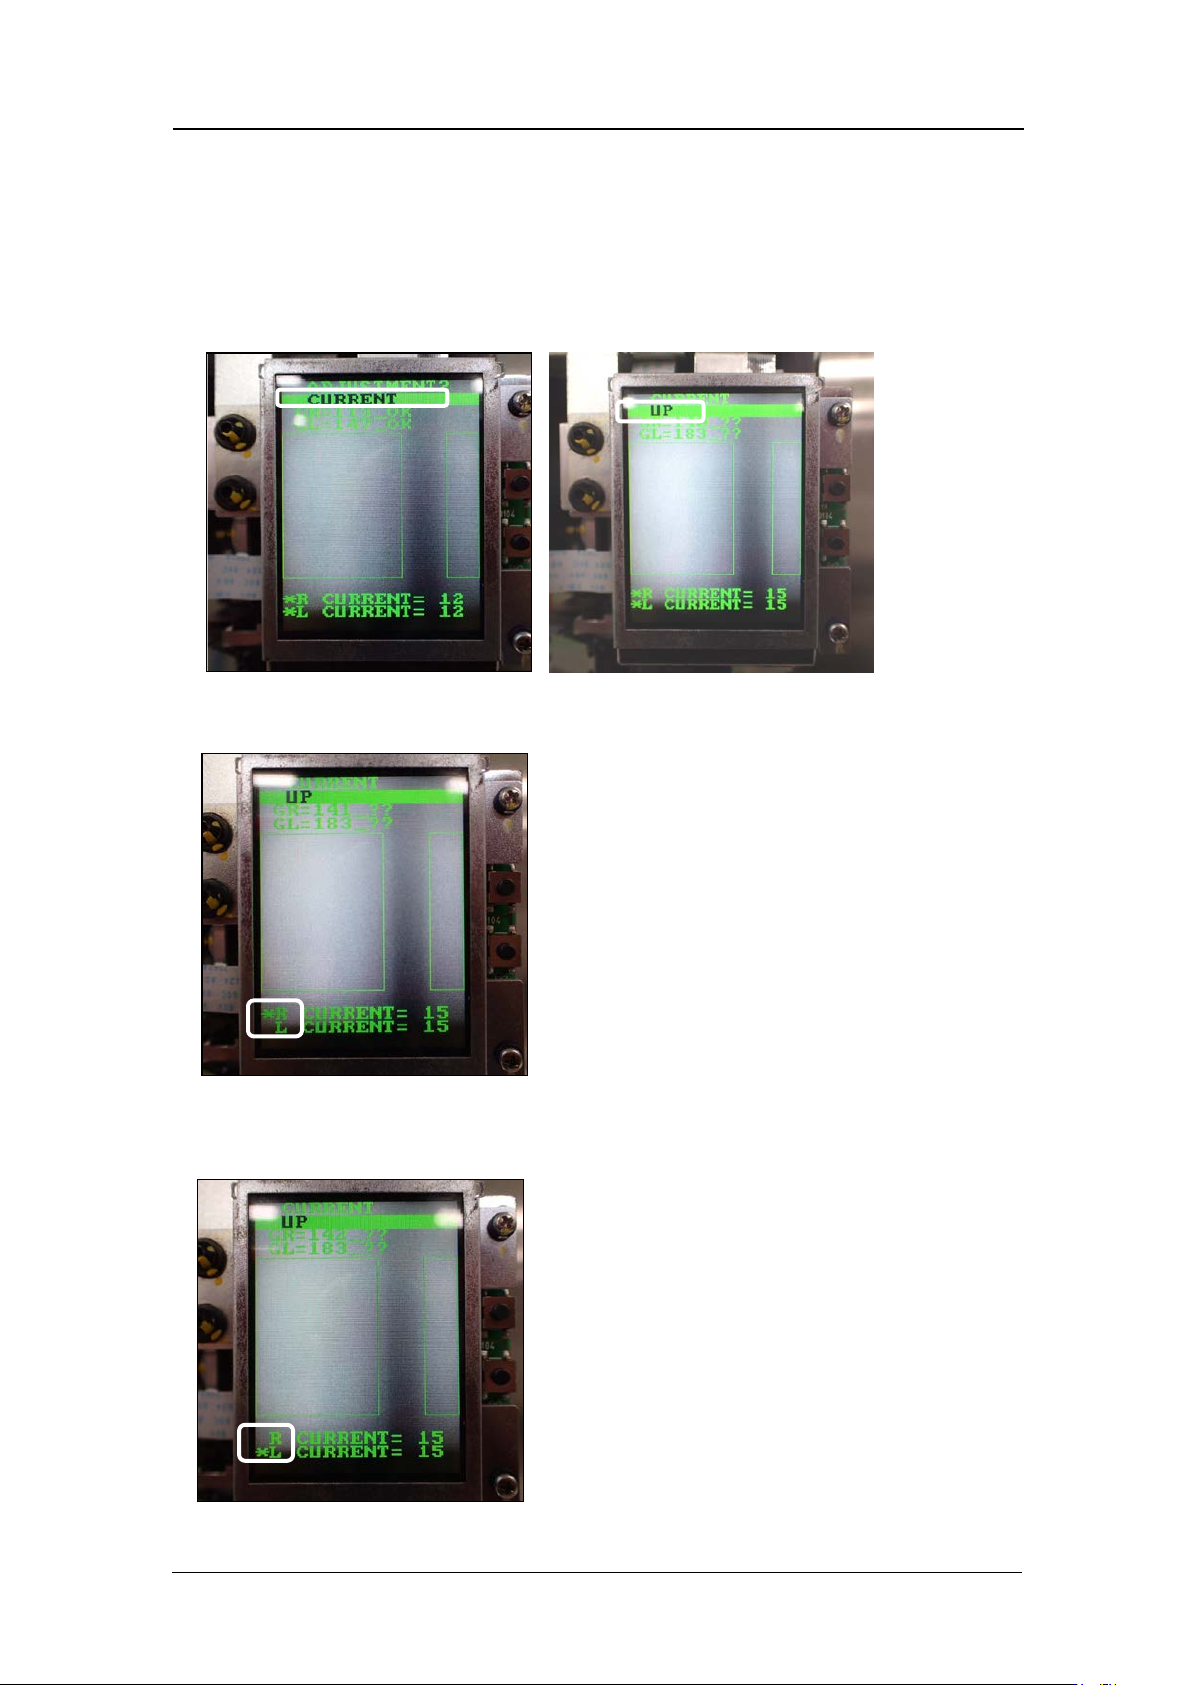
5. If the gray scal e values are out sid e the tar get values, adjust t hem as shown below.
6. Press the upper button to select CURRENT, and then with either CURRENT UP or
CURRENT DOWN selected, press the lower button to raise or lower the CURRENT
value.
7. With either CURRENT UP or CURRENT DOWN selected, press and hold the lower
button.
8. An asterisk mark (*) displays next to the “R CURRENT” value only. The lower button
can now be used t o adjust t he R Current v alue separately.
9. Press and hold the lower button to display an asterisk mark (*) next to the “L
CURRENT ” value. The lower button can now be used to adj ust the L CURRENT value
separately.
CONFIDENTIAL
Edition 1.0
IPS Adjustment for Various Head Types on the Module
<H08MQ head>
FK-9F50-74-0E
6-14
FUJI CORPORATION
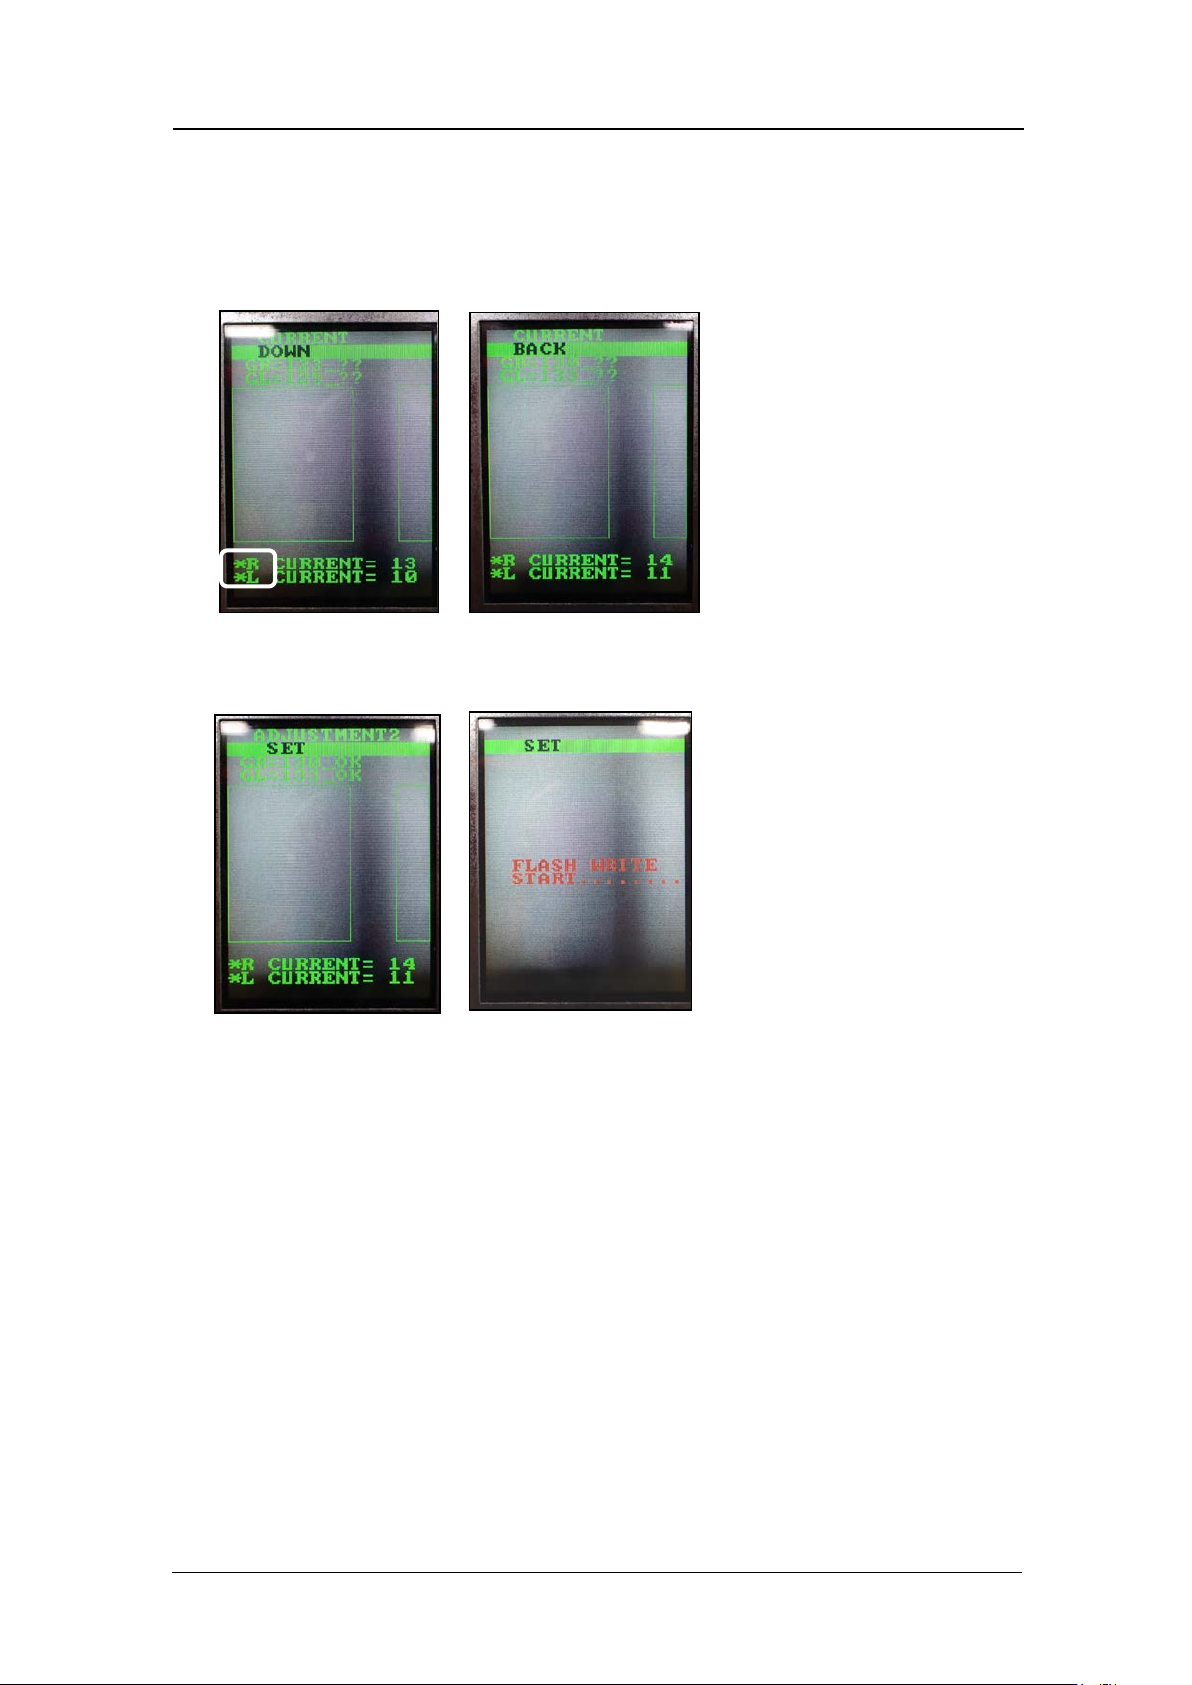
10. Press and hold the lower button to display an asterisk mark next to both the “R
CURRENT” and “L CURRENT” values. The lower button can now be used to adjust
the R CURRENT and L CURRENT values together. Once the values are within
tolerance, press the upper button once with [BACK] selected to return to the
[CURRENT] screen. Press the upper button once to select [SET], and then press the
lower button once to save the v alues.
11. Use the upper button to return to [ADJ MODE] and then reboot the machine to turn
the head pow er O FF and ret ur n t o [AUTO MODE].
CONFIDENTIAL
Edition 1.0
IPS Adjustment for Various Head Types on the Module
<H08MQ head>
FK-9F50-74-0E
6-15
FUJI CORPORATION
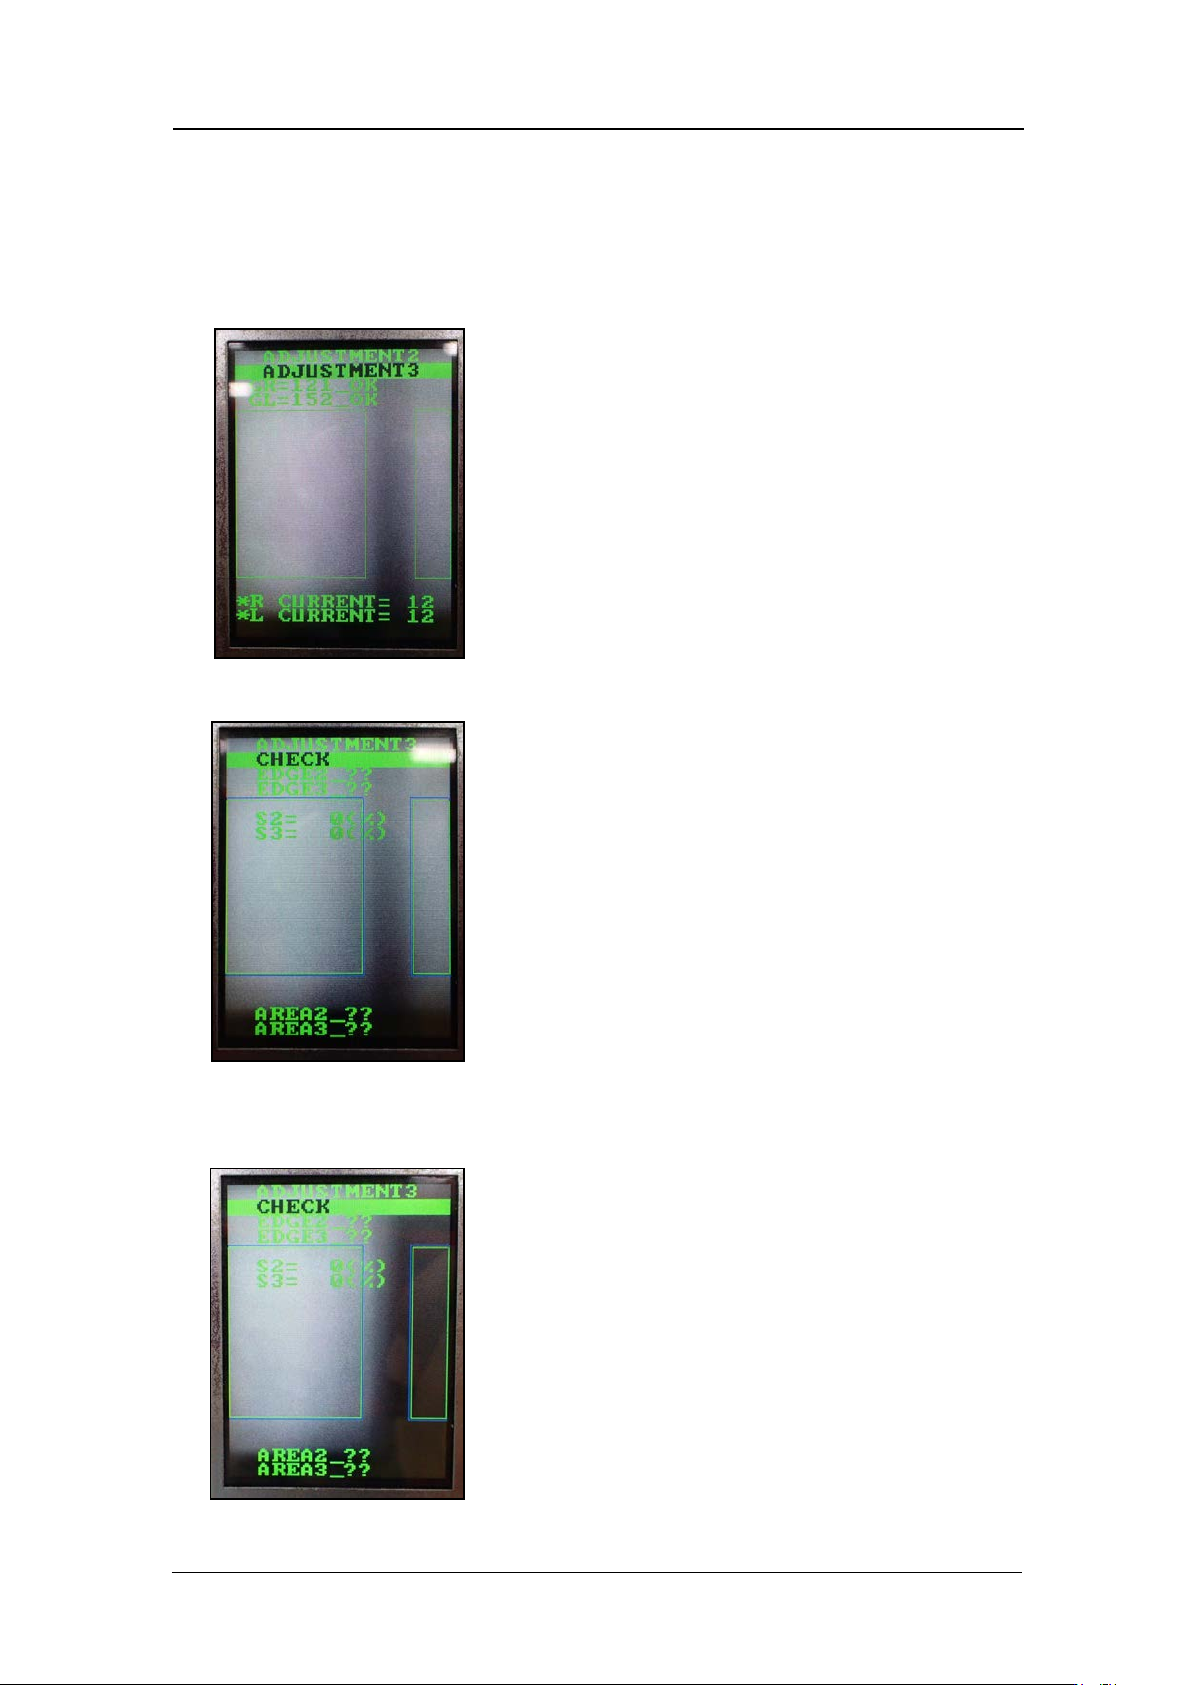
Checking the fiel d of vis ion
External l ight can affect the results, so be sure t o perform the pr ocedure in a shaded area.
1. Continuing from the previous procedure, press the upper button to display “Adjustment
3”.
2. Press the low er but t on t o display “ ADJUSTMENT 3 CHECK”.
3. Block one of the IPS camera lenses with a piece of paper, and then press the lower
button. (In the example below, the right-hand lens (as viewed from the front of the
machine) is blocked).
CONFIDENTIAL