IPS adjustment on the modules.pdf - 第160页
Edition 1 .0 IPS Adjustment for V arious Hea d T ypes on the Module < H12 L h ead > FK - 9F50 - 74 - 0E 8-6 FUJI CORPORA TION Configur a t i on setti ngs 1. Make sure th at "IPS TYP E" is 2G an d "HA…
Edition
1.0 IPS Adjustment for Various Hea d Types on the Module
<H12L head>
FK-9F50-74-0E 8-5 FUJI CORPORATION
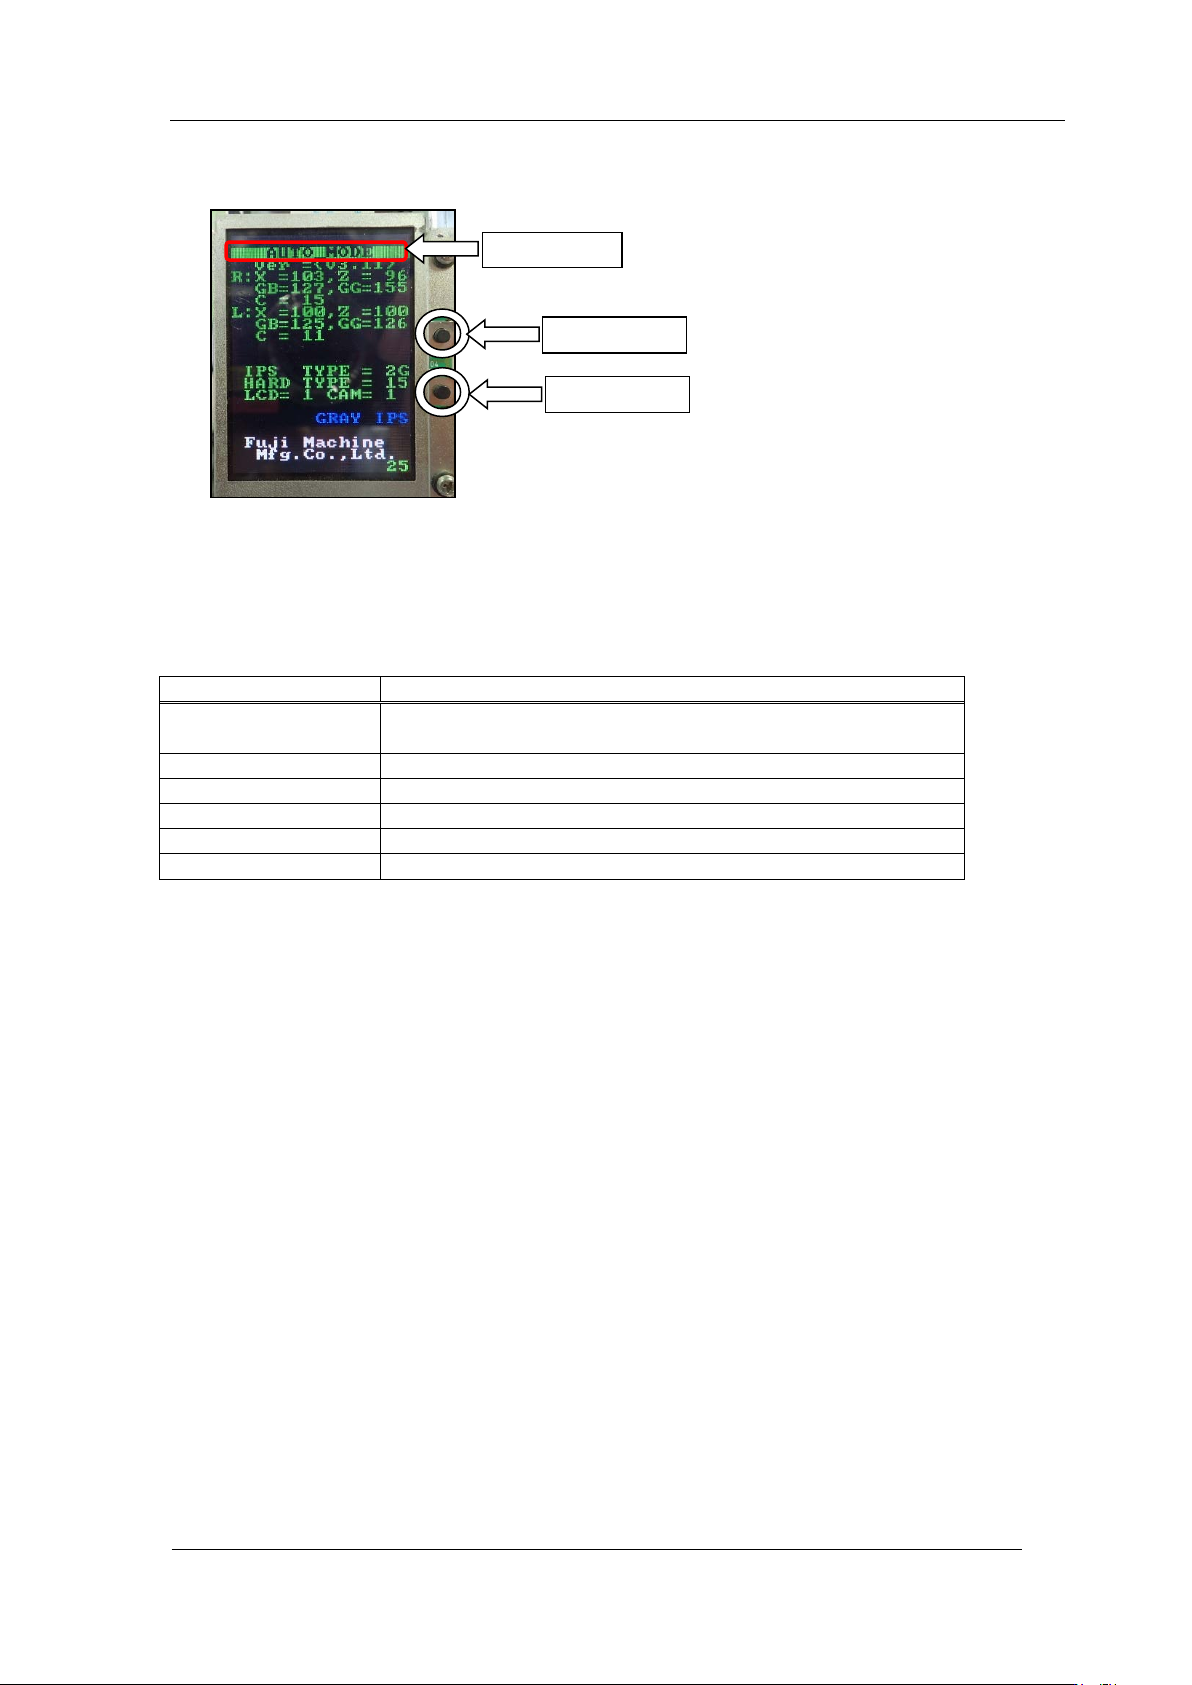
Component nam e s and e x planation of the a djustment modes
Mode name: displays the curr ent ly s el ected adjustment mo de.
Back butt on: used t o switch t o a different mode from t he cur r ent ly selected mode.
Set button: us ed when saving or when selecting modes.
There are 6 different adjustme nt m odes.
Mode name
Contents
AUTO MODE
The initial screen displayed when the power is supplied to
the head.
ADJ MODE
This mode is used to acce ss t he 3 adjustme nt modes below.
ADJUSTMENT 1
Used for res ol ut ion and ti lt adjustment.
ADJUSTMENT 2
Used for gray scale and cu r r ent value adjustment.
ADJUSTMENT 3
Used to chec k the field of vision.
CONFIGURATION
Used to set t he function settings.
Mode name
Back butt on
Set button
CONFIDENTIAL
Edition
1.0 IPS Adjustment for Various Hea d Types on the Module
<H12L head>
FK-9F50-74-0E 8-6 FUJI CORPORATION
Configur a t ion setti ngs
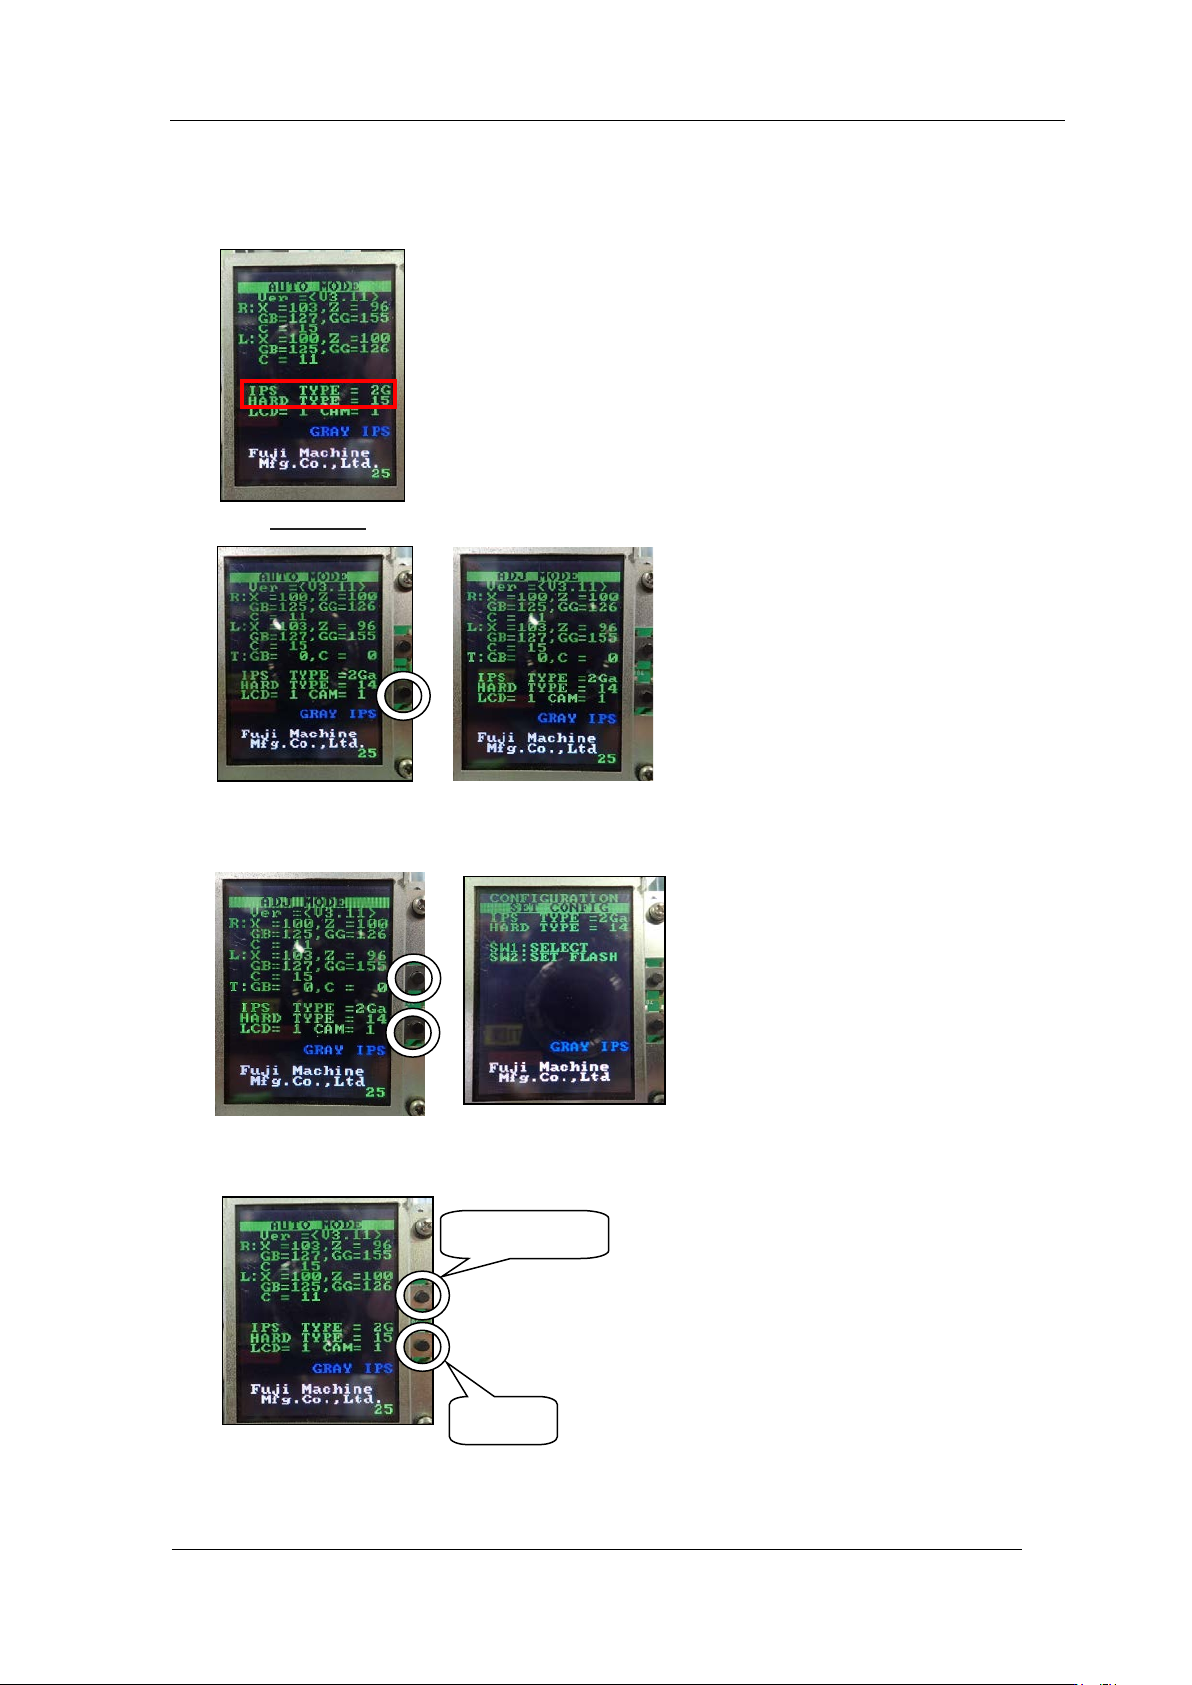
1. Make sure that "IPS TYP E" is 2G and "HA RD TYPE" is 15.
2. If not, hold down the lower butt on and ent er "ADJ MO DE".
3. In the "ADJ MODE" screen, press the upper and lower buttons at the same time to
display the " CONFIG U RATION" screen.
4. Press the upper button to make "IPS TYPE" 2G and "HARD TYPE" 15, then press the
lower button t o save the s et ting.
5. Reboot the base if you change the s et t ings.
Select TYPE
Save
CONFIDENTIAL
Edition
1.0 IPS Adjustment for Various Hea d Types on the Module
<H12L head>
FK-9F50-74-0E 8-7 FUJI CORPORATION
Adjusting the camera instllation position
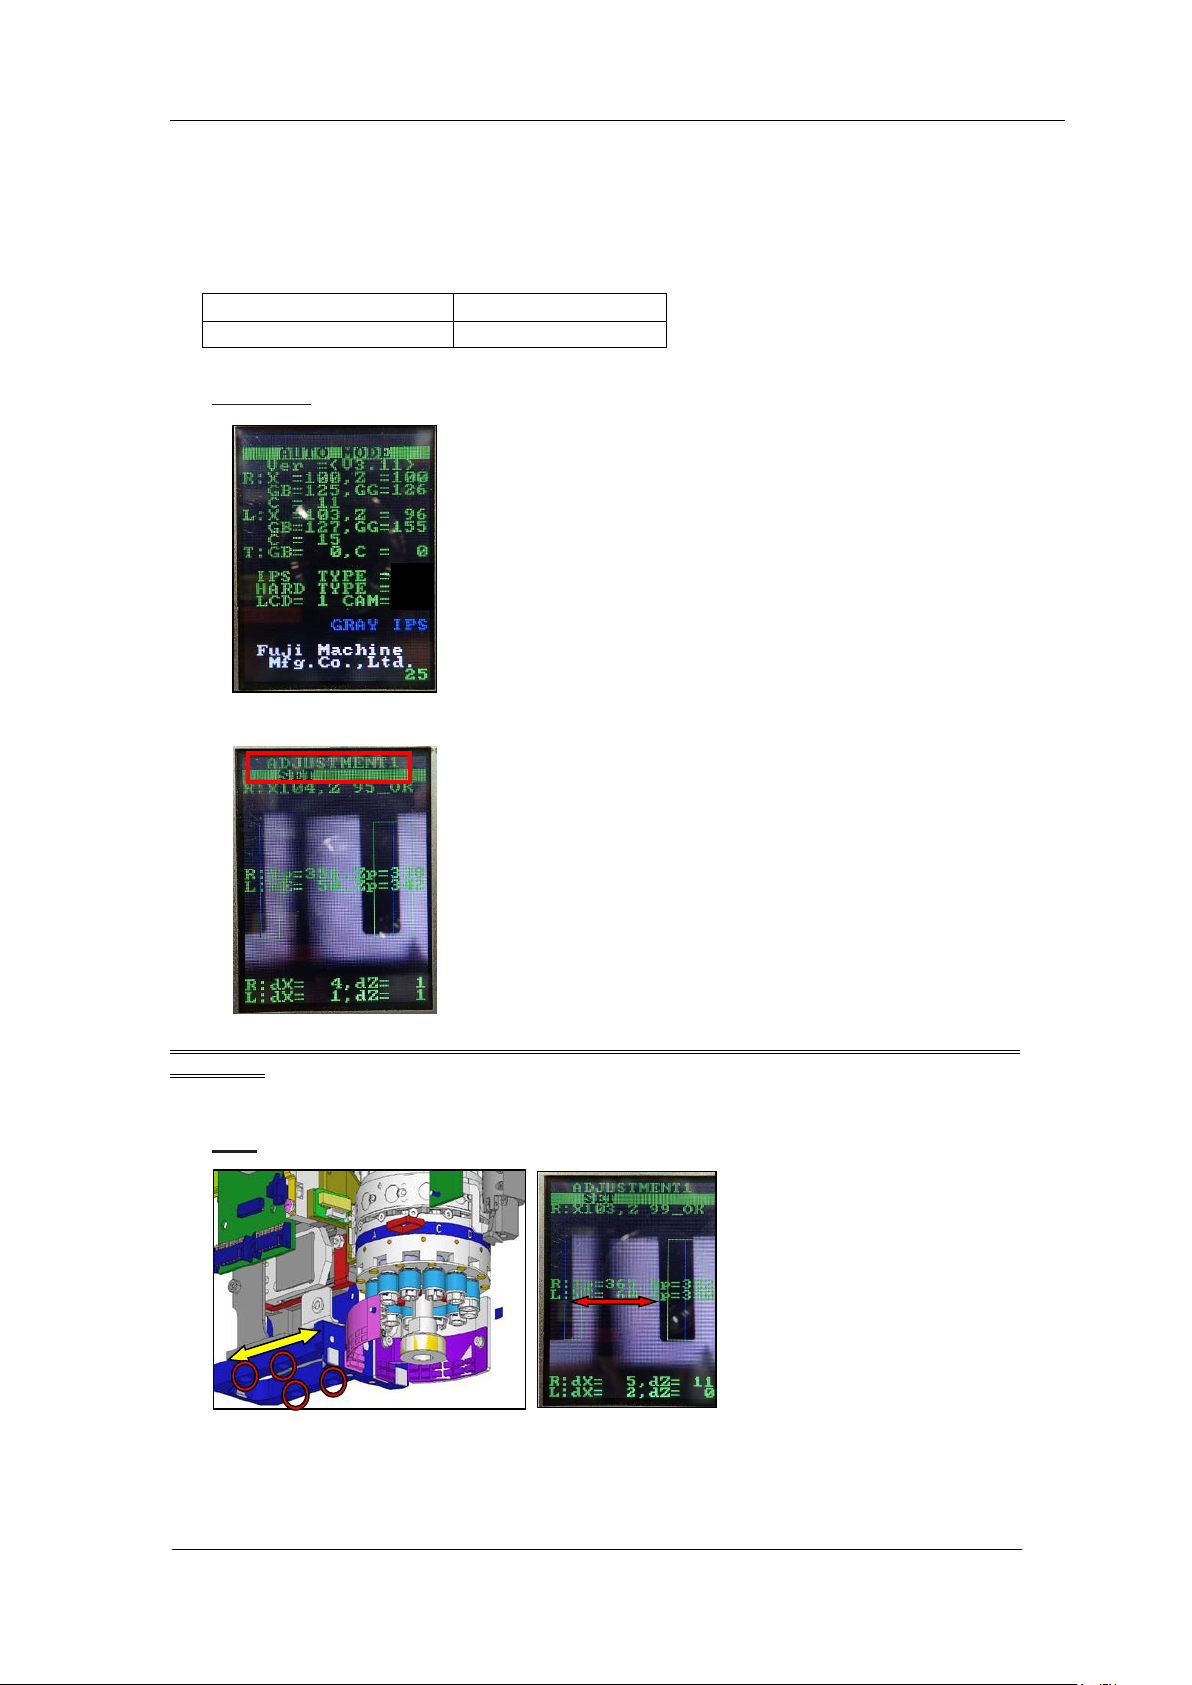
1. Startup Equipment Check to supply power to the head. Startup MotionAdjustmentTool
and move the R-axis and Q-axis to their original positions. (Refer to Section 4.2, step 6
to 9.)
2. Hold down the lower but ton to enter "AD J MODE".
3. Press the lower but t on t o enter "ADJ US TMENT 1" and blin k the LED.
Adjust the camera installation position in the order of pitch, height direction and X
direction.
4. Loosen the f our prism mounting bolts and move the prism back and forth to adjust the
pitch.
R-axis origi nal position
0
~
60000 pulses
Q-axis original positio n.
30000 ± 500 pulses
2G
15
1
CONFIDENTIAL