IPS adjustment on the modules.pdf - 第169页
Edition 1 .0 IPS Adjustment for V arious Hea d T ypes on the Module < H12 L h ead > FK - 9F50 - 74 - 0E 8- 15 FUJI CORPORA TION 8. In the “ADJU STME NT3 CHECK” screen , bloc k the right glass wit h some p aper etc.…
Edition
1.0 IPS Adjustment for Various Hea d Types on the Module
<H12L head>
FK-9F50-74-0E 8-14 FUJI CORPORATION
5. In the “ADJUSTMENT3 CHECK” screen, block the left glass with some paper etc., (in
this case, the left side glass as seen from the front of the device) and then press the
lower button t o check the v alue is within tolerance show n below.
6. Remov e t he jig nozzles.
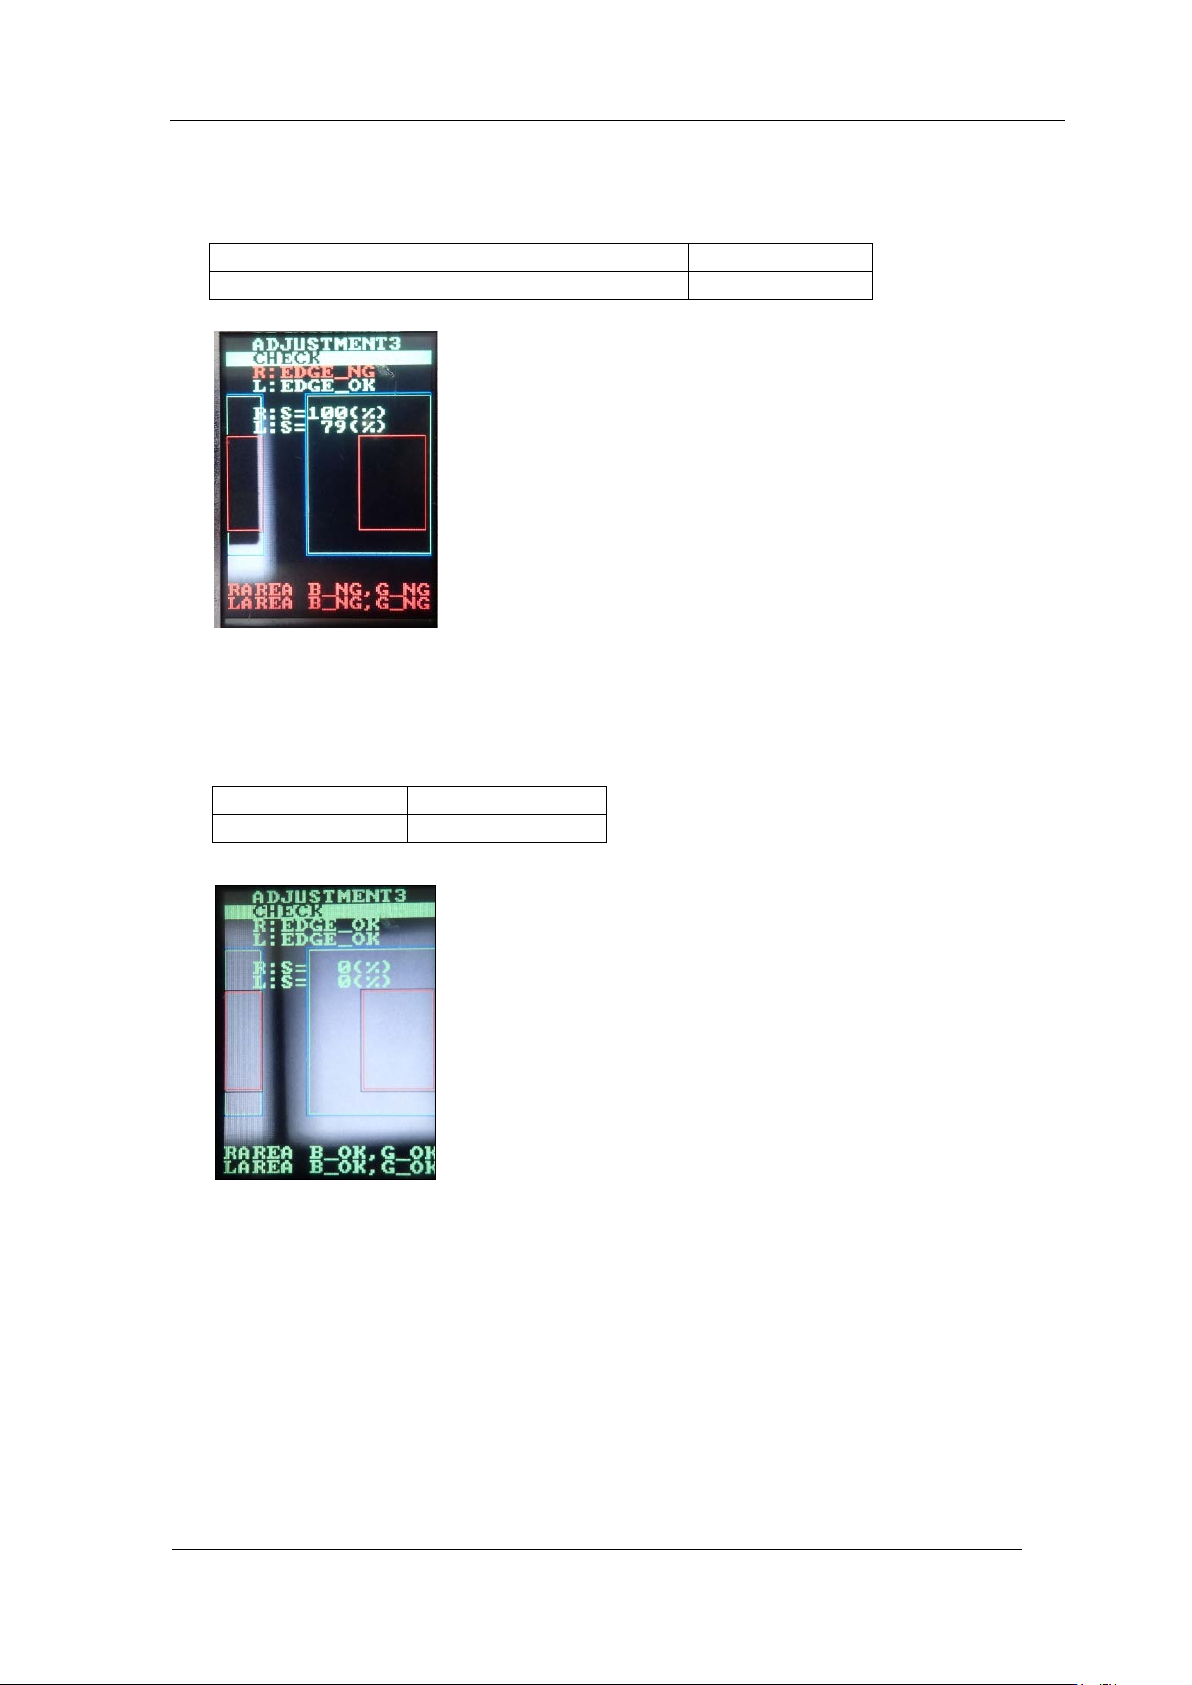
7. In the “ADJUSTMENT3 CHECK” screen, press the lower button without blocking the
glasses to check the v alu e. The value sh oul d be shown like below.
L
:
EDGE
=
OK
R
:
EDGE
=
NG
L
:
S
=
The same value a s when it is not blocked
R
:
S
=
100%
R:EDGE
=
OK
L:EDGE
=
OK
R
:
S
=
0%
L
:
S
=
0%
CONFIDENTIAL
Edition
1.0 IPS Adjustment for Various Hea d Types on the Module
<H12L head>
FK-9F50-74-0E 8-15 FUJI CORPORATION
8. In the “ADJUSTMENT3 CHECK” screen, block the right glass with some paper etc., (in
this case, the right side glass as seen from the front of the device) and then press the
lower button t o check the value is within tolerance below.
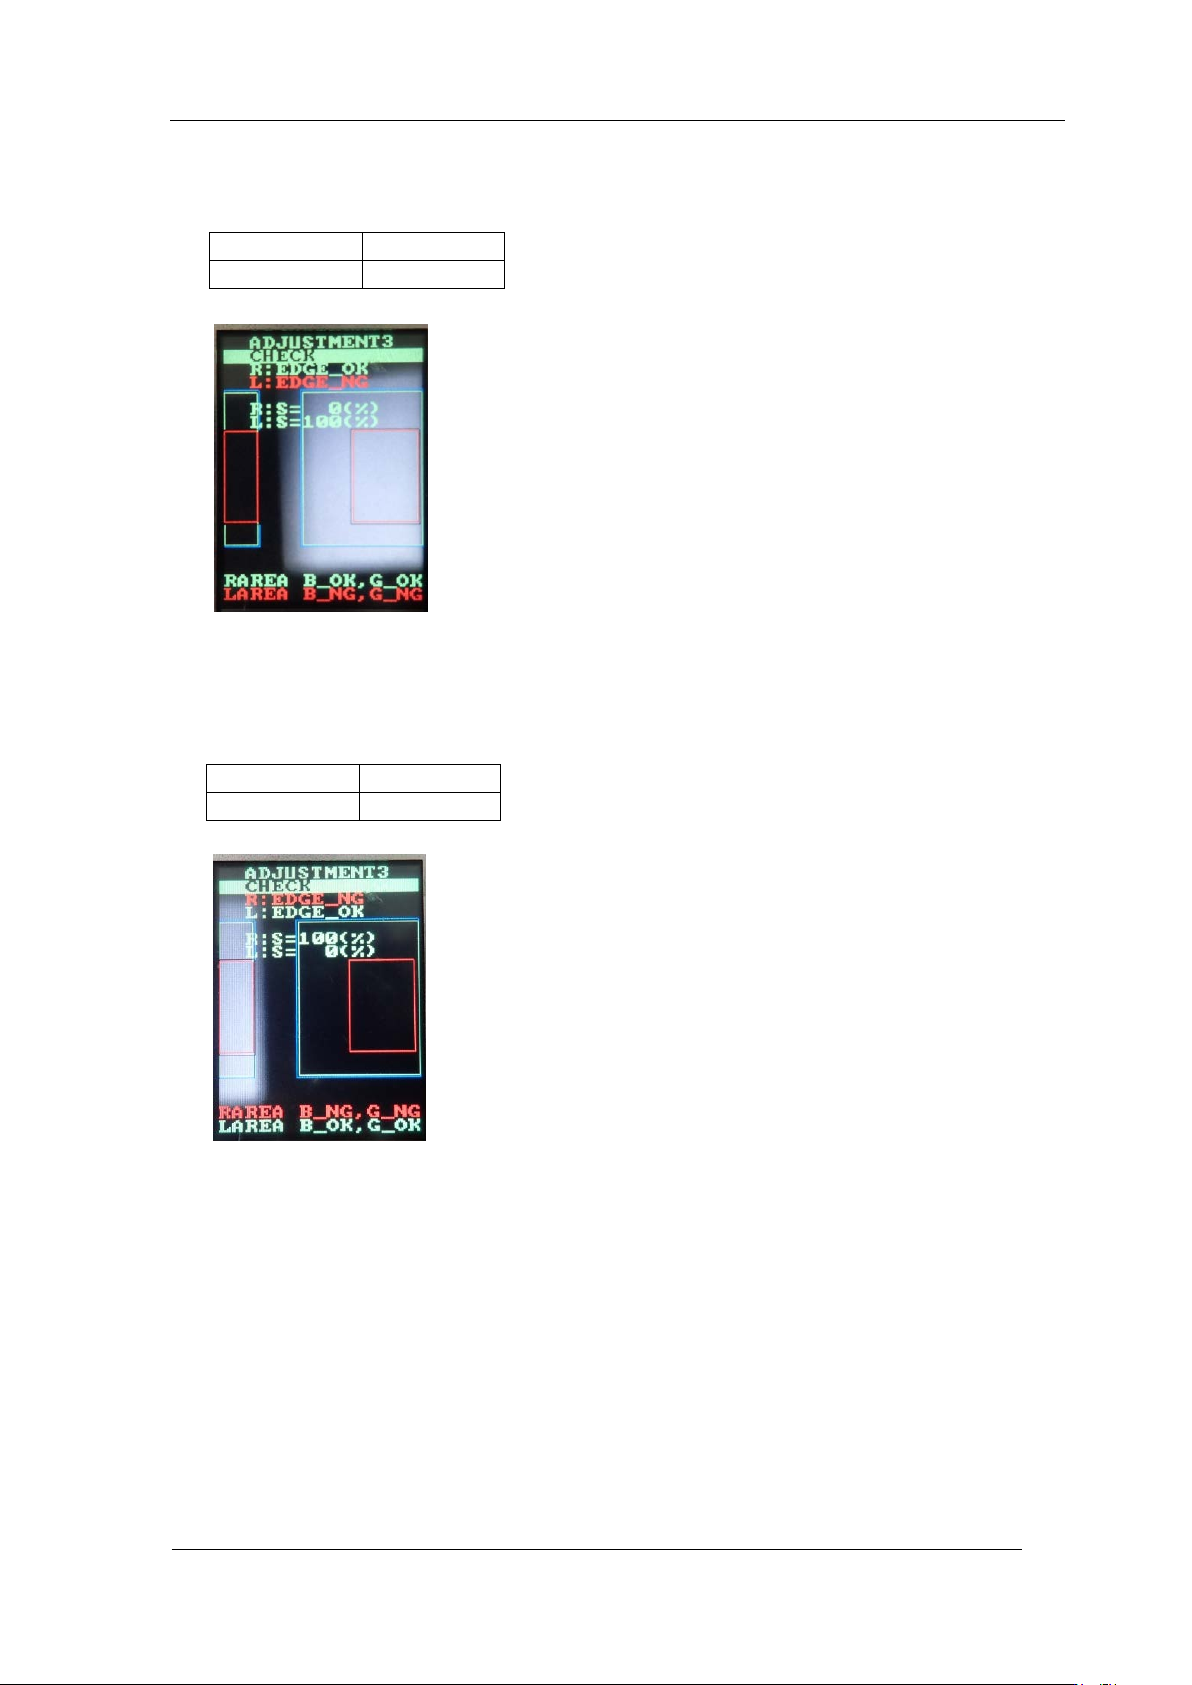
9. In the “ADJUSTMENT3 CHECK” screen, block the left glass with some paper etc., (in
this case, the left side glass as seen from the front of the device) and then press the
lower button t o check the value is within tolerance below.
R:EDGE_OK
L:EDGE_NG
R
:
S
=
0%
L
:
S
=
100%
R:EDGE_NG
L:EDGE_OK
R
:
S
=
100%
L
:
S
=
0%
CONFIDENTIAL

Edition
1.0 IPS Adjustment for Various Hea d Types on the Module
<H12L head>
FK-9F50-74-0E 8-16 FUJI CORPORATION
Below is the procedure t o r eturn to [ADJ MODE] scr een.
(1) Press the upper button to display “ADJUSTMENT 3 BACK”.
(2) Press the lower but ton to display “ADJUSTMENT 2 CURRENT”.
(3) Press the upper button to display “ADJUSTMENT 2 SET”.
(4) Press the upper button to display “ADJUSTMENT 2, ADJUSTME NT 3”.
(5) Press the upper button to display “ADJUSTMENT 2, BACK”.
(6) Press the lower but ton to display “ADJUSTMENT 1 SET”.
(7) Press the upper button to display “ADJUSTMENT 1 ADJUSTMENT 2”.
(8) Press the upper button to display “A DJUSTMEN T 1 BACK”.
(9) Press the lower but ton to display “A DJ MO DE”.
(10) Turn the mac hine power OF F.
(11) Remove the IPS monitor ji g
(12) Attach the h ead cover.
(13) Perform the cali br at io n. (Requ ired)
Note: If the ADJUSTMENT 1 data was updated, it is necessary to perform the
calibration using [Accessory software] – [Calibration] – [Remeasure
Calibration] command
.
Otherwise, the saved values w i l l not be u pdated.
CONFIDENTIAL