IPS adjustment on the modules.pdf - 第62页
Edition 1.0 IPS Adjustment for Various Head Types on the Modul e <DX h ead> FK - 9F50 - 74 -0E 3-8 FUJI CORPORAT ION 19. Pu sh the lower butt on once to display “CURRENT” . 20. R otate the j ig 180 de grees (R - ax…
Edition
1.0 IPS Adjustment for Various Head Types on the Module
<DX head>
FK-9F50-74-0E 3-7 FUJI CORPORATION
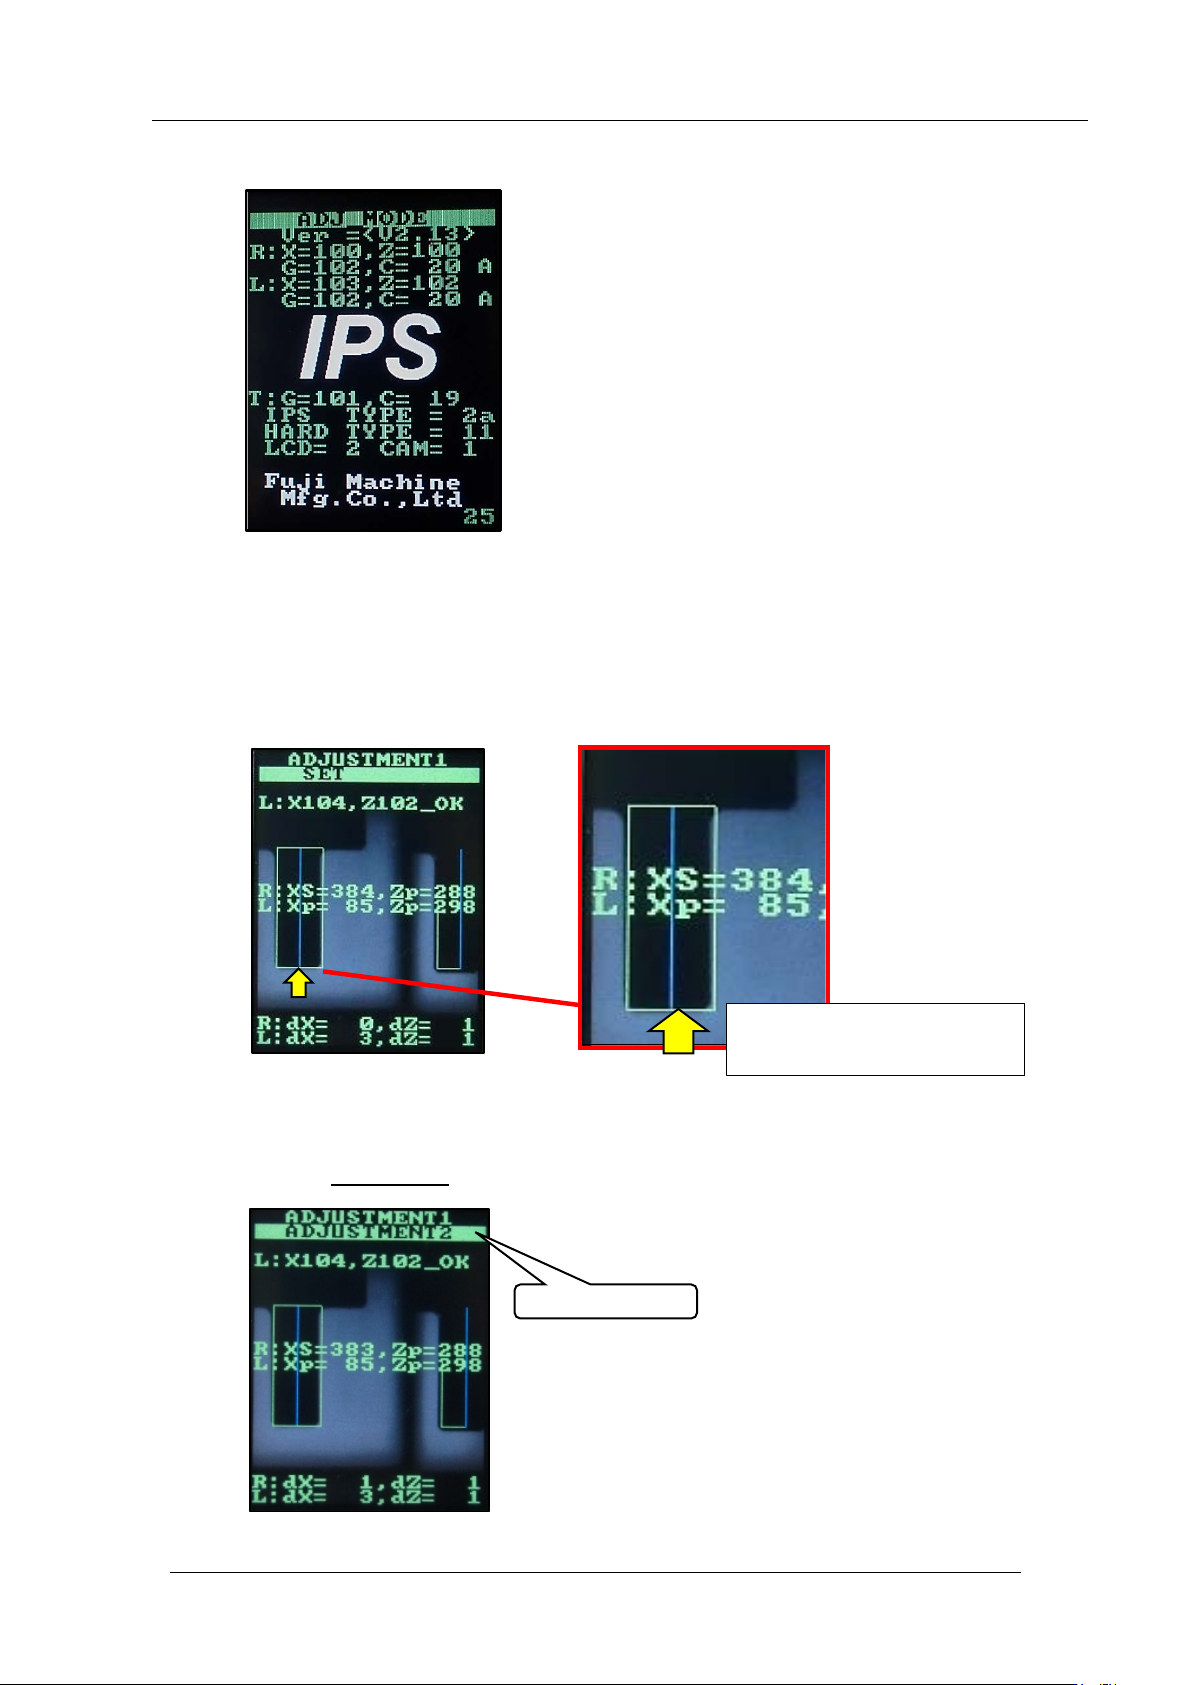
13. On the IPS monit or, hold down the low er but t on t o enter “ADJ MO DE”.
14. Push the lower button once to enter “ AD JUSTME N T1”.
15. Move the Z1-axis to the IPS vision processing position. Use Equipment Check I/O
monitor to turn ON [Y10A Z1AXIS BRAKE RELEASE].
16. Raise the Z1-axis so the jig displays on the IPS monitor as shown below. Align the
bottom edge of n ozzle with the green frame.
17. Turn OFF [Y10A Z1AXIS BRAKE RELEASE].
18. Push the upper butt on
once to select “ AD JUSTME NT 2” .
ADJUSTMENT 2
Align the bot t om edge of the
nozzle with the gr een frame.
CONFIDENTIAL
Edition
1.0 IPS Adjustment for Various Head Types on the Module
<DX head>
FK-9F50-74-0E 3-8 FUJI CORPORATION
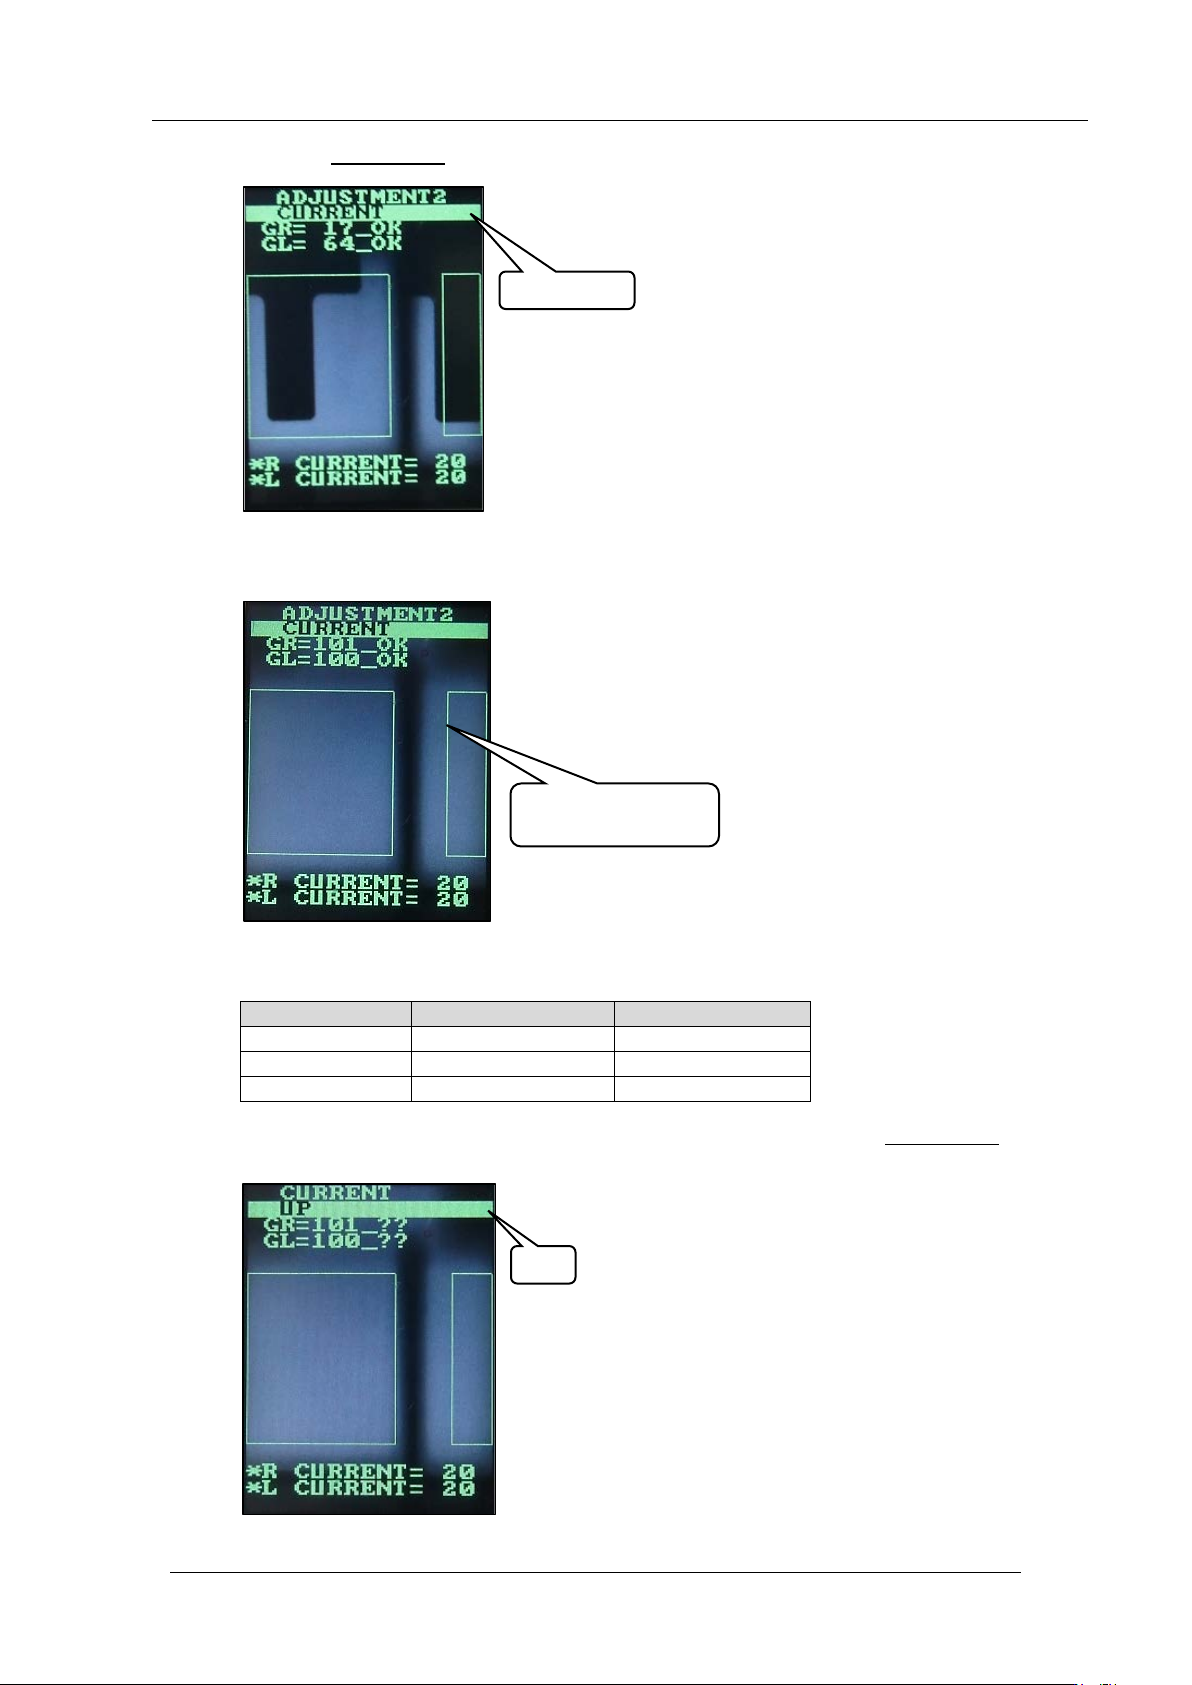
19. Push the lower button once to display “CURRENT”.
20. Rotate the jig 180 degrees (R-axis) so only the fluorescent sticker is displayed on the
IPS monitor .
21. Check the current and gray scale values are within tolerance shown in the following
table.
Tolerance
Target
CURRENT
26 or less
Same as toler ance
GR
100 ~ 140
100
GL
100 ~ 140
100
22. If the gray scale value is not close to the target value of 100, push the lower but ton once
to select “UP” .
。
CURRENT
UP
Only the sticker is
displayed
CONFIDENTIAL
Edition
1.0 IPS Adjustment for Various Head Types on the Module
<DX head>
FK-9F50-74-0E 3-9 FUJI CORPORATION
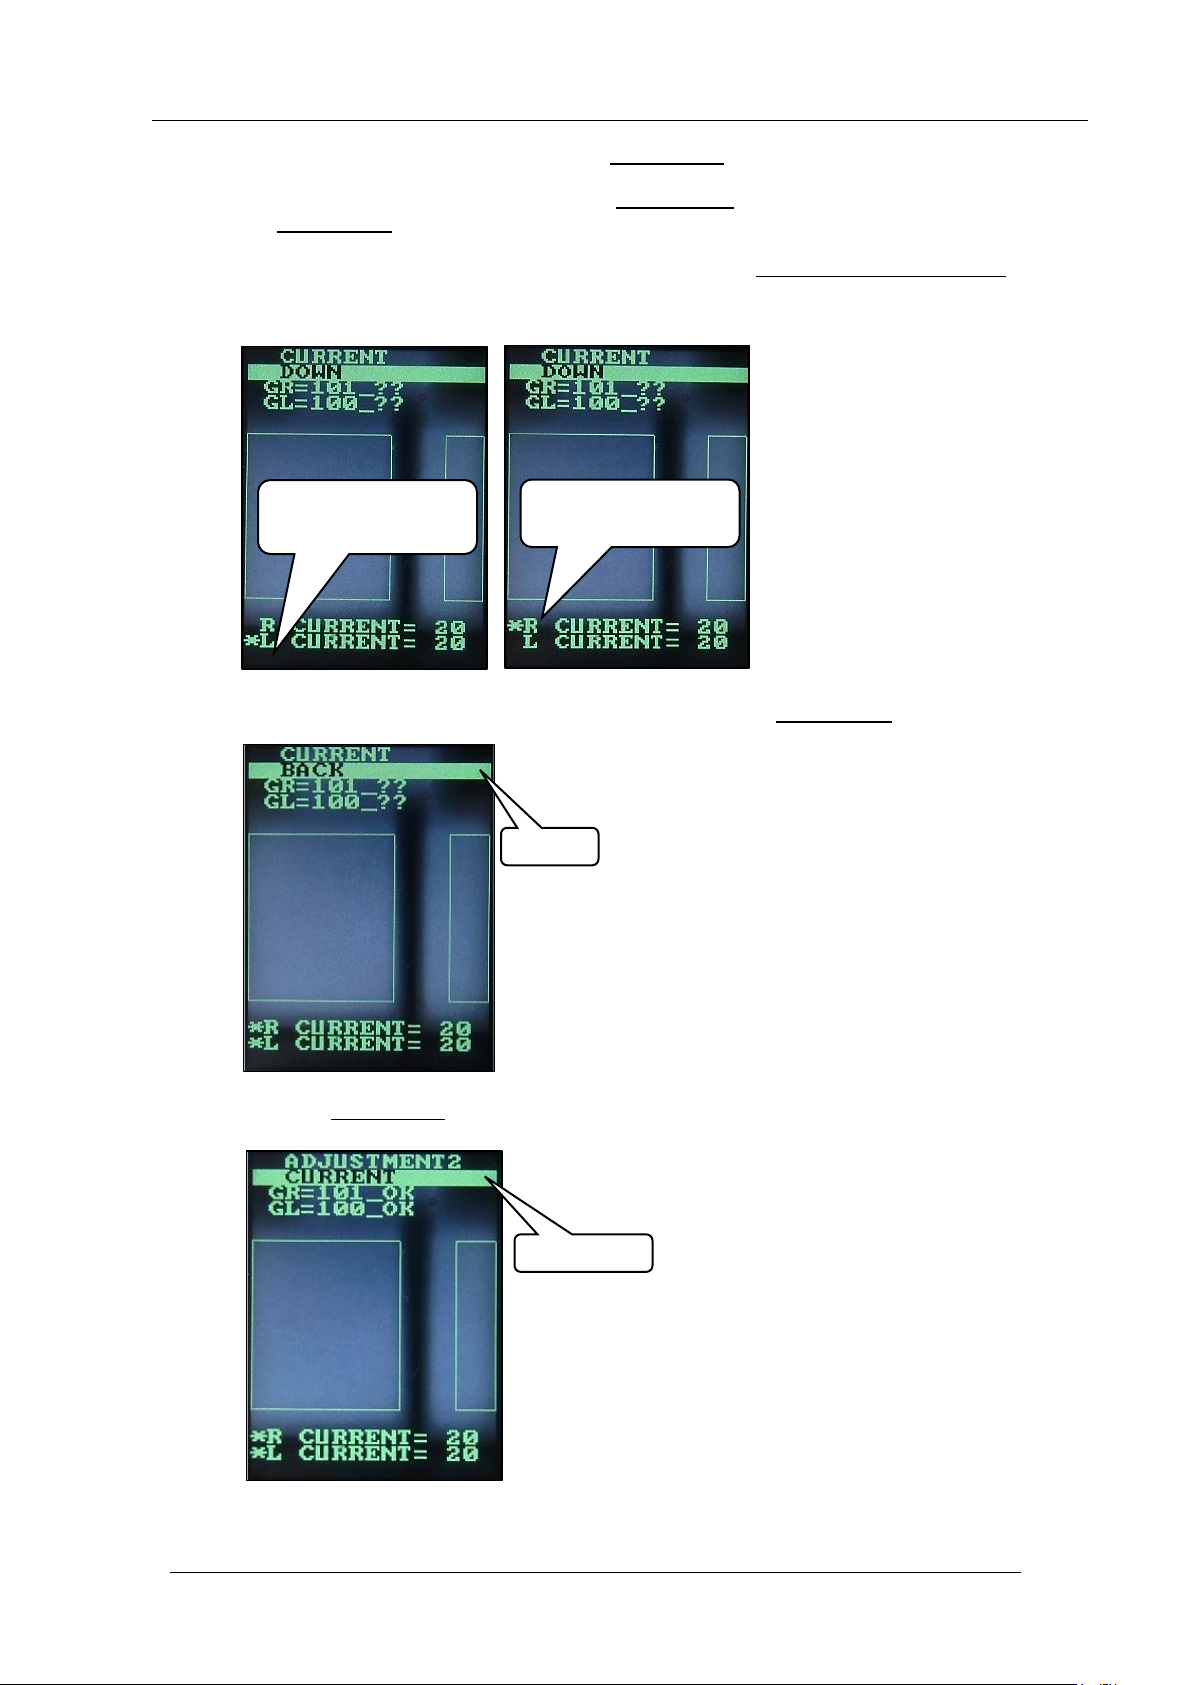
23. To increase the current value, push the lower button.
24. To decrease the curr ent v alue, push the upper button to select “ DOWN”, and then push
the lower but t on to decr ease the v alue.
25. If you need to adjust t he GR and GL values separate ly, hold down the lower button with
either “UP” or “DOWN” selected to move the asterisk (*) symbol to L or R. The left and
right value s can now be a djust ed separat ely.
26. Once the gray values are close to the target value, use the upper button
to select “BACK”.
27. Push the lower b ut t on
once to display “ CU R RENT”.
Left value can be
adjusted separately
Right value can be
adjusted separately
BACK
CURRENT
CONFIDENTIAL