IPS adjustment on the modules.pdf - 第66页
Edition 1.0 IPS Adjustment for Various Head Types on the Modul e <DX h ead> FK - 9F50 - 74 -0E 3- 12 FUJI CORPORAT ION 35. Block the right -h an d glass w ith a piece of paper as s hown be low . 36. W ith t he glas…
Edition
1.0 IPS Adjustment for Various Head Types on the Module
<DX head>
FK-9F50-74-0E 3-11 FUJI CORPORATION
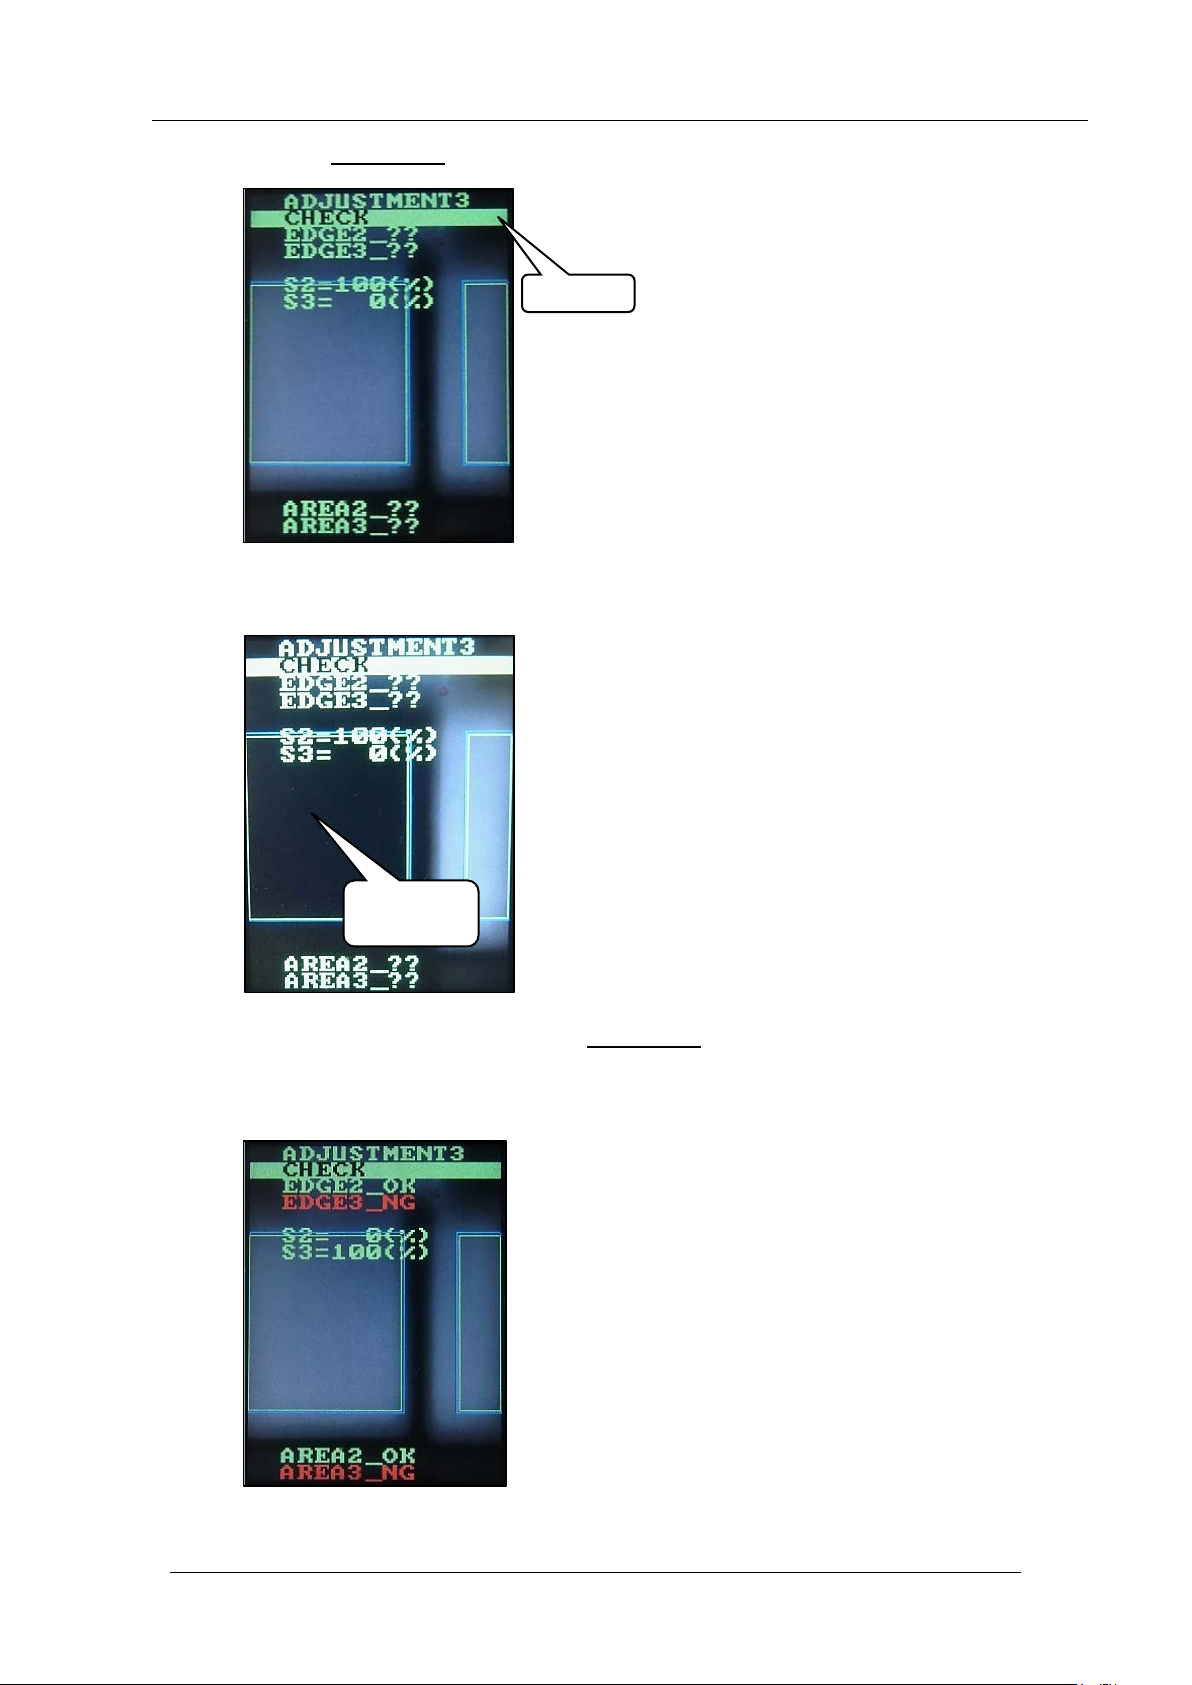
31. Push the lower b ut t on once to display “CHE CK”.
32. Block the left-hand glass w ith a piece of paper as shown be low.
33. With the glass still blocked, push the lower button
.
34. Check that “EDGE2_OK” and “EDGE3_NG” are displayed. Also, check that “S2=0%”
and “S3=100%” are displayed.
Block with
paper
CHECK
CONFIDENTIAL
Edition
1.0 IPS Adjustment for Various Head Types on the Module
<DX head>
FK-9F50-74-0E 3-12 FUJI CORPORATION
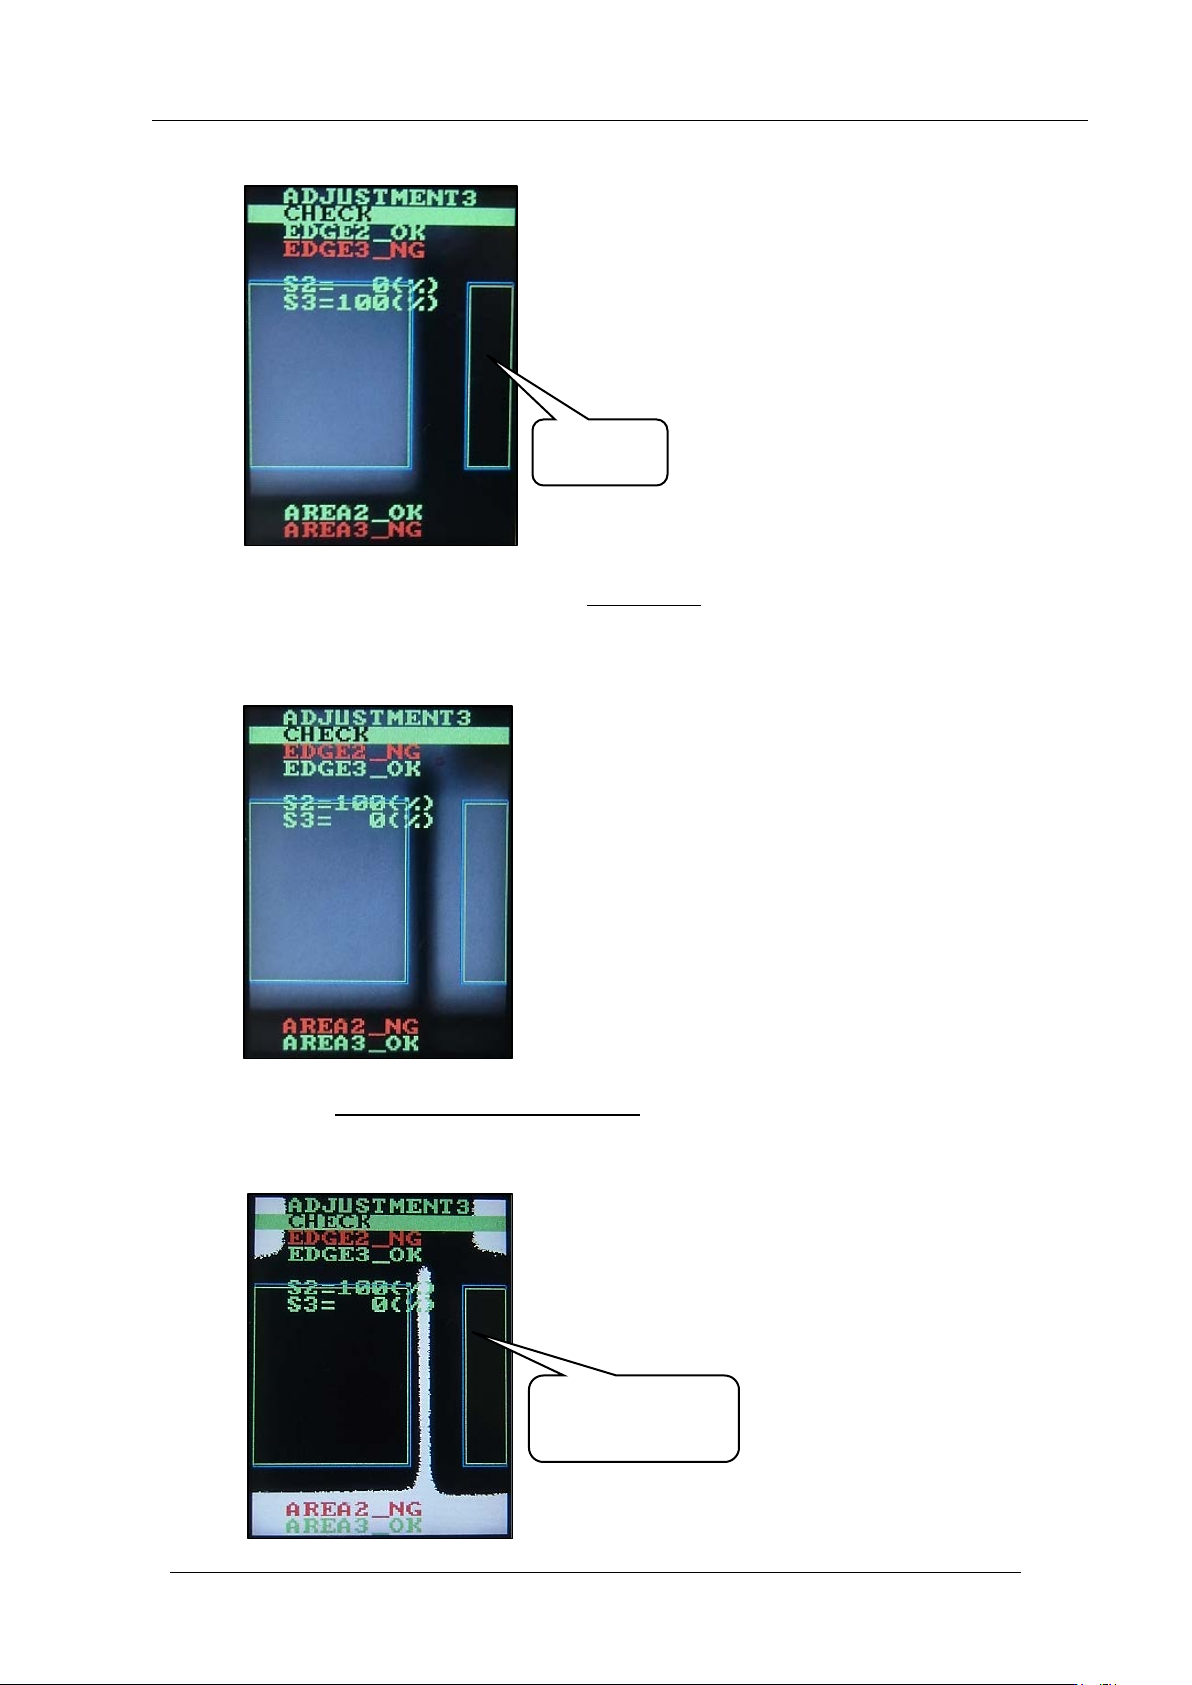
35. Block the right -hand glass with a piece of paper as shown below.
36. With the glass still blocked, push the lower button
.
37. Check that “E DGE 2_NG” and “E DGE3_O K” are displayed. Also, che ck that “S2=1 00% ”
and “S3=0%” are displayed.
38. Push the upper and lower buttons together
to reverse the LCD contrast, and then chec k
there are no white areas inside the rectangles. If there are white areas inside the
rectangles, it is necessar y to readjust t he position o f the IPS unit.
Block with
paper
Check there are no
white areas inside
the rectangles
CONFIDENTIAL
Edition
1.0 IPS Adjustment for Various Head Types on the Module
<DX head>
FK-9F50-74-0E 3-13 FUJI CORPORATION
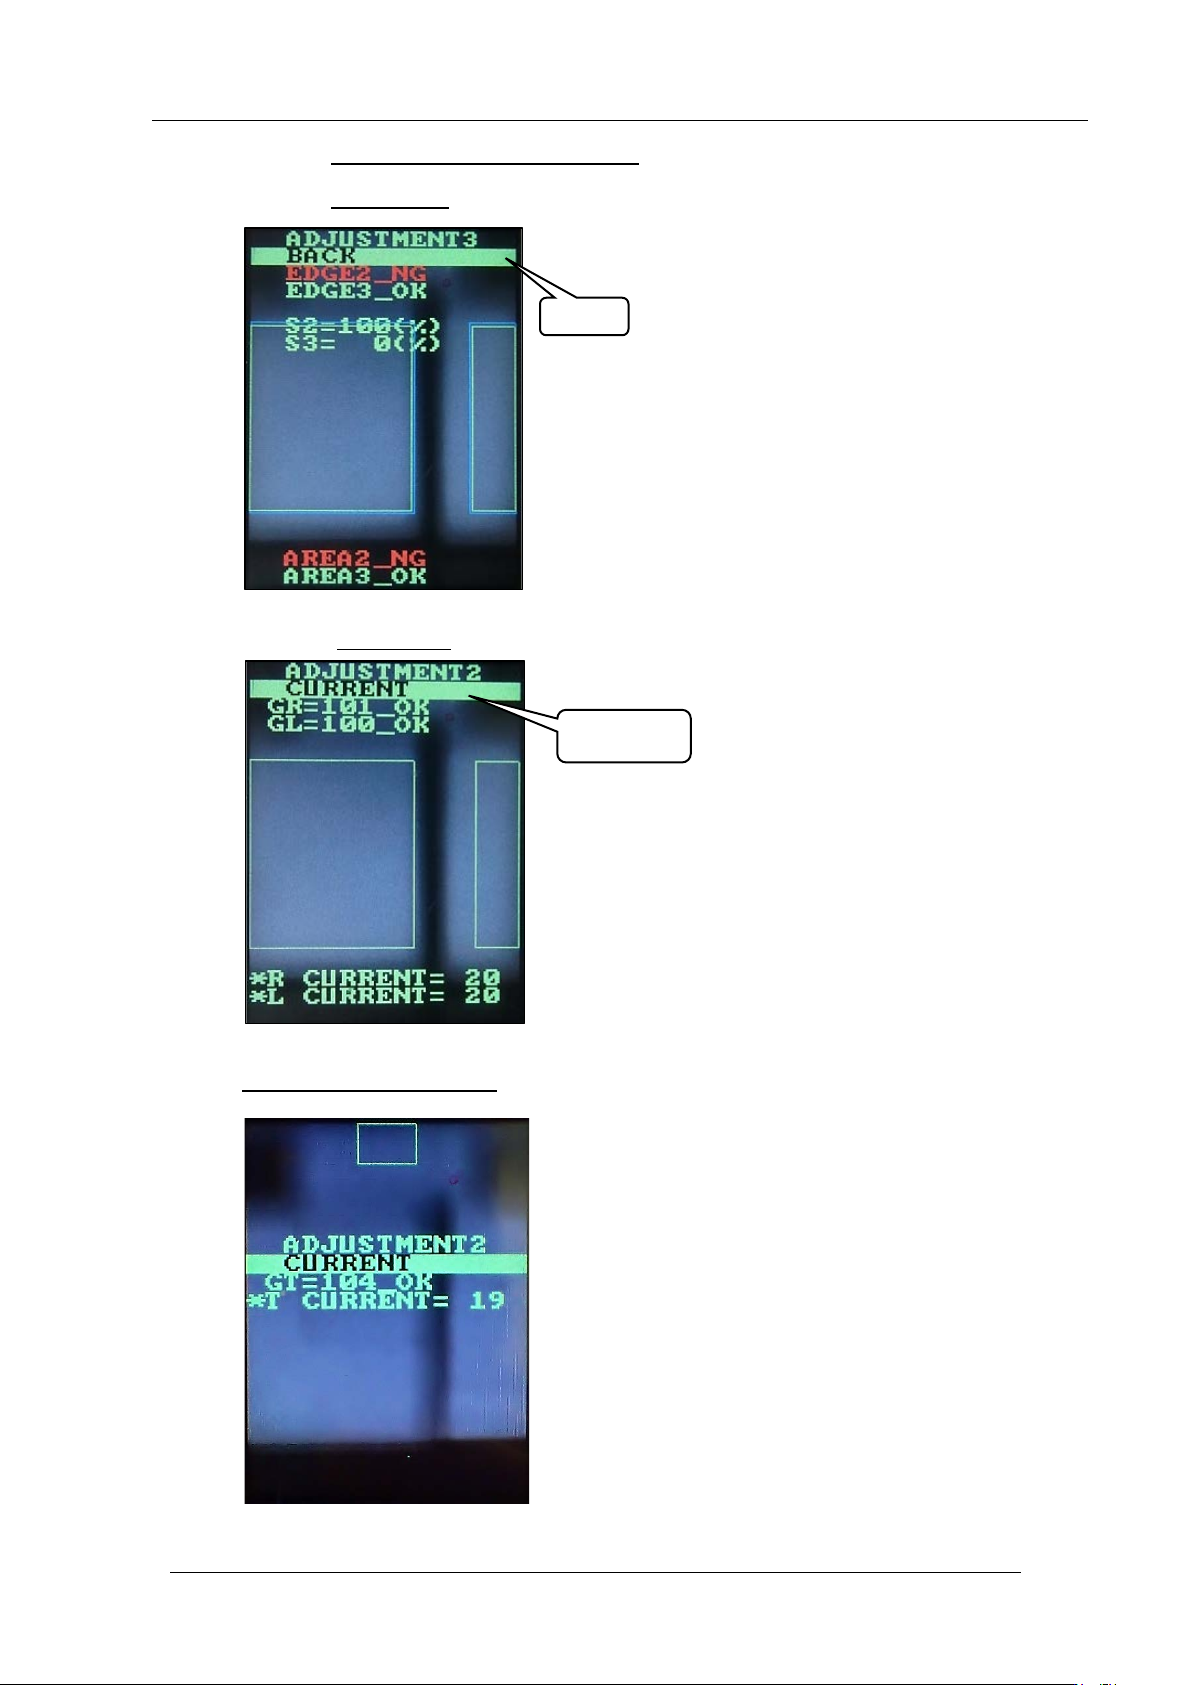
39. Push the upper and lower butt ons together to set the LCD contrast back to normal.
40. Push the upper butt on once to sele ct “BACK”.
41. Push the lower but ton
once to select “CURRENT”.
42. Hold down the lower button
to display the follow ing screen
BACK
CURRENT
CONFIDENTIAL