TX系列贴片机机台半年保养手册 - 第23页
5 WF 3 TX-Series Maintenance Return a maintained CPPx head 8 min 1 / 2 C A U T I O N ! R e f e r t o s a f e t y i n s t r u c t i o n s i n u s e r m a n u a l b e f o r e c o m m e n c i n g M a i n t e n a n c e Mac…
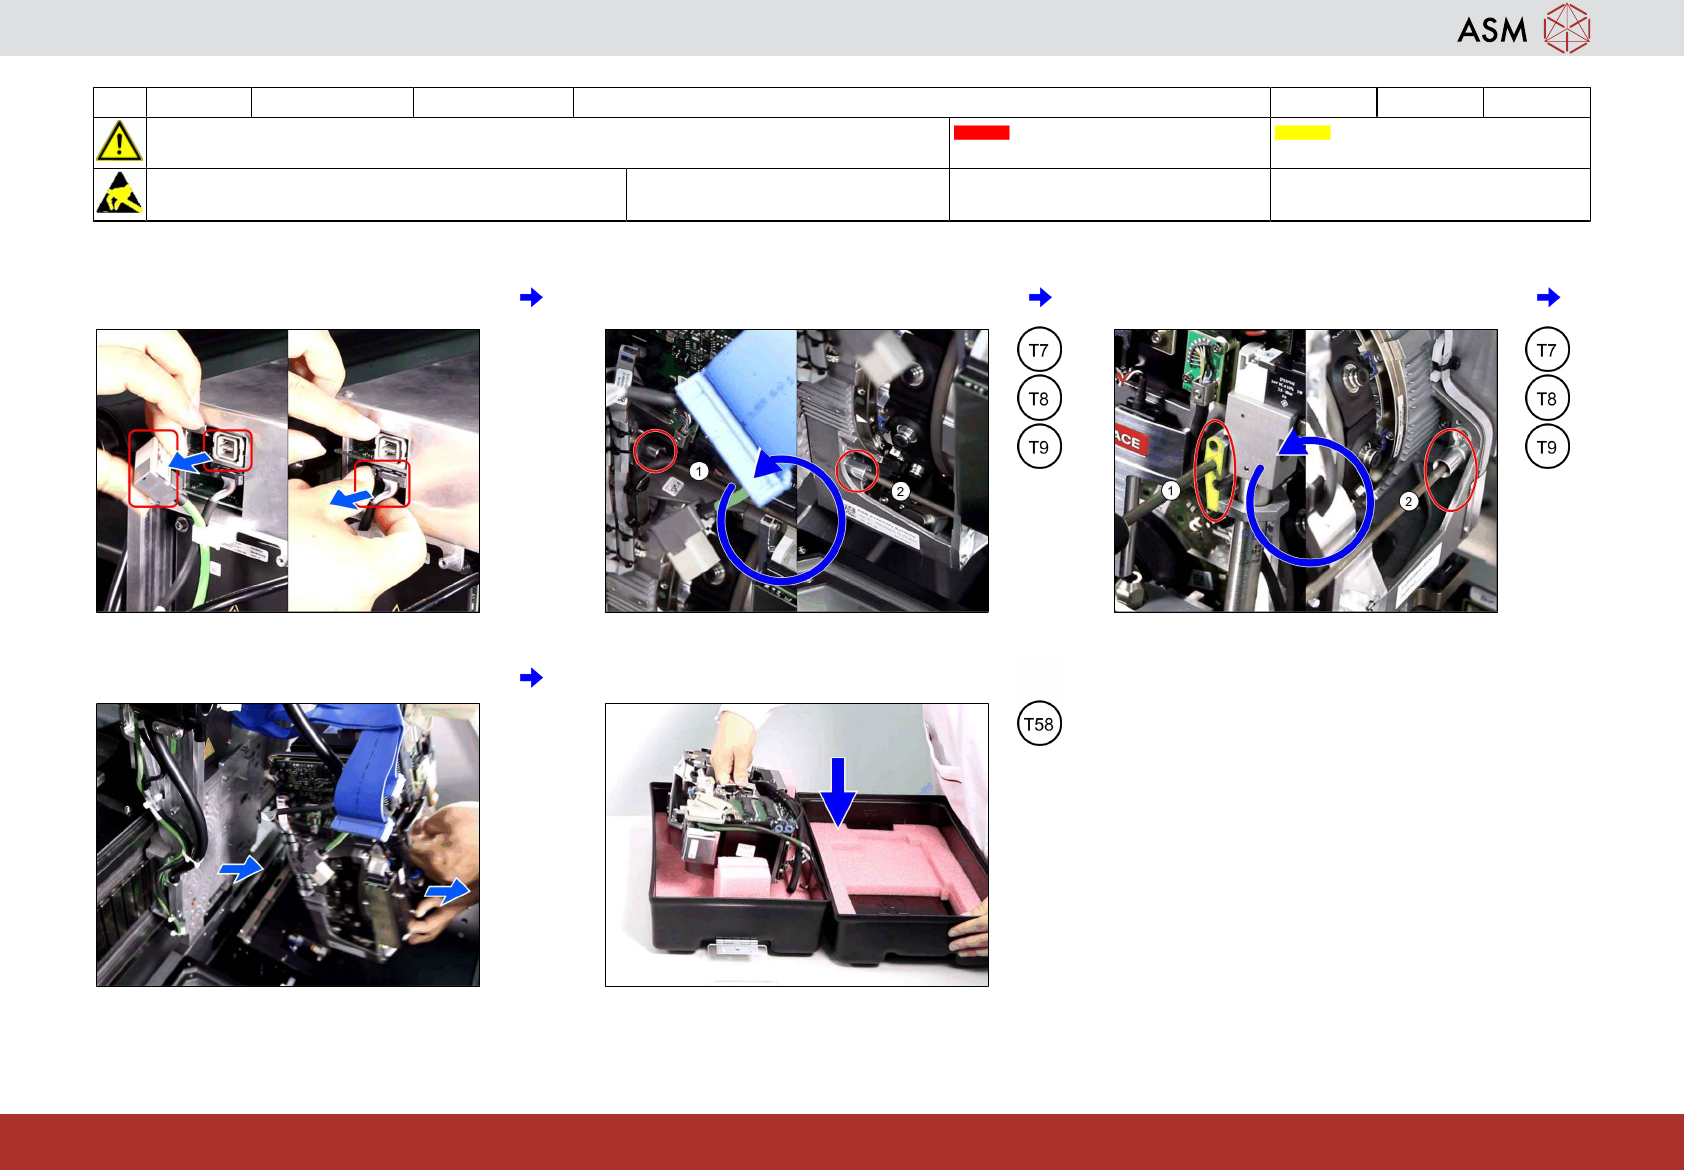
4 WF 3 TX-Series Maintenance Remove the CPPx to be maintained 12 min 2 / 2
CAUTION! Refer to safety instructions in user manual before commencing Maintenance
Machine Status OFF Conveyor Empty
NOTICE! ESD guidelines are to be followed Tool:
T7, T8, T9, T14, T58
Wear Part: Consumables:
www.asm-smt.com
7 Release the plug lock and unplug the two
camera cables.
8 Loosen the screws (1) and (2) on the left
fixing the head.
9 Loosen the screws (1) and (2) on the right
fixing the head.
10 Take the head from the hook. 11 Put the head into the transport container.
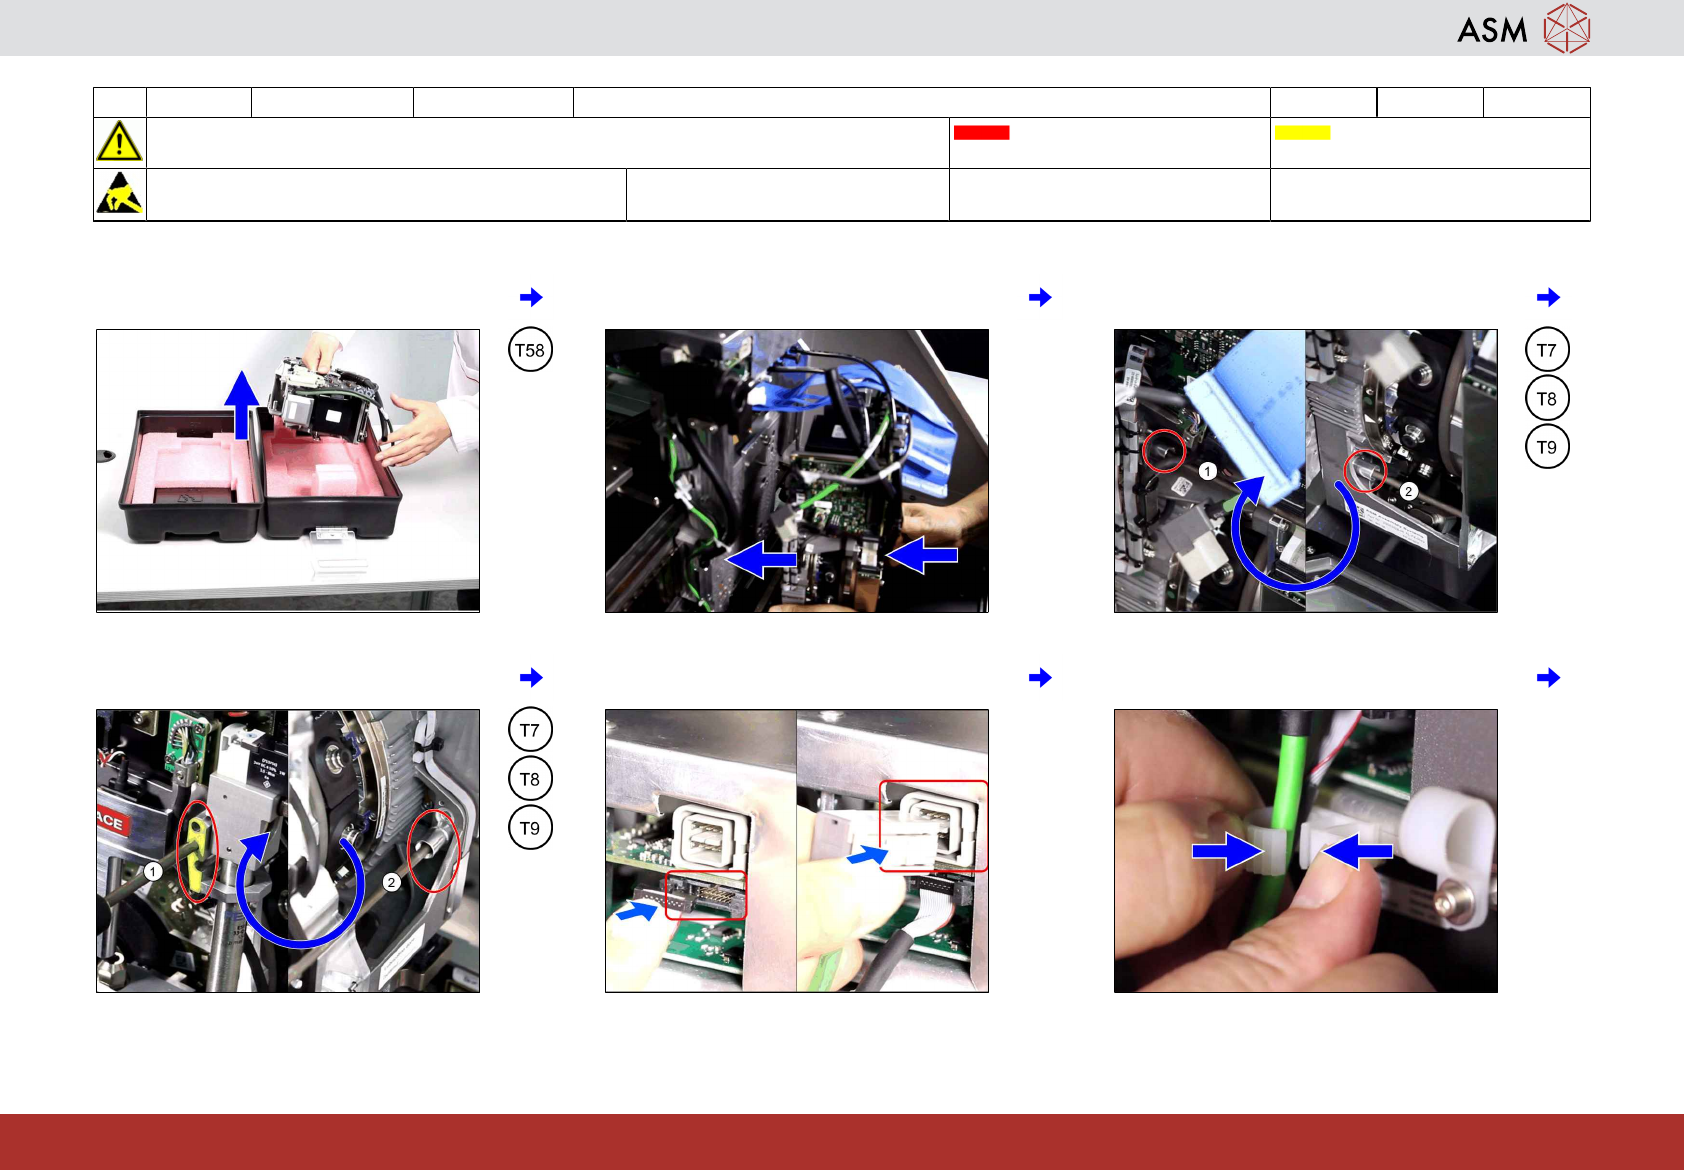
5 WF 3 TX-Series Maintenance Return a maintained CPPx head 8 min 1 / 2
CAUTION! Refer to safety instructions in user manual before commencing Maintenance
Machine Status OFF Conveyor Empty
NOTICE! ESD guidelines are to be followed Tool:
T7, T8, T9, T14, T58
Wear Part: Consumables:
www.asm-smt.com
1 Take the maintained head out of the trans-
port container.
2 Put the head on the hook. 3 Fasten the screws (1) and (2) on the left
with a torque of 2.7 Nm.
4 Fasten the screws (1) and (2) on the right
with a torque of 2.7 Nm.
5 Connect the two camera cables. 6 Close the camera cable clip.
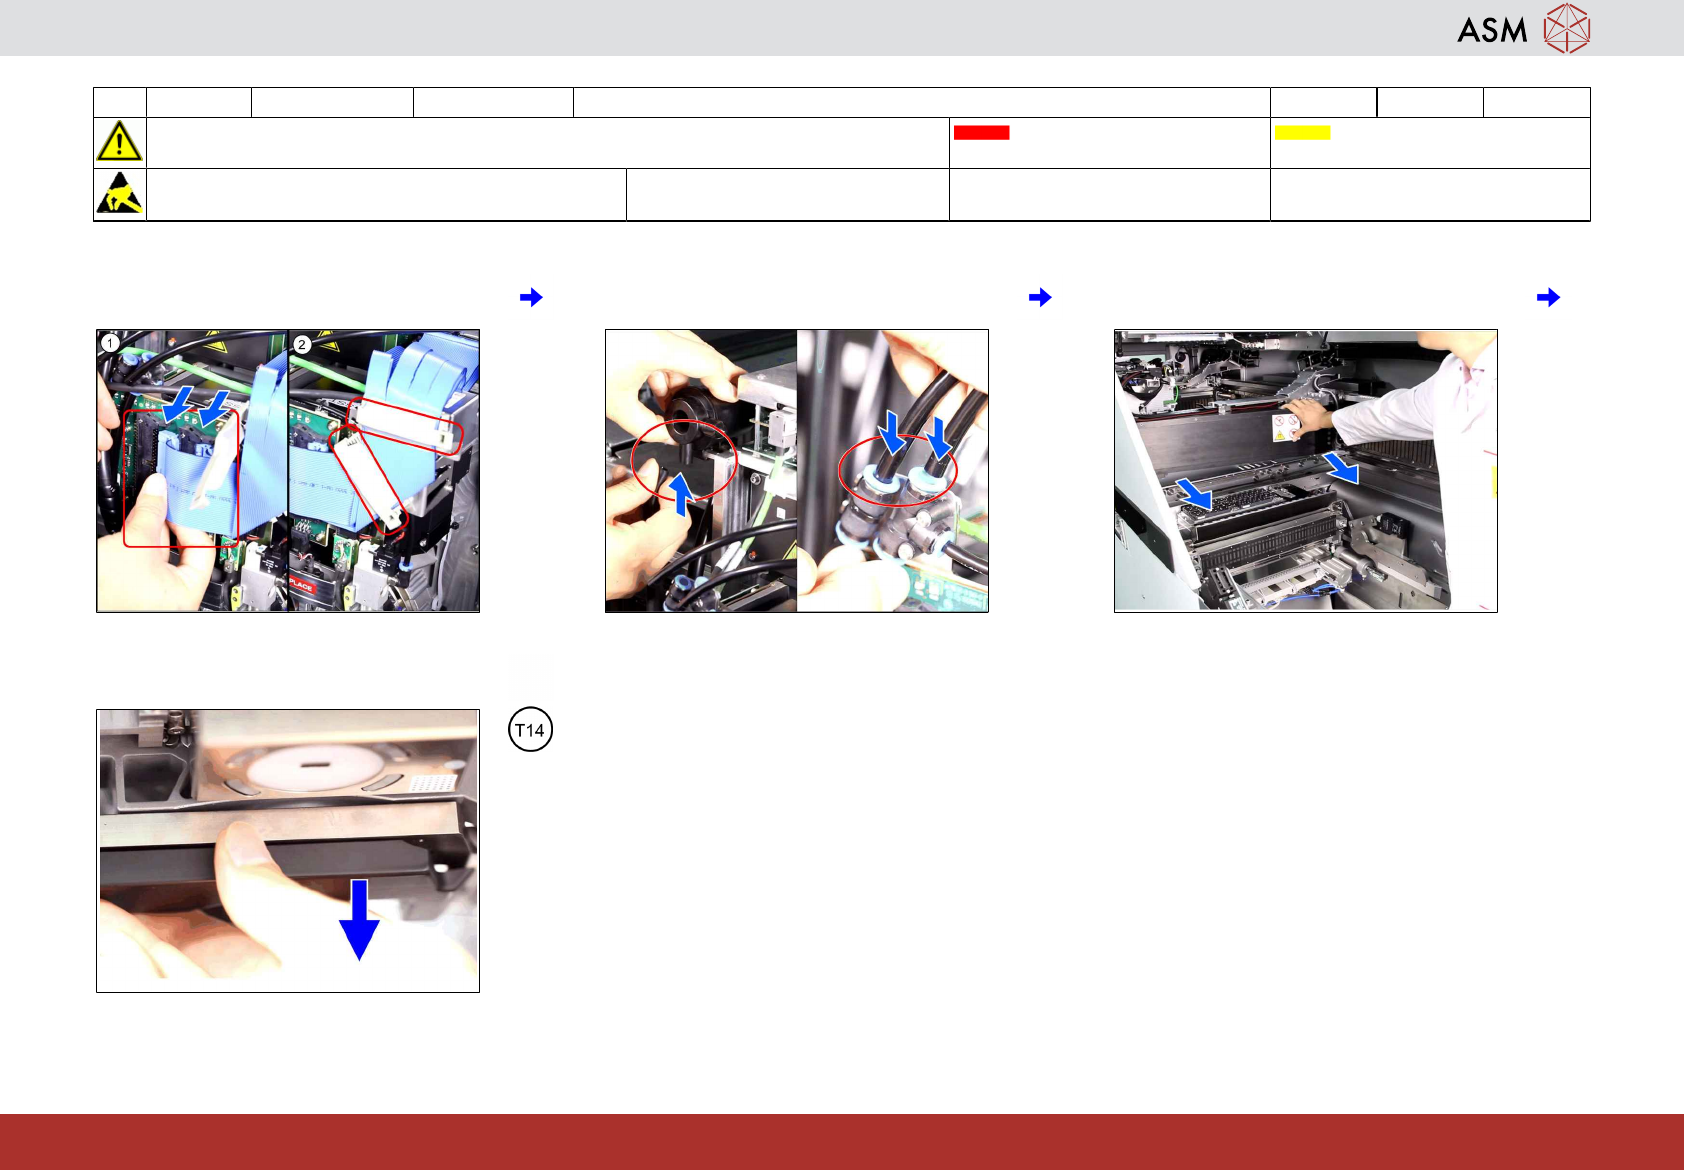
5 WF 3 TX-Series Maintenance Return a maintained CPPx head 8 min 2 / 2
CAUTION! Refer to safety instructions in user manual before commencing Maintenance
Machine Status OFF Conveyor Empty
NOTICE! ESD guidelines are to be followed Tool:
T7, T8, T9, T14, T58
Wear Part: Consumables:
www.asm-smt.com
7 Connect the ribbon cables (1) and close
the two clips (2).
8 Connect the exhaust air and the two com-
pressed air connections.
9 Move the gantry with the maintained head
to the end limit.
10 Remove the components sensor protec-
tion.