YSM20_YSM20W_Mainte_E.pdf - 第133页
Chapter 4 Maintenance of options Contents 1. Ionizer 4-1 1.1 Cleaning ionizer discharge needle (Monthly) 4-2 1.2 Replacing ionizer discharge needle (2-year) 4-3 2. UPS (Uninterruptible Power Supply) 4-4 2.1 Replacing UPS…
3-74
3
Periodic maintenance items
6. 2-year maintenance
This section describes 2-year maintenance items.
6.1 Replacing the ejector bit
As the ejector bit is used for a long time, its function may lower. Therefore, it is recommended to replace the
ejector bit with a new one once every about 2 years so as to maintain its performance even though this service
life may vary depending on the operating conditions. The following describes the replacement procedures for
the ejector bit.
c
CAUTION
The bit cannot be reused. When replacing the ejector bit, be sure to use a new one.
1
Make the preparations.
1. Take off all accessories susceptible to the
magnetic fields, such as a wristwatch
and/or magnetic ID card.
e
2. Press the emergency stop button and
then open the machine safety cover.
3. Place a square cloth under the head unit
for the bit replacement.
2
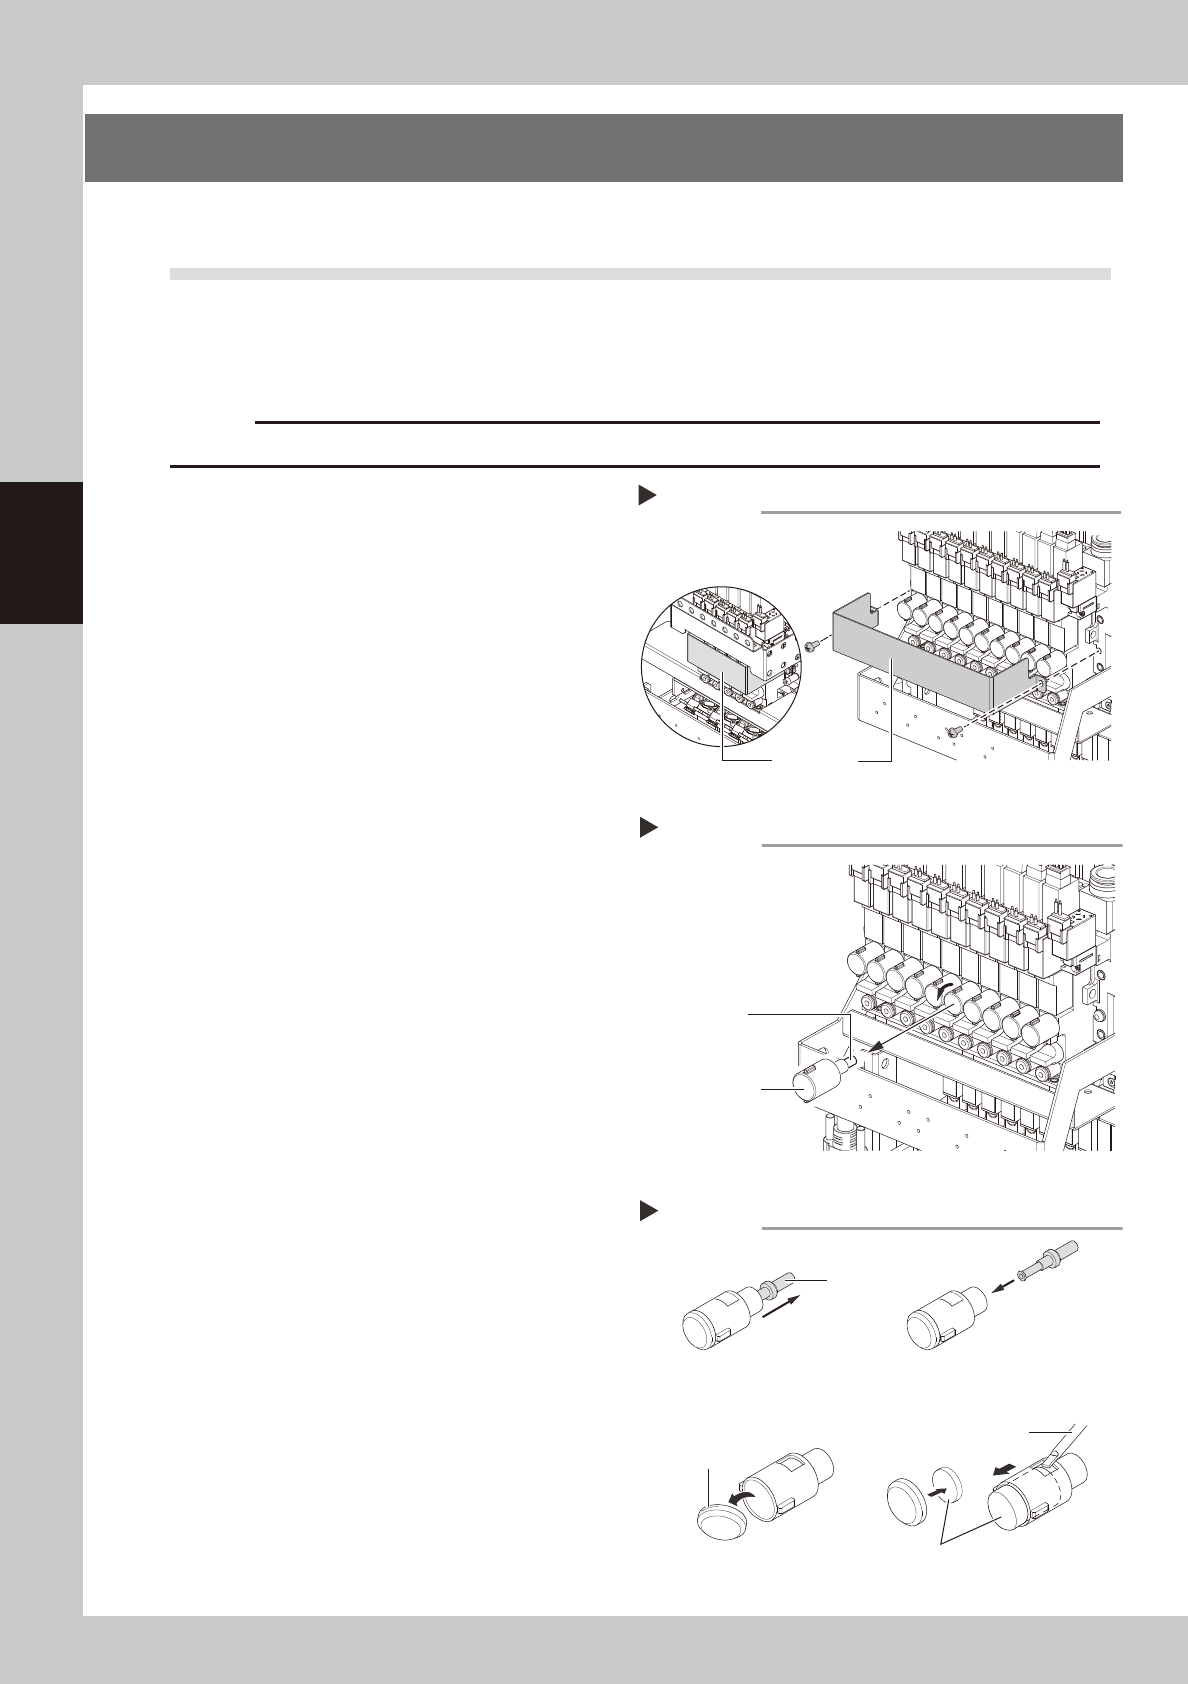
Detach the baffle plate.
Use a Phillips screwdriver to Detach the
baffle plate.
3
Detach the bit cap.
Turn the bit cap counterclockwise manually
to remove it.
4
Replace the bit.
Pull out the bit to be replaced from the bit
cap and insert a new bit.
If the muffler is contaminated, replace it
with a new one.
5
Reattach the bit cap to the head.
1. Insert the bit cap into its original position
and turn it clockwise to mount it.
2. Use a Phillips screwdriver to attach the
baffle plate at its original position.
3. Remove the square cloth.
Detaching the baffle plate
Step 2
Baffle plate
FM head
HM head
53390-N2-00
Detaching the bit
Step 3
Bit cap
Bit
53391-N2-00
Replacing the bit
Step 4
Bit
If the muffler is contaminated:
Precision screwdriver
Claw
Detach the bit cap tip.
Detach the muffler.
Muffler
53392-N2-00

Chapter 4 Maintenance of options
Contents
1. Ionizer 4-1
1.1 Cleaning ionizer discharge needle (Monthly) 4-2
1.2 Replacing ionizer discharge needle (2-year) 4-3
2. UPS (Uninterruptible Power Supply) 4-4
2.1 Replacing UPS battery (3-year) 4-4
3. Nozzle station 4-5
3.1 Checking and cleaning nozzle sensor (1-year) 4-5
4-1
4
Maintenance of options
1. Ionizer
As the ionizer is used for a long time, the discharge needle (electrode) is worn out and deteriorates.
Additionally, the periodic cleaning work is needed to maintain the static elimination effect and ion balance.
c
CAUTION
The tip of the ionizer discharge needle is sharp and the voltage is applied. The power supply to the ionizer is stopped
by opening the safety cover. However, make sure not to touch the tip of the ionizer discharge needle when
performing maintenance in the machine.
n
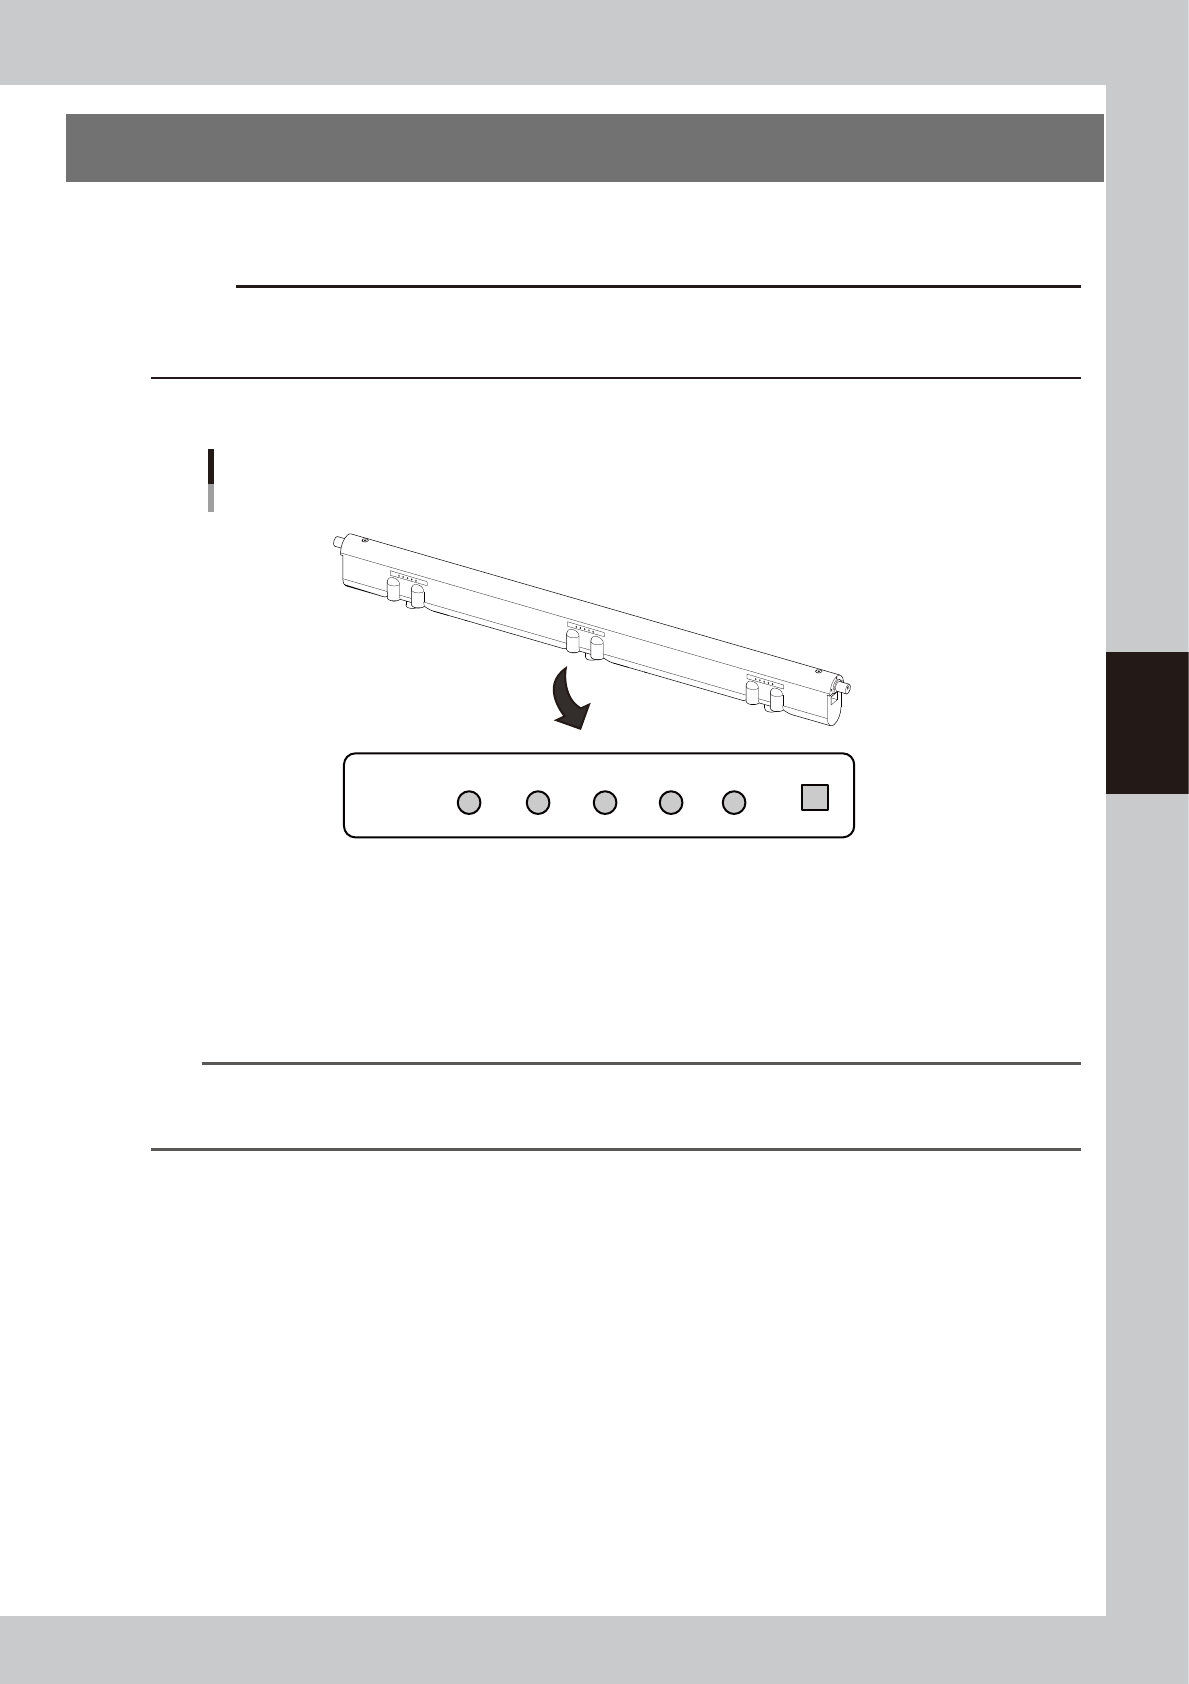
LED display on ionizer main unit
+ -
Trinc
ERR PREC
GOOD
PREC
ERR
LED display is provided at three locations of each ionizer.
Ionizer
Contents of LED display
53419-N2-00
• Normal operation (GOOD): Lit in blue.
• Large ion balance correction amount (+PREC, -PREC): Lit in green.
The contamination of the discharge needle advances. The discharge needle needs to be cleaned.
• Ion balance error (+ERR, -ERR) : Flashes in red.
The discharge needle may be contaminated or deteriorate significantly. The relevant error is also given on the machine side.
n
NOTE
The performance and capability of the ionizer to remove static electricity depends on the operating environment or
the materials and shape of the items that the static electricity is removed. YAMAHA does not guarantee such
performance or capability.