TR7500_Series_Software_v29_En - 第185页
Test Research Inc. TR7500 Series User Guide – Software v.2.9.0 163 (1). LED Control Figure 271 : LED Control This c ontroller graphicall y expresses every regional position o f the LED board. The lower part o f the gra…
Test Research Inc.
162 TR7500 Series User Guide –Software v.2.9.0
7 L
IGHT
A
DJUSTMENT
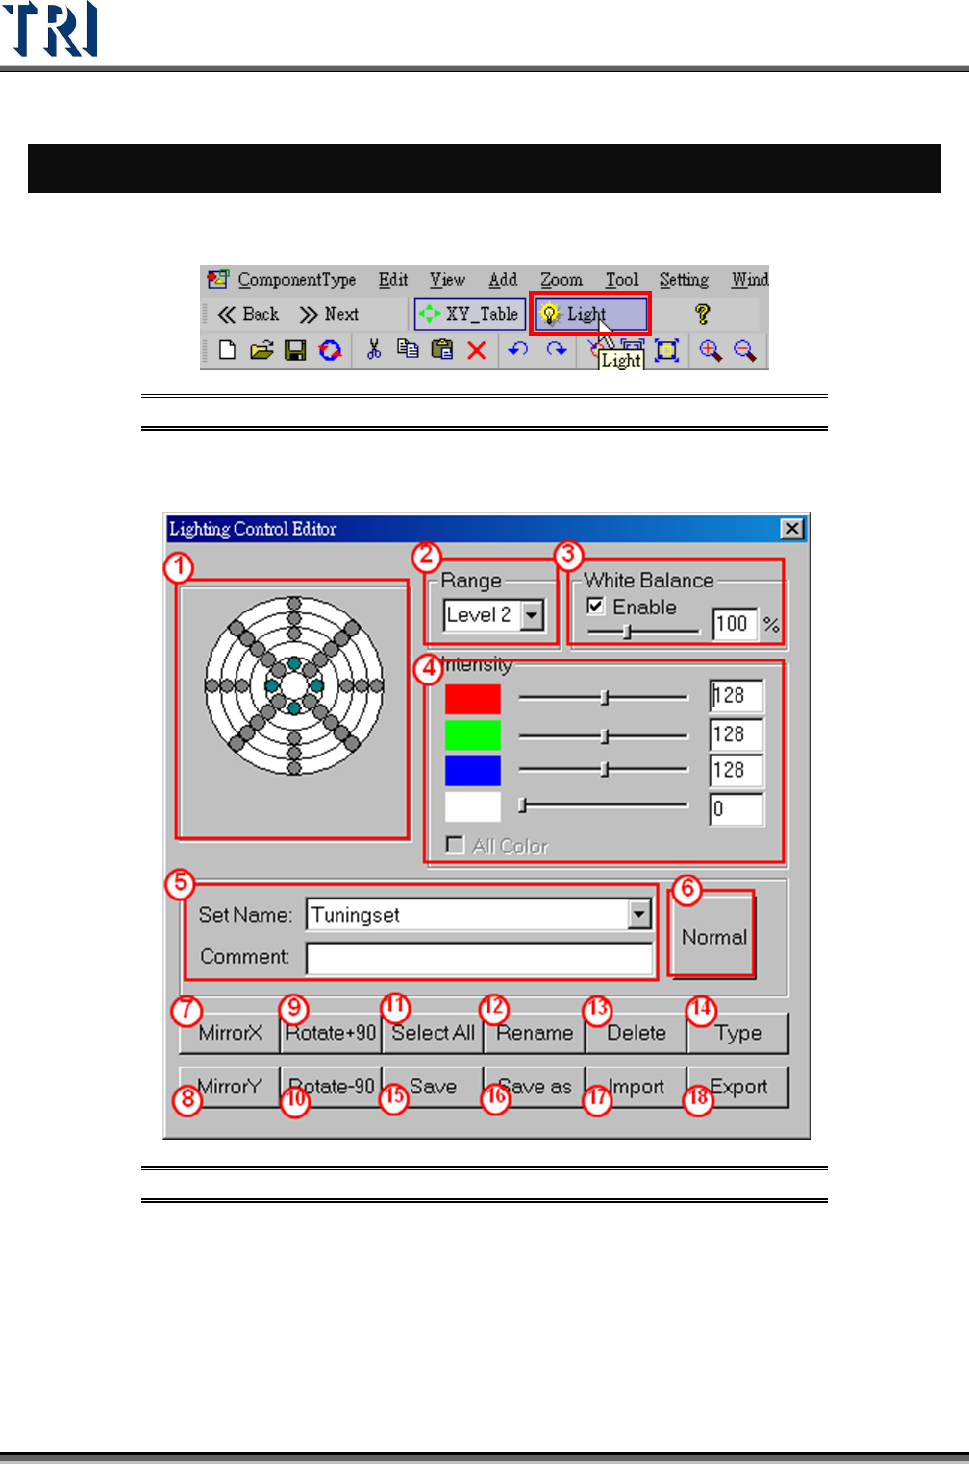
Push the [LIGHT] setting button to edit lighting control.
Figure 269: Light Button for Lighting Control Editor
7.1 Lighting Control Editor
Figure 270: Lighting Control Editor
Test Research Inc.
TR7500 Series User Guide –Software v.2.9.0 163
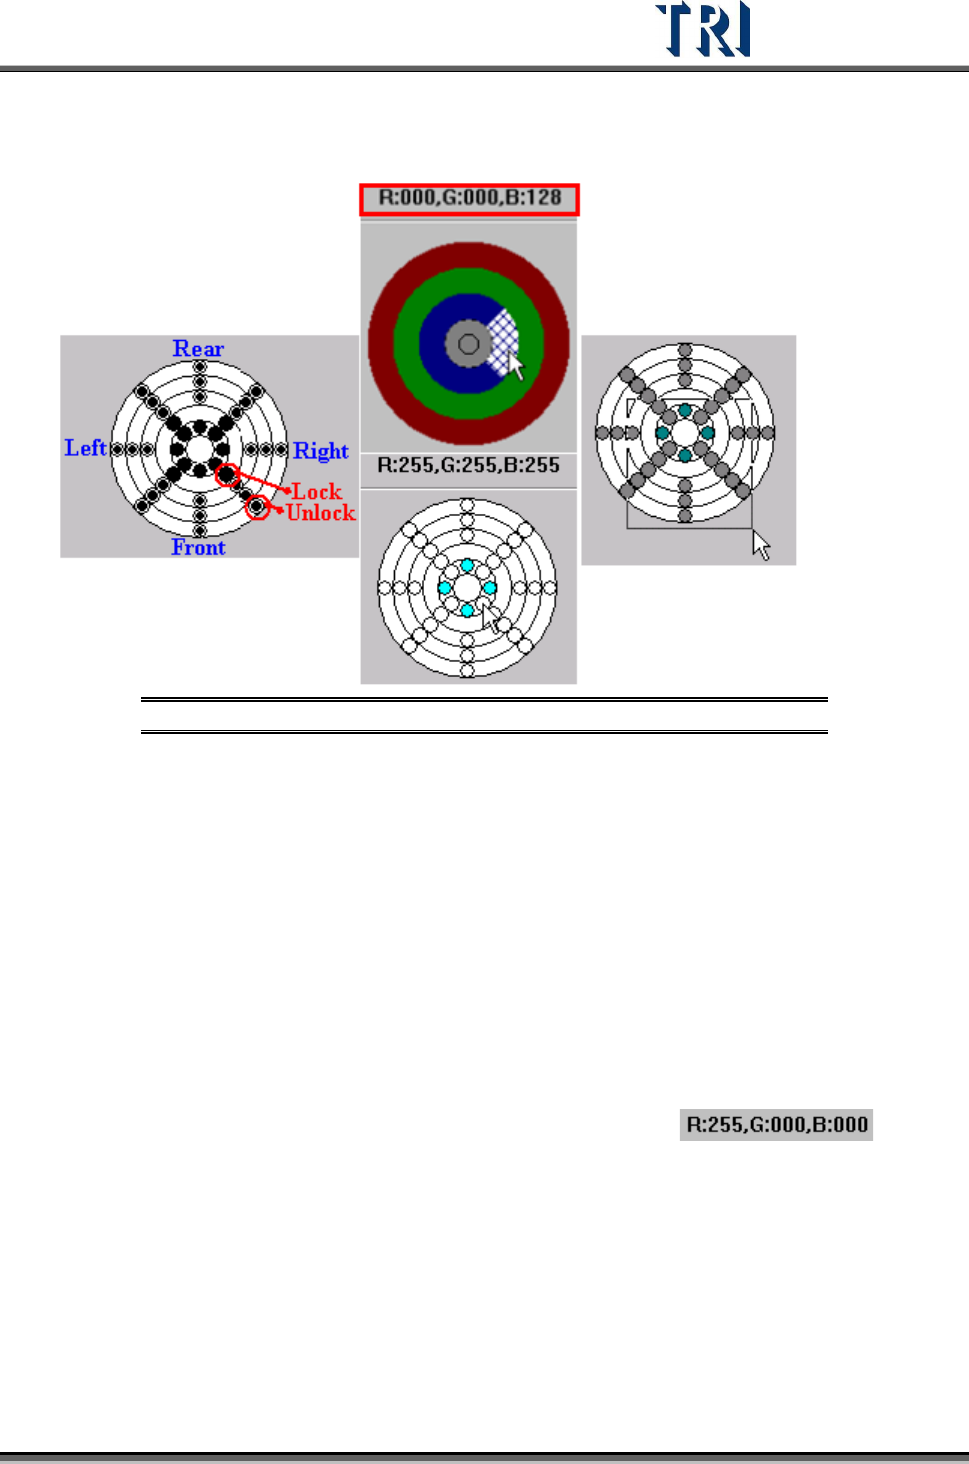
(1). LED Control
Figure 271: LED Control
This controller graphically expresses every regional position of the LED board.
The lower part of the graphic refers to the light source of the front of the board. It
is adjusted that the lighting can divide into 36 zones. Every circle represents an
adjusted zone.
Every district of 28 zones (except the central top lighting area) allows for
separate adjustment of red, green and blue lighting. Only the white light can be
adjusted in the central area.
Open or close a zone to adjust by clicking on it. Toggle an open zone to closed
or vice versa.
Adjust an area by clicking and dragging the lower right corner of the displayed
box.
Put the mouse at a one of the zones then the top area of the control graphic will
show the light setting value of that area. [For example
].
(2). [Range] – Set electric current for LED. (40mA, 60mA, 80mA, and 100mA). The
larger the electric current is, the brighter the LEDs are.
[White Balance] – When the current lighting is set to White Balance, you can check
[Enable] to review the image that is white balanced. The control bar below is to
adjust the brightness of the image.
(3). [Intensity] – Adjust LED RGB lighting brightness (0~255). The larger the values are,
the brighter the LEDs are.
(4). [All Color] – This function is only for the TR7500DT system.

Test Research Inc.
164 TR7500 Series User Guide –Software v.2.9.0
Figure 272: LED Brightness Adjustment
(5). [Set Name] [Comment] – Choose lighting style (Top light, Topside light, Side light,
etc.) with its comment.
(6). [Normal/All]: Toggles between showing the lighting sets specific to this project and
showing all the different lighting sets available to the system.
(7). [MirrorX] – Mirror the current lighting according to the X axis.
(8). [MirrorY] – Mirror the current lighting according to the Y axis.
(9). [Rotate+90] – Click once to rotate the lighting 90 degrees clockwise.
(10). [Rotate-90] – Click once to rotate the lighting 90 degrees counterclockwise.
(11). [Select All/Unselect All]
[Select All] – After pressing the button all controlled circles will be locked and the
characters of the button will be turned into [Unselect All].
[Unselect All] – After pressing the button all controlled circles will be locked and the
characters of the button will be turned into [Select All].
Figure 273: Select/Unselect LED