TR7500_Series_Software_v29_En - 第206页
Test Research Inc. 184 TR7500 Series User Guid e –Softwa re v.2.9.0 Figure 311 : Example -- Add Al l Windows Dialog C A M ERA L IGHT Missing Top ToplightA Missing (Polarity) Top ToplightA Solder Rear RearlightA Solder Al…
Test Research Inc.
TR7500 Series User Guide –Software v.2.9.0 183
The settings of this window are [TopCamera], [Topsidelight] and [Void Window]. Click on
[Property] to change the settings. See section
8.7.3 Property
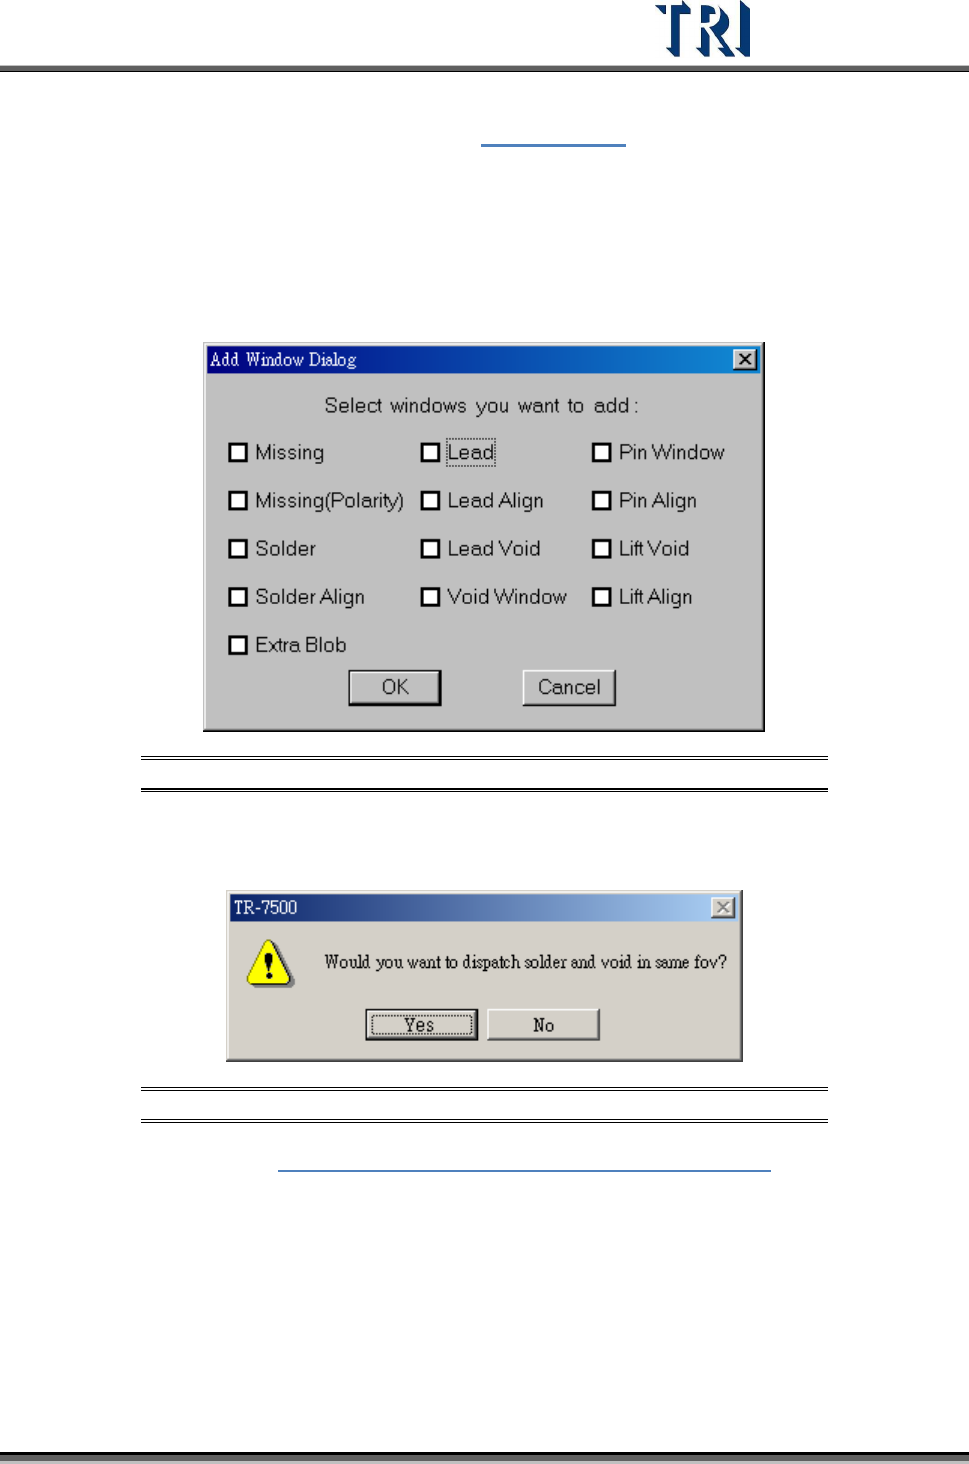
8.4.4 All Window
Choose [A
DD
>
A
LL
W
INDOW
] to create multiple windows at the same time. Check the
windows that are needed. [Missing] and [Missing(Polarity)] are created on the [Body] box.
[Solder], [Lead], [Lead Void], [Pin Window] and [Lift Void] are created on the [Pin] boxes.
[Align] is created to cover all pins.
Figure 309: Add All Window Dialog
When selecting [Solder] and [Void Window] at the same time and pressing [OK], you can
select whether you want to arrange [Solder] and [Void] windows in the same FOV.
Figure 310: Confirm Window Arrangement in Same FOV
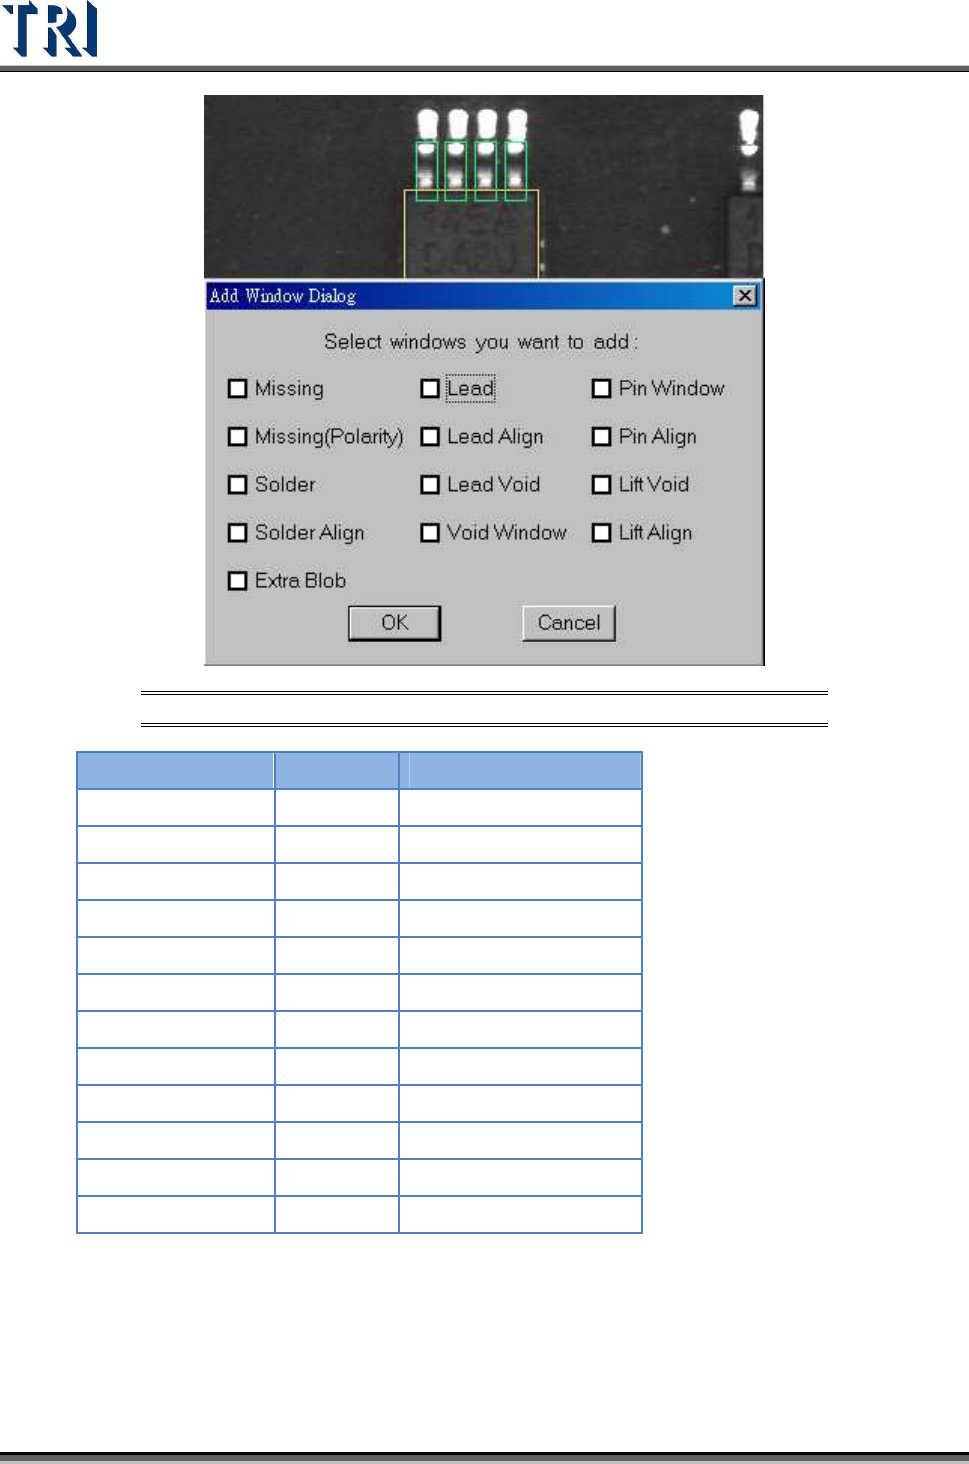
Example: Refer to Figure 311: Example -- Add All Windows Dialog. If we take the
upper leads of an IC, we can select the testing windows by the camera angles given
below.
Test Research Inc.
184 TR7500 Series User Guide –Software v.2.9.0
Figure 311: Example -- Add All Windows Dialog
C
AMERA
L
IGHT
Missing
Top ToplightA
Missing (Polarity)
Top ToplightA
Solder
Rear RearlightA
Solder Align
Rear RearlightA
Lead
Top ToplightA
Lead Align
Top ToplightA
Lead Void
Top ToplightA
Void Window
Rear RearlightA
Pin Window
Rear RearlightA
Pin Align
Rear RearlightA
Lift Void
Right/Left RightlightA - LeftlightA
Lift Align
Right/Left RightlightA - LeftlightA
Test Research Inc.
TR7500 Series User Guide –Software v.2.9.0 185
8.4.5 Polarity Pair
Click [A
DD
>
P
OLARITY
P
AIR
], a pair of windows will be created. Move them to different
positions with a variation of gray levels. The system will show Polarity Fail if the gray level of
two windows is reversed.
Figure 312: Add Polarity Pair Function
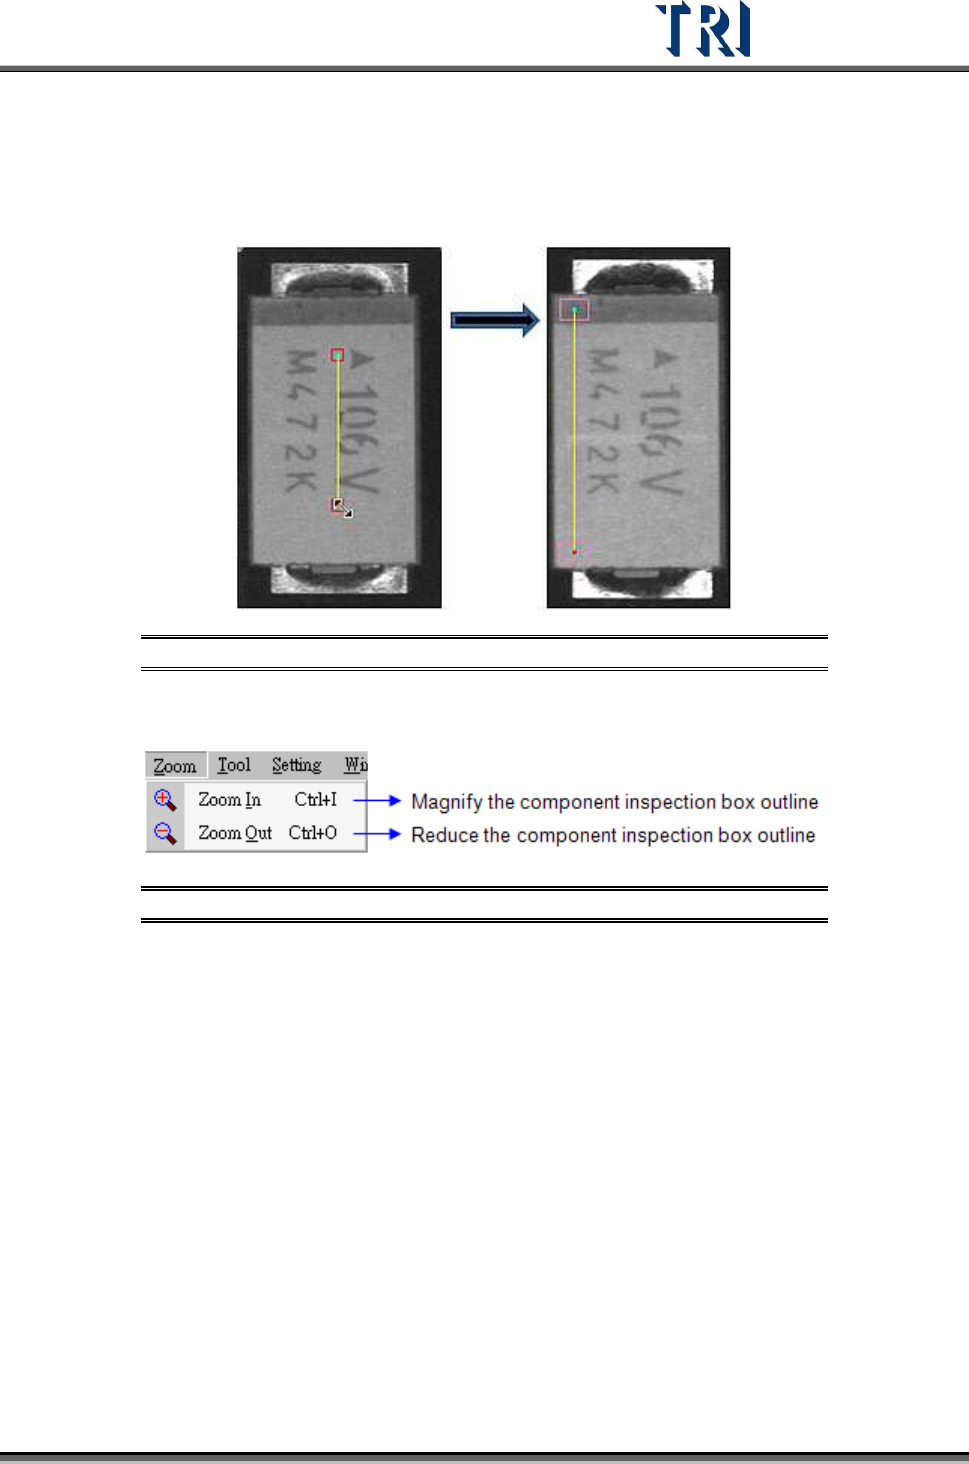
8.5 Zoom Command
Figure 313: Zoom Command Menu
8.5.1 Zoom In
After choosing [Zoom > Zoom In], an enlarged drawing frame window is shown. The windows
enlarge10% each time [Zoom In] is selected.
8.5.2 Zoom Out
Window size is reduced after pressing [Zoom > Zoom Out]. The windows reduce 10% each
time [Zoom Out] is selected.