TR7500_Series_Software_v29_En - 第211页
Test Research Inc. TR7500 Series User Guide – Software v.2.9.0 189 Figure 320 : Confirm Name Index Data Sav e 8.6.2 Original Size Press [Original Si ze] to go back to the original size and ima g e frame. 8.6.3 Suit Size …
Test Research Inc.
188 TR7500 Series User Guide –Software v.2.9.0
Figure 318: Create Secondary Name, Step 2
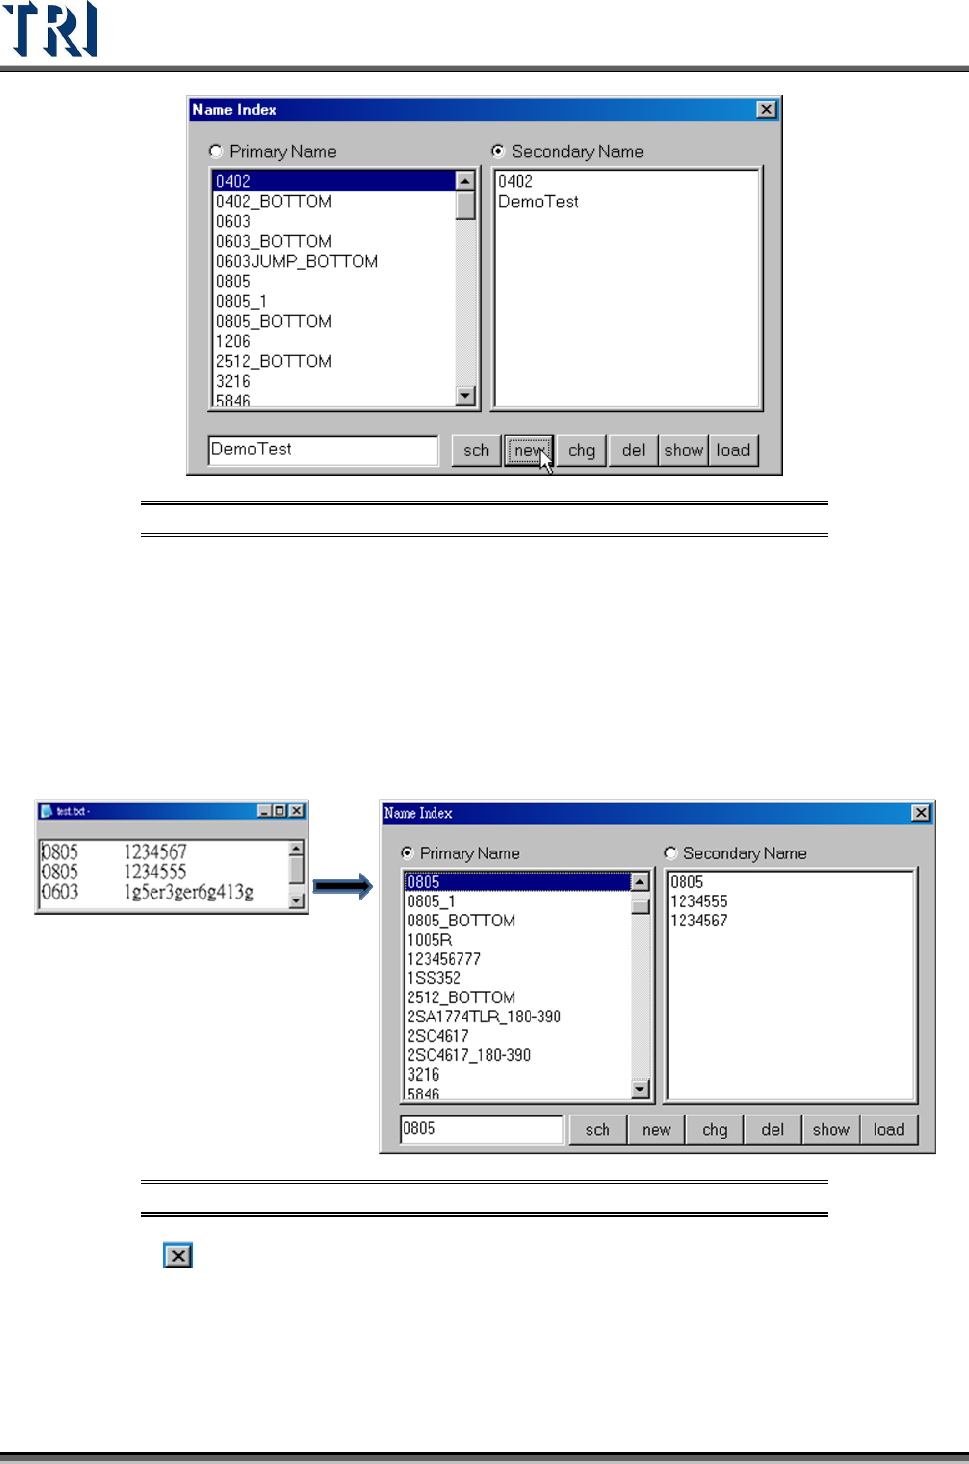
[Chg] – Change the primary or secondary index name.
[Del] – Delete the primary or secondary index name.
[Show] – Show the all Primary Name.
[Load] – User may load a .TXT file into [Name Index]. The format is shown in the
next figure. The first part is the [Type], for example 0805. Using a tab separator,
the second part is [Part Name], for example 1234567. The first part will be
loaded as the [Primary] name and the second part as [Secondary].
Figure 319: Name Index Load Function Result
[ ] – Close. Press [Yes] to save.

Test Research Inc.
TR7500 Series User Guide –Software v.2.9.0 189
Figure 320: Confirm Name Index Data Save
8.6.2 Original Size
Press [Original Size] to go back to the original size and image frame.
8.6.3 Suit Size
Press [Suit Size] to show all windows with suit size in drawing frame.
8.6.4 Move Center
In image frame, press [Move Center] to move the camera to component center.
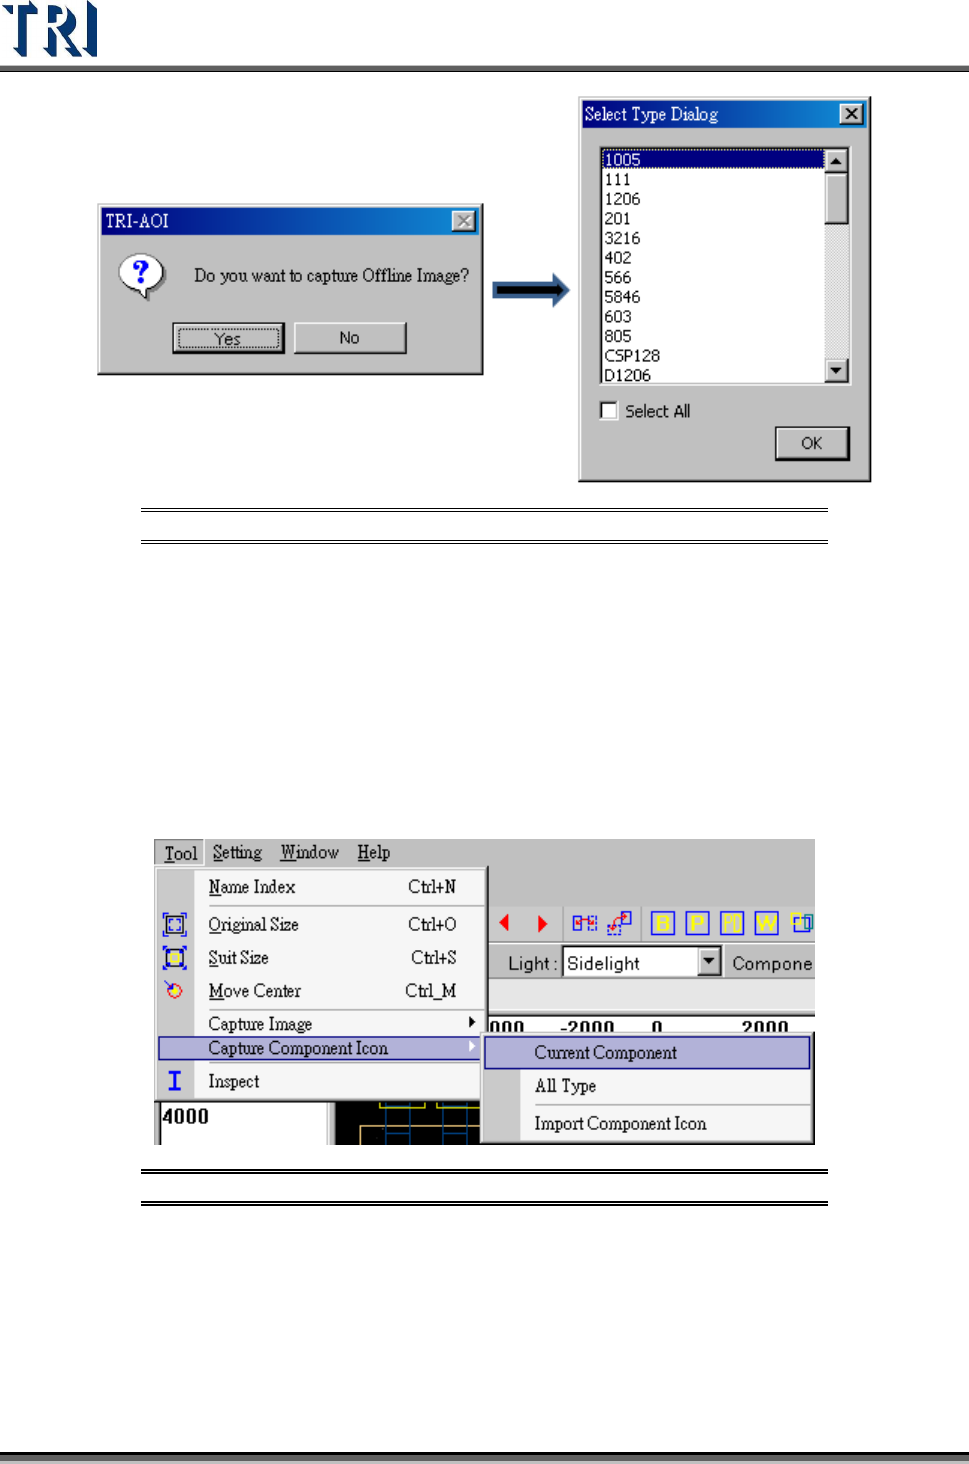
8.6.5 Capture Image
Capture images for offline editor to edit project. System will create a new folder named
[OfflineImage] in the folder that the project file is in. The images are named by type and
component name.
[Current Component] – Capture the component currently being edited. A total of
10 images will be captured: two by top camera [ToplightA/B], two by front
camera [FrontlightA/B], two by rear camera [RearlightA/B], two by left camera
[LeftlightA/B] and two by right camera [RightlightA/B].
[All Type] – For all types capture 10 images (as explained above) for the first
component (ranked by name).
Test Research Inc.
190 TR7500 Series User Guide –Software v.2.9.0
Figure 321: Capture Offline Image Process
If the component is larger than an FOV image, users can enlarge the [Body Box] to fit the
component. The system will then capture the images in the boundary of the [Body Box] and
combine them to be a complete image. The angle camera can still capture a single FOV
image.
8.6.6 Capture Component Icon
[Capture Component Icon] allows users to capture a real image and save it as a component
icon. When users load the [Component Library] and click [Icon]. they will see the icon
instead of the original inspection box layout.
Figure 322: Capture Component Icon Command
[Current Component] – Selecting this will capture and save the real image only for the
current component icon.
[All Type] – This will capture and save all types’ real images as icons.
[Import Component Icon] – Import a saved image as a new component icon