TR7500_Series_Software_v29_En - 第214页
Test Research Inc. 192 TR7500 Series User Guid e –Softwa re v.2.9.0 8.6.8.2 Model Library U s age Under the [Library] w indow, users select the component and [T OOL > M ODEL L IBRARY ]. Figure 324 : Model Library Comm…
Test Research Inc.
TR7500 Series User Guide –Software v.2.9.0 191
8.6.7 Inspect
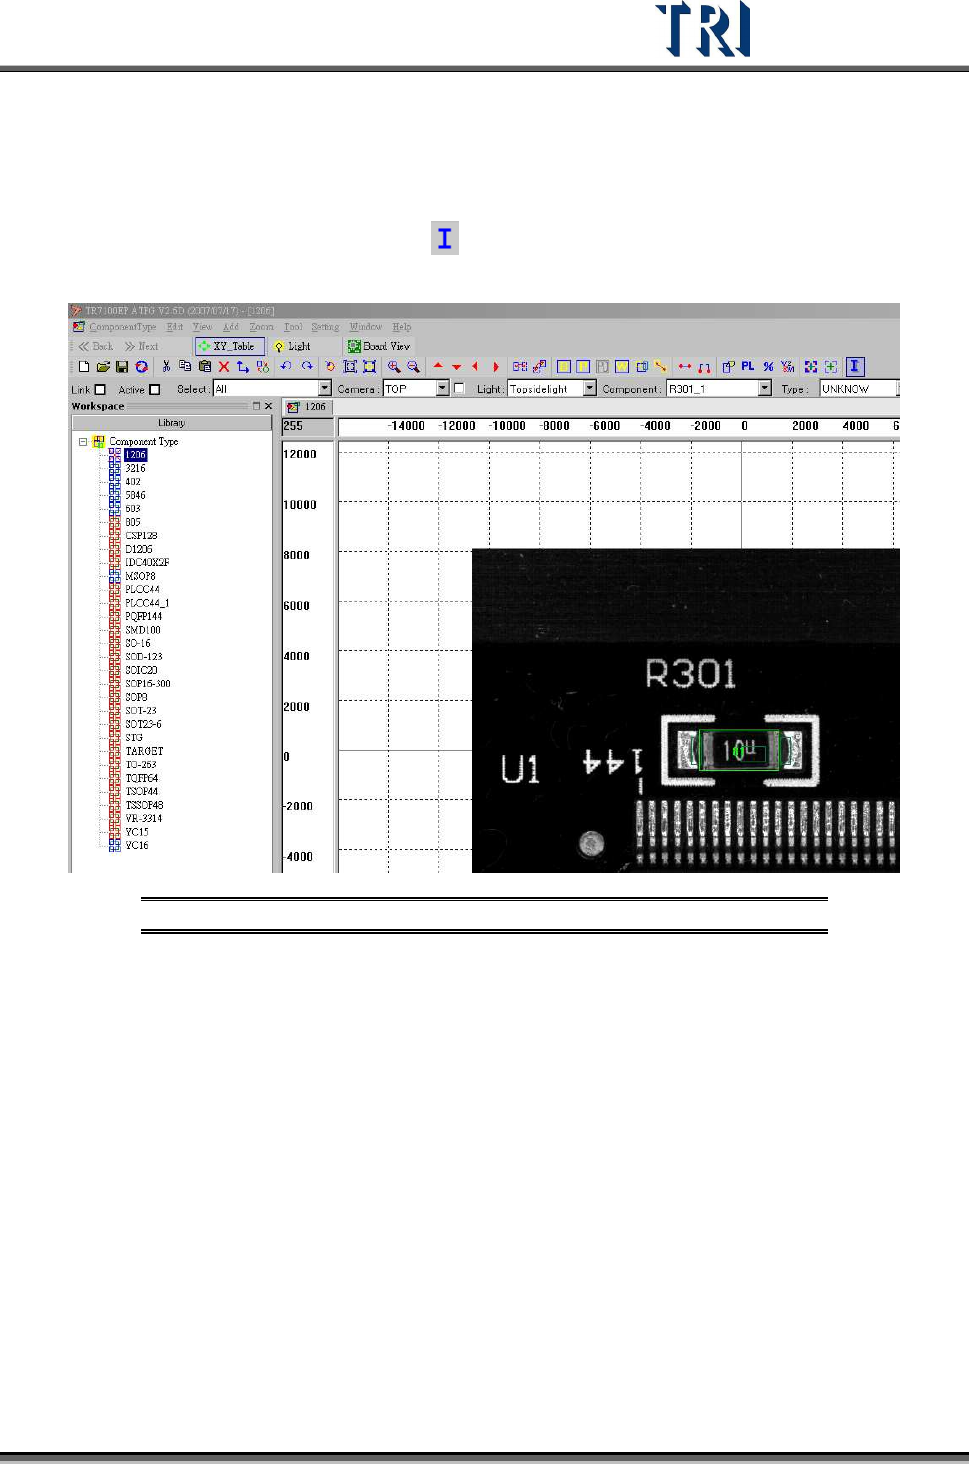
The [Inspect] function tests a single inspection box to make parameter tuning easier. Users
can only test one inspection box once.
Select an inspection box first then press [
], The system will inspect the selected inspection
box and display the result.
Figure 323: Inspect Single Inspection Box
8.6.8 Model Library
Users may use the pre-built [Model Library] to reduce programming time when creating the
inspection boxes for each component type.
8.6.8.1 Model Library Creation
The TR7500 will separate the saved [Model Library] into two paths. [Post-Flow] data will be
saved under [C:\ AOI\ ModelSuite \PostFlow]; [Pre-Flow] data will be saved under [C:\ AOI\
ModelSuite \PreFlow]
There are two model-related files types saved under these categories: .XML and .BMP files.
They share the same model name. .XML is to define the inspection boxes’ type, variable,
location, size, location of the [Model Library] and the Hint. .BMP is the icon file.
The [Model Library] file is provided by TRI and is proprietary. Customers can not modify the
file.
Test Research Inc.
192 TR7500 Series User Guide –Software v.2.9.0
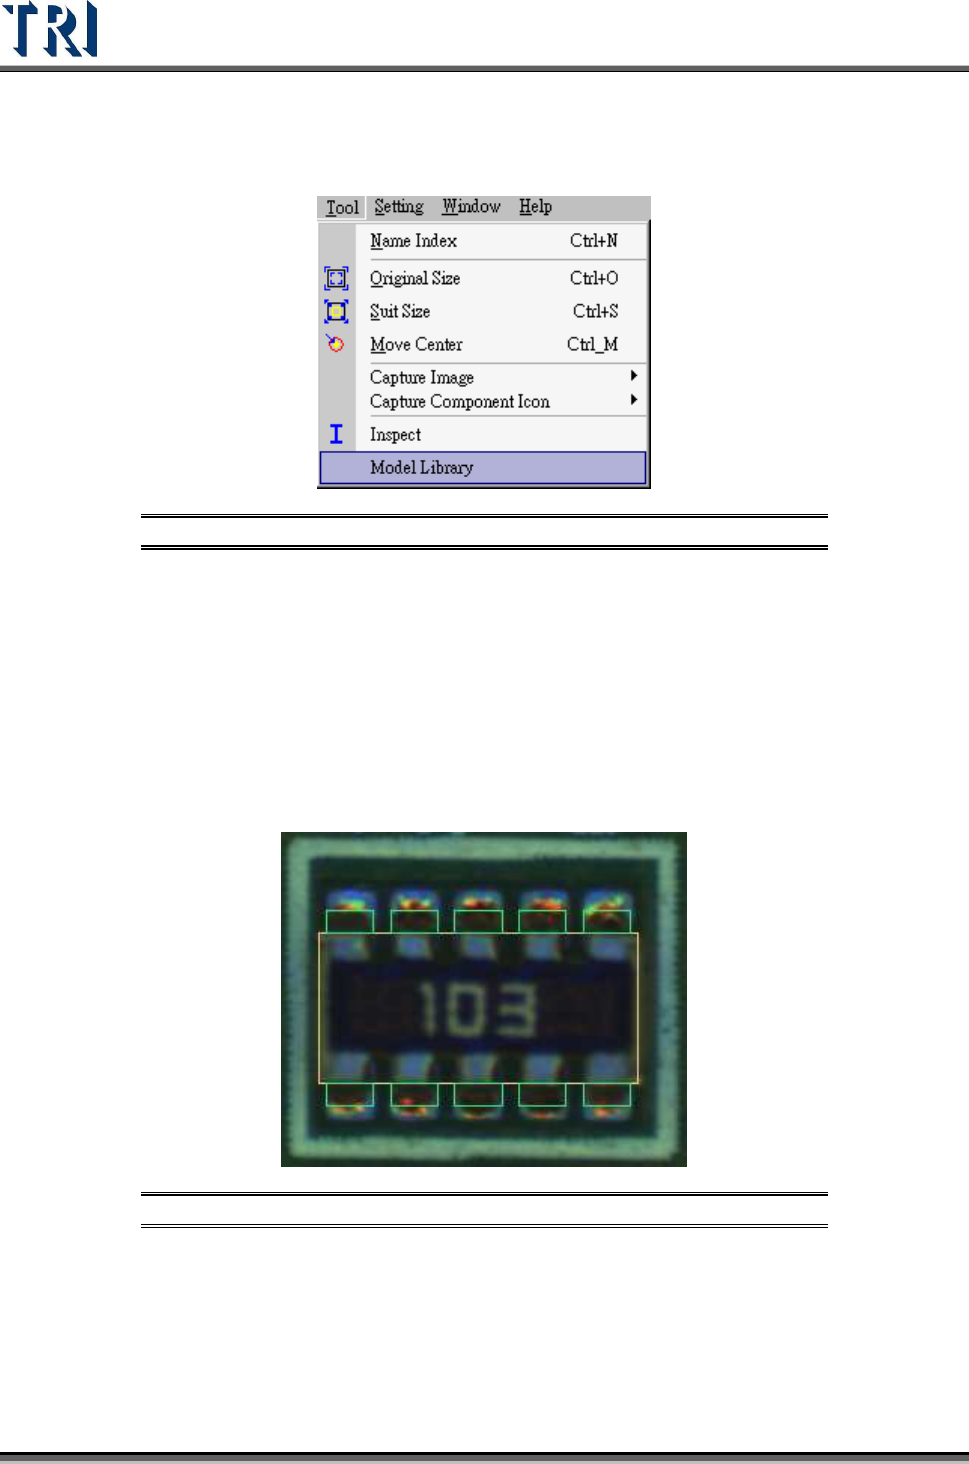
8.6.8.2 Model Library Usage
Under the [Library] window, users select the component and [T
OOL
>
M
ODEL
L
IBRARY
].
Figure 324: Model Library Command
Users need to create [Body] and [Pin] windows for “R-Net”, “C-Net”, “SOT”, “TO”, “IC” and
“DIP” types. For other component types only the [Body] window needs to be created.
After completing the [Body] and [Pin] boxes, the system will apply the corresponding
inspection boxes with the selected [Model].
8.6.8.3 Model Library Procedure
1. Users need to add all the [Body] and [Pin] boxes for the selected [Type] under the
[Library] window.
Figure 325: Body & Pin Boxes
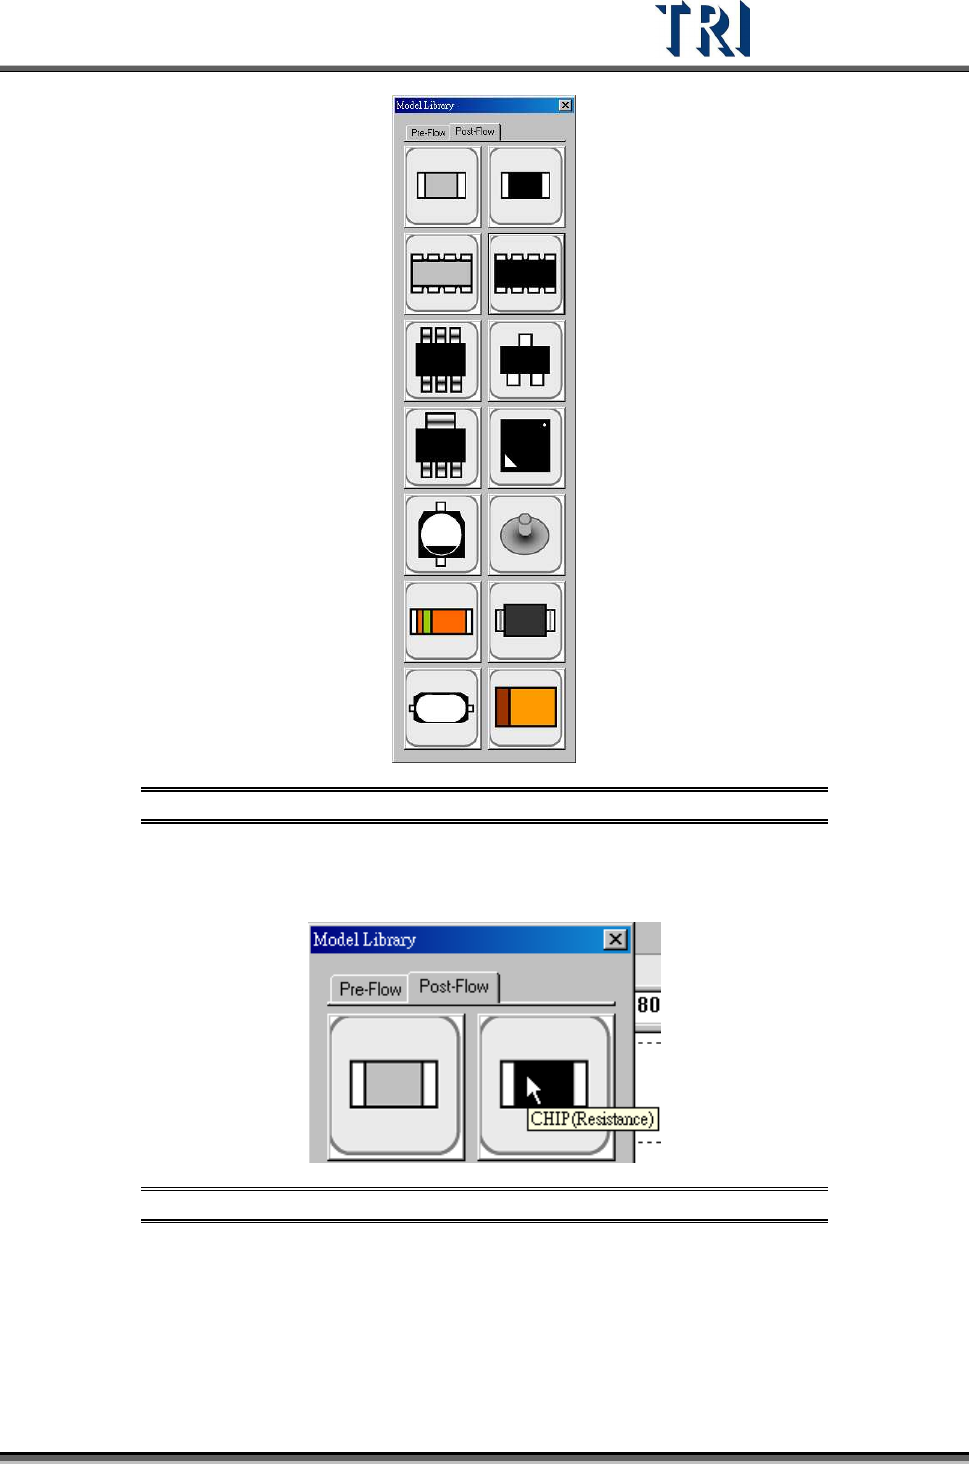
2. Select [T
OOL
>
M
ODEL
L
IBRARY
]. The [Model Library] dialog will appear.
Test Research Inc.
TR7500 Series User Guide –Software v.2.9.0 193
Figure 326: Model Library Dialog
3. When the mouse cursor is rolled over an icon, a label appears with component type
and kind. Refer to the figure below.
Figure 327: Example – Icon Label
4. Select the default model. Use [R NET] for this example.