TR7500_Series_Software_v29_En - 第240页
Test Research Inc. 218 TR7500 Series User Guid e –Softwa re v.2.9.0 (4) Adjust the size o f [Void] wi ndows to contain black area . Figure 366 : Adjust Void Wi ndows (5) Press [Set Property] to add the image of [Mi s sin…
Test Research Inc.
TR7500 Series User Guide –Software v.2.9.0 217
8.9 Example: Edit Component Library
8.9.1 Example 1 – Chip
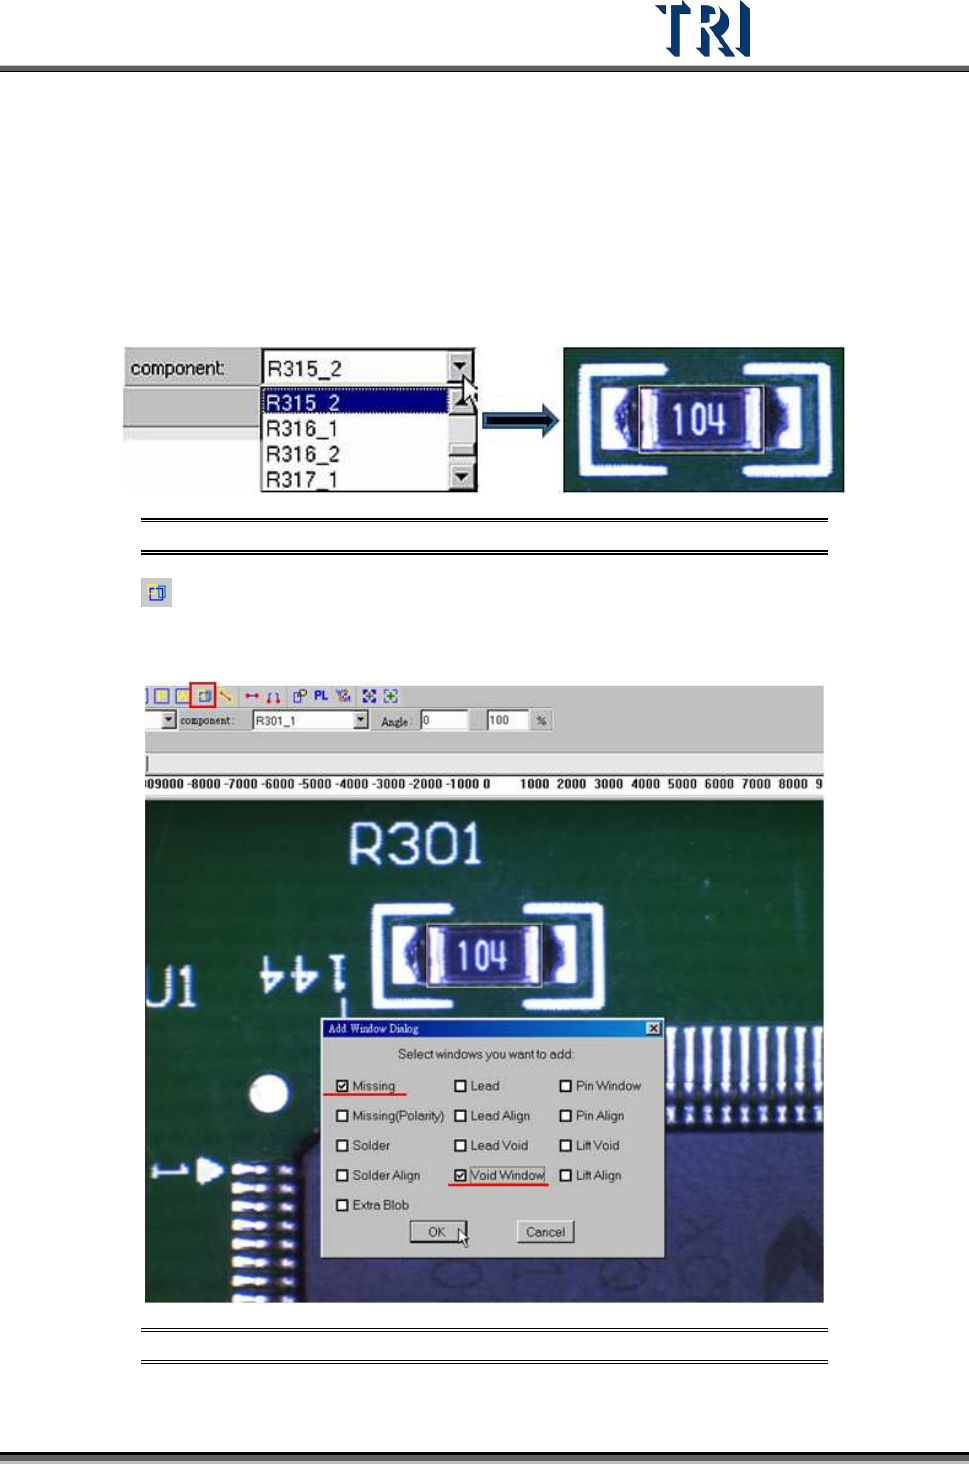
(1) Choose a component that is not shifted or skewed and has a clear, clean shape.
(2) Then resize the [Body] window to match the component area.
Figure 364: Choose a Component, Resize Body Window
(3) Press [Add all] to add [Missing] and [Void] windows. The system will create one
[Missing] window on the [Body] window and two [Void] windows, one on each of the two
short sides of the [Missing] window.
Figure 365: Add Missing & Void Windows
Test Research Inc.
218 TR7500 Series User Guide –Software v.2.9.0
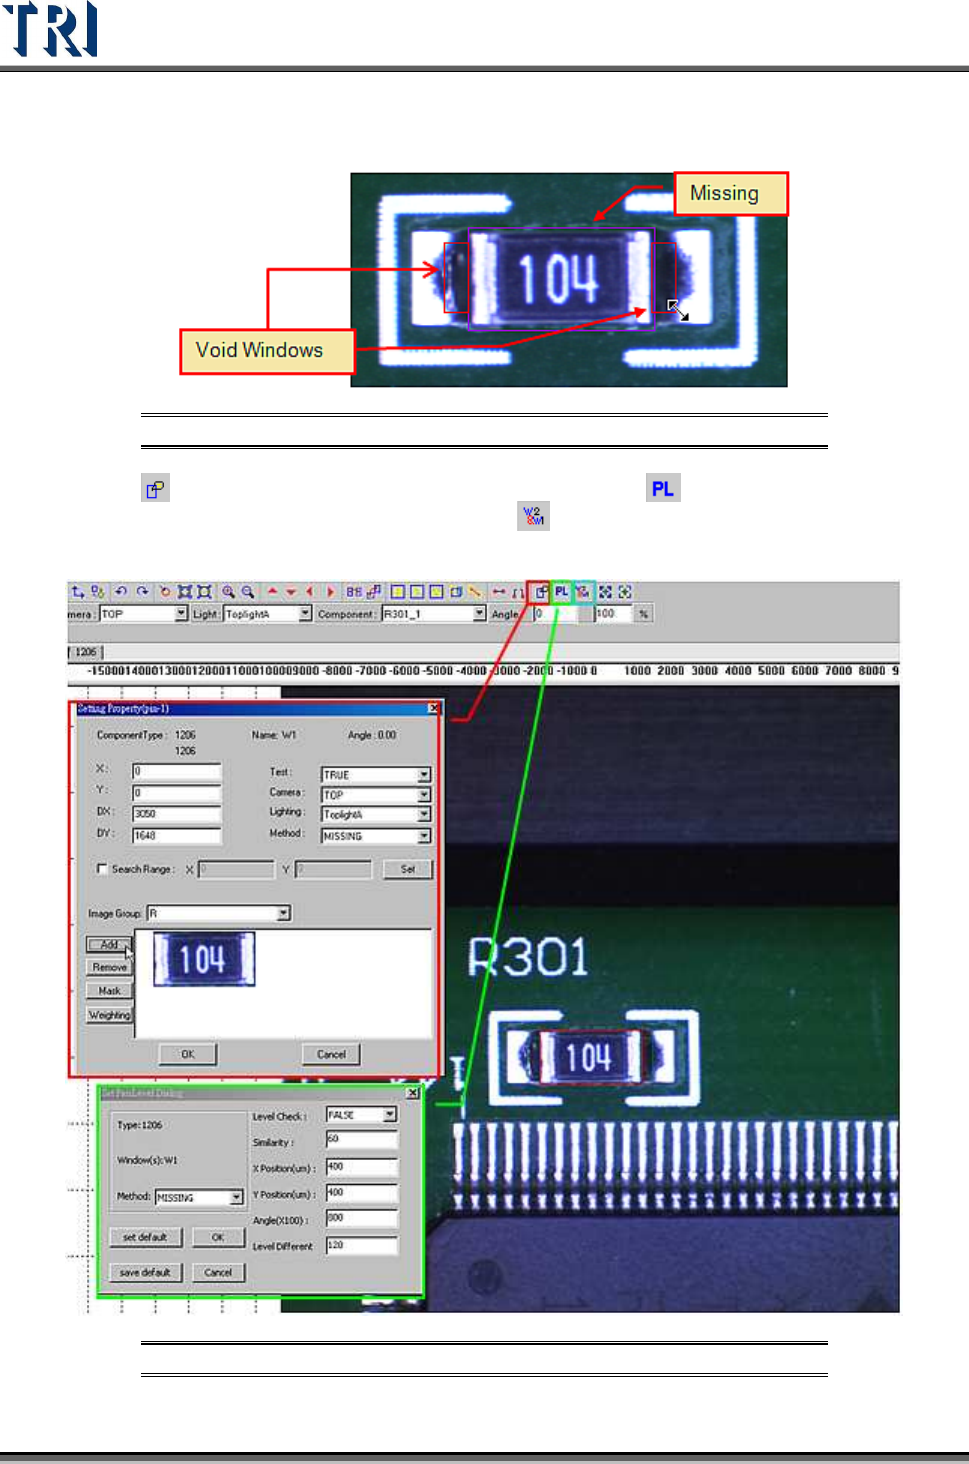
(4) Adjust the size of [Void] windows to contain black area.
Figure 366: Adjust Void Windows
(5) Press [Set Property] to add the image of [Missing] and [Pass Level] to set the
parameters of [Pass Level]. If needed, press
[Set Algorithm] to set the logic of the
windows.
Figure 367: Set Property, Pass Level, & Set Algorithm Icons
Test Research Inc.
TR7500 Series User Guide –Software v.2.9.0 219
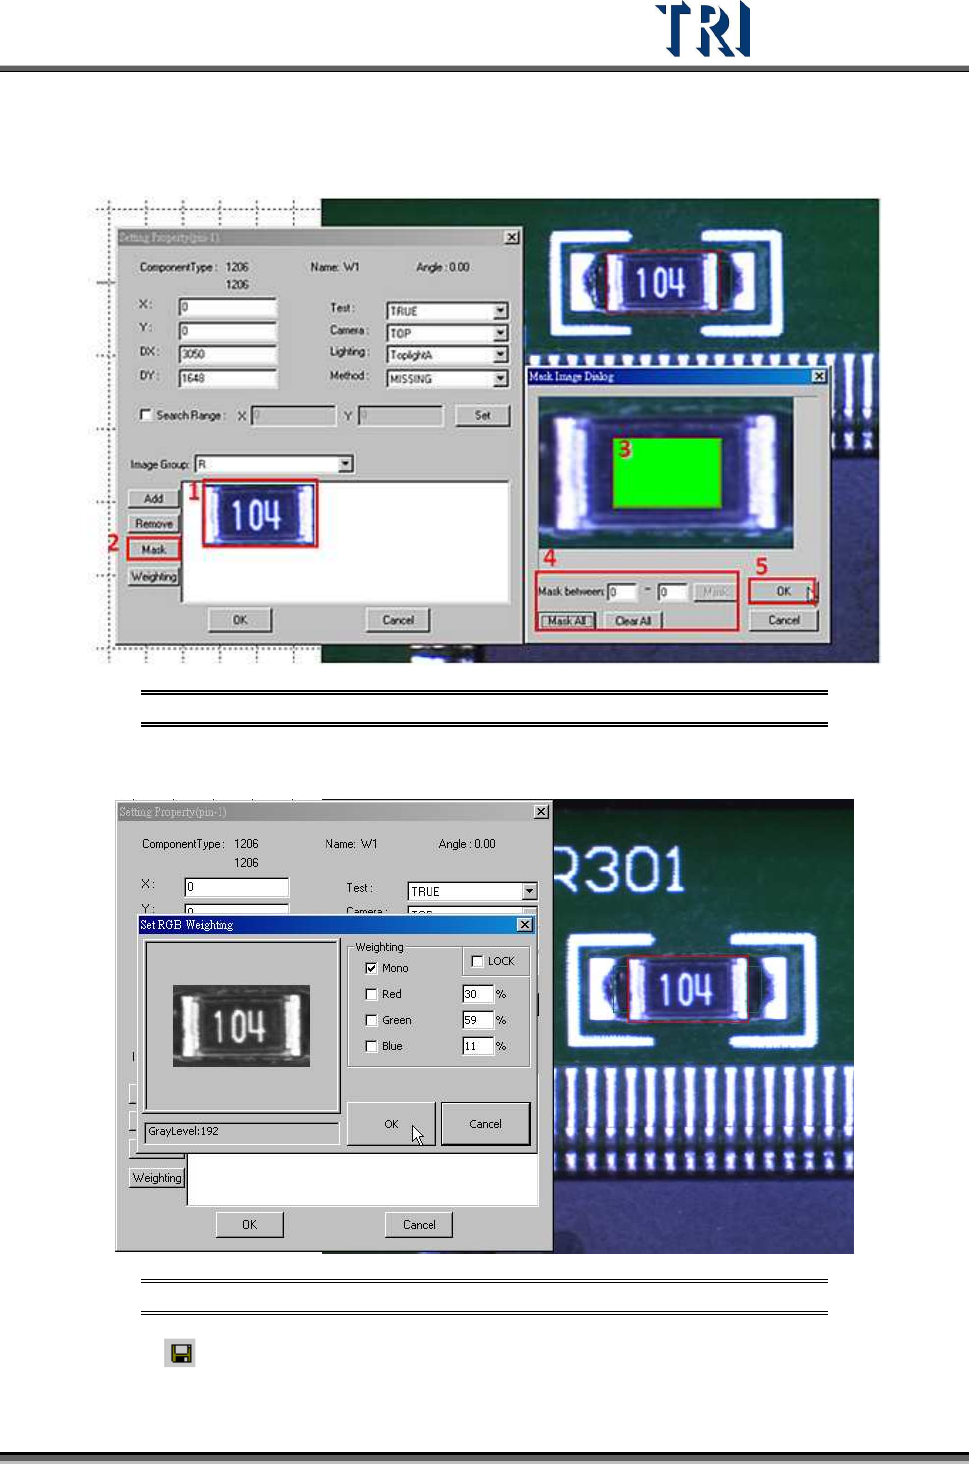
(6) Mask image of [Missing] window. Select the image and press [Mask] to mask the center
area of image.
Figure 368: Mask Center of Image
(7) Set the [Weighting].
Figure 369: Set Weighting
(8) Click on [Save] to save this type. The system will store the saved file in
[C:\AOI\packagelibrary] folder.