TR7500_Series_Software_v29_En - 第266页
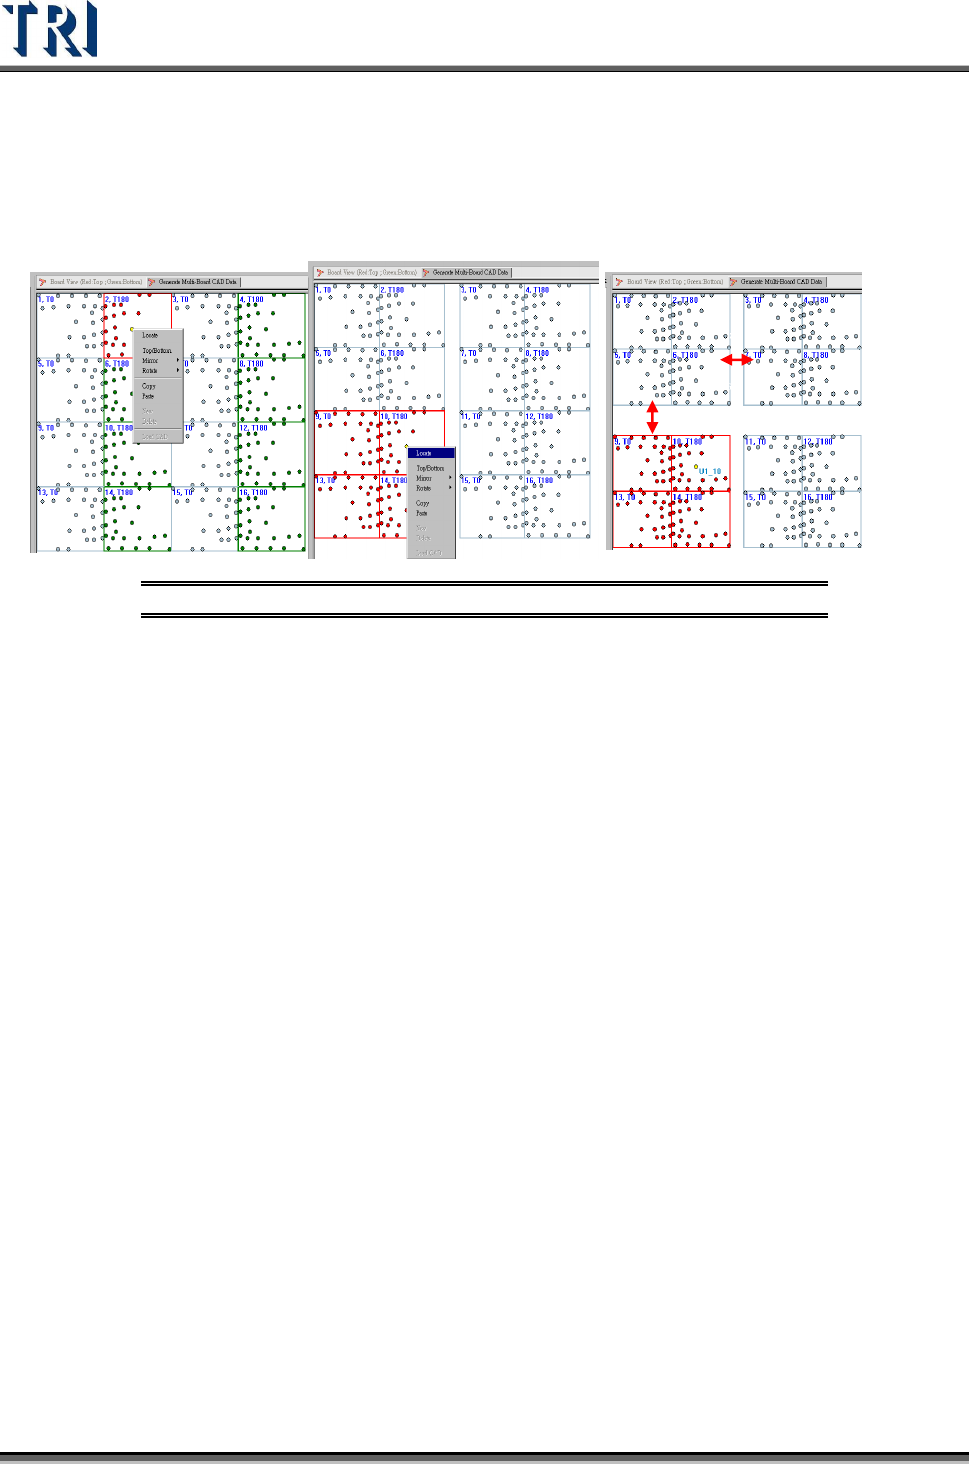
Test Research Inc. 244 TR7500 Series User Guid e –Softwa re v.2.9.0 Type 2 and 3 (1) Locate Board 2 and Boa rd 5 to get the X and Y dir ect ion gaps. (2) Select the multi-boards in Blo ck 2 by [Shi ft], then locate a com…
Test Research Inc.
TR7500 Series User Guide –Software v.2.9.0 243
Step2. Find the rotate angle.
Step3. Locate the first Block to get the gap of X direction and Y direction within Block.
Step4. Select Block 2 and Block 3 by pressing [Shift] key and left clicking on the board.
Locate the board to get the gap between Blocks.
Step5. Press [Next] and do the other standard process in ATPG.
There are three main types for multi-boards, explained below.
Type 1 Type 2 Type3
Figure 406: Types of Panel Layout
Type 1
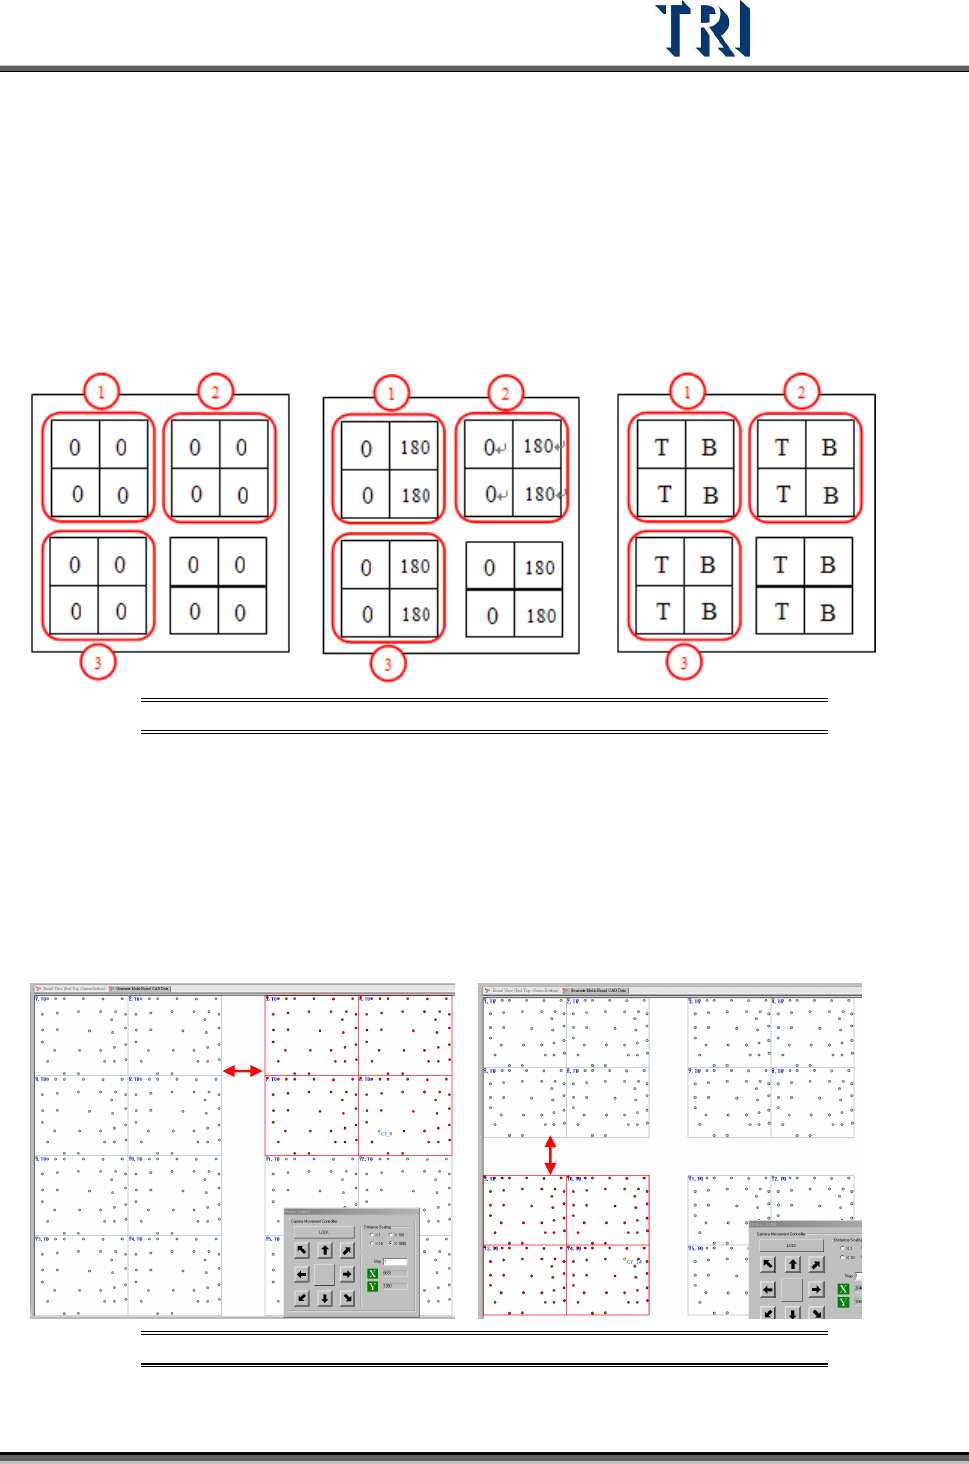
(1) Locate the Board 6 to get the gap between boards.
(2) Select the multi-boards in Block 2 by [Shift], then locate a component in Block 2 to get
the X direction gap between Blocks.
(3) Select the multi-boards in Block 3 by [Shift], then locate a component in Block 3 to get
the Y direction gap between Blocks.
Figure 407:Type 1
X-Gap
Y-Gap
Test Research Inc.
244 TR7500 Series User Guide –Software v.2.9.0
Type 2 and 3
(1) Locate Board 2 and Board 5 to get the X and Y direction gaps.
(2) Select the multi-boards in Block 2 by [Shift], then locate a component in Block 2 to get
the Y direction gap between Blocks.
(3) Select the multi-boards in Block 3 by [Shift], then locate a component in Block 3 to get
the Y direction gap between Blocks.
Figure 408:Type 2 and Type 3
Test Research Inc.
TR7500 Series User Guide –Software v.2.9.0 245
11 T
RAIN
D
IALOG
F
UNCTION
11.1 Main Frame
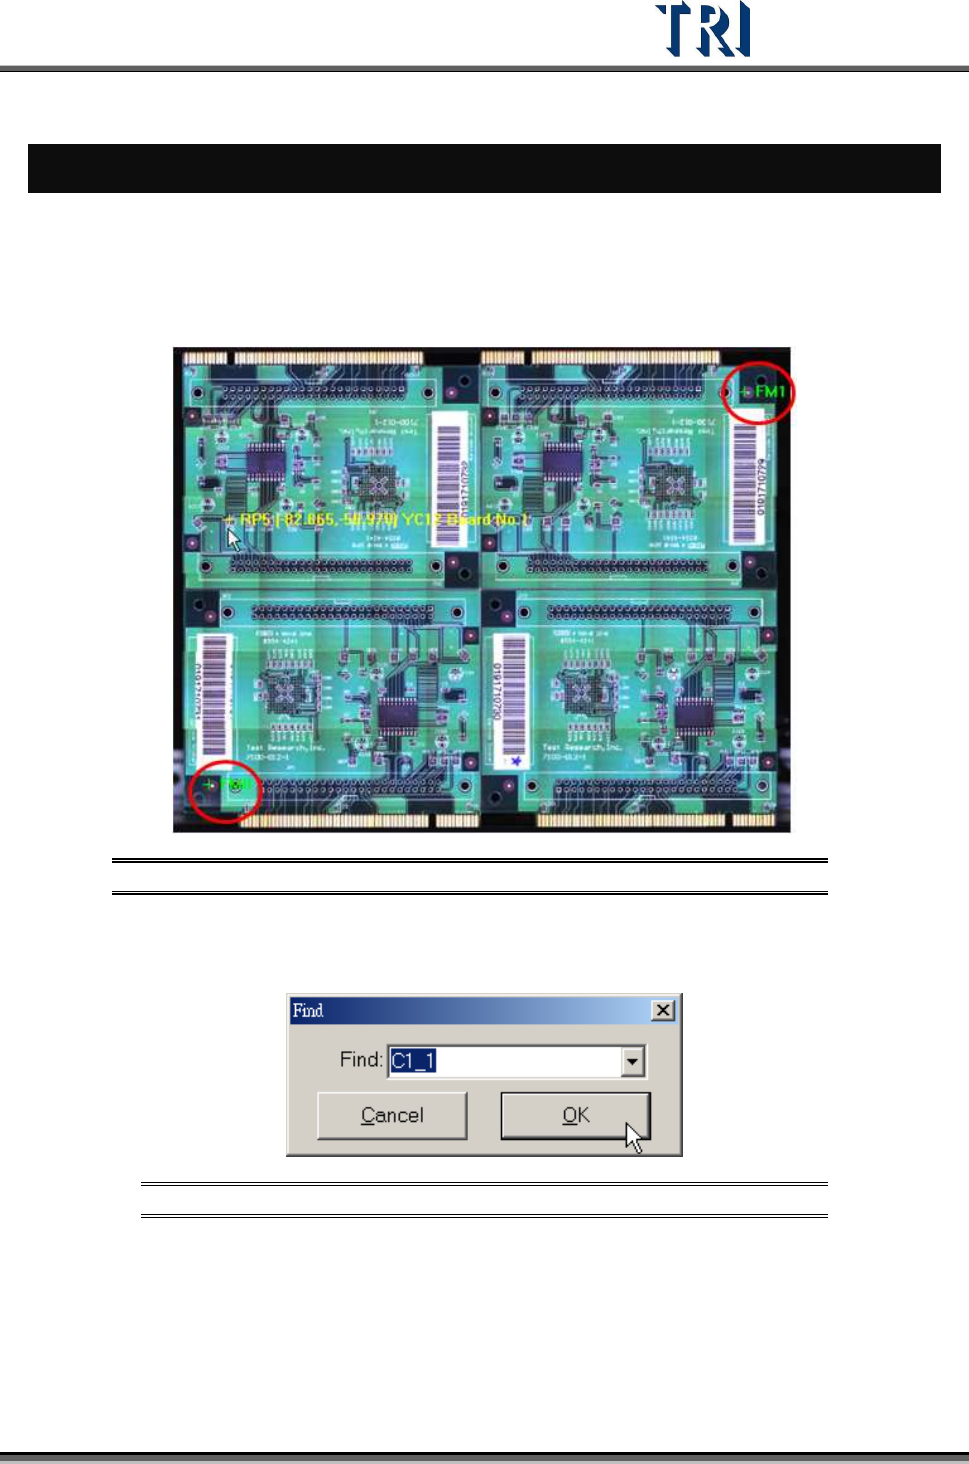
After completing all ATPG steps, close the ATPG dialog to see the following frame. Clicking
on the panel map will show the position of the fiducial marks.
Figure 409: Click on Panel to Show Fiducial Marks
After right clicking on this window, it is possible to select a specific component to be marked
on the panel. Click on the window again and the system returns to the original display.
Figure 410: Find Component Dialog
Finish the ATPG flow then enter the [Train] dialog.