TR7500_Series_Software_v29_En - 第320页
Test Research Inc. 298 TR7500 Series User Guid e –Softwa re v.2.9.0 Figure 492 : Click on Open F ile Icon, Select Project to O pen 3. Press [Inspect] button to s tart inspecting. Figure 493 : Click Inspect B utton 4. Put…
Test Research Inc.
TR7500 Series User Guide –Software v.2.9.0 297
14
S
TART TO
I
NSPECT
WARNING: Risk of electric shock and mechanical injury. Only fully trained
persons should be allowed to perform the installation process.
14.1 Power On
1. Open the upper cover and confirm that there is no foreign matter inside. Be sure the front
and back emergency stop switches are released, and the interlock is set to [ON]. Then
close the upper cover.
2. Be sure that the power cable is connected to 220V single phase power.
3. Turn on the breaker that is on the back door.
4. Turn on the power switch clockwise to start the machine.
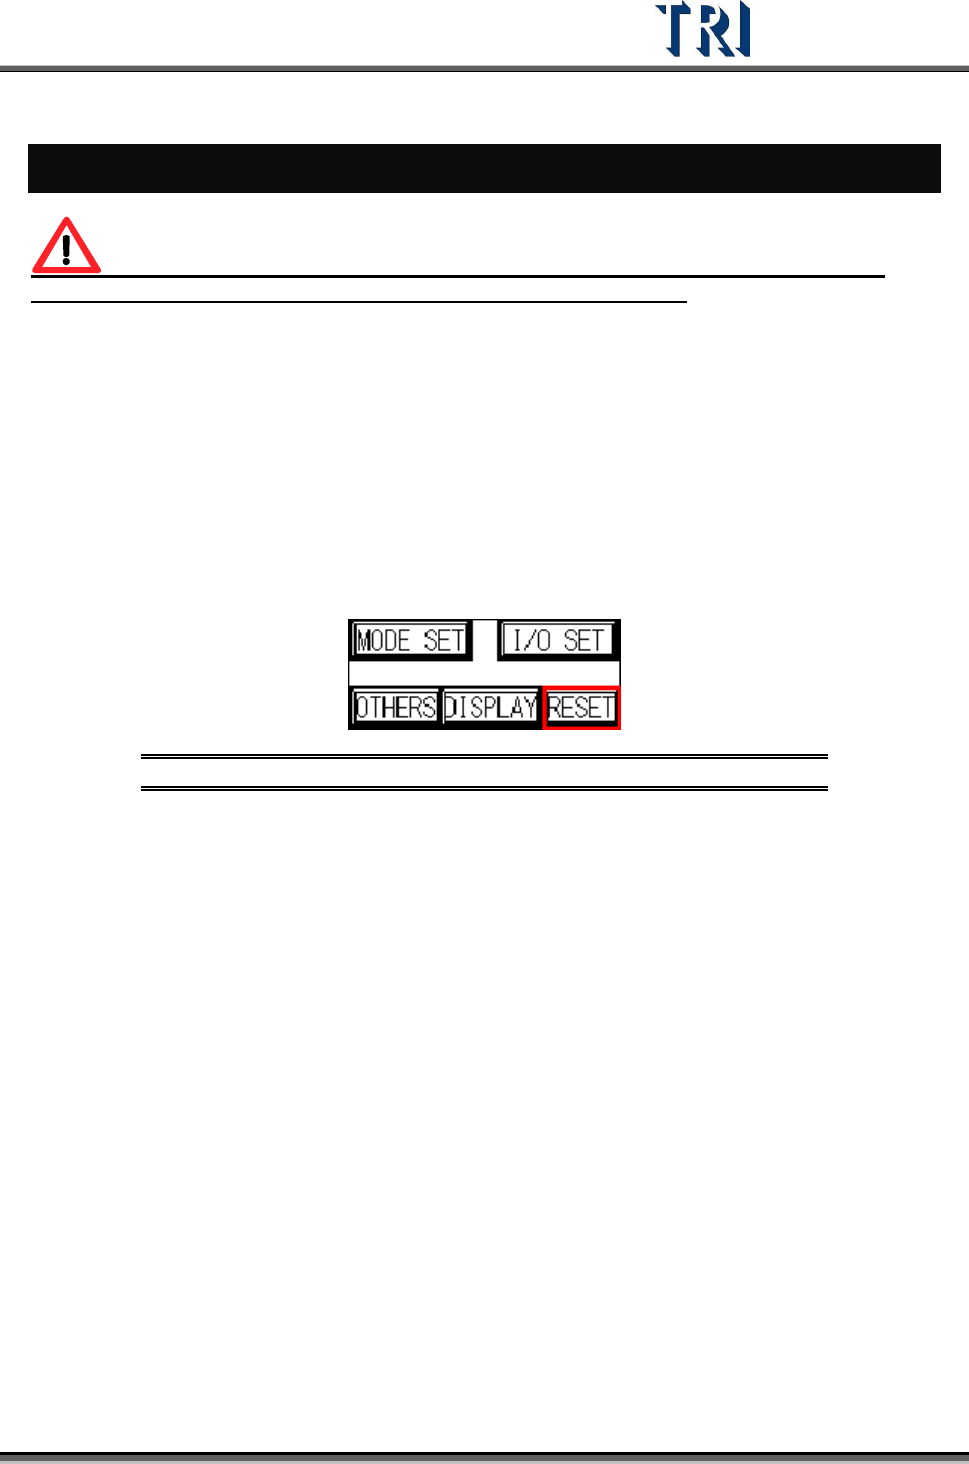
5. Press [RESET] on the HCI to start the X-Y table.
Figure 491: Push Reset on HCI to Start X-Y Table
14.2 Open Program
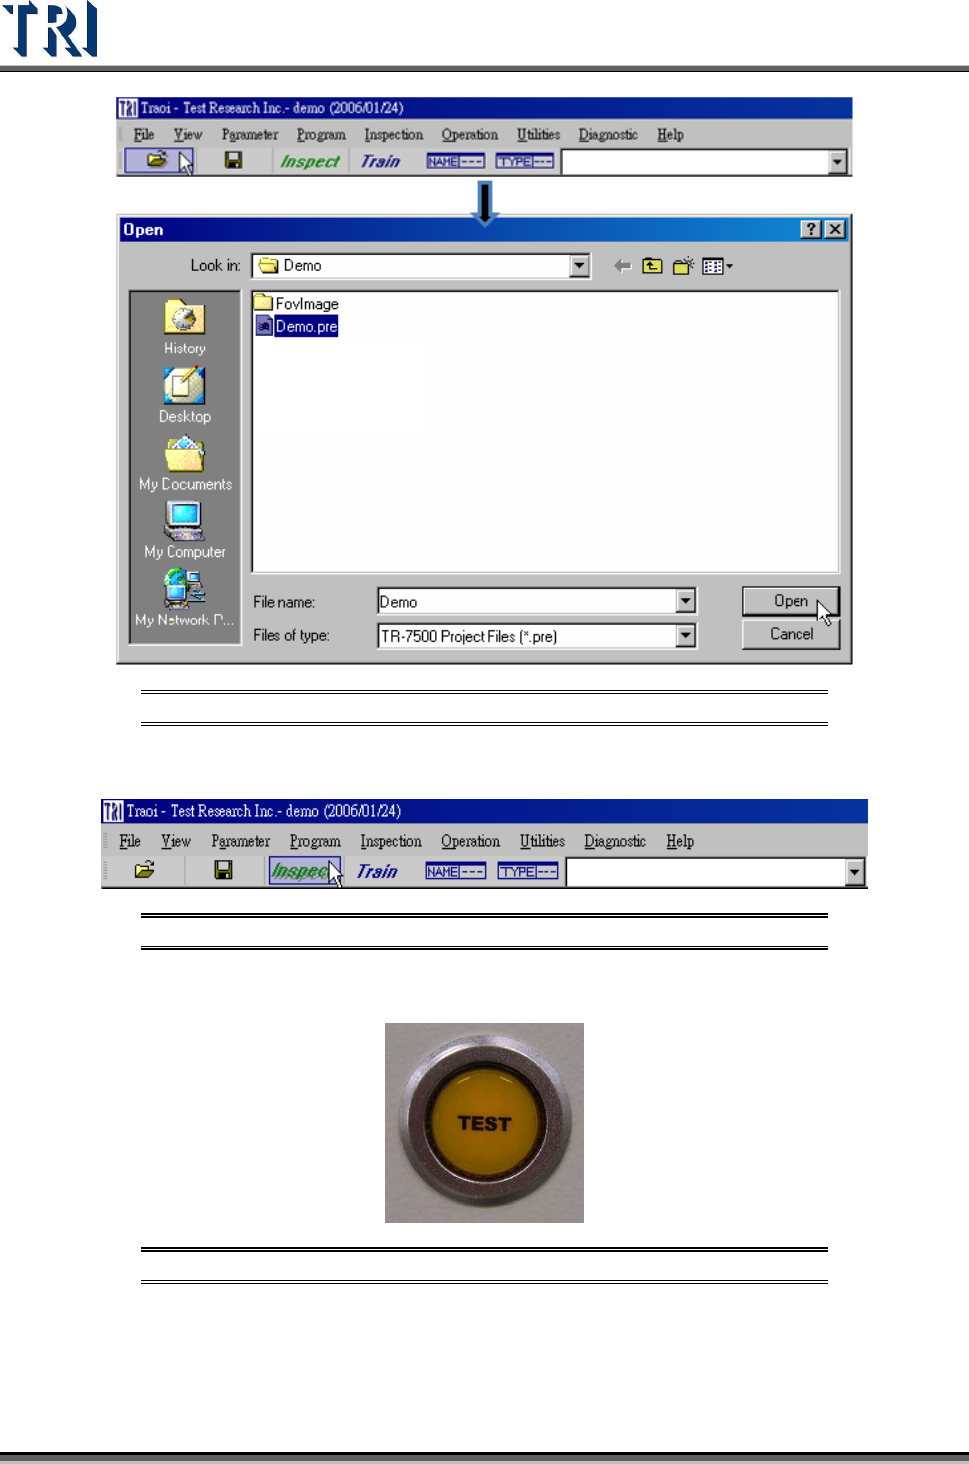
1. Double click on the shortcut of the TR7500 main program.
2. Open a project file (*.pre)
Test Research Inc.
298 TR7500 Series User Guide –Software v.2.9.0
Figure 492: Click on Open File Icon, Select Project to Open
3. Press [Inspect] button to start inspecting.
Figure 493: Click Inspect Button
4. Put the PCB into the tray, then press [TEST] to let the board in.
Figure 494: Press TEST Button
14.3 Check Barcode
1. Set [P
ARAMETER
>
P
ANEL
>
B
ARCODE
>
B
ARCODE
S
ETTING
]
2. Check [P
ARAMETER
>
P
ANEL
>
B
ARCODE
>
C
HECK
B
AR
C
ODE
]
Test Research Inc.
TR7500 Series User Guide –Software v.2.9.0 299
14.4 Link to Repair Station
1. Select [P
ARAMETER
>
U
SER
M
ODE
>
L
INK TO
R
EPAIR
S
TATION
]
2. Set the path in [P
ARAMETER
>
P
ANEL
>
R
EPAIR
S
TATION
] to the [C:/AOI_Repair_Data]
directory.
3. Select [U
TILITIES
>
R
ESEND
I
MAGE
D
ATA FOR
R
EPAIR
]
4. Save the project and start to inspect.
14.5 Inspect on Another Machine
1. Copy the project (*.pre ) and panel map to another AOI machine.
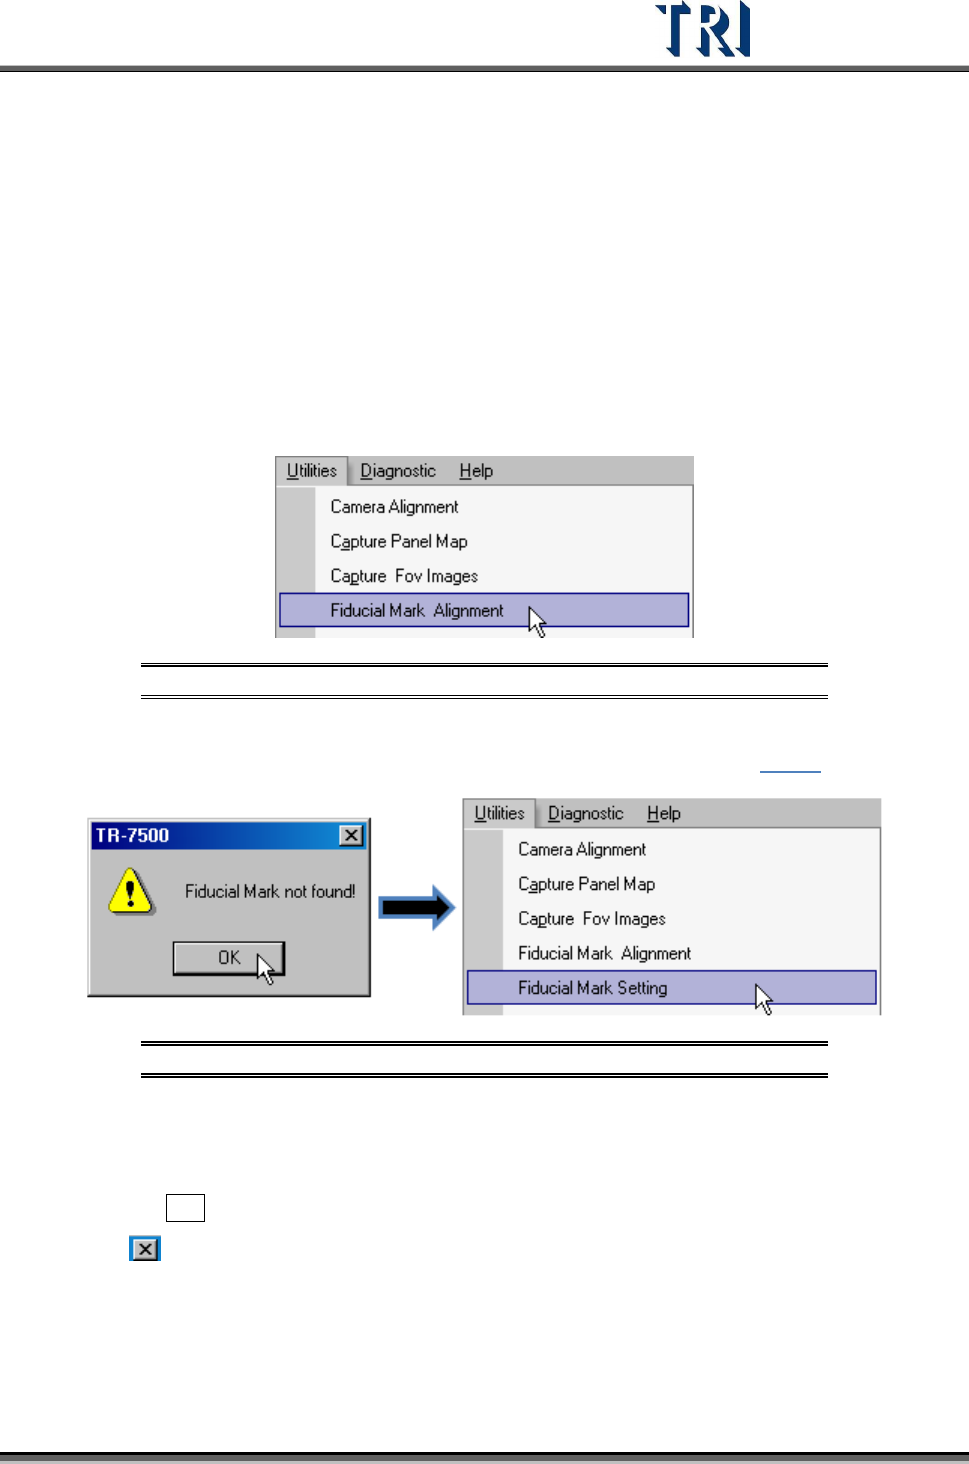
2. Select [U
TILITIES
>
F
IDUCIAL
M
ARK
A
LIGNMENT
]
Figure 495: Select Fiducial Mark Alignment
3. If the system can’t find the fiducial mark, change the [Fiducial0] position. Select
[U
TILITY
/F
IDUCIAL
M
ARK
S
ETTING
] to set the position of [Fiducial0]. (See 3.10.6)
Figure 496: Select Fiducial Mark Setting
4. Start to inspect.
14.6 Stop Testing and Shut Down
5. Press the Esc key on the keyboard to stop the project that is testing.
6. Press button to close the TR7500 main program. At the same time the system asks if
you want to save the project. Choose to save or not according to your preference.
7. Select [S
TART
>
S
HUT
D
OWN
] to close down the TR7500 main computer .
8. Turn the power switch counterclockwise to shut down the machine.
9. Turn the breakers OFF.