TR7500_Series_Software_v29_En - 第47页
Test Research Inc. TR7500 Series User Guide – Software v.2.9.0 25 6. Press [Get Fiducial Ma rk] icon. Figure 38: Get F iducial Mar k Process 7. Select to use the standar d image. If the f iducial mark image that was gott…
Test Research Inc.
24 TR7500 Series User Guide –Software v.2.9.0
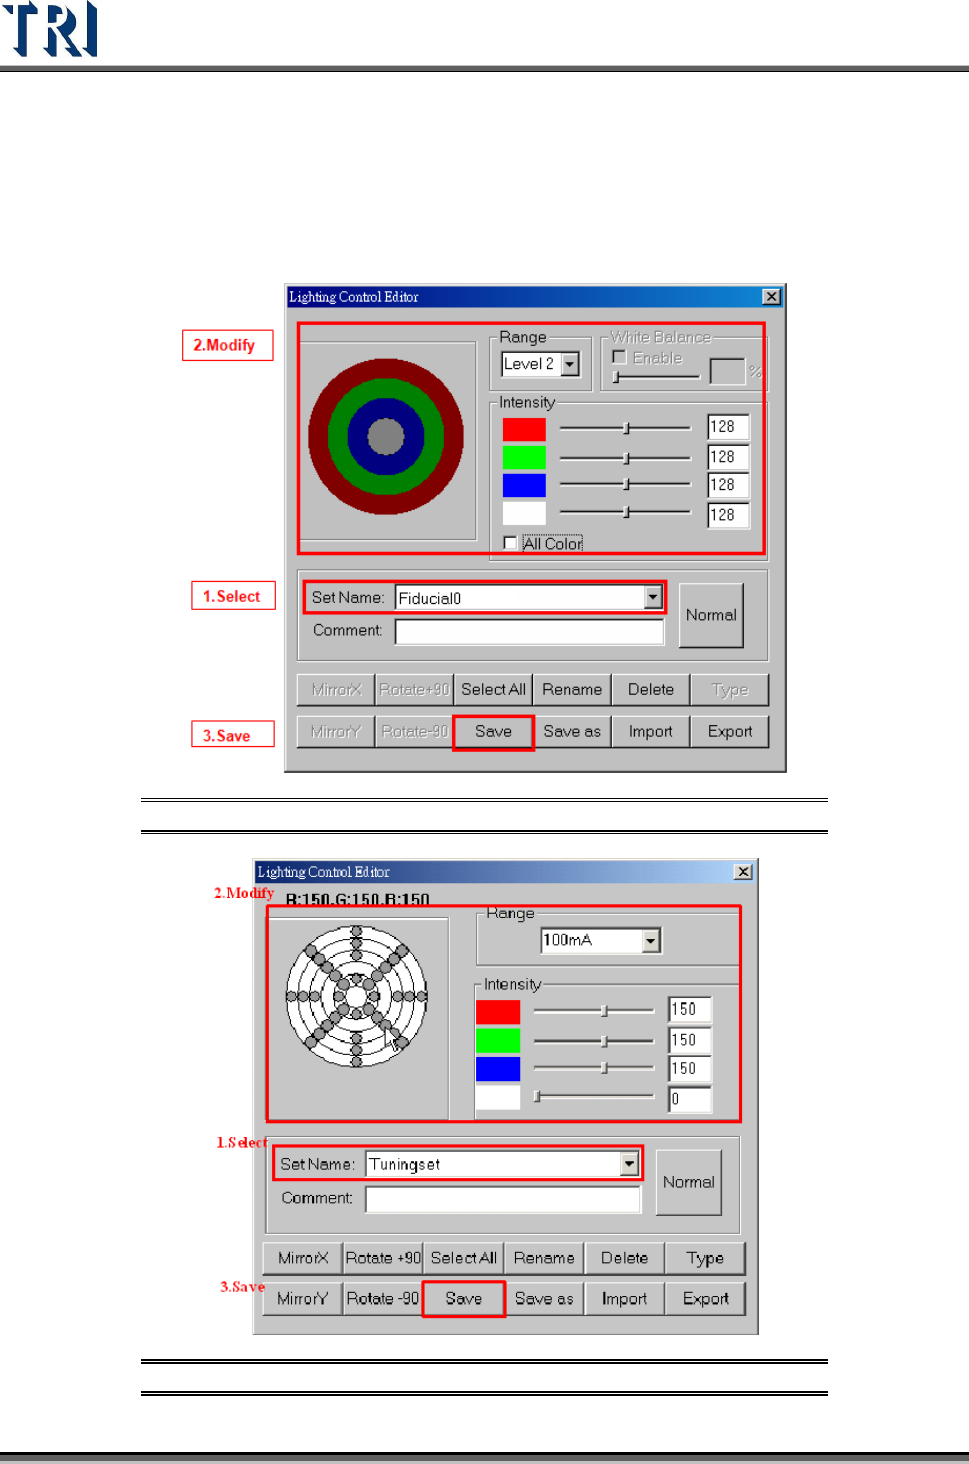
5. Set the lighting for the first fiducial mark. When the shape of fiducial mark is not clear
under the current lighting, adjust the lighting manually. Press the [Light] button, and
the [Lighting Control Editor] window appears. Select the [Fiducial0] lighting set item,
adjust the lighting, then press [Save] to finish the setting.
Figure 36: Set Lighting for First Fiducial Mark 1
Figure 37: Set Lighting for First Fiducial Mark 2
Test Research Inc.
TR7500 Series User Guide –Software v.2.9.0 25
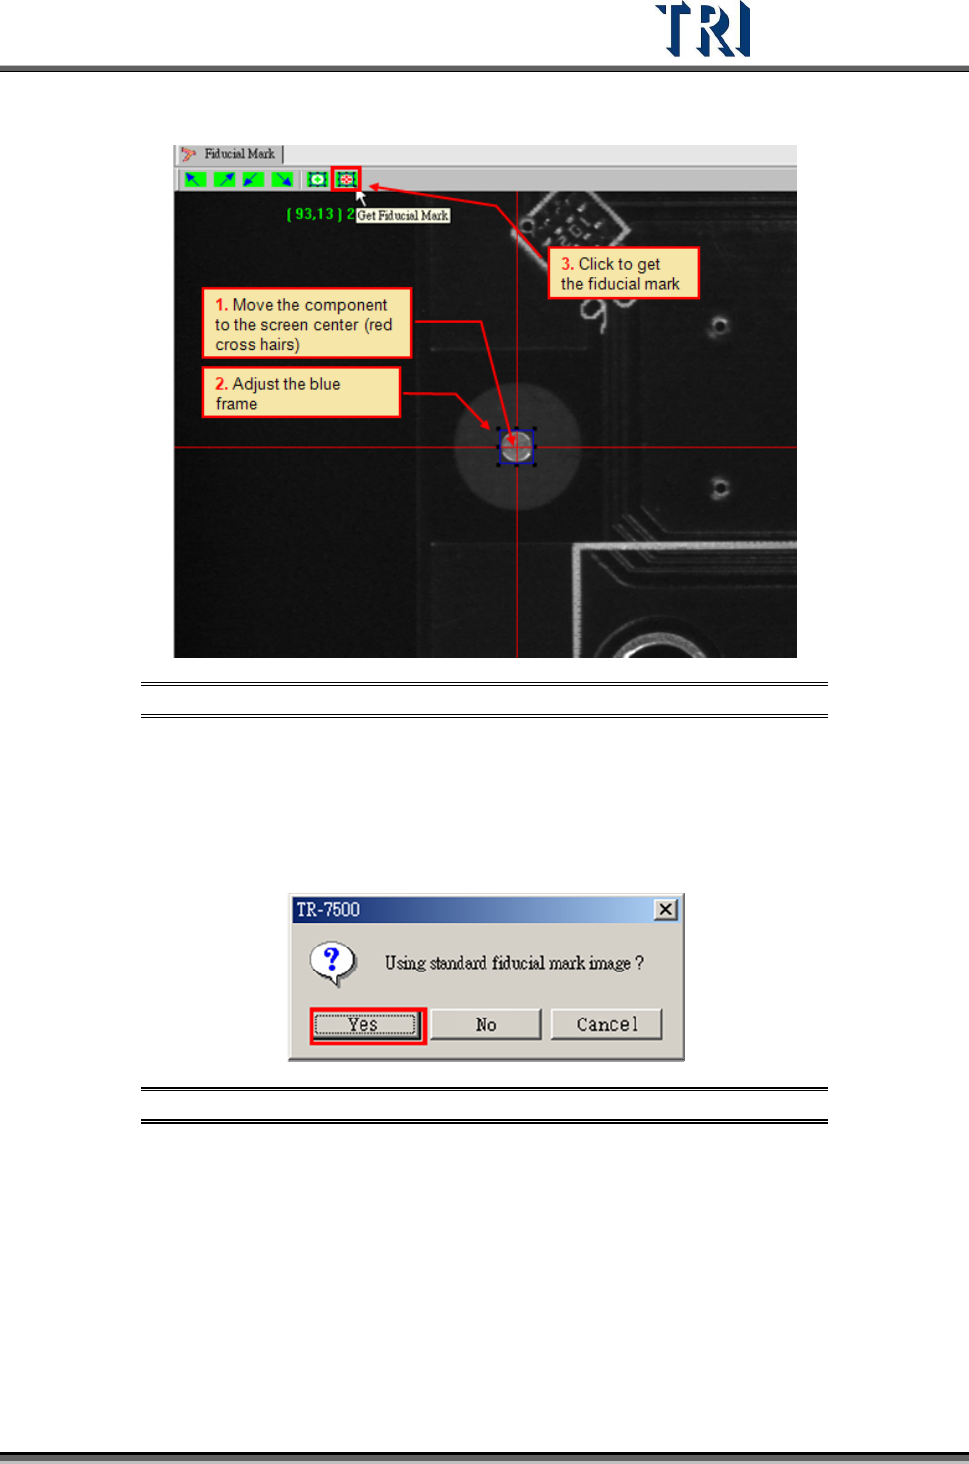
6. Press [Get Fiducial Mark] icon.
Figure 38: Get Fiducial Mark Process
7. Select to use the standard image. If the fiducial mark image that was gotten is not
clear enough, select the standard image saved in the computer.
Use the standard image.
Step1. Select [Yes]
Figure 39: Confirm Using Standard Fiducial Mark Image
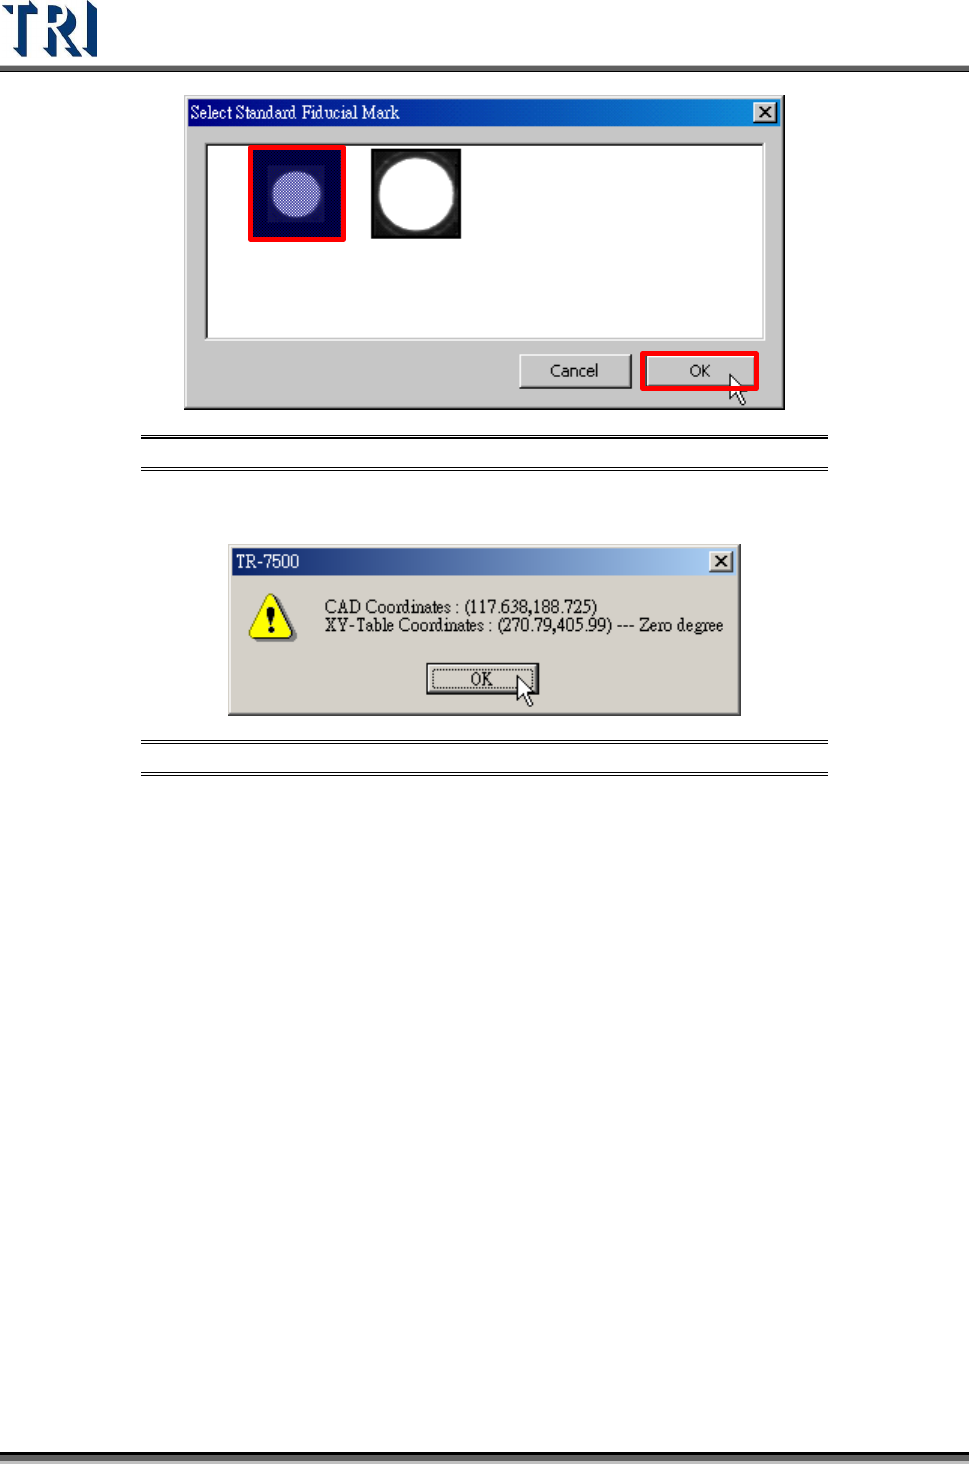
Step2. [Select Standard Fiducial Mark] dialog appears. Select a suitable image
then press [OK].
Test Research Inc.
26 TR7500 Series User Guide –Software v.2.9.0
Figure 40: Select Standard Fiducial Mark Image
Step3. A window pops up to show the coordinates of fiducial mark. Press [OK].
Figure 41: Confirm Fiducial Mark Coordinates
Step4. The system takes the selected standard image as the standard matching
image.