TR7500_Series_Software_v29_En - 第48页
Test Research Inc. 26 TR7500 Series User Guide – Software v.2.9.0 Figure 40: Sel ect Standard Fiducial Mark Image Step3. A w indow pops up to show the coordinates o f fiducial mark. Press [OK]. Figure 41: Conf irm Fiduc …
Test Research Inc.
TR7500 Series User Guide –Software v.2.9.0 25
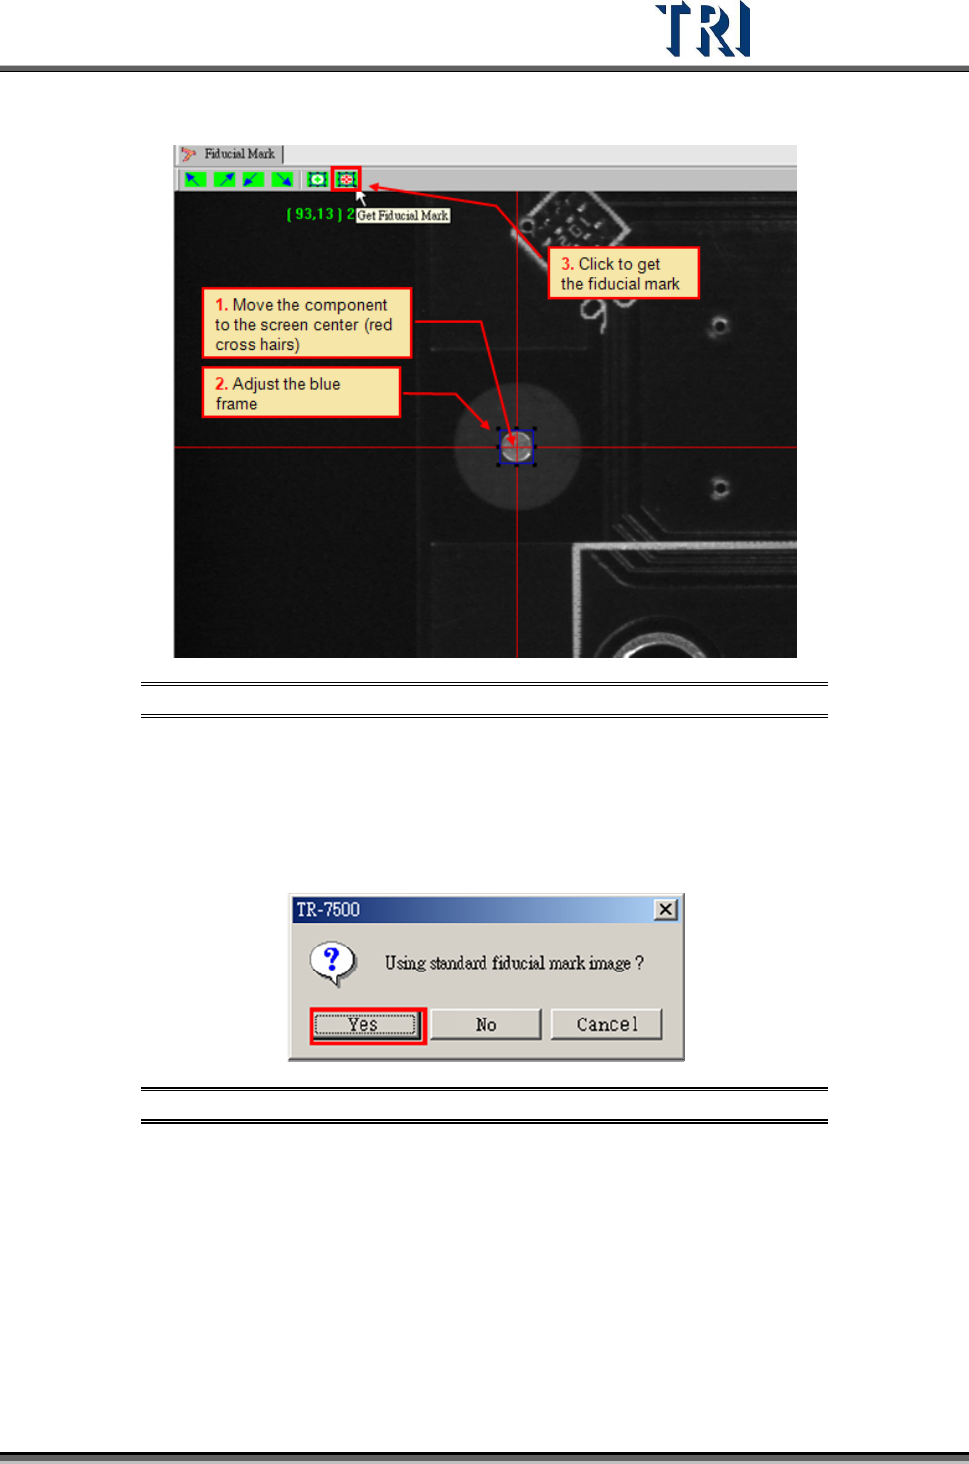
6. Press [Get Fiducial Mark] icon.
Figure 38: Get Fiducial Mark Process
7. Select to use the standard image. If the fiducial mark image that was gotten is not
clear enough, select the standard image saved in the computer.
Use the standard image.
Step1. Select [Yes]
Figure 39: Confirm Using Standard Fiducial Mark Image
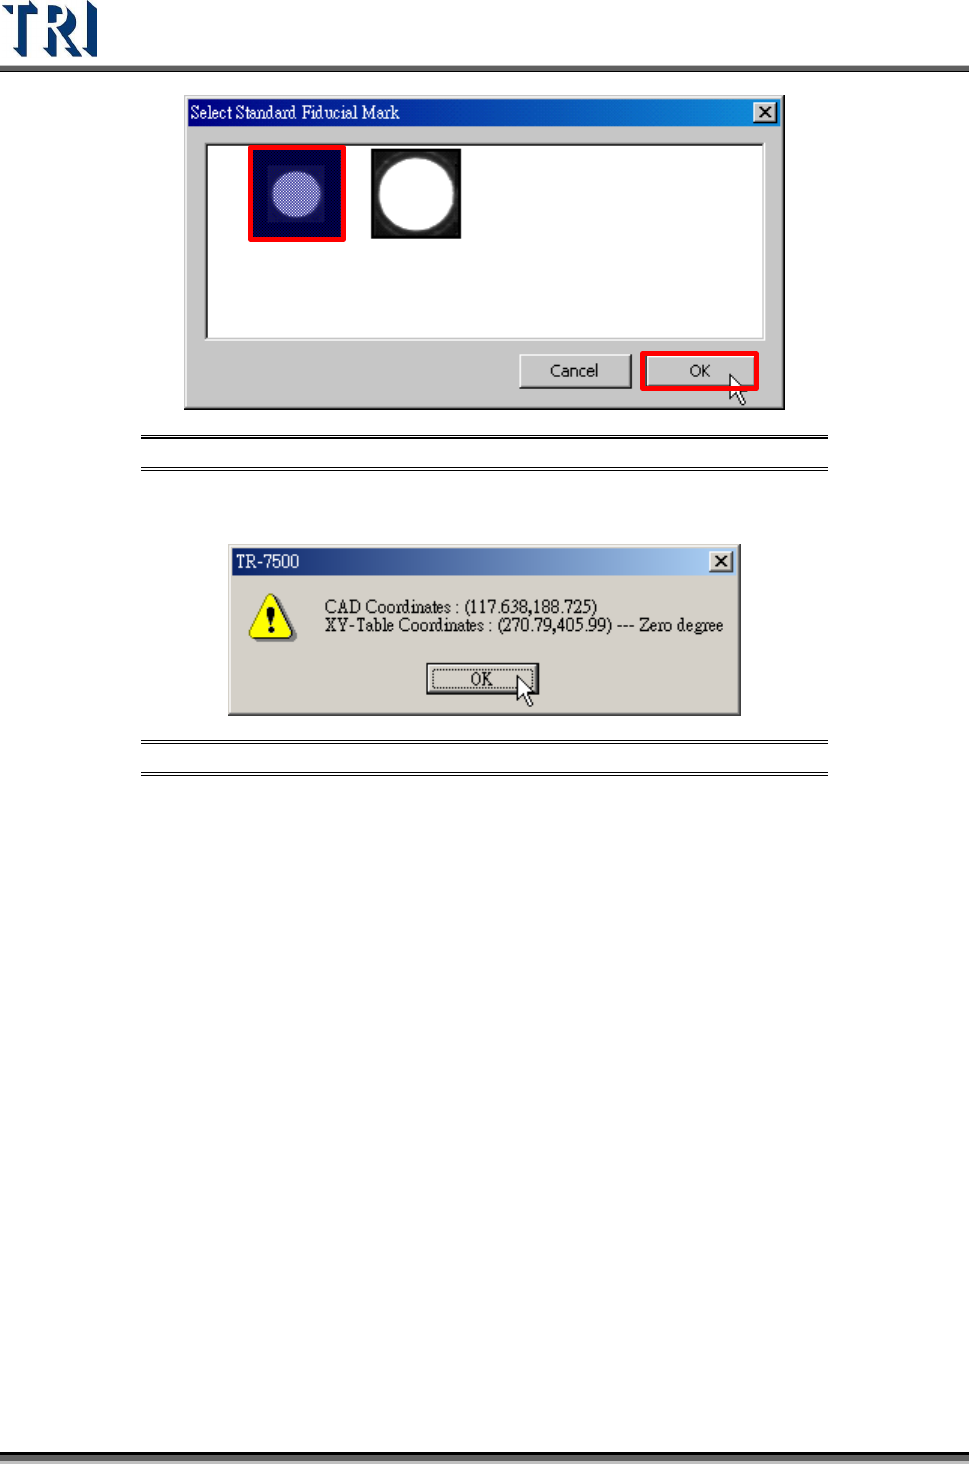
Step2. [Select Standard Fiducial Mark] dialog appears. Select a suitable image
then press [OK].
Test Research Inc.
26 TR7500 Series User Guide –Software v.2.9.0
Figure 40: Select Standard Fiducial Mark Image
Step3. A window pops up to show the coordinates of fiducial mark. Press [OK].
Figure 41: Confirm Fiducial Mark Coordinates
Step4. The system takes the selected standard image as the standard matching
image.
Test Research Inc.
TR7500 Series User Guide –Software v.2.9.0 27
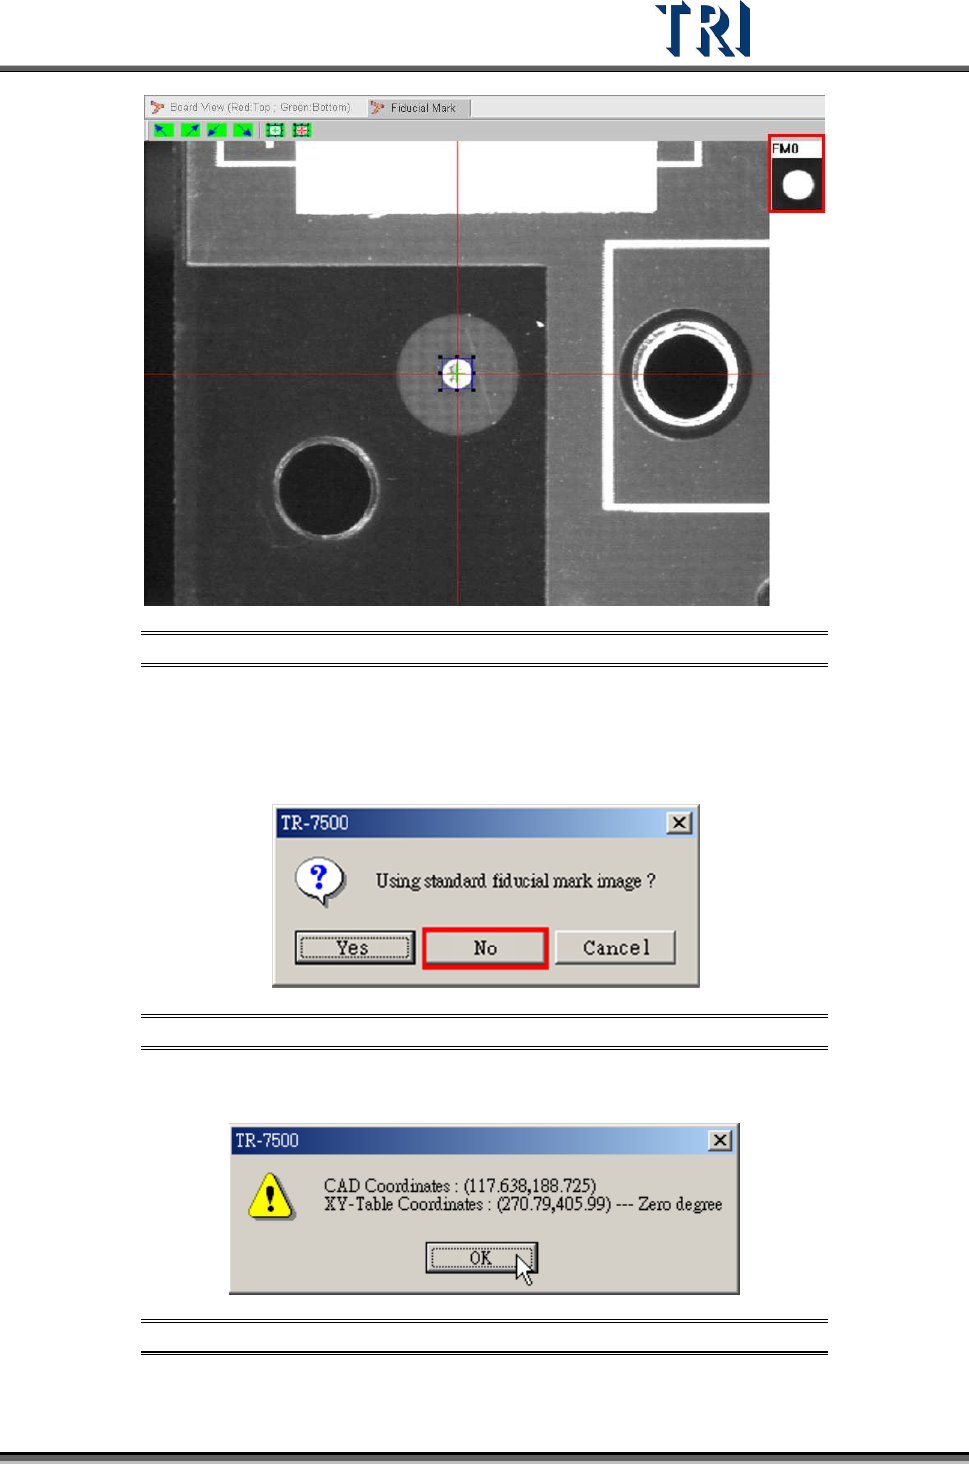
Figure 42: Standard Fiducial Mark Image Implemented
Not Using the Standard Fiducial Mark Image.
Step1. When the [Confirm Using Standard Fiducial Mark Image] window is
displayed, select [No].
Figure 43: Not Using Standard Fiducial Mark Image
Step2. A window appears showing the coordinates of fiducial mark. Press [OK].
Figure 44: Confirm Fiducial Mark Coordinates
Step3. System will use the grabbed image as the standard matching image.