TR7500_Series_Software_v29_En - 第76页
Test Research Inc. 54 TR7500 Series User Guide – Software v.2.9.0 Step3. Press [ T o Laser On] butto n to start the laser and adj ust the scanner so that the laser and the barcode to be scanned are at the po sition shown…
Test Research Inc.
TR7500 Series User Guide –Software v.2.9.0 53
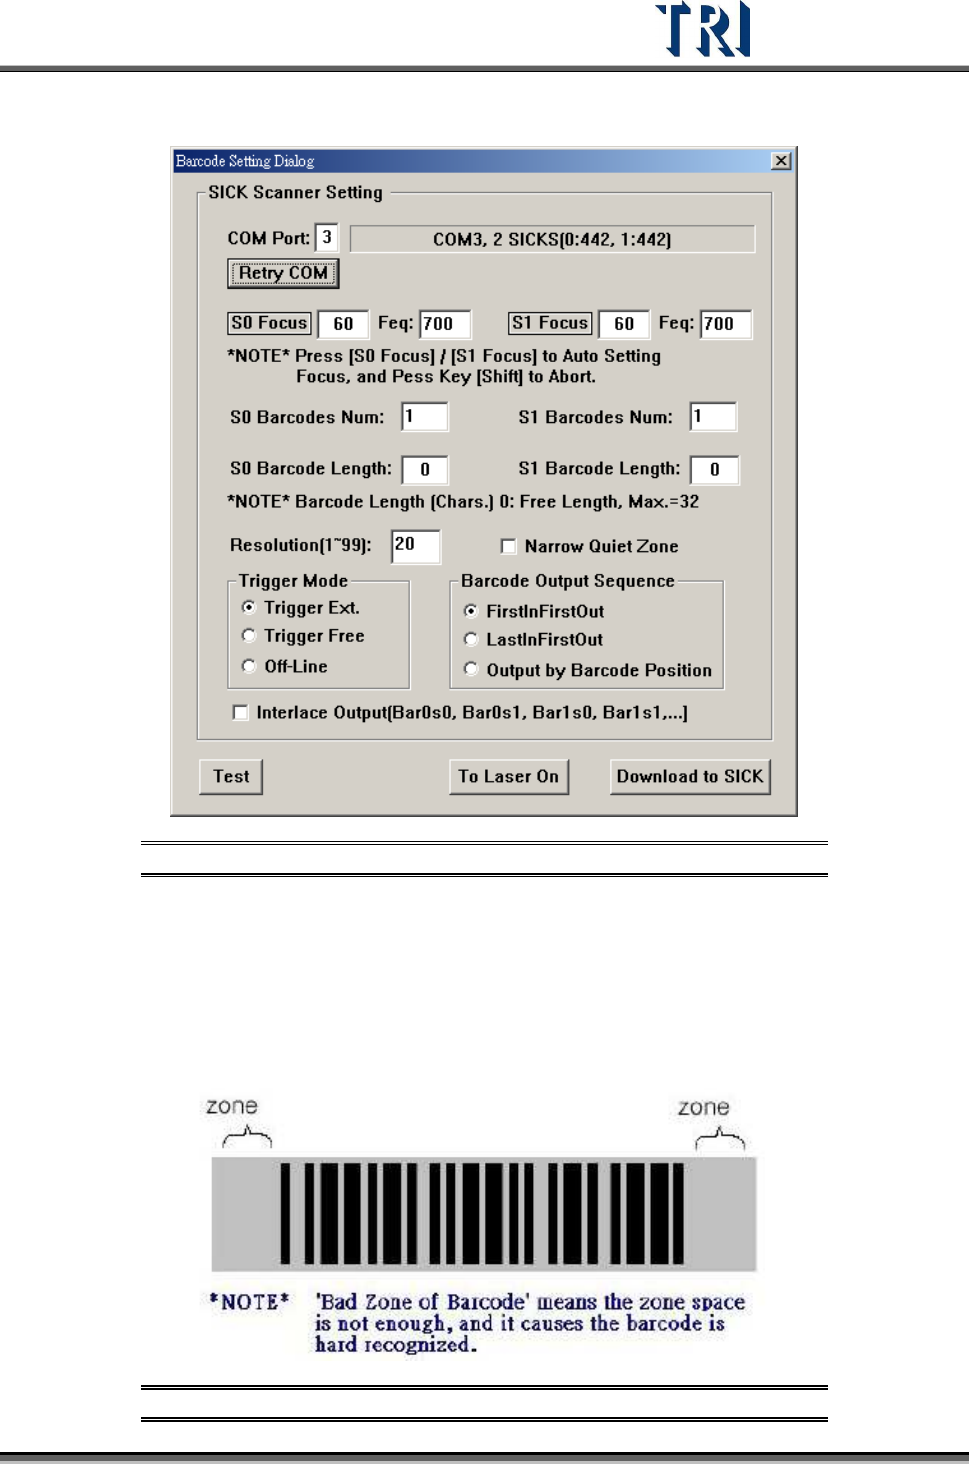
3.3.4.2 Barcode Setting Dialog
Figure 95: Barcode Setting Dialog
Step1. Make sure the Barcode is detected in COM3. If it displays [COM3, 1 SICK] as
in the above figure, it is normal. If it does not display [COM3, 1 SICK], click
[Retry Com] to search again. If you still cannot find it, you need to check the
hardware and see if it is in good order.
Step2. If the “quiet zone” is too narrow (as shown in the following figure), the barcode
will be difficult to be identified. Select [Narrow Quiet Zone].
Figure 96: Barcode “Quiet Zone”
Test Research Inc.
54 TR7500 Series User Guide –Software v.2.9.0
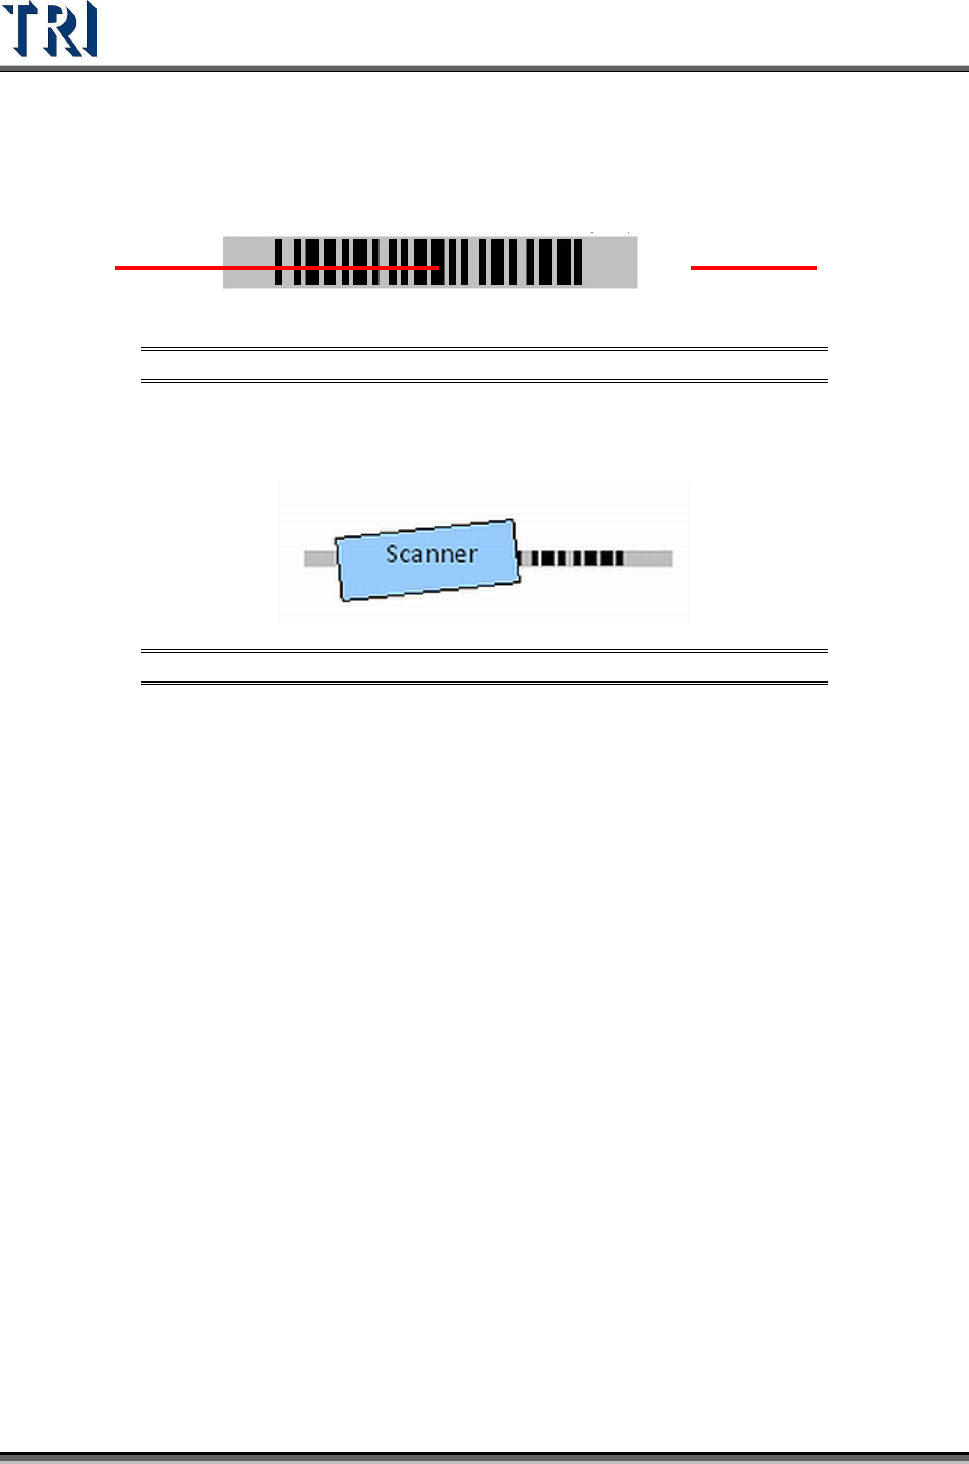
Step3. Press [To Laser On] button to start the laser and adjust the scanner so that the
laser and the barcode to be scanned are at the position shown in the following
figure.
Figure 97: Barcode Laser Scan Position
Step4. If the barcode space is too small, the scanner can be turned to an angle to
facilitate the reading as shown in the following figure
Figure 98: Scanner Adjusted to Read Barcode
Step5. When the barcode position is certain, click [S0 Focus] to maintain the barcode
at a fixed position and let the scanner read its focus and frequency. When
done, the system will buzz. The focus and the frequency are also changed
automatically.
Step6. If it is a dual barcode, the position of the scanner must still be positioned well,
and then click on [S1 Focus] to set the focus and the frequency for Scanner 1.
Step7. After setting Scanner 1, click [Download to SICK] button to save the setting in
the Scanner.
3.3.4.3 Detailed Explanation of Barcode Setting
Fill in [Num. of Barcodes] the total number of barcodes necessary to be read. (For
example, if each of two Scanners reads two barcodes, this column is filled in 4)
The default value for [Resolution] is 20. The smaller the number, the better the
resolution. Normally, this value does not have to be changed. If the barcode
material is so special that it is hard to read, this value should be adjusted to make it
easier for reading.
Fill in the bit number of the barcode in [Barcode Length]. After you set the bit
number, the scanner can only read the barcode with the number you have set. If
there are many kinds of barcodes on a board, you can use this set number to
screen out the correct barcode to read. The default value of 0 means no limit for bit
number.
[Trigger Mode] – Selecting [Trigger Ext.] means that the laser turns on only when
an external trigger occurs. Selecting [Trigger Free] means that the laser of barcode
scanner is always on. Selecting [Off-Line] means that the SICK Barcode is
triggered automatically according to the number of barcodes. The time for every
Test Research Inc.
TR7500 Series User Guide –Software v.2.9.0 55
trigger is about 2 seconds. Since it’s an independent action for every scanning, the
barcode scanner will read the same barcode twice or more when the scanner reads
the same barcode.
[First In First Out] - means the data on the barcode first read will first be sent out,
while [Last In First Out] means the data last read will first be sent out. [Output By
Barcode Position] means it depends on the barcode position, data near the
Scanner will first be sent out.
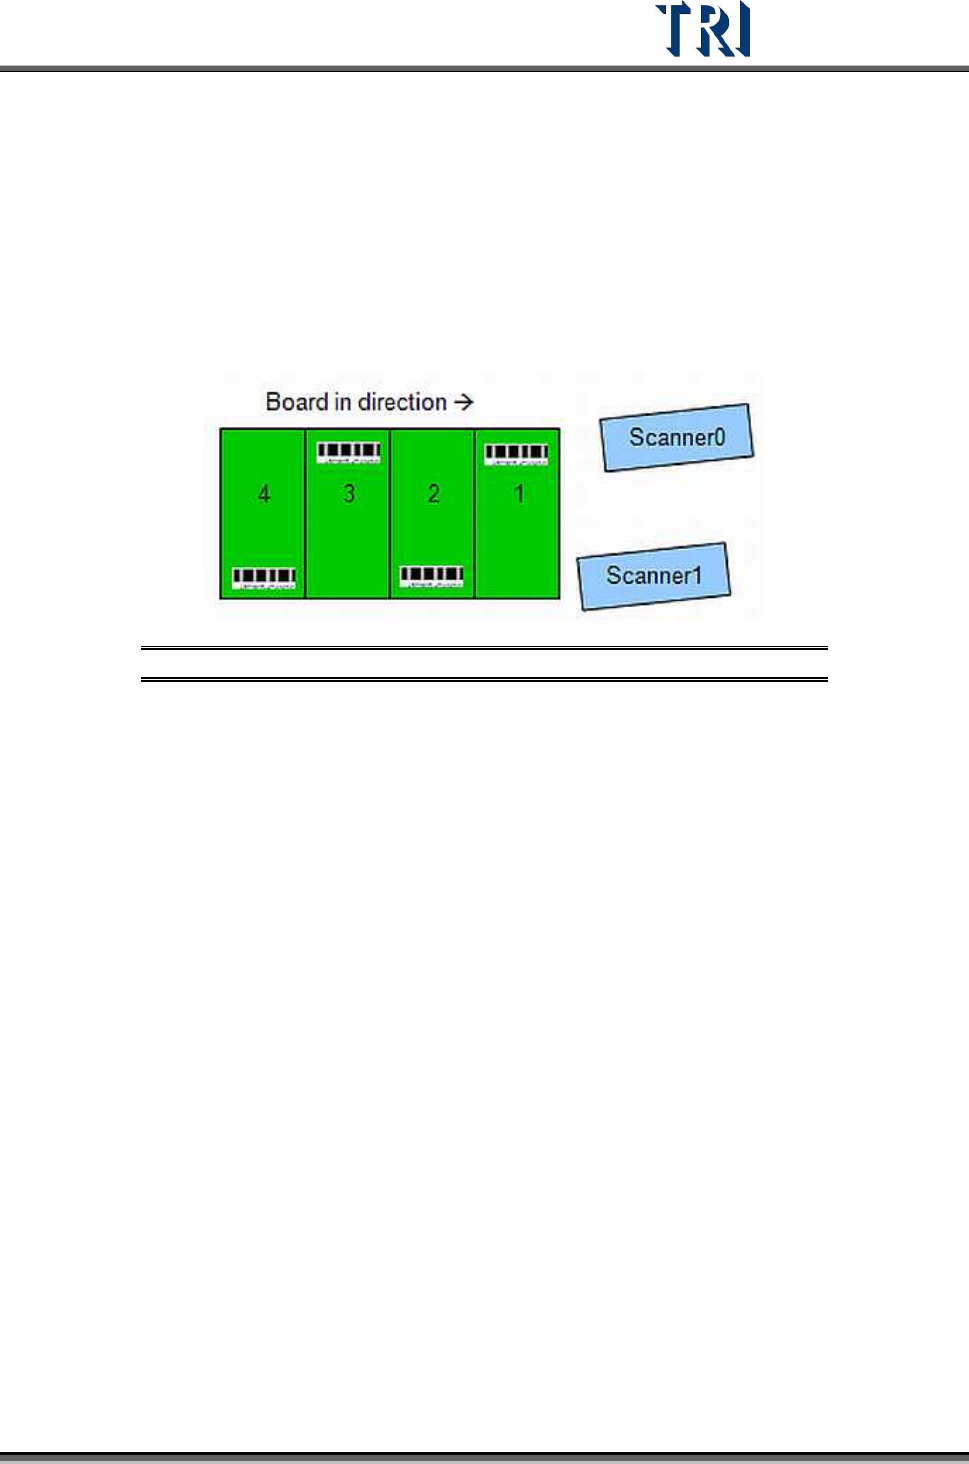
[Interlace Output] - For dual scanners; this should be selected if the barcodes are to
be read in sequence as shown in the following figure.
Figure 99: Interlaced Barcodes, Dual Scanners